What you are installing, in plain English
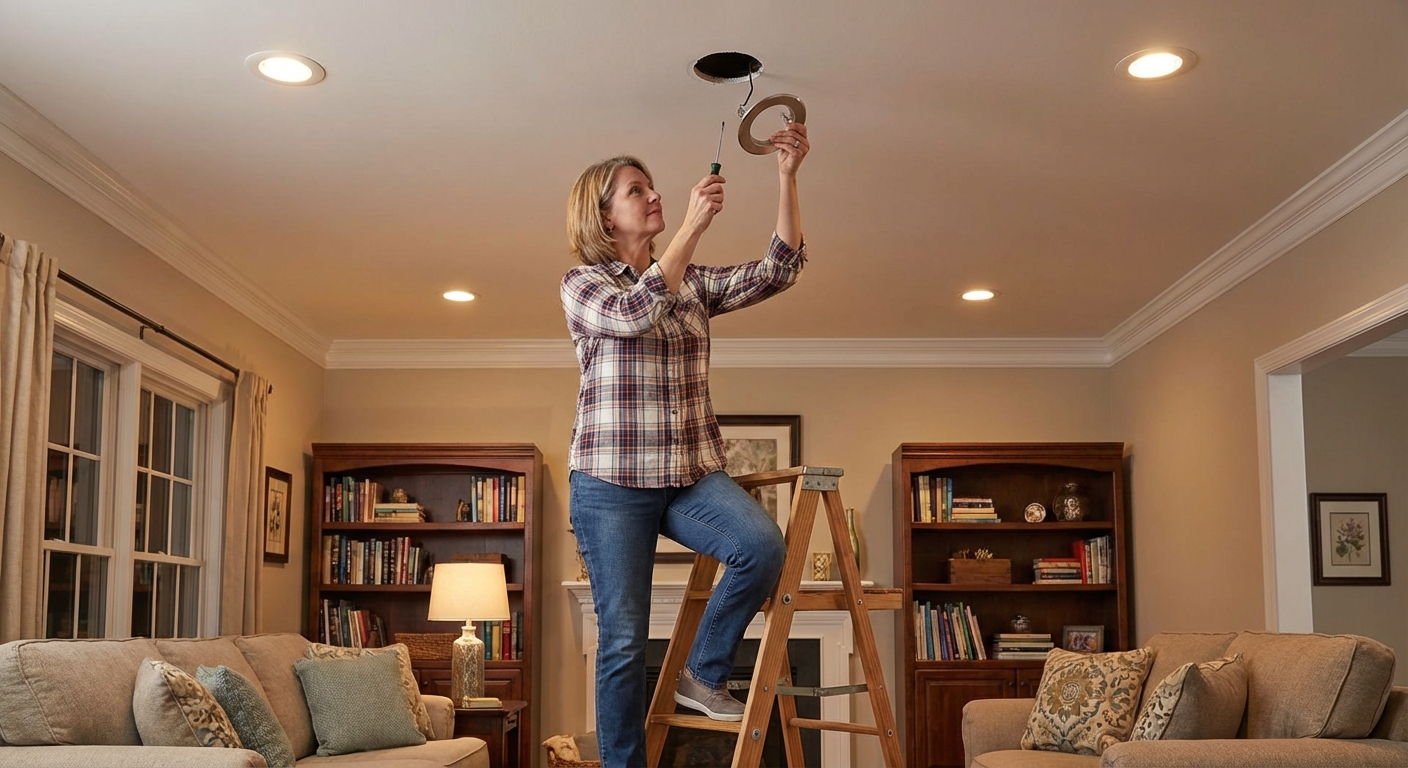
Recessed lighting (often called can lights) is a fixture that sits up inside your ceiling, with only a trim ring and light source visible from below. Done right, it makes a room feel taller, brighter, and cleaner. Done wrong, it can look like a scattered constellation or worse, become an electrical headache.
This guide walks you through installing recessed lights in an existing ceiling, meaning you are cutting holes and fishing wire where drywall is already up. I will cover both traditional housings and modern “canless” wafer LEDs, because the steps are similar but the hardware is different.
Important: If you feel even a little unsure around household wiring, this is a great project to do with a friend who has done basic electrical work, or to hand off the final connections to a licensed electrician. There is no shame in tapping out on anything that involves safety.
Before you start: safety and code reality check
Turn off power the right way
- Turn off the breaker for the circuit you will tie into.
- Verify at the existing light or switch with a non-contact voltage tester and, ideally, a multimeter.
- Put a piece of tape over the breaker so nobody flips it back on “to help.”
Know when a permit is likely
Rules vary, but adding new fixtures and running new cable often triggers a permit and inspection in many areas. If you are in a condo, there may also be HOA rules. When in doubt, a quick call to your local building department saves a lot of worry later.
If your ceiling might be special, pause
- Popcorn ceiling (often homes built before the mid-1980s, sometimes later): It can contain asbestos. Do not sand or scrape without testing.
- Plaster ceilings: Possible, but cutting is more delicate and fishing is harder.
- Fire-rated assemblies: Garages below living space, multi-family units, and certain basements may require specific fire-rated fixtures, covers, or methods. If you are not sure, ask before you cut.
Do not bury junction boxes
Any junction box has to remain accessible. Recessed light junction boxes are fine because they are accessible through the light opening. A random splice box buried above drywall is not.
Plan the layout and spacing
Most recessed lighting regrets come from layout, not wiring. So we slow down here.
Choose what the lights are supposed to do
- General lighting: Even coverage across the room.
- Task lighting: Brighter zones over counters, desks, or reading spots.
- Accent lighting: Highlighting art, a fireplace, or a wall texture.
Spacing rules (plus the fine print)
- Start with 4 to 6 feet between lights for typical 8-foot ceilings using common recessed LED units.
- Keep lights 2 to 3 feet off the walls to avoid harsh scallops and shadows (unless wall-washing is your goal).
- Avoid lining up directly with ceiling fans or HVAC registers where possible.
Reality check: Those numbers are a rule of thumb, not code. Spacing depends on lumen output, beam angle, ceiling height, and how reflective your room is. As a reference point, many 4-inch and 6-inch LEDs land around 600 to 900 lumens with a wide 90 to 110 degree beam. Higher lumens or a tighter beam can let you space wider. Lower lumens, dark walls, or a cozy vibe usually means you tighten spacing or add one more fixture.
If your ceiling is taller (9 to 10 feet), bump spacing wider a bit. If you want brighter task light, tighten spacing in those areas.
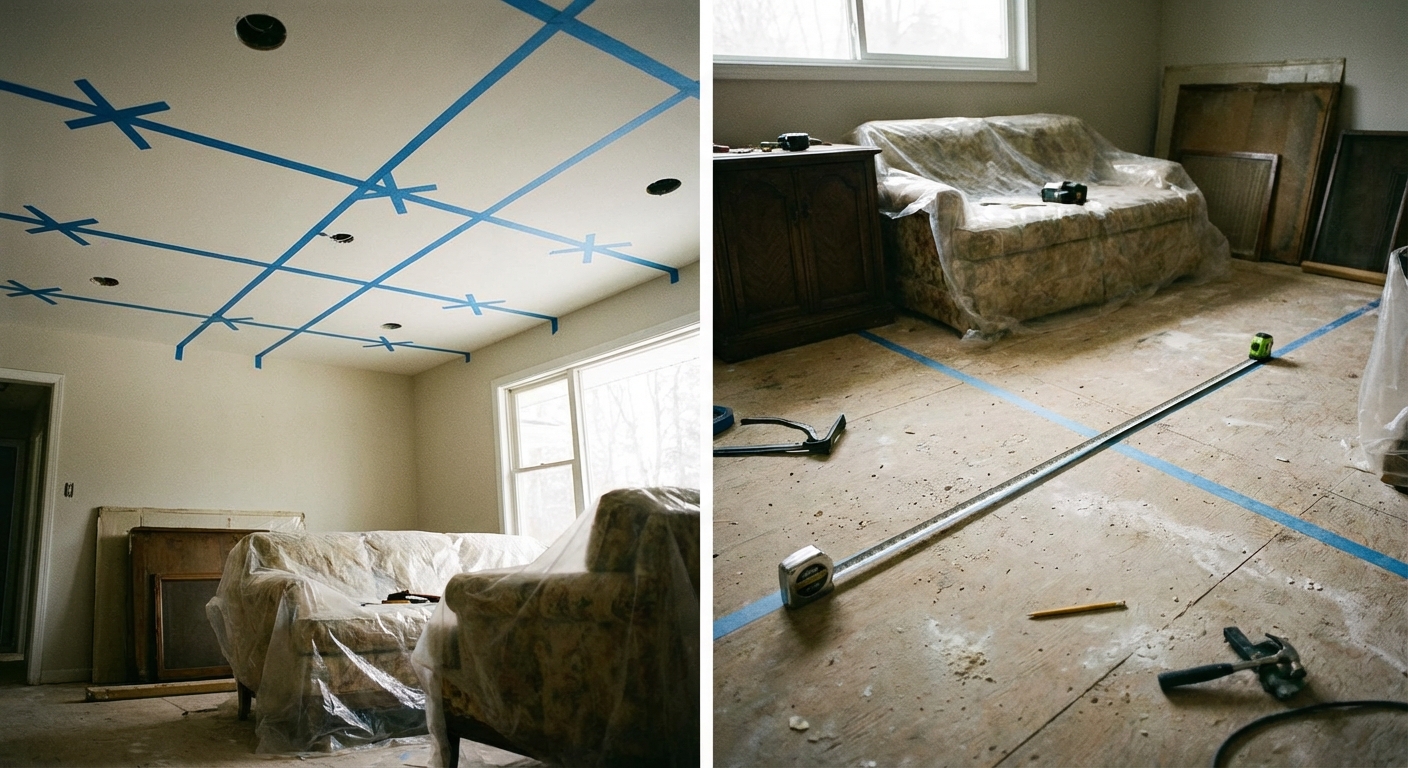
Mark a grid you can trust
I like to snap chalk lines or use a laser, then mark each proposed center point with painter’s tape and a Sharpie dot. Step back and look from the doorway, from the couch, from the kitchen entry. Your eyes catch uneven patterns fast, especially when lights are on.
Check above the ceiling before you cut
Best case, you have attic access. If you do, go up and look for:
- Joists and their direction
- Plumbing vents, HVAC ducts, and exhaust fans
- Existing wiring you need to avoid
If you do not have attic access (like a first floor with a finished level above), you can still do this. You just need to be more careful with measurements and use remodel-rated fixtures designed for old work.
Pick the right recessed light type
Option A: Traditional housing (can) with separate trim
These are the classic recessed lights: a metal housing above the drywall and a trim kit below. They are sturdy and flexible, but they can require more clearance and more work in tight spaces.
Option B: Canless wafer LED (my go-to for most remodels)
Wafer LEDs are thin, bright, and designed for tight spaces. You cut a hole, connect to a small junction box, and spring clips hold the light to the drywall. For many DIYers, this is the simplest route with the fewest “will it fit?” surprises.
IC-rated vs non-IC rated
- IC-rated: Safe for direct contact with insulation. If the fixture could contact insulation now or later, choose IC-rated. This is the common choice.
- Non-IC: Must be kept away from insulation by a required air gap. In real life, that gap is easy to lose when someone adds more insulation later, so I avoid non-IC unless there is a clear reason.
Airtight matters
Look for airtight or air-sealing models if the fixture penetrates an insulated ceiling under an attic. Also know this: “airtight” performance depends on installation (gaskets, sealed knockouts, proper fit), and local energy codes may require it in certain ceilings. Done well, it helps reduce drafts and heat loss. In older homes, it can be the difference between a cozy room and a “why is it always cold in here?” room.
Size and hole diameter
Most modern installs use 4-inch or 6-inch units. Four-inch often looks more contemporary and can be plenty bright with LED. Six-inch is classic and forgiving. Whatever you choose, confirm the cutout size on the box and keep it consistent across the room.
Bathrooms and damp locations
If any light is going in a bathroom, over a shower, or near steam, confirm the fixture is rated for the location (damp-rated or wet-rated, depending on placement) and follow the manufacturer’s trim requirements. Also check whether your area requires GFCI and/or AFCI protection for the circuit.
Tools and materials checklist
- Recessed lights (housings or canless wafer LEDs) and trims
- Matching dimmer switch (rated for LED, and for the load)
- NM-B cable (commonly 14/2 or 12/2 with ground, match your circuit breaker)
- Wire connectors (wire nuts) or push-in connectors approved for the application
- Old-work electrical boxes if adding a new switch location
- Stud finder and a small inspection mirror or borescope (optional but helpful)
- Non-contact voltage tester and/or multimeter
- Drywall hole saw or the included cutout template, plus a jab saw
- Fish tape or fiberglass fish rods
- Drill and long flex bit (great for top plates if needed)
- Safety glasses and a dust mask
Thrifty tip: If you are buying one specialty tool for this job, make it a decent set of fish rods. They turn “impossible” wire runs into a 10-minute task.
Step 1: Map your circuit
You have a few common ways to feed recessed lights:
- From an existing ceiling fixture: Remove the old fixture and use that box as your power source (common in living rooms).
- From a switch box: Tap into the switched hot and run up to the lights.
- From an outlet or nearby junction: Sometimes legal, sometimes a bad idea. Kitchens, bathrooms, garages, laundry areas, and dining spaces often have required or dedicated circuits, and adding lighting to those receptacle circuits may be prohibited or unwise. When in doubt, do not tap a receptacle circuit without confirming the circuit purpose and local rules.
In many rooms, the cleanest approach is: power comes into the switch, then one cable goes up to the first light, then daisy-chain to the rest.
If your existing wiring is confusing (multiple cables, travelers, mixed circuits), take photos before disconnecting anything and label wires with tape. I have saved myself hours with a $3 roll of painter’s tape.
Dimmer and switch gotchas
- Neutral in the box: Many modern codes require a neutral in most switch boxes. Even when not required, it is smart for future smart switches and dimmers.
- Minimum load: Some dimmers need a minimum LED load to dim smoothly. A few small LEDs can fall below that range and cause flicker or dropouts. Check the dimmer specs.
Step 2: Cut test holes
Before you cut full-size holes for every light, cut one exploratory opening where the first fixture will go.
How to do it
- Use a stud finder to locate joists and mark them.
- Cut a small hole (like a 1/2-inch to 3/4-inch) at your center mark.
- Bend a piece of wire or a coat hanger and spin it gently to check for nearby obstructions.
- If you can, peek with a borescope or small mirror and flashlight.
If your pilot hole hits a joist, do not force it. Shift the layout and re-check. It is far less painful to move a light 2 inches now than to fight framing later.
Once you know the spot is clear, use the included template or a hole saw to cut the proper size opening.
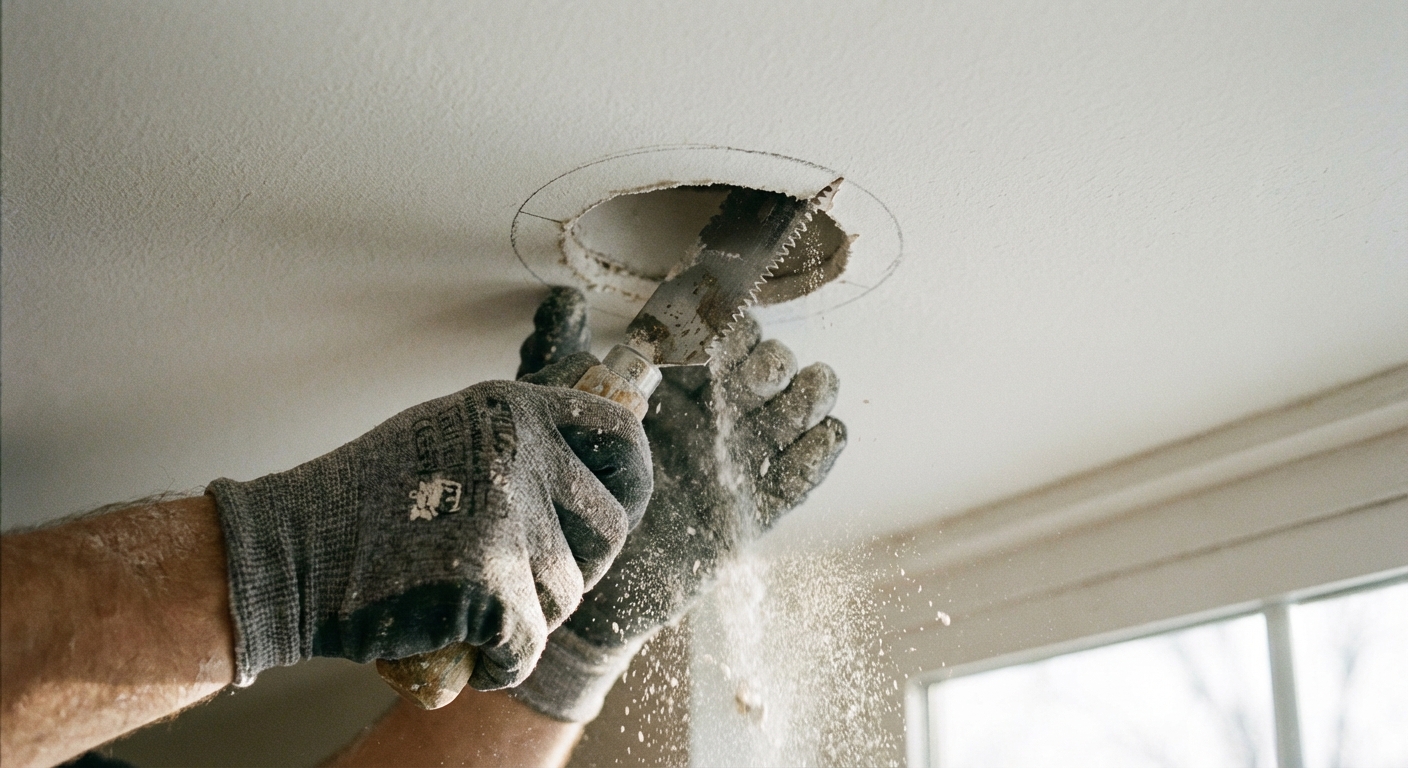
Step 3: Cut all the ceiling holes
After the test location checks out, mark and cut the rest.
- Use the manufacturer’s template so the hole is not oversized.
- Keep your cuts smooth and controlled. A sloppy hole can cause trims to sit unevenly.
- Save the cut drywall circles if you might patch later.
Mistake I made once: I traced a template on the ceiling, then cut just outside the line “to be safe.” The trim barely covered it and it bugged me every time I looked up. Cut on the line, not outside it.
Step 4: Run the wiring
Most recessed lighting is wired in a simple chain: power to Light 1, then Light 1 to Light 2, and so on. That means you typically run one cable between each adjacent pair of lights.
If you have attic access
- Drill through joists as needed (following code rules for hole placement).
- Run NM cable neatly, stapling where required and keeping it away from sharp edges.
- Drop cable down through each hole to the fixture location.
If you do not have attic access
- Fish cable from hole to hole using fish rods or fish tape.
- Use the recessed openings to your advantage. Each hole is an access point for your hands and tools.
- Work one span at a time: first hole to second hole, then second to third.
The joist-bay reality check: Fishing is straightforward when your lights are in the same joist bay (parallel to the joists). If your layout requires you to cross perpendicular to the joists, you usually cannot magically snake NM cable through solid framing. The normal solution is to cut a few small access openings, drill through the joists, then patch and paint afterward. Plan for that possibility before you commit to a perfect grid.
Wire size reminder: Match cable to breaker. Typically, 15-amp circuits use 14-gauge wire (14/2), and 20-amp circuits use 12-gauge wire (12/2). Do not downsize wire on a bigger breaker.
Protect and secure: Where the cable is accessible (attic), secure it per local requirements, keep it protected from nails and screws near framing faces, and use nail plates where needed. This is one of those “nobody sees it, but it matters” parts.
Step 5: Install housings or junction boxes
For remodel (old-work) can housings
- Slide the housing into the hole.
- Secure it using the built-in clips or clamps that grab the drywall.
- Open the housing junction box and bring in your cables through approved clamps.
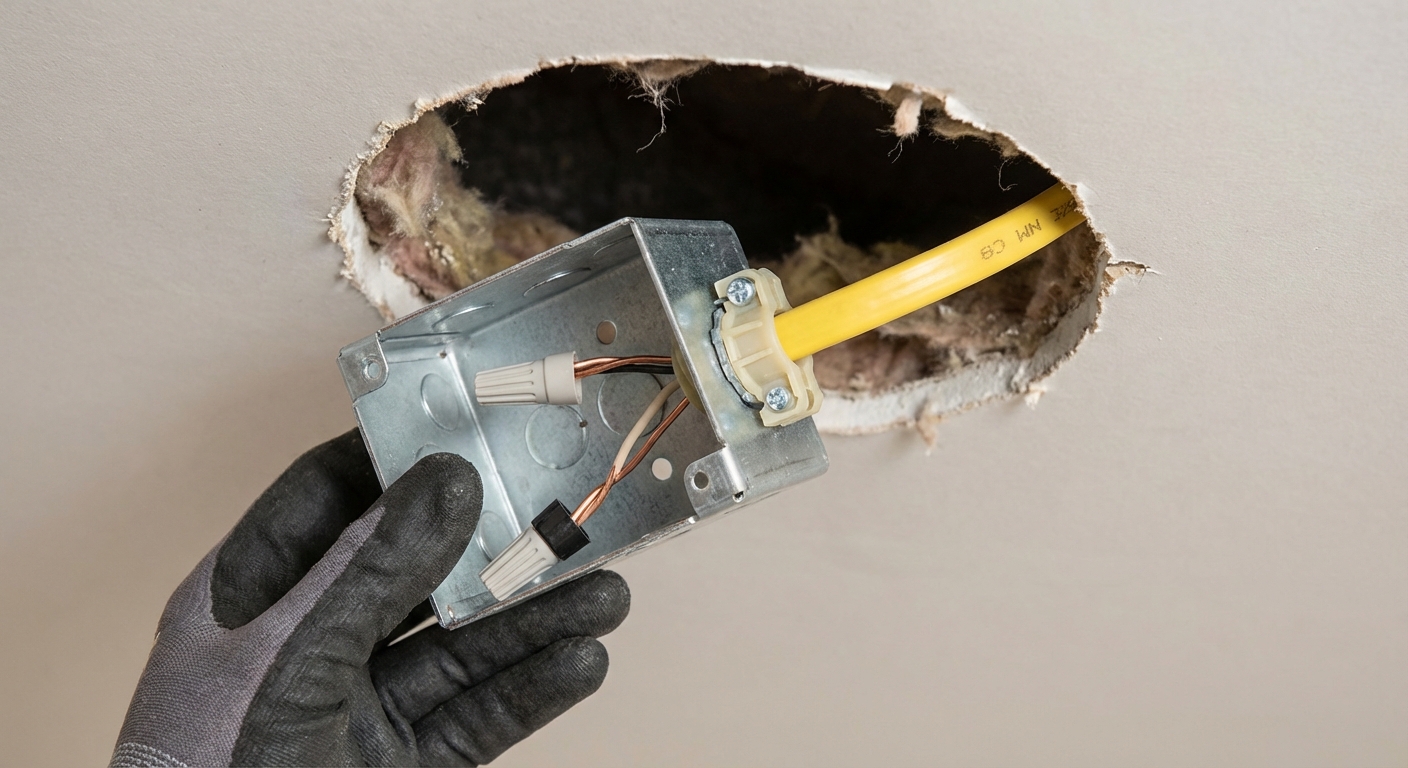
For canless wafer LEDs
- Mount the small junction box above the ceiling, close enough to reach the light.
- Bring the feed and onward cable into the junction box using proper knockouts and secure NM cable clamps (strain relief matters).
- Many wafer kits include built-in push-in connectors inside the box. They make wiring cleaner, but you still need solid strip lengths and tight cable clamping.
- Leave enough slack to service the light later without yanking on connections.
Step 6: Make the electrical connections
This is the part where you slow down, double-check, and work neatly.
Typical connections inside each junction box
- Ground (bare or green): Connect all grounds together and to the fixture ground screw or ground lead.
- Neutral (white): Connect incoming neutral to outgoing neutral and to the fixture neutral lead (if present).
- Hot (black): Connect incoming hot to outgoing hot and to the fixture hot lead.
Depending on the fixture, you might use wire nuts, lever connectors, or push-in connectors that come pre-installed in the wafer junction box. All can work, as long as they are listed for the conductors and you follow strip length and torque or seating instructions.
If you are wiring a switch leg (power first to the fixture, then to the switch), or if you have a multi-wire branch circuit or 3-way switching, the wiring can change. If that description makes you pause, it is a good moment to consult a wiring diagram for your exact setup or call an electrician.
Do not overstuff the box
Follow the manufacturer’s instructions for how many cables can enter each fixture junction box and do not exceed conductor fill limits. Some small wafer junction boxes look roomy until you try to fit three cables and a dimmer-rated splice inside.
My “no surprises” checklist
- All cable jackets extend into the box as required.
- NM cable clamps are tight and providing strain relief.
- Connectors are tight and conductors are fully seated.
- No nicked insulation.
- Box covers are installed where required.
Step 7: Install the LED modules and trims
For canless wafer LEDs
- Plug the light into the junction box lead.
- Compress the spring clips.
- Push the light up until the trim sits flush with the ceiling.
For traditional can housings
- Install the socket module or LED retrofit kit per the manufacturer instructions.
- Attach the trim using the springs or friction clips.
- Make sure each trim sits flat with no gaps.
Step 8: Choose trim and color temperature
Trim choices that look good
- Baffle trim: Reduces glare, great for living rooms and bedrooms.
- Reflector trim: Brighter punch, often used in kitchens.
- Adjustable gimbal: Aim light at art, shelves, or a fireplace.
Color temperature (Kelvin) made simple
- 2700K: Warm, cozy, classic “lamp” feel. Great for living rooms and bedrooms.
- 3000K: Warm white, a touch cleaner. Great for open floor plans.
- 3500K to 4000K: Neutral to cool. Popular in kitchens, laundry rooms, garages.
- 5000K: Daylight look. Good for task spaces, but can feel stark in relaxing rooms.
If you are unsure, buy one light first and test it at night. Your wall color, flooring, and natural light change how Kelvin looks in real life.
Pro-looking move: Keep color temperature consistent within sight lines. A 2700K living room next to a 5000K hallway feels like walking between two different planets.
Step 9: Restore power, test, and troubleshoot
Power up safely
- Make sure all junction boxes are closed and fixtures are secured.
- Turn the breaker on.
- Test the switch and dimmer.
Common problems and fixes
- Some lights do not turn on: Check for a loose neutral in a junction box upstream.
- Flicker on a dimmer: Confirm the dimmer is LED-rated and compatible with your fixture, and make sure you are within the dimmer’s load range (including any minimum load).
- Buzzing: Often dimmer compatibility, sometimes a loose connection.
- Trim not flush: Hole may be oversized or clips are not seated evenly.
Recessed lighting FAQ
How many recessed lights do I need?
It depends on room size, ceiling height, beam angle, and how bright you like it. A quick starting point is spacing lights 4 to 6 feet apart and then adjusting for task zones. If your room still feels dim, it is usually better to add a light or two than to rely on one ultra-bright fixture in the center.
Can I install recessed lights in a ceiling with insulation?
Yes, but use IC-rated fixtures, and ideally airtight ones. Insulation and heat do not play well with the wrong housing.
Do canless wafer lights last?
Quality ones do. Buy from a reputable brand, verify damp-rating or wet-rating if used in bathrooms, and keep your receipts. LEDs can last a long time, but the driver electronics matter.
Can I put recessed lights on a dimmer?
Usually, yes. Make sure both the lights and the dimmer are dimmable and compatible, and that the dimmer is rated for LED loads.
My final advice
If you want recessed lighting that looks like it came with the house, spend 60 percent of your effort on layout and 40 percent on the install. Straight lines, consistent spacing, and the right color temperature do more for “finished” than any fancy trim ever will.
And if you get stuck mid-project, stop, take photos, label everything, and back up a step. That one habit has saved me from turning a Saturday project into a two-week patch-and-paint saga.
About Marcus Vance
Content Creator @ Grit & Home
Marcus Vance is a lifelong DIY enthusiast and self-taught home renovator who has spent the last decade transforming a dilapidated 1970s ranch into his family's dream home. He specializes in budget-friendly carpentry, room-by-room renovations, and demystifying power tools for beginners. Through his writing, Marcus shares practical tutorials and hard-learned lessons to help homeowners tackle their own projects with confidence.