🚨 In a DIY emergency or rush?
Skip the details and jump straight to our 30-second cheat sheet for the most crucial info.
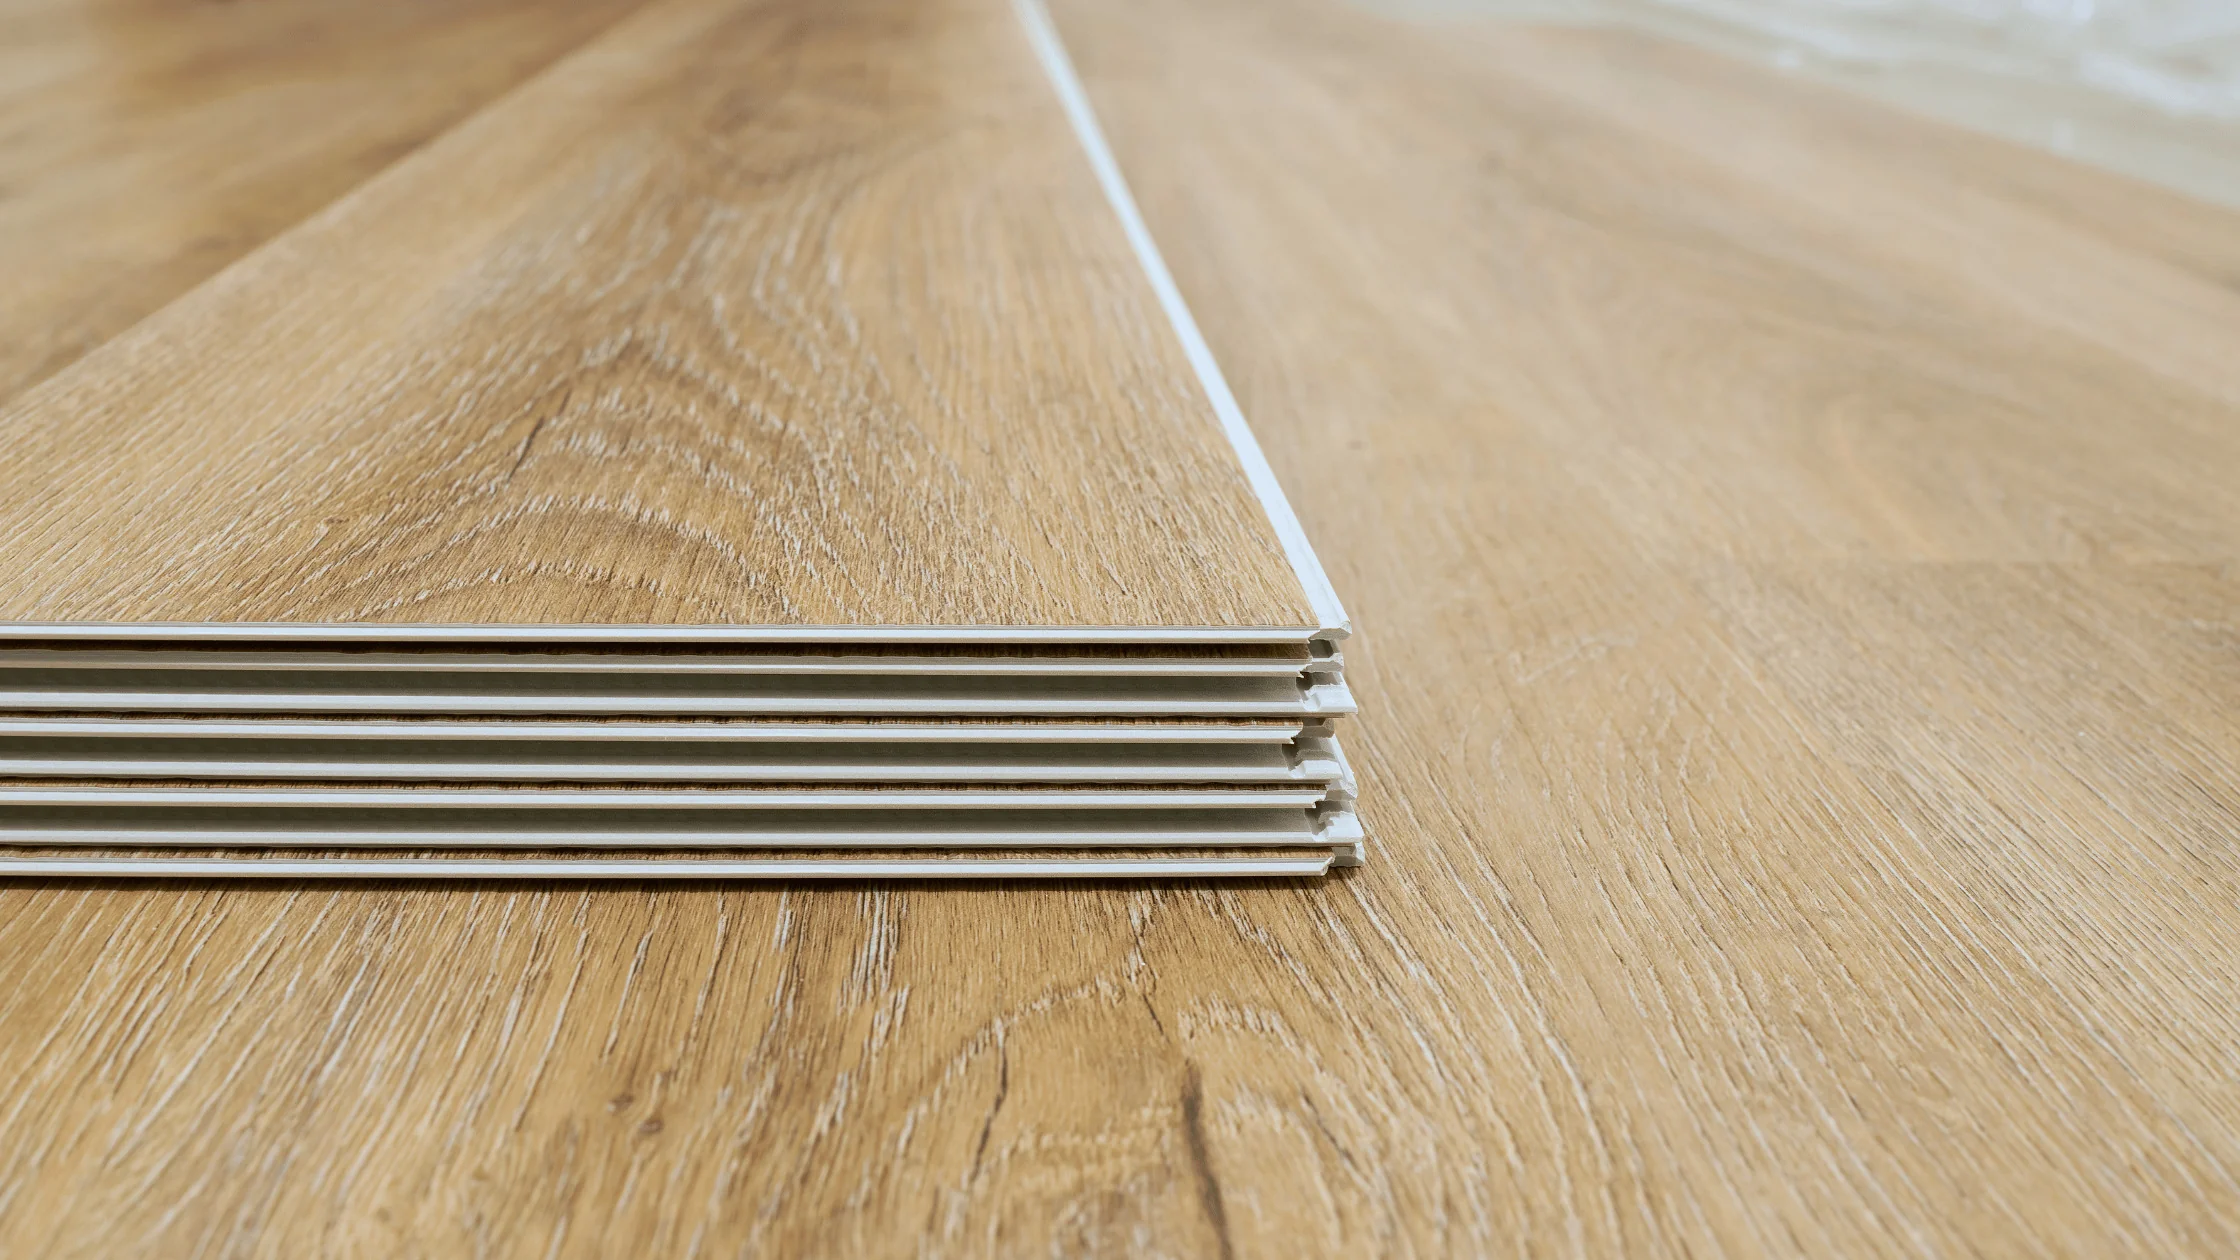
If you can measure, cut a straight line, and stay patient when a plank fights back, you can install click-lock luxury vinyl plank (LVP) on a plywood or OSB subfloor. The goal is simple: a flat, clean, dry base and a floor that can float without being pinched.
This guide is for standard subfloor installs (plywood or OSB). It is not for going over tile. If your room is already tile, follow a tile-specific approach because the prep and flatness rules change.
One non-negotiable: read your specific manufacturer installation guide before you start. Lock systems, flatness tolerances, moisture limits, acclimation rules, and approved underlayments vary more than most people expect.
Before you start: what click-lock LVP needs
- Flat, not level. Tolerances vary by brand and core type. Many call for about 3/16 inch variation over 10 feet or 1/8 inch over 6 feet. Check your box insert and install guide.
- Clean and solid. No loose panels, squeaks, crumbling edges, old adhesive ridges, paint overspray bumps, or staple lines that create high spots.
- Dry. Moisture is the silent troublemaker that can lead to swelling, mold, or a spongy feel.
- Room to float. Expansion gaps around the perimeter are non-negotiable, and transitions cannot clamp the field of flooring.
My rule: if you spend an extra hour on prep, you save a whole weekend of pulling planks back up later.
Tools and materials (beginner-friendly list)
Must-have tools
- Tape measure
- Pencil and a notepad (seriously, it keeps you organized)
- Speed square or framing square
- Utility knife with extra blades (for scoring LVP)
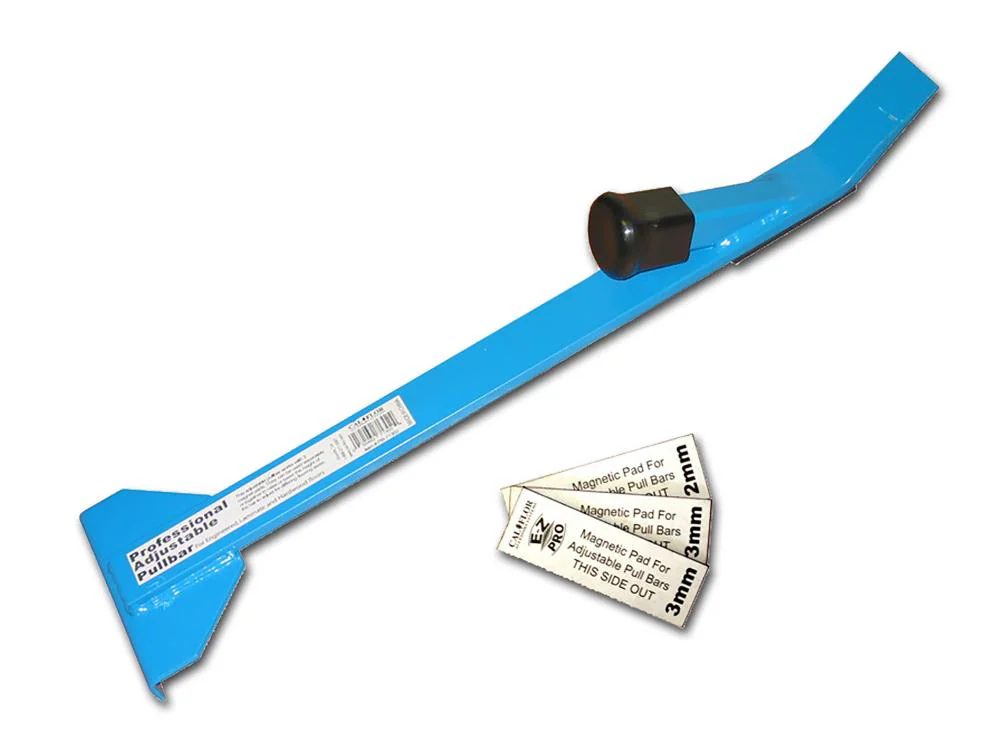
- Pull bar (for the last row and tight spots)
- Tapping block (made for LVP so you do not crush the locking edge)
- Spacers for expansion gap (or scrap wood cut to size)
- Rubber mallet
- 6 foot straightedge or a long level (for flatness checks)
- Broom and shop vac
Nice-to-have tools
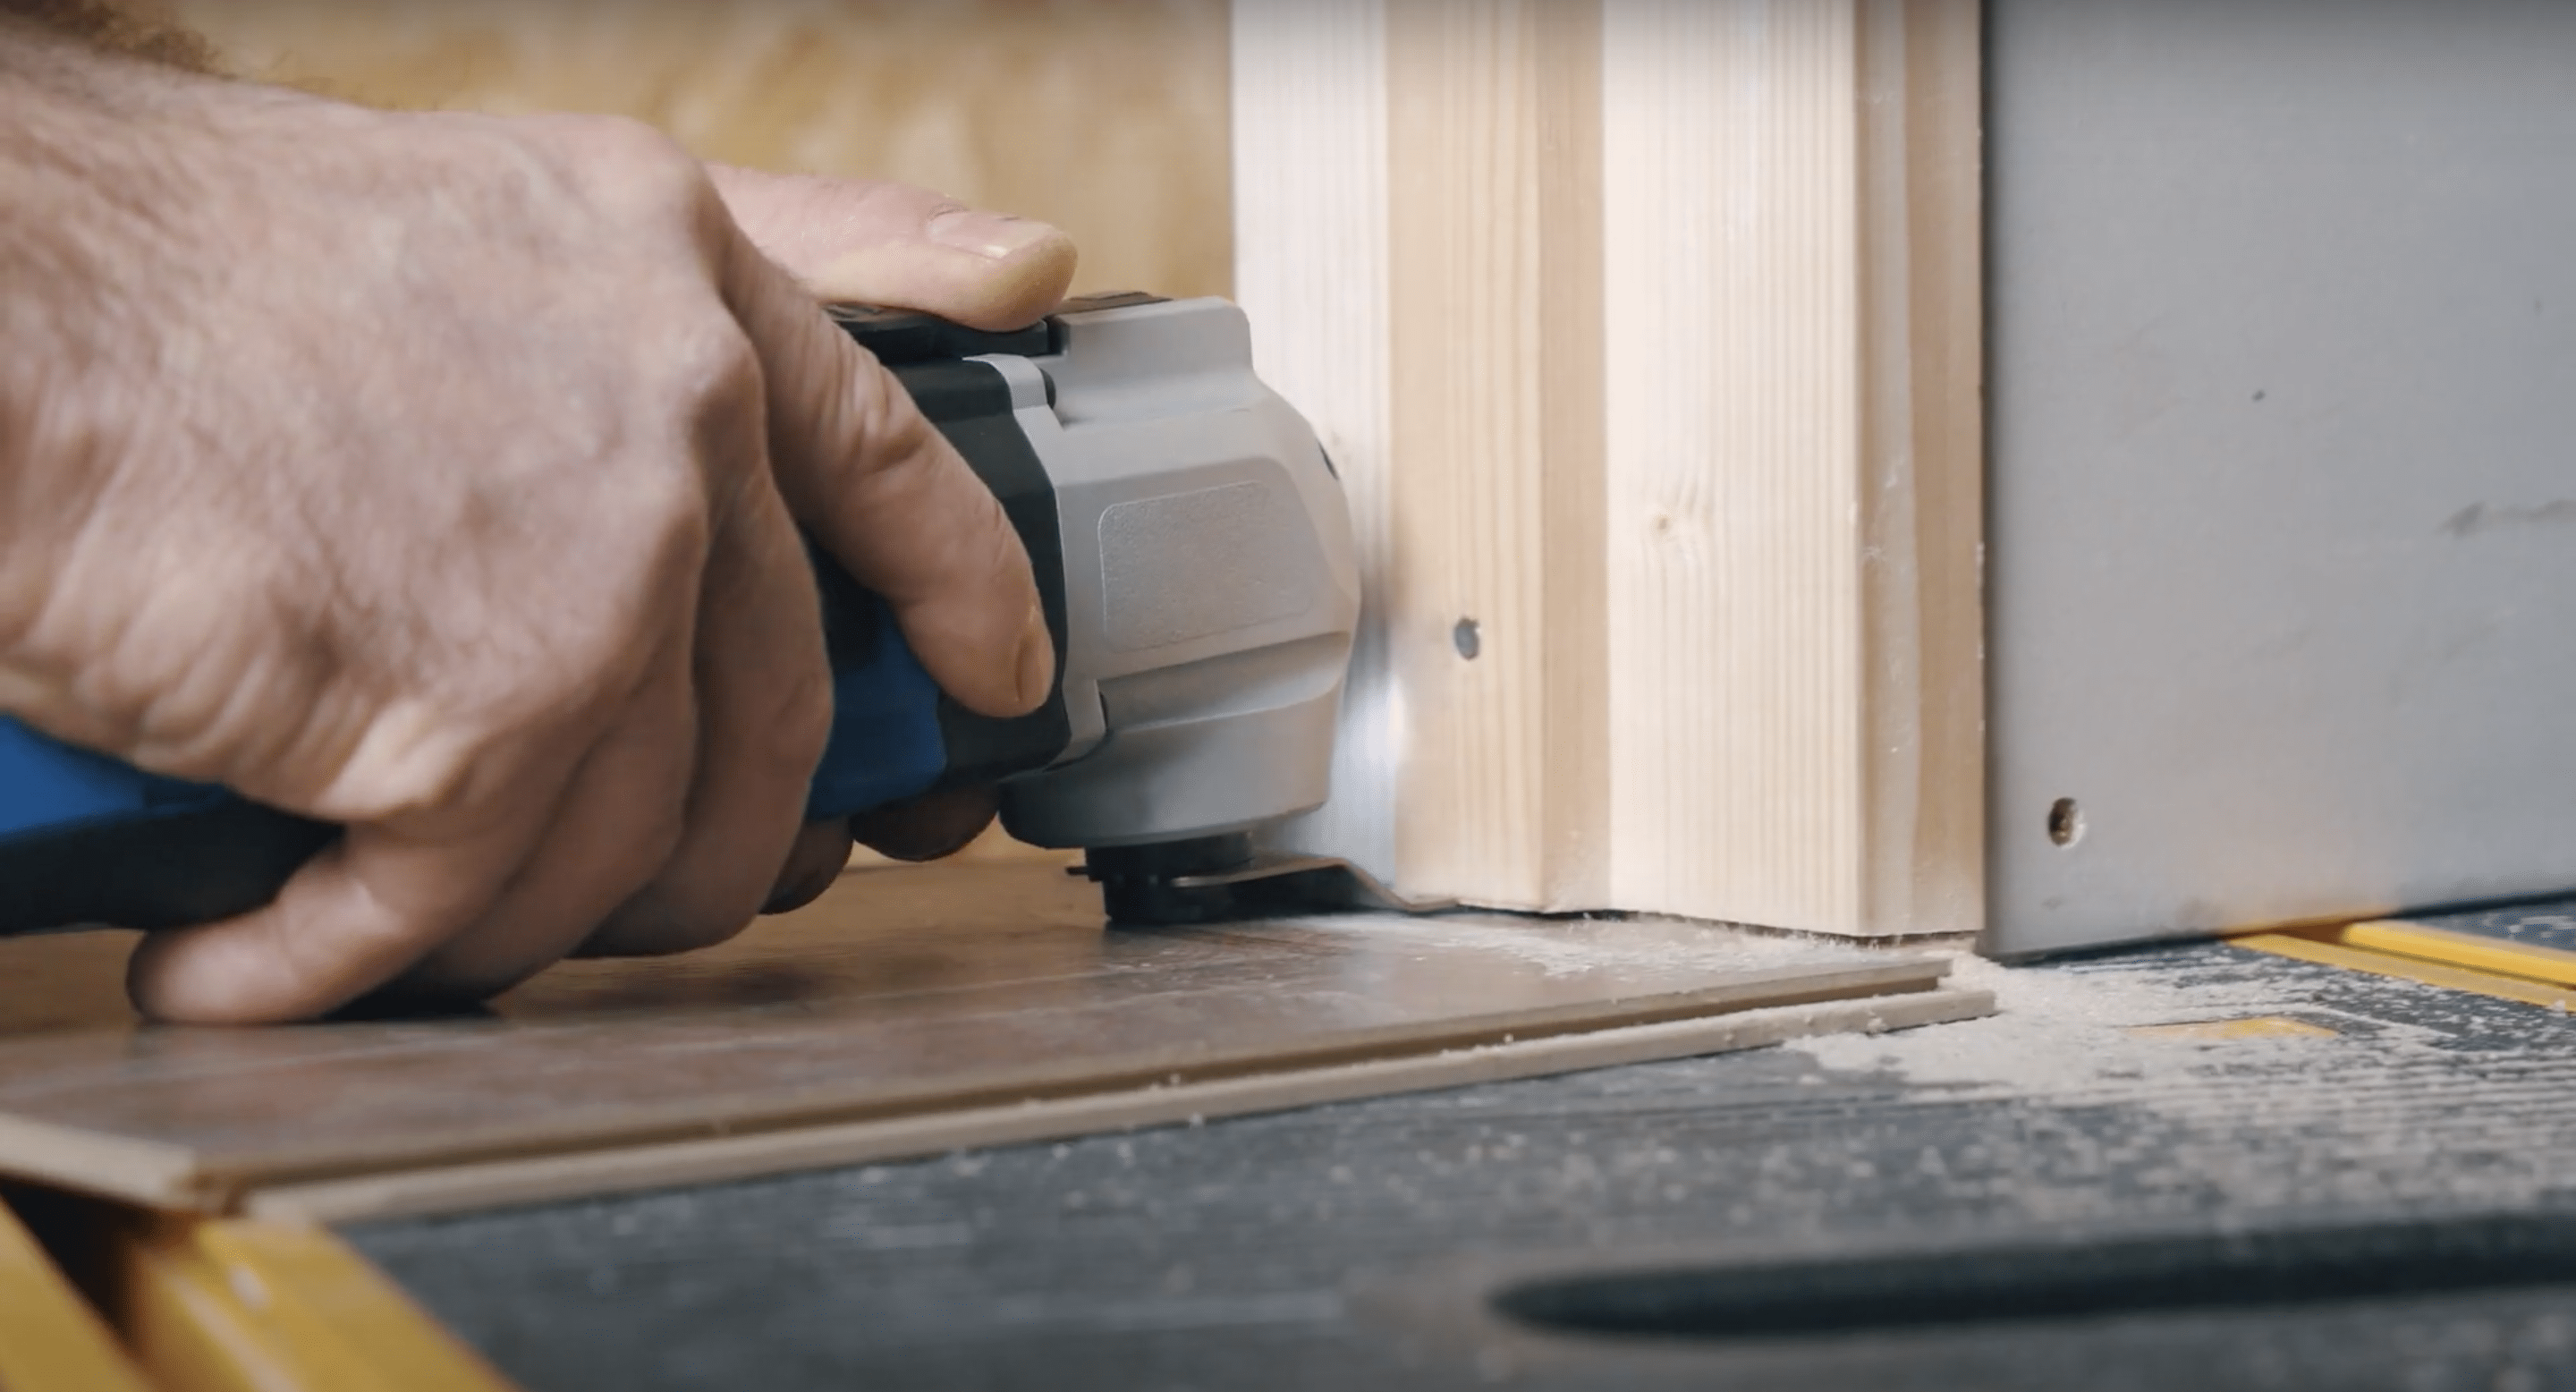
- Oscillating multi-tool (best for door jamb undercuts)
- Jigsaw (curves and notches)
- Miter saw or table saw (fast, accurate cuts for lots of planks)
- Knee pads
- Moisture meter (recommended)
Safety basics
- Eye protection for cutting and undercutting jambs
- Hearing protection around saws
- Dust control when sanding or mixing patch (vacuum, mask as needed)
Materials
- Click-lock LVP (buy 10% extra, or 15% for tricky layouts)
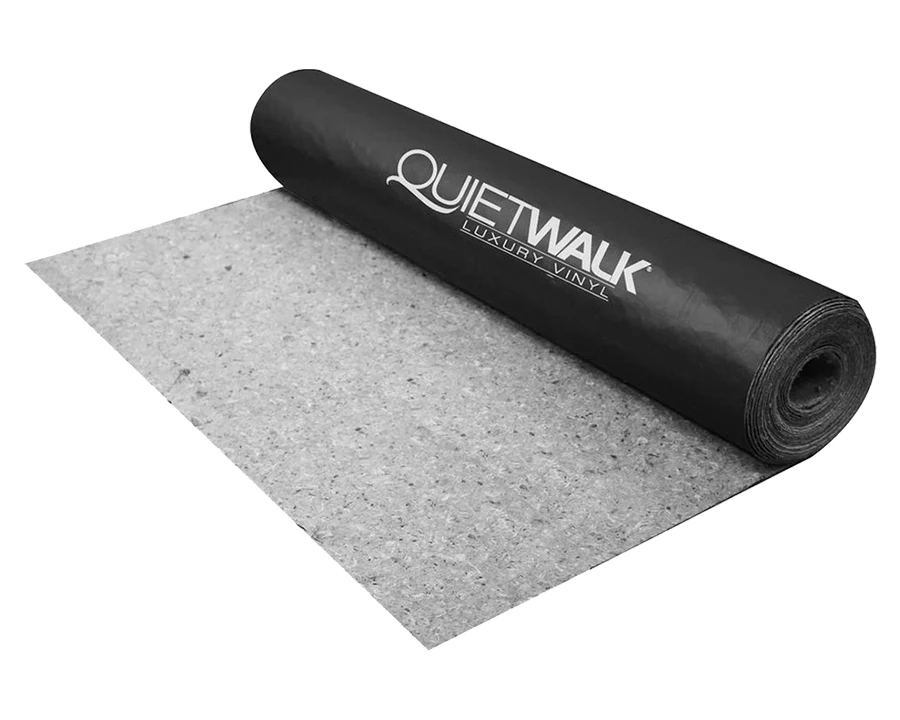
- Underlayment (only if your LVP needs it and does not have attached pad, or if your brand requires a specific one)
- Vapor retarder or barrier (only when required by manufacturer and appropriate for your assembly, climate, and subfloor)
- Floor patch or leveling compound (for low spots)
- Wood filler or patch (for subfloor voids, if appropriate)
- Transition pieces: T-moldings, reducers, end caps, stair nosing as needed
Acclimation: when it matters and how to do it
Some LVP products are marketed as “no acclimation needed,” but temperature still matters because vinyl changes size slightly with heat. I have seen floors installed straight off a freezing truck that looked fine on day one and started opening micro-gaps after a few days of HVAC running.
Simple acclimation routine
- Bring the unopened boxes into the room 24 to 48 hours before install, unless your manufacturer says otherwise.
- Keep room temperature in the recommended range (commonly 65 to 85 F) during install and for a couple days after, per manufacturer guidance.
- Stack boxes flat and spread them out so air can circulate.
Do not store boxes on a damp slab, in direct sun through a window, or in an unconditioned garage if the house is conditioned.
Moisture checks: plywood or OSB is not immune
Even on wood subfloors, moisture can cause problems, especially over crawl spaces, after plumbing work, or in a new build where framing lumber is still drying.
Quick moisture checklist
- Look and smell: dark staining, musty odor, swelling at panel seams are red flags.
- Check the crawl space (if you have one): standing water, wet insulation, missing ground vapor barrier, or poor ventilation needs fixing before flooring.
- Use a moisture meter if you can: follow the LVP manufacturer limits for wood subfloors (often a maximum wood moisture content and a maximum difference between subfloor and flooring).
If you suspect a leak, stop and fix it. LVP can handle spills on top. It cannot fix a wet subfloor underneath.

Subfloor prep: flat, tight, squeak-free
Before you worry about patching compound, make sure the floor is structurally sound. If the room has real bounce or deflection, patch will not save you. Fix loose panels, add blocking where needed, and address joist issues first.
Step 1: secure the subfloor
- Walk the room and listen for squeaks and pops.
- Add screws into joists where panels move. I typically use 2 inch to 2 1/2 inch decking screws, spaced about every 6 to 8 inches along problem areas.
- Set protruding fasteners and remove staples or debris.
Step 2: check flatness
Use a 6 foot straightedge and slide it around the room. Mark:
- High spots: ridges at panel seams, old adhesive, paint drips, crowned areas.
- Low spots: dips that create a “bridge” under the straightedge.
Step 3: fix high and low spots
- High spots: sand or plane carefully. For OSB, go slow and avoid tearing fibers.
- Low spots: use a floor patch or leveling compound rated for wood subfloors. Feather the edges wide so you do not create a bump.
- Panel seams: do not “mud” every seam like drywall. Only address ridges or damage that affects flatness.
Thrifty tip: Many “soft spot” complaints are just low spots that never got filled. Spend your money on patching compound, not on thicker underlayment hoping it hides waves.
Underlayment: pick the right one (and when to skip it)
Underlayment choices confuse people because LVP is not like laminate. With click-lock vinyl, the locking joint is strong, but it can flex if the base is spongy.
Start with the box: attached pad or not?
- If your LVP has an attached pad: many manufacturers say do not add extra foam. Too much cushion can cause the joints to flex and eventually separate.
- If your LVP does not have a pad: use the underlayment type and thickness the manufacturer allows. It is usually a thin, vinyl-approved product (often around 1 to 2 mm), or a specific branded underlayment.
Vapor retarder: do you need plastic on a wood subfloor?
It depends on the manufacturer, the assembly below (especially crawl spaces), and local conditions. Some brands want a vapor retarder in certain above-crawlspace situations, and some do not. Also, plastic in the wrong place can trap moisture where you do not want it. Follow your flooring instructions and local code or best practices for your climate. If you have a crawl space, the most important moisture control is usually down in the crawl space, not as a mystery layer right under the planks.
Sound control
If you are installing above a living space, a denser underlayment (approved by your LVP brand) can help footfall noise. Just do not exceed the allowed thickness.
Plan your layout (this is where pros win)
Pick plank direction
- Most people run planks parallel to the longest wall for a clean look.
- If your subfloor has a slight wave, running planks along the wave can sometimes hide it better than crossing it.
- If you are connecting rooms, think about how the planks flow through doorways and hallways.
Avoid skinny rows
Measure your room width (perpendicular to plank direction). Divide by the plank width. If your last row will be less than about 2 inches (or your manufacturer minimum), adjust your starting row by ripping the first row narrower so the first and last rows look balanced.
Expansion gap plan
Plan for a gap around all fixed vertical surfaces:
- Walls and baseboards
- Kitchen islands
- Fireplace hearths
- Sliding door tracks (if allowed, or use a proper transition)
- Cabinet toe kicks if flooring runs under them (often it should not; see your product guidance)
Typical gap is 1/4 inch, but always follow your manufacturer spec.
How to stagger seams
Staggering is not just “random.” You are trying to avoid weak points and repeating patterns that scream DIY.
Basic staggering rules
- Follow the minimum end-joint stagger on your box insert (often 6 to 8 inches).
- Follow any minimum end piece length rule (commonly around 8 inches). This is a big one beginners miss.
- Do not create an H-joint (end seams lining up every other row).
- Do not create a stair-step pattern that repeats every 3 rows. It looks busy and can concentrate stress.
An easy pattern for beginners
- Row 1: start with a full plank.
- Row 2: start with a plank cut to about 1/3 length.
- Row 3: start with a plank cut to about 2/3 length.
- Row 4: start with a full plank again, but keep checking that you are meeting the minimum stagger and minimum end piece length.
If your offcut is long enough to start the next row while meeting the rules, use it. That is how you save money without making the layout look like a patchwork quilt.
Install step-by-step: click-lock LVP over plywood or OSB
Step 1: remove trim (or plan shoe molding)
For the cleanest look, remove baseboards and reinstall after. If you do not want to pull baseboards, you can leave them and add shoe molding to cover the expansion gap.
Step 2: undercut door jambs
Door jambs are where beginners usually leave ugly cuts. The trick is to slide the flooring under the jamb instead of cutting around it.
- Use an oscillating multi-tool with a flush-cut blade.
- Use a scrap piece of LVP plus underlayment as a height guide.
- Cut the jamb and casing so the plank can slide under while still leaving the manufacturer-required gap.
Step 3: install the first row straight
Your first row is the steering wheel for the whole floor.
- Snap a chalk line if your starting wall is not perfectly straight.
- Place spacers for the expansion gap along the wall.
- Assemble the first row by clicking the end joints.
- Orient tongue and groove per your instructions. Different lock systems vary.
Beginner save: If you notice you are drifting out of square early, fix it now. It is much harder after you have 10 rows installed.
Step 4: install rows 2 and onward
- Follow your manufacturer’s recommended locking sequence for your specific joint style (long side first vs end first, angle-angle vs drop-lock).
- Use a tapping block only when needed, and only in the way your brand allows.
- Keep checking that you still have the expansion gap and that the field stays straight.
- If a seam is not tight, stop and fix it before you cover it with more rows.
Step 5: deal with obstacles and irregular walls
- For small notches: mark carefully and cut with a jigsaw.
- For pipes: drill a hole slightly larger than the pipe, then cut a wedge to slip the plank around. If your manufacturer allows it, glue the plug back to the plank only (often a small amount of CA glue works well). Do not glue the flooring to the subfloor.
- For wavy drywall: scribe the plank to the wall if needed, but keep the expansion gap.
Step 6: the last row (usually the hardest)
- Measure the gap to the wall in multiple spots, subtract the expansion gap, then rip planks to width.
- Use a pull bar to lock the last row in without smashing the tongue.
Cutting LVP cleanly (without fancy saws)
Score-and-snap (straight cuts)
- Measure and mark.
- Use a straightedge and score firmly with a sharp utility blade.
- Snap downward along the score.
- Trim the attached pad on the back if needed.
Jigsaw (notches and curves)
- Use a fine-tooth blade.
- Cut from the face side if it reduces chipping on your particular plank surface. Test on an offcut first.
Miter saw or table saw (speed and repeatability)
If you have one, it makes the work faster, especially in big rooms. Use a blade appropriate for vinyl or a fine-tooth finish blade. Support the plank so it does not chatter.
Transitions and doorways
LVP needs to move. Doorways and room transitions are where people accidentally anchor it.
When you need a transition
- At changes in flooring type (carpet to LVP, LVP to tile, etc.)
- At exterior door thresholds if required
- At long runs or large areas if your manufacturer specifies maximum length or square footage without a break
How to install transitions correctly
- Most transitions use a metal or plastic track screwed to the subfloor.
- Do not screw through the LVP. The floor should float under the transition piece with the proper gap.
- Leave the manufacturer-required expansion gap at the doorway and cover it with the transition.

Expansion gaps: do not skip them
Click-lock LVP expands and contracts with temperature swings. If it is trapped tight to the wall, it can buckle, peak, or separate at the joints.
Where to leave gaps
- All walls
- Door jambs and casing (yes, even though the plank slides under)
- Columns, cabinets, hearths, and any fixed vertical object
How to cover gaps
- Reinstall baseboards (preferred) or add shoe molding.
- Transitions at doorways.
- Quarter round is acceptable in a pinch, but shoe molding usually looks cleaner.
Important: Baseboards and shoe molding get nailed to the wall, not into the floor.
Common mistakes that cause separation or soft spots
What causes gaps
- Subfloor not flat: planks flex under foot traffic and work the joint loose over time.
- Wrong underlayment or too much cushion: extra foam under a padded LVP can make the lock system move.
- Debris in the joint: a grain of drywall mud or grit can keep the click from fully seating.
- Not fully locked seams: you think it clicked, but it did not. Check by gently lifting the edge (per your system) or running a finger along the seam.
- Hitting the lock wrong: tapping directly on the edge without a block can deform the profile so it never seats perfectly.
- Pinching the floor: tight to walls, tight under jambs, or transitions installed so they clamp the planks.
What causes soft spots
- Low spots left unpatched
- Loose subfloor panels
- Skipping screws in squeaky areas
- Installing over damaged OSB: swollen edges telegraph through and can flex.
- Floor structure has bounce: if the subfloor or joists flex too much, the whole installation can feel springy and stress the joints.
My most common beginner fix
If you find a small gap after a few rows, stop and address it immediately. Often you can unlock a couple rows, clean the joint, and re-click. Waiting until the whole room is down makes it a much bigger job.
Final checks and trim-out
- Remove spacers.
- Reinstall baseboards or install shoe molding, nailed to the wall.
- Install transitions, making sure the floor can still float.
- Vacuum thoroughly. Grit under furniture pads scratches floors faster than you would think.
- Keep temperature in the recommended range and follow your brand’s guidance for furniture placement and heavy items.
If you did your prep right, the floor should feel firm, seams should look tight, and walking across it should sound consistent. That is the moment I always stop for a second and enjoy it. A clean, solid floor changes the whole room.
Quick FAQ
Can I install click-lock LVP directly over plywood without underlayment?
Sometimes, yes. If the product has an attached pad, many brands want it installed directly over the subfloor. If it does not have a pad, it may require a specific underlayment. Always check the manufacturer instructions for your exact line.
Do I need to fill plywood seams?
Only if they create a ridge or a low area that violates the flatness requirement. The goal is flatness, not a perfectly smooth, sealed surface like you would do for sheet vinyl.
What expansion gap should I leave?
Commonly 1/4 inch, but it varies. Use the number in your installation guide and keep it consistent.
Should I run LVP under kitchen cabinets?
Most floating floor instructions say no because the weight can pin the floor. Many people install up to the toe kick and cover the gap with trim. Follow your product requirements and think through appliances that slide in and out.
The 30-Second Cheat Sheet
Essential takeaways for: How to Install Vinyl Plank Flooring
What you need for a clean, tight click-lock LVP install
- Subfloor must be flat: tolerances vary by brand and lock system. Many call for about 3/16 inch over 10 feet or 1/8 inch over 6 feet. Check your manufacturer guide. Flat matters more than level.
- Fix squeaks first: add screws into joists anywhere the subfloor moves.
- Acclimate: store boxes in the room 24 to 48 hours at normal indoor temps unless your manufacturer says otherwise.
- Moisture check: investigate crawl space and any staining or swelling; use a moisture meter if possible and follow brand limits.
- Underlayment rules: if planks have an attached pad, do not add extra foam unless approved. Too much cushion can cause joint separation.
- Expansion gap: leave the specified gap (often 1/4 inch) at all walls and fixed objects. Never nail trim into the floor.
- Door jambs: undercut and slide planks under for a pro look (still keep the gap).
- Stagger seams: meet minimum end-joint offset (often 6 to 8 inches). Also follow any minimum end-piece length rule (commonly around 8 inches). Avoid H-joints and repeating stair-step patterns.
- Transitions: do not screw through LVP. Use the track system and let the floor float under the molding.
Top mistakes that cause gaps or soft spots
- Installing over low spots or ridges without patching or sanding
- Letting debris sit in the locking joint so it never fully clicks
- Using an unapproved underlayment, or too much cushion under a padded plank
- Pinching the floor at walls, jambs, islands, or transitions
- Not fully seating joints row by row (fix issues immediately, not after the room is finished)
Fast install order
- Read your manufacturer install guide (seriously) and confirm underlayment and moisture rules
- Remove baseboards (or plan shoe molding)
- Screw down subfloor, check flatness, patch low spots, sand high spots
- Acclimate planks, keep HVAC in the recommended temp range
- Undercut door jambs
- Set spacers, lay first row straight
- Click and lock rows following your lock system sequence, keep expansion gap, stagger seams
- Rip last row, pull bar to lock it in
- Install transitions and trim, nailed to walls only
💡 Tip: Scroll up to read the full article for detailed, step-by-step instructions.
⬆️ Back to topAbout Marcus Vance
Content Creator @ Grit & Home
Marcus Vance is a lifelong DIY enthusiast and self-taught home renovator who has spent the last decade transforming a dilapidated 1970s ranch into his family's dream home. He specializes in budget-friendly carpentry, room-by-room renovations, and demystifying power tools for beginners. Through his writing, Marcus shares practical tutorials and hard-learned lessons to help homeowners tackle their own projects with confidence.