🚨 In a DIY emergency or rush?
Skip the details and jump straight to our 30-second cheat sheet for the most crucial info.
Hardwood floors are tough, but they are not invincible. Chair legs, pet nails, grit on shoes, a dropped pan, and suddenly you have a scratch that catches the light every time you walk by. The good news is most damage can be patched so it blends in from standing height, and you can do it without renting a sander or clearing the whole room.
This is the exact approach I use in my own 1970s ranch: assess the depth, clean it like it matters, pick the right filler, blend the color, then lock it in. The trick is matching the repair method to the type of floor finish, because prefinished boards and site-finished floors play by different rules.
Quick note: this guide is for real hardwood and engineered wood with a real wood wear layer. If you have laminate or LVP , skip the fillers and markers and use the manufacturer’s repair kit instead.

Jump-to summary
- Light surface scuff (you cannot feel it with a fingernail): clean, then use a clear scratch concealer, a very mild polishing compound, or the classic raw walnut rub, then buff.
- Light scratch (you can just barely feel it): clean, then use a stain marker sparingly (the finish is usually broken enough to accept pigment), buff, and optionally topcoat on site-finished floors.
- Medium scratch (you can feel it, but wood is not crushed): clean, fill with hard wax filler (heat-set kits) or a color-matched rub-in wax stick, level, buff, then seal if your floor is site-finished.
- Gouge or missing wood (fibers crushed or gone): wood filler or epoxy filler, sand level carefully, touch up color, then topcoat. For prefinished floors, sealing is tricky and often best left to a pro for perfect blending.
- Many scratches across the room: spot repairs can look like polka dots. That is when a screen and recoat (or full refinish) makes more sense.
Step 1: Identify your floor type
How to tell
- Prefinished (factory finished): boards often have tiny micro-bevels along the edges, and you may notice a slight groove line between planks. The finish is commonly a UV-cured urethane or acrylic system, often with aluminum-oxide reinforcement, but it varies by manufacturer.
- Site-finished (finished in place): boards typically look flatter edge-to-edge with no visible bevel line, and the sheen looks continuous across many boards. Common finishes are polyurethane (oil or water based).
Why it matters: site-finished floors can often be spot-topcoated to protect a repair, but sheen matching and adhesion still depend on cleanliness and compatibility. Prefinished floors are harder to spot-coat invisibly because the factory finish is tough to bond to and the sheen match can be finicky.
If your home is older: some floors are waxed, oiled, or shellac-finished. If you suspect that, pause and confirm the finish before using polyurethane or solvent wipes, because the rules change.
Step 2: Assess the depth
Before you buy anything, run a fingernail across the mark.
- No catch: likely a scuff in the clear coat only. You want a clear restorer or gentle polishing, not stain.
- Catches slightly: the finish is usually broken. Wax filler or a light touch of marker works well.
- Catches hard or there is a divot: gouge into wood. You will likely need wood filler or epoxy filler, then sanding and touch-up.
If the scratch looks raw, dull, lighter or whitish compared to the surrounding sheen, or it is clearly drinking in cleaner, assume you have exposed bare wood somewhere in the line. On site-finished floors, sealing after the repair helps prevent water stains and dark edges.
Pro tip: do your “does it disappear?” check in two lights: daylight and your evening overheads. Floors are optical illusions.
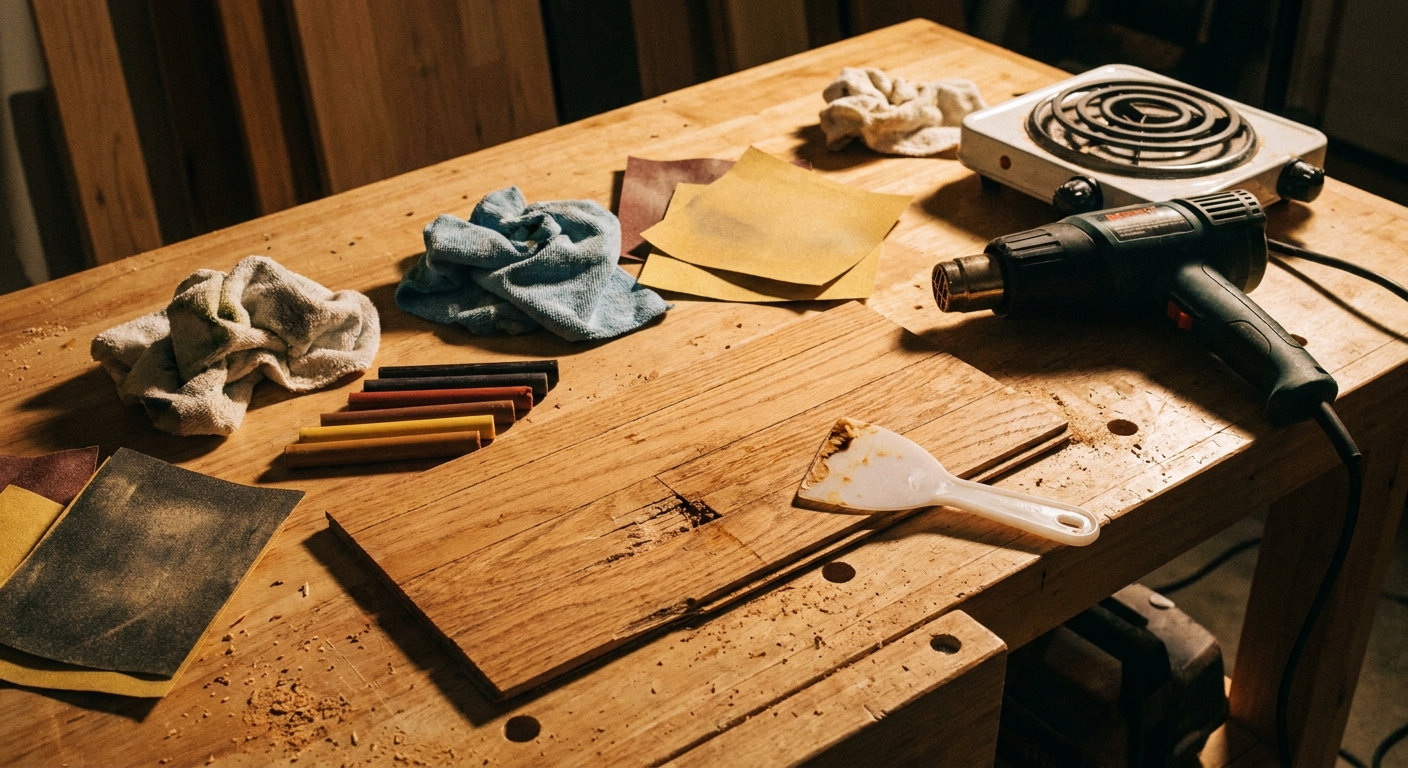
Tools and materials
Basic cleaning and prep
- Vacuum or soft broom
- Microfiber cloths
- Hardwood floor cleaner (manufacturer-approved if possible)
- Painter’s tape
For finish scuffs
- Clear scratch concealer or finish restorer (made for hardwood floors)
- Mild polishing compound (floor-safe), plus soft cloths
- Raw walnut (yes, really) for tiny white scuffs in some finishes
For scratches
- Color-matched wax repair sticks or hard wax filler
- Plastic putty knife or old gift card
- White non-scratch pad for buffing (avoid green abrasive pads)
- Stain markers (best when the finish is broken)
For gouges
- Wood filler (water-based for easy sanding) or two-part epoxy wood filler (tougher for missing chunks)
- 150/180 and 220 grit sandpaper (hand sanding only for small spots, start coarser only if filler is proud)
- Matching stain (optional, depends on your floor color)
- Topcoat for site-finished floors: water-based or oil-based polyurethane that matches your existing finish type
My thrift tip: buy a small assortment of wax sticks that match your floor rather than betting on one perfect color. Real wood has variation, and blending two shades usually looks more natural.
Step 3: Clean it
Filler and touch-up products fail when they are applied over grit, waxy buildup, or old polish. Take five extra minutes here and your patch will last.
Cleaning routine
- Vacuum the area thoroughly. Dirt trapped in a scratch will keep it visible.
- Wipe with a barely damp microfiber cloth and hardwood floor cleaner.
- If the area feels slick or looks hazy (polish buildup), start with the cleaner again and extra buffing with a dry cloth.
If you still suspect residue, you can try a small amount of mineral spirits on a cloth in a hidden spot first (ventilate, keep away from flames, follow the label). I avoid jumping straight to stronger solvents because some finishes can haze or shift sheen.
Important: do not soak the floor. Water can swell raw wood in a gouge and make the edges fuzzy.
Option A: Fix surface scuffs
If your fingernail does not catch, start here. This is the lowest-risk approach and the one people overcomplicate.
Method 1: Clear scratch concealer or restorer
- Apply a tiny amount to the scuff.
- Rub in with the grain using a soft cloth.
- Buff until it looks even, then stop. More product is not better here.
Method 2: Mild polishing compound
- Use a floor-safe, non-abrasive or very mild polishing compound.
- Buff gently with a soft cloth or white non-scratch pad.
- Do not chase perfection if you start changing sheen. A slightly visible scuff is better than a shiny halo.
Method 3: The walnut trick (for tiny white scuffs)
- Rub a raw walnut meat over the scuff, following the grain.
- Let it sit a minute, then buff dry.
This works surprisingly well on some light scuffs because it adds a little oil and color to the mark. It is not a miracle fix, but it is low-risk and fast.
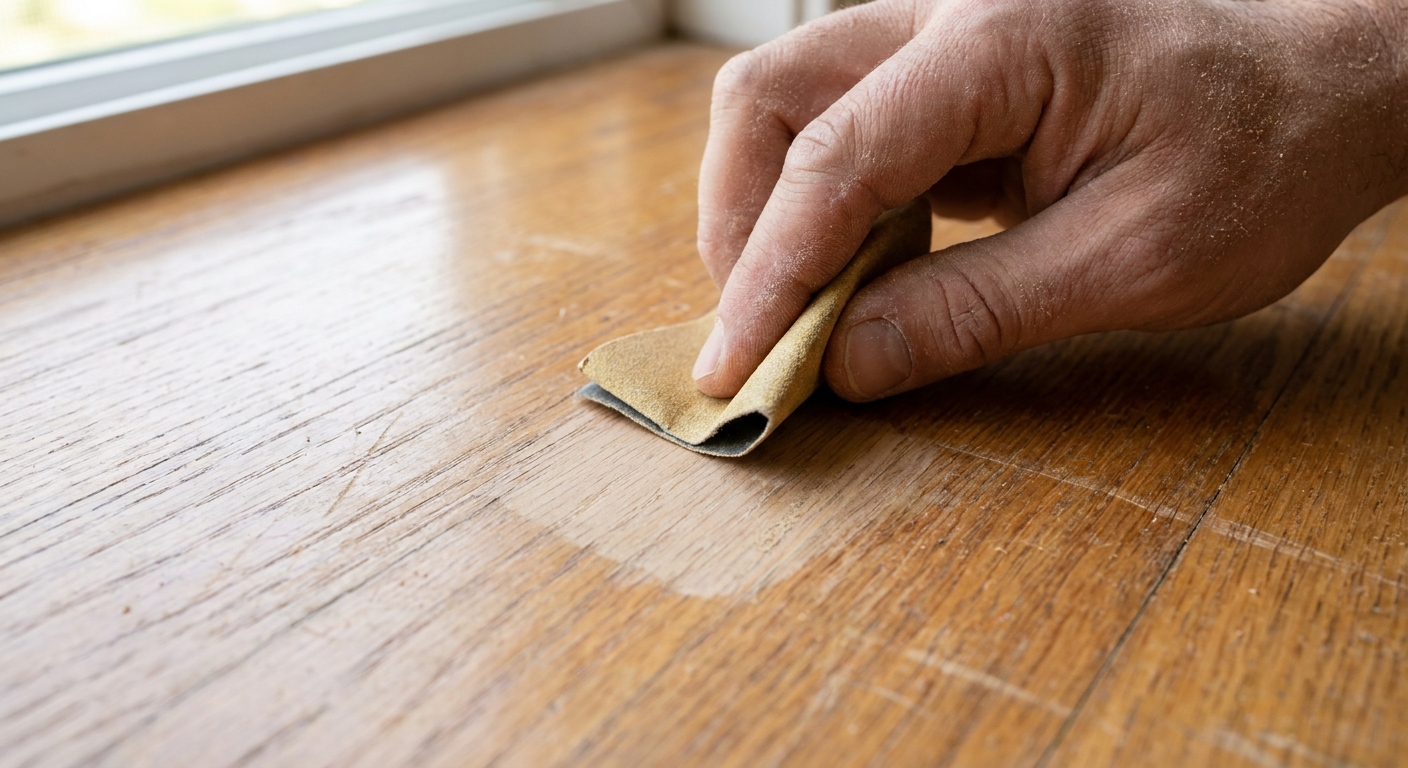
Option B: Hide light scratches
If your nail just barely catches, the finish is typically broken enough for pigment to grab. That is where markers and tinted wax actually shine.
Method 1: Stain marker
- Test the marker on an inconspicuous spot or a scrap of similar wood.
- Lightly color the scratch in the direction of the grain.
- Immediately buff with a clean cloth to soften the line and pull any extra pigment off the surrounding finish.
Method 2: Tinted wax crayon
- Rub the wax across the scratch, then buff firmly.
- If it looks too dark, buff more. If it looks too light, add a second pass.
My real-world mistake: the first time I used a marker, I tried to make it perfect in one pass. It looked like a drawn line. Multiple light passes with buffing between them looks far more like wood.
Option C: Fill medium scratches with wax
For scratches you can feel but that are not deep craters, wax filler is forgiving. It also avoids aggressive sanding that can create a shiny spot-repair halo.
Step-by-step
- Tape the edges (optional): painter’s tape along both sides of the scratch keeps the wax off surrounding texture.
- Apply wax: rub a wax stick across the scratch or press hard wax filler into it with a plastic putty knife.
- Level it: scrape gently with the plastic edge, following the grain. Your goal is flush, not proud.
- Blend: buff with a cloth. If the color is off, layer a second wax shade just in the scratch, then buff again.
Color matching that works
- Match the undertone first (warm amber vs cool brown vs gray).
- Then match the darkest grain streaks, not the overall average color.
- Two colors blended lightly usually beats one perfect color applied too heavy.
One more practical note: wax is a cosmetic repair, not a structural one. It can also interfere with future recoats in that spot unless it is fully removed, so keep wax repairs small and targeted.
Option D: Patch gouges with filler
If you have a dented trench, a chip, or a gouge where fibers are crushed, wax alone can sink over time. This is when wood filler or epoxy earns its keep.
Choose the right filler
- Water-based wood filler: easy, sands well, good for shallow gouges.
- Two-part epoxy wood filler: stronger, better when a chunk is missing, but harder to sand and can resist stain.
Step-by-step
- Trim loose fibers: if splinters are sticking up, trim them with a sharp utility knife so the repair sits cleanly.
- Fill in thin layers: press filler into the gouge. Slightly overfill to allow for shrinkage and sanding.
- Let it cure fully: follow the label. Sanding early pulls the filler right back out.
- Hand sand level: start at 150 or 180 unless the patch is clearly proud, then finish at 220. Keep sanding tight to the repair so you do not dull the surrounding sheen.
- Color match: use stain, a touch-up marker, or a mix of markers to mimic grain tones. Let it dry.
Grain reality check: you are not trying to paint a perfect wood portrait. You are trying to make the spot disappear from 5 to 6 feet away in normal lighting.
What about dents?
A dent is compressed wood fibers, not missing wood. Sometimes you can raise it with a damp cloth and a warm iron, but only when the wood is bare or you are in the middle of a full refinish. Doing this over an intact finish can turn a small dent into a bigger finish problem.
Step 4: Seal it
Site-finished floors
If your repair exposed bare wood or you sanded a spot, sealing helps prevent water stains and keeps the patch from looking dry. Spot topcoats can still telegraph as a sheen patch, so go thin and test first.
- Use a small artist brush or foam brush.
- Apply a very thin coat of polyurethane.
- Feather the edges, then leave it alone while it levels.
- If needed, apply a second thin coat after the first dries, following the product recoat window.
Prefinished floors
This is where DIY spot coating can go sideways. Factory finishes are extremely durable, and many clear coats do not bond well without the right prep. Matching sheen (matte, satin, semi-gloss) is also surprisingly hard in a small patch.
- For minor scratches: stick with wax repair and buffing.
- For exposed bare wood or deep gouges in high-traffic areas: a flooring pro may recommend a localized board repair or board replacement. Spot sanding can also mess with the factory bevel and texture, which is hard to hide.
When refinishing is the move
Spot repairs are great for isolated damage. If the entire room is showing its age, patching each scratch can turn into a never-ending game of whack-a-mole.
Consider refinishing if
- There are many scratches across every board, especially in traffic lanes.
- The finish is worn through in multiple areas (raw, dull, uneven-looking wood).
- The floor has widespread cupping, water staining, or deep pet damage.
- You have patched several spots and they look speckled in certain lighting.
A middle option: screen and recoat
If the wood itself is in good shape but the finish looks tired, a pro or experienced DIYer can do a light abrasion (screening) and apply a new clear coat. It is less dust than a full refinish and can dramatically reduce the look of fine scratches. Adhesion still depends on a squeaky-clean surface, so polishes and waxes need to be dealt with first.
Common patch mistakes
- Skipping the cleaning step: wax and filler will not bond well over polish residue.
- Using stain marker on a scuff: stain does not penetrate an unbroken clear coat and can smear. If your nail does not catch, go clear and polish instead.
- Over-sanding: you can dull the surrounding sheen and create a bigger visible spot than the scratch.
- Using an abrasive pad: a green scrub pad can turn a small scratch into a wide, dull haze. Stick with a white non-scratch pad.
- Chasing perfect color under one light: check your repair in daylight and at night. Floor color shifts with lighting.
- Topcoating without a test: compatibility and sheen match are the whole game. Test in a hidden spot first.
Quick FAQ
Can I use wood filler for a scratch?
You can, but it is often overkill and may look chalky in a thin line. For scratch-width damage, wax filler usually blends better and is easier to adjust.
Will wax repairs last?
In low-traffic areas, yes, they can last a long time. In entryways and kitchen lanes, expect occasional touch-ups. The upside is that touch-ups are fast.
What if I do not know my floor color?
Start with a small kit that includes multiple shades and practice in a closet corner. Blending two colors is the most reliable way to get close without guessing one perfect match.
The 30-Second Cheat Sheet
Essential takeaways for: How to Patch Scratches and Gouges in Hardwood Floors
Assess first
- No fingernail catch: finish-level scuff. Use a clear scratch concealer, polishing compound, or a walnut rub, then buff.
- Light catch: the finish is likely broken. Use a stain marker (very lightly) or tinted wax crayon, then buff.
- Deep catch or divot: wood filler or epoxy filler, let cure, hand sand level, touch up color, then seal (site-finished floors).
Do this every time
- Vacuum and wipe clean before any repair.
- Test products in a closet corner first, especially solvents and clear coats.
- Work in thin layers and blend color gradually.
- Buff after each pass to avoid a dark, obvious patch.
Prefinished vs site-finished
- Prefinished: avoid DIY spot clear coats in most cases. Wax repairs are safest for cosmetics.
- Site-finished: if you exposed bare wood or sanded, you can often apply a thin matching polyurethane coat to protect the repair, but sheen matching can still be tricky. Test first.
When not to patch
- If scratches are everywhere, patches can look speckled. Consider a screen and recoat or a full refinish instead.
💡 Tip: Scroll up to read the full article for detailed, step-by-step instructions.
⬆️ Back to topAbout Marcus Vance
Content Creator @ Grit & Home
Marcus Vance is a lifelong DIY enthusiast and self-taught home renovator who has spent the last decade transforming a dilapidated 1970s ranch into his family's dream home. He specializes in budget-friendly carpentry, room-by-room renovations, and demystifying power tools for beginners. Through his writing, Marcus shares practical tutorials and hard-learned lessons to help homeowners tackle their own projects with confidence.