Before you touch it: asbestos and why it matters
A popcorn ceiling is one of those projects that feels like it should be quick. Spray it, scrape it, roll on paint, done. But there is one big catch: some older popcorn textures can contain asbestos. Scraping can turn that texture into airborne dust, and dust is where the danger lives. Inhaled asbestos fibers can lodge in the lungs and cause serious disease years later.
If your home is older and you do not know what is in that ceiling, test first. Cutoff dates vary by region and by what products were used locally. As a practical rule, many homeowners and inspectors treat pre-1990 materials as “when in doubt, test.” In my own 1970s ranch, that one step changed the entire plan for a hallway ceiling. The $30 to $60 test kit felt annoying until I realized the alternative was gambling with my family’s lungs.
How to test for asbestos (simple version)
- Buy a test kit from a reputable lab or use a local asbestos testing service.
- Turn off HVAC so you do not circulate dust.
- Mist a small area with water to keep fibers from going airborne.
- Scrape a teaspoon of texture into the provided bag, following the kit instructions.
- Cover the sample spot with painter’s tape and a small piece of plastic until results come back.
If the test is positive: do not scrape it, wet or dry. Do not sand it. In many areas, removal and disposal are regulated, and DIY removal can be illegal or unsafe without the right containment and training. Most homeowners either hire a licensed asbestos professional or choose a non-disturbing option like encapsulation (skim coating over it) or covering (drywall over it), depending on local rules and the condition of the ceiling.
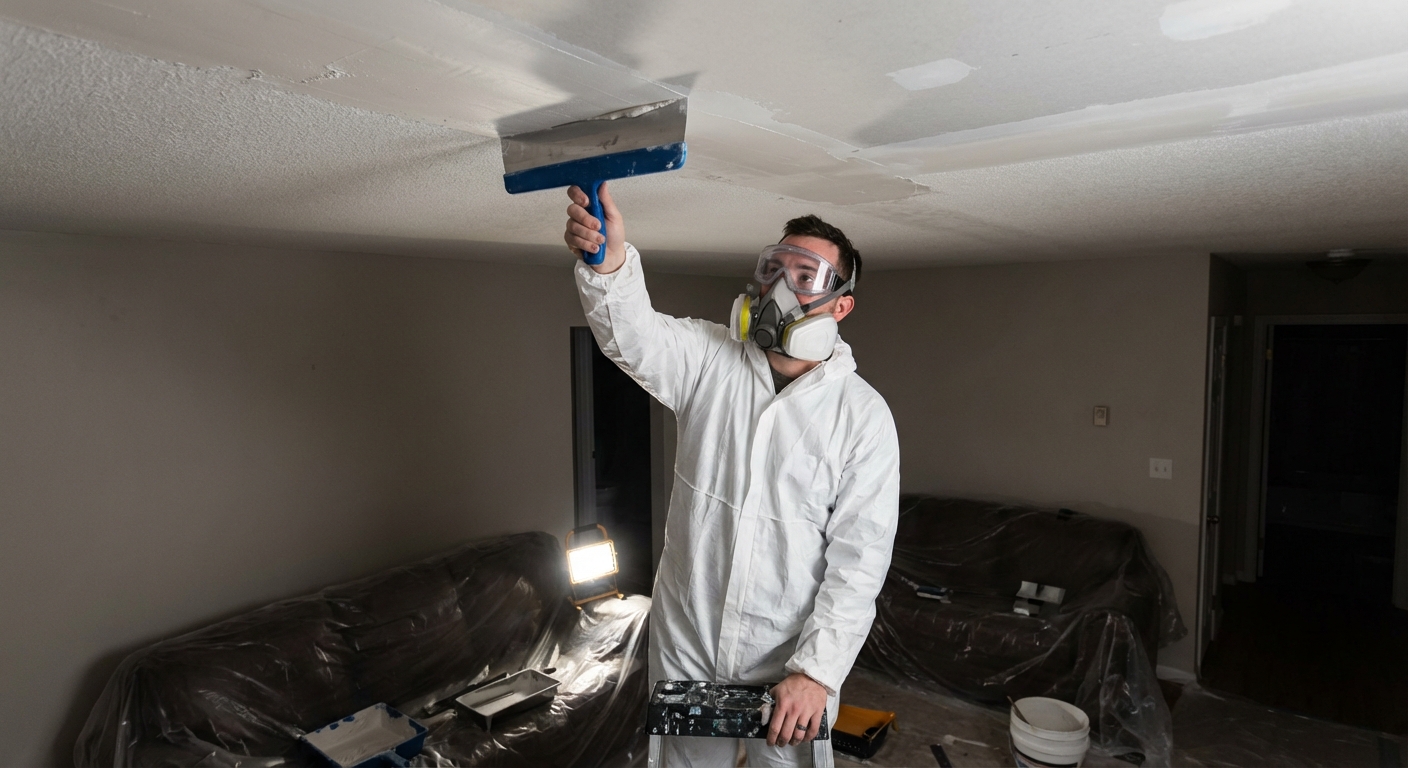
PPE note: A P100 respirator is not a “nice upgrade” for asbestos. It is a different protection class. But even with a P100, suspected or confirmed asbestos is not a DIY weekend scrape in a typical mask and drop cloth setup.
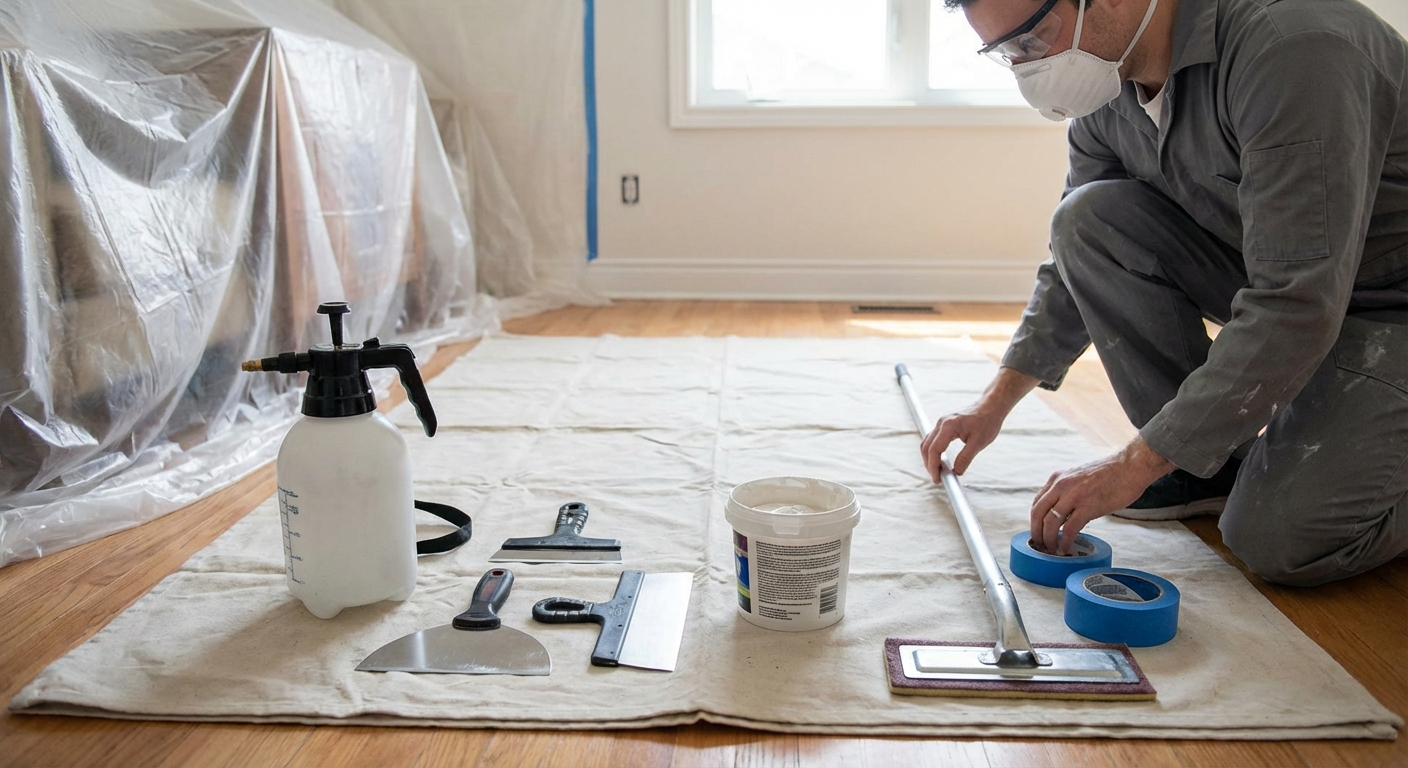
Tools and materials
There is the “getting it off” phase and then the “making it look like it was never there” phase. Plan for both.
For prep and protection
- Plastic sheeting (4 mil or 6 mil) for floors and walls
- Painter’s tape (1.5 in or 2 in)
- Rosin paper or cardboard (optional, under plastic for extra puncture protection)
- Drop cloths (optional, for furniture you cannot move)
- Contractor bags (wet popcorn is heavy and will burst light bags)
- Bucket for debris (helpful for short moves, then dump into contractor bags)
- Step ladder or small scaffold
- Safety glasses
- N95 or P100 respirator (P100 is my preference for dusty work)
- Hat or hood, and a long-sleeve shirt you do not mind trashing
For the wet-scrape method
- Pump sprayer or spray bottle
- Warm water
- A few drops of dish soap (optional, helps wetting)
- Wide drywall knife or floor scraper (6 in to 12 in)
- Ceiling texture scraper attachment (optional, helps with mess control)
For the dry-scrape alternative
- Drywall knife or ceiling scraper
- Shop vacuum with HEPA filter (strongly recommended)
- Dust containment pole or vacuum-assisted sander (optional)
For repairs and finishing
- All-purpose joint compound (or lightweight topping compound for final coat)
- 6 in taping knife and 10 in or 12 in finishing knife
- Mud pan
- Sanding pole and sanding screens (120 and 150 grit, with 220 only for a very light final buff)
- Work light or bright raking light
- Stain-blocking primer (especially if you have water stains)
- Ceiling paint (flat is most forgiving)
- Roller frame and covers (3/8 in nap is common for smooth ceilings)
- Caulk for perimeter gaps (optional)
Time and cost estimates
Every ceiling is different, but here is a realistic range for a typical 10 ft by 12 ft bedroom.
- Time: 1 to 2 hours prep, 1 to 3 hours scraping, 1 to 2 days for skim coat and dry time (often 2 to 3 coats), 1 to 2 hours sanding, 2 to 4 hours priming and painting.
- Cost: $75 to $250 DIY for consumables (plastic, tape, compound, sandpaper, primer, paint). Add $30 to $60 for asbestos testing if needed. If you buy a sanding pole, sprayer, or scaffold, cost can climb.
My budget tip: buy decent knives and a sanding pole once, then treat joint compound and plastic sheeting as your consumables. Good tools make ceiling work less miserable.
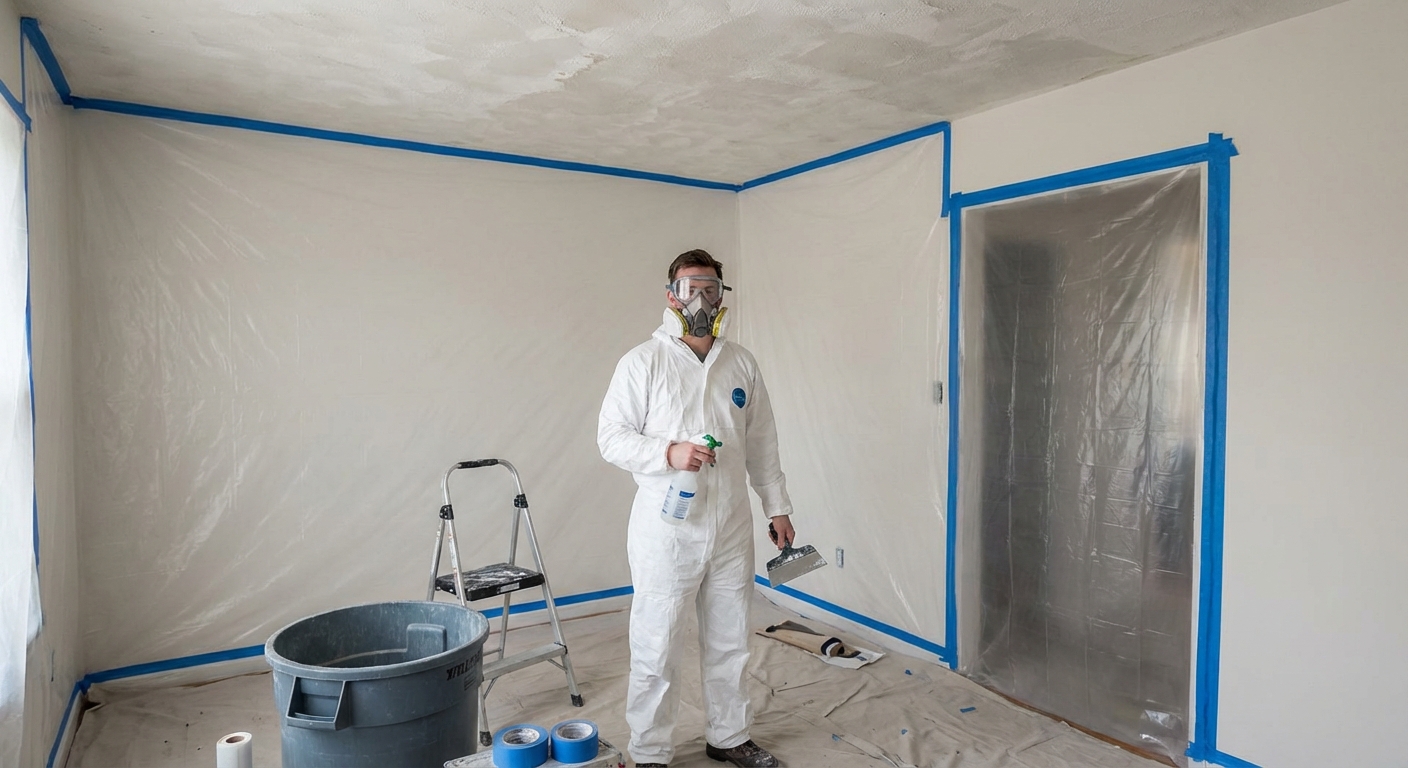
Room prep that actually saves you time
If you only read one section before starting, make it this one. Popcorn removal is messy by nature, but most of the nightmare stories come from poor prep.
Step 1: Clear the room
- Remove as much furniture as possible.
- Anything that stays gets pushed to the center and covered.
Step 2: Kill power and protect fixtures
- Turn off the breaker to the room.
- Remove light fixtures if you can, or bag them tightly with plastic and tape.
- Cover smoke detectors and vents. Do not forget ceiling speakers.
Step 3: Cover floors and walls
- Run plastic wall-to-wall on the floor and tape it up the baseboards a few inches to create a bathtub.
- If you are scraping wet, consider hanging plastic on the walls too. Wet popcorn splatters farther than you think.
- Tape off doorways and return air grilles. Turn HVAC off during scraping and sanding.
Step 4: Do a small test patch
Pick a corner and try your intended method. Some popcorn is painted, and painted popcorn does not like to release. A 2 ft by 2 ft test tells you whether this is a simple scrape or a bigger skim-coat job.
Step 5: Know your substrate
If your ceiling is drywall, wet scraping usually behaves predictably. If it is plaster, repaired in spots, or already cracked, be extra conservative with water and pressure. Those ceilings can chip, delaminate, or reveal repairs that need more patch work than you planned.
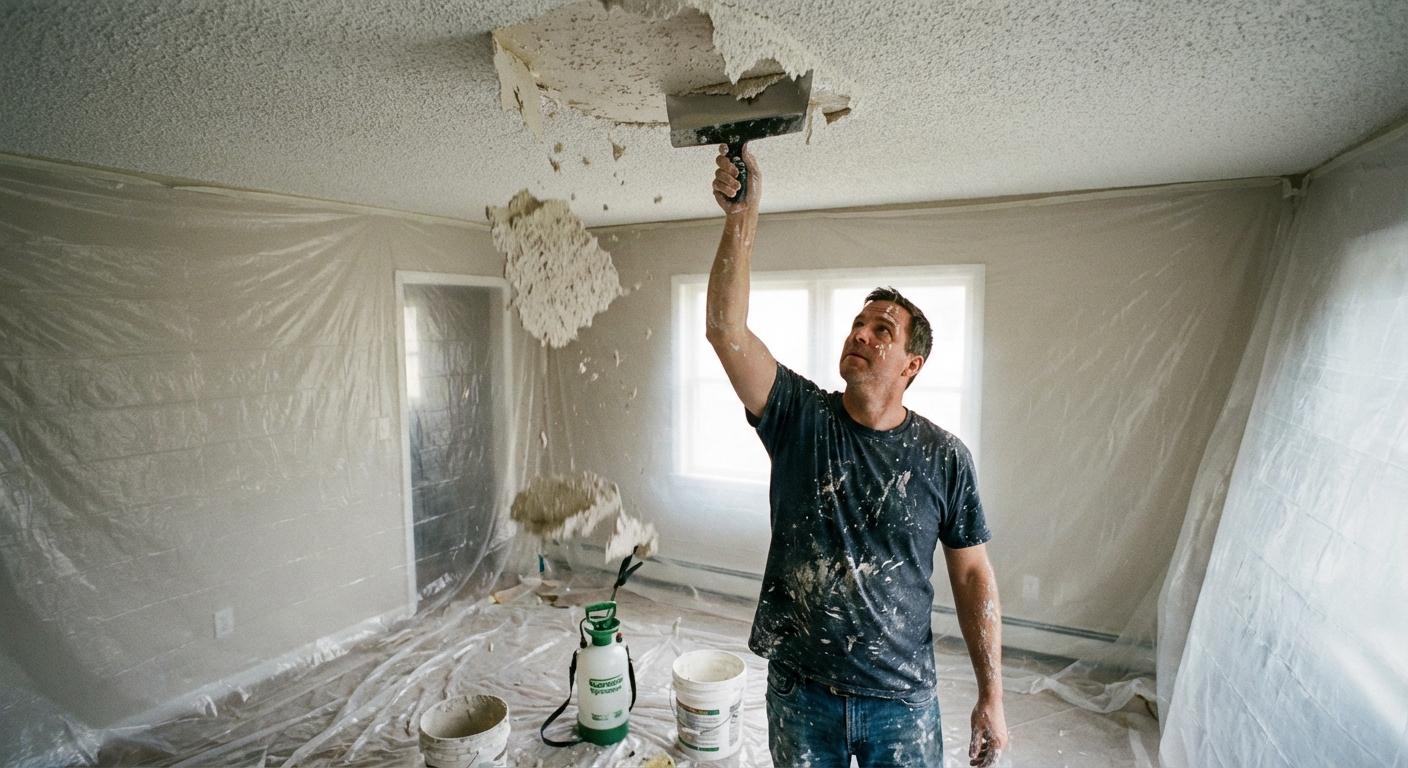
Wet-scrape method (best for unpainted popcorn)
This is the classic approach: you soften the texture with water, then scrape it off in sheets. When it works, it feels like peeling wallpaper.
Step 1: Mist, do not soak
- Fill a pump sprayer with warm water. Add a couple drops of dish soap if you want better wetting.
- Spray a section about 4 ft by 4 ft.
- Wait 10 to 15 minutes, then re-mist once.
My mistake to save you from: the first time I did this, I got impatient and drowned the ceiling. Water found every tiny joint around a light box and made a mess. Mist lightly, wait, then scrape.
Step 2: Scrape with a wide blade
- Hold the knife at a shallow angle.
- Use steady pressure. Let the water do the work.
- Dump debris often so you do not drag it across the drywall.
Step 3: Leave stubborn areas for skim coating
If you hit a painted patch or a spot that tears paper, stop forcing it. Leave those islands. You can skim coat over small stubborn areas later.
Step 4: Let the ceiling dry completely
Once the texture is off, let the drywall dry overnight. This is especially important before you start repairs and skim coating.
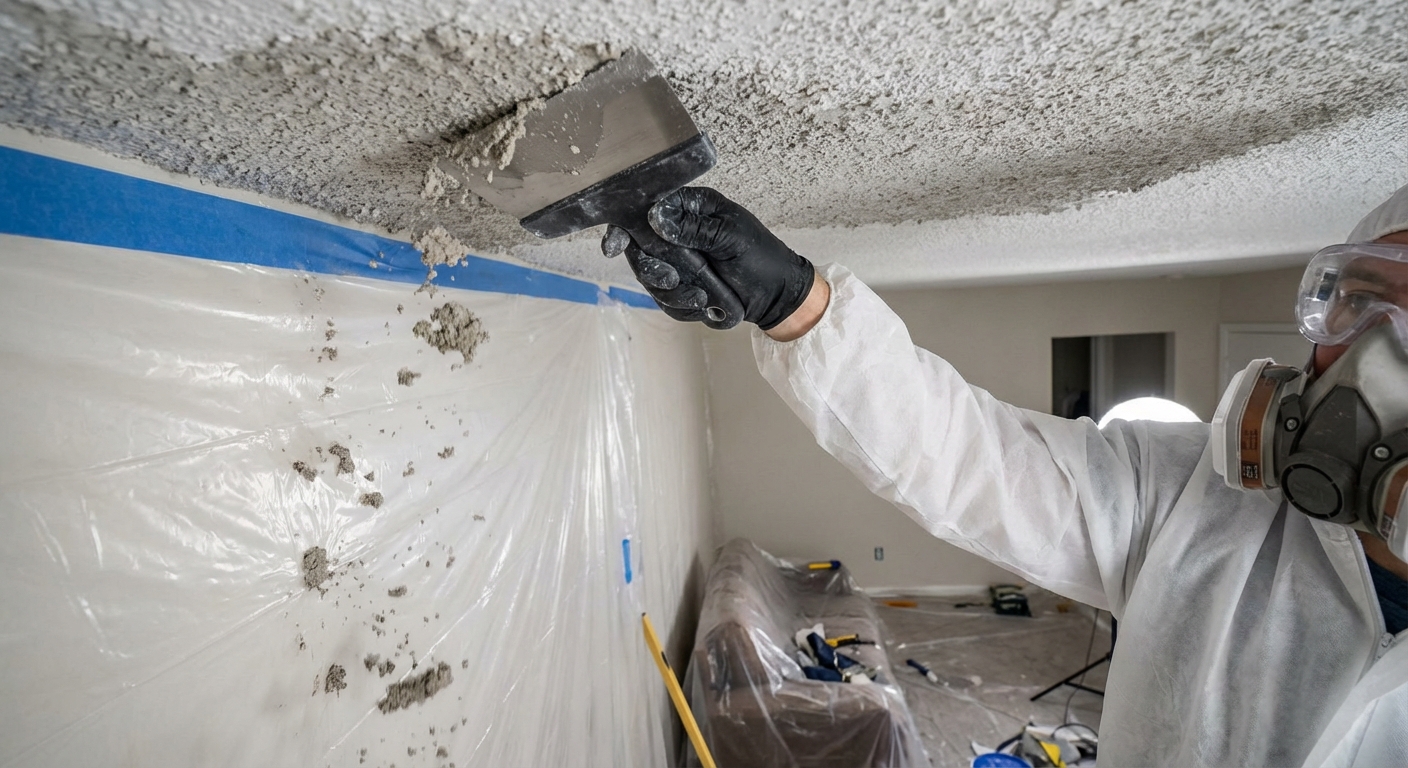
Dry-scrape method (when water is risky or texture is painted)
Dry scraping creates more dust, but it can be the better choice if your ceiling is painted and water does not penetrate, or if you have concerns about water damage. If you go this route, dust control is the whole game.
When dry-scrape makes sense
- The popcorn is painted and does not soften with water.
- You have delicate plaster or you are trying to minimize moisture.
- You have strong dust control tools like a HEPA shop vac and good containment.
How to do it without coating your house in dust
- Seal the room well, including door gaps and HVAC returns.
- Wear a proper respirator and eye protection.
- Scrape in small sections and vacuum frequently. A HEPA shop vac helps a lot.
- Consider using a vacuum-attached scraper or holding the vac nozzle near the blade as you work.
Important: If there is any chance the texture contains asbestos, do not scrape at all. Test first and follow local rules if positive.
After scraping: repairs and skim coat
Once popcorn is gone, most ceilings look worse than before. That is normal. You are seeing every taped seam, every fastener, and every little gouge from scraping. Skim coating turns that mess into a finish you can be proud of.
Step 1: Check for hidden issues
- Mark popped nails or screws and re-secure as needed.
- If you uncover water stains, do not just paint them. Find and fix the source first.
- Look for cracks or previous patches that will need extra attention.
Step 2: Knock down high spots
- Use your drywall knife to shave off ridges and loose paper.
- Lightly sand only where needed. Do not create dust just to create dust.
Step 3: Patch damage
- Fill gouges with joint compound.
- Let it dry, then scrape or sand flush.
Step 4: Skim coat the ceiling
- Apply a thin coat with a 10 in or 12 in knife. Work in manageable strips.
- Feather your edges so each pass blends into the next.
- Let it dry fully, then apply a second coat. Many ceilings need a third light coat.
Thrifty truth: the compound is cheap, but your time is not. Multiple thin coats beat one thick coat every day of the week because sanding thick mud on a ceiling is misery.
Sanding without hating your life
Sanding is where smooth ceilings are made, and where most DIYers create the most dust. Your goal is to sand just enough to flatten, not to grind the whole ceiling into powder.
Step 1: Use the right grit
- 120 grit for knocking down ridges and tool lines.
- 150 grit for most smoothing work without clogging instantly.
- 220 grit only for a very light final buff, if you want it.
Step 2: Use raking light
Shine a bright work light along the ceiling at a low angle. Imperfections pop immediately. Sand the problems, not the entire surface.
Step 3: Control dust
- Wear a respirator.
- Use a sanding pole with a vacuum attachment if you have it.
- Do not use a non-HEPA vacuum for fine dust. You will just launch it back into the air.
Prime and paint for a clean finish
Step 1: Prime
Fresh joint compound needs primer. If you skip it, your ceiling paint can flash and look blotchy, even if you used good paint.
- Use a drywall primer for normal ceilings.
- If you had stains, use a stain-blocking primer.
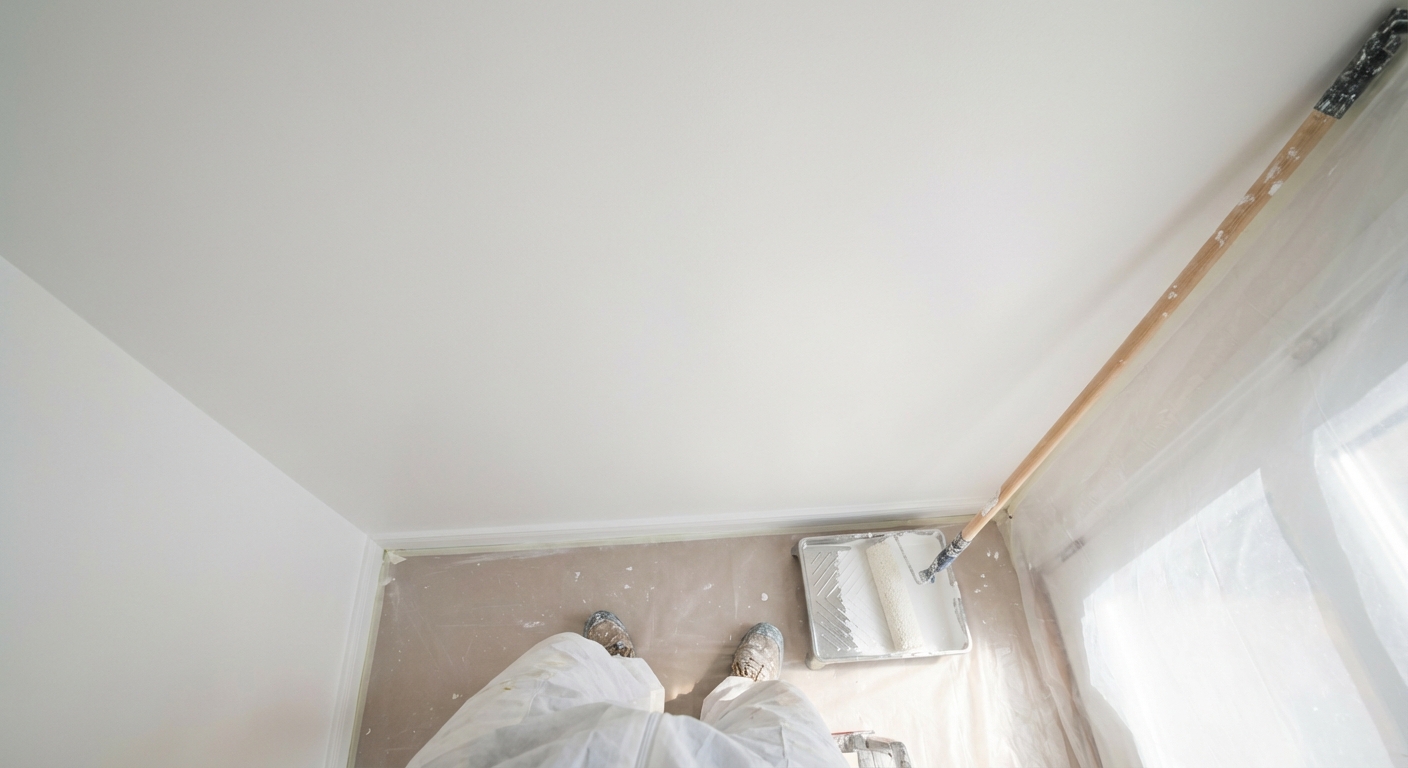
Step 2: Paint
- Flat ceiling paint hides imperfections best.
- Cut in edges, then roll in one direction, keeping a wet edge.
- Two coats usually look better than one, especially on fresh skim coat.
Cleanup and disposal
This is the part nobody posts on social media. Do it right and you will not be finding ceiling grit in your socks for a week.
- Bag smart: Use contractor bags. Wet popcorn is heavy, and thin bags split at the worst possible time.
- Do not overfill: Half a bag of wet texture can weigh a lot more than you think.
- Fold plastic inward: Roll it up like a burrito so debris stays inside.
- Vacuum with HEPA only: A standard shop vac can turn fine dust into a room-sized fog.
- Know your local rules: Disposal requirements vary by city and county, especially if asbestos is suspected or confirmed.
Common mistakes to avoid
- Skipping asbestos testing: If your ceiling is old enough to raise the question, test first.
- Assuming wet scraping is safe for asbestos: If it is positive, do not scrape it at all. Follow local regulations and consider a pro.
- Not prepping enough: Plastic and tape feel slow. They are faster than cleaning texture out of carpet and vents.
- Over-wetting the ceiling: Too much water can loosen drywall tape and cause sagging around seams.
- Using too steep a scraper angle: This gouges drywall and creates more patch work.
- Expecting scraping to be the finish: Most ceilings need skim coating to look truly smooth.
- Trying to do one thick skim coat: It cracks, it sags, and it is brutal to sand.
- Painting without priming: You will get flashing and uneven sheen.
- Not using raking light: The ceiling looks perfect at night, then terrible the next morning in daylight.
Quick decision guide: scrape, skim, or cover?
If you are standing in your living room staring up, here is a simple way to decide what to do next.
Choose wet-scrape if
- The texture is not painted.
- Your test patch scrapes easily after misting.
- You want the least dust possible.
Choose dry-scrape if
- The texture is painted and water does not soften it.
- You have strong dust control and can seal the room.
Choose skim-over or drywall-over if
- The ceiling tests positive for asbestos (or you are waiting on results and want a plan B).
- The texture is stubborn and damages drywall when scraped.
- You would rather trade mess for more finishing work.
My best keep-your-sanity tips
- Work in small squares: 4 ft by 4 ft keeps water timing predictable and reduces gouges.
- Use a sharp knife edge: A dinged-up scraper catches and tears paper.
- Plan for drying time: The calendar is driven by dry time, not scraping speed.
- Protect your neck and shoulders: Take breaks, use a small scaffold if you can, and do not try to be a hero.
- Clean as you go: Bag debris early. Fold plastic inward when you are done so you do not spill dust back into the room.
FAQ
Can I paint over popcorn instead of removing it?
You can, and it is sometimes the smartest move, especially if asbestos is present or suspected. The downside is that painted popcorn is harder to remove later, and thick paint can make the texture look heavier.
What if my popcorn ceiling is already painted?
Test a patch. If water does not soften it, you can dry-scrape with strong dust control, but many people skip the fight and go straight to skim-over or drywall-over. Multiple heavy paint coats usually push you toward covering or skimming.
Do I need to remove the texture if I am going to skim coat anyway?
Not always. If the texture is sound and you are sure it is non-asbestos, some DIYers skim right over it. If the texture is loose, flaky, or thick, removal usually creates a flatter, more predictable base.
Is it normal to see seams after priming?
Yes. Primer reveals sins. That is why raking light and a second touch-up skim coat are so common on ceilings.
Wrap-up
Popcorn ceiling removal is not hard in the way electrical work is hard. It is hard in the way marathon cleaning is hard. Prep carefully, test for asbestos when the house is old enough to raise the question, choose the method that fits your ceiling, and give yourself permission to take the project one clean section at a time.
If you do it right, you will walk into the room, look up, and feel that quiet pride that never gets old: I did that.
About Marcus Vance
Content Creator @ Grit & Home
Marcus Vance is a lifelong DIY enthusiast and self-taught home renovator who has spent the last decade transforming a dilapidated 1970s ranch into his family's dream home. He specializes in budget-friendly carpentry, room-by-room renovations, and demystifying power tools for beginners. Through his writing, Marcus shares practical tutorials and hard-learned lessons to help homeowners tackle their own projects with confidence.