If your dryer powers on and heats up but the drum will not turn, a broken or slipped belt is one of the most common culprits. The good news is that a belt replacement is usually a very doable DIY repair. It is mostly screws, patience, and taking a few photos before you pull anything apart.
I have replaced more belts than I care to admit, including one time when I routed the belt wrong and the drum spun for about three seconds before the belt walked itself right off. Learn from my mistake. In this guide, we will match the correct belt, access the cabinet, route it around the motor and idler pulleys, set proper tension, and do a quick test run.
Before you start: safety and quick diagnosis
Unplug first, always
- Unplug the dryer from the wall. Do not rely on the control panel being off.
- If gas: shut off the gas valve if you need to move the dryer far enough to stress the flex line. If you smell gas at any point, stop and call a pro.
- Wear cut-resistant gloves if you have them. Dryer cabinets love sharp edges.
Signs the belt is the problem
- Drum will not spin, but the dryer runs and you can hear the motor humming.
- You can spin the drum by hand easily through the door opening (some resistance is normal, but it should move).
- Thumping or squealing before it stopped spinning can point to worn rollers or idler pulley, which can also take out a belt.
Stop and reconsider: If the drum is hard to turn by hand, you may have a seized roller, a jammed blower wheel, or something wrapped around the motor shaft. A new belt will not fix that, and forcing it can burn up the motor.
Tools and parts you will need
- New dryer belt (matched to your model)
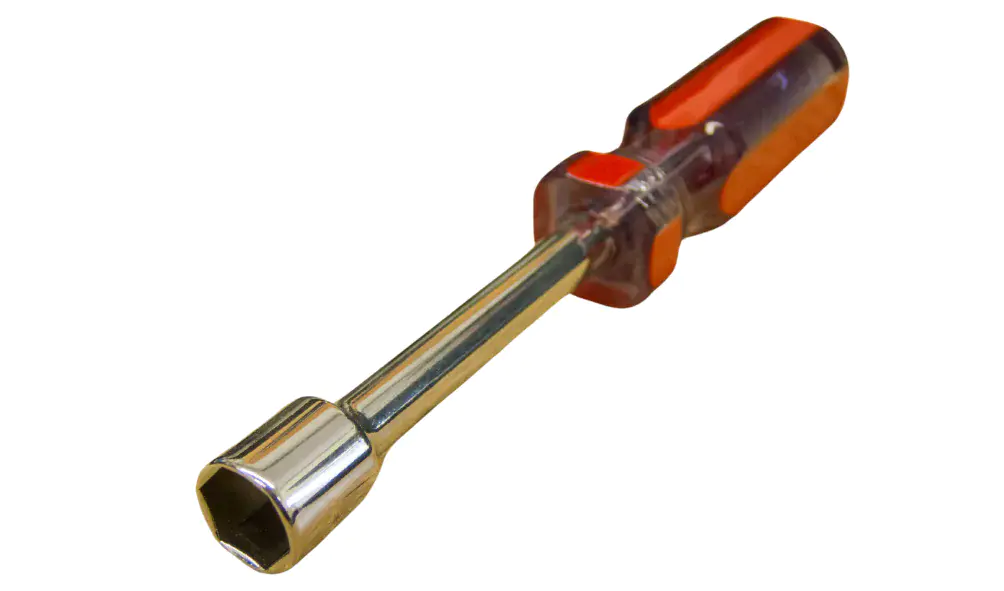
- Phillips and flathead screwdrivers
- 1/4-inch and 5/16-inch nut drivers (common on many dryers)
- Putty knife (for spring clips on some tops)
- Needle-nose pliers (helpful for tight connectors)
- Vacuum with hose attachment (highly recommended)
- Painter’s tape and a marker for labeling wires (optional, but calming)
Step 1: Match the correct replacement belt
This is the part that saves you the most frustration. Belts look similar until they do not fit.
Use the model number, not the dryer brand
- Look for the model number sticker inside the door opening, on the door frame, or on the back panel.
- Search for: [model number] dryer belt.
- If your old belt is intact, check for numbers printed on it and use that as confirmation, not your only source.
Ribbed vs smooth side
Most dryer belts are ribbed on one side. On most modern dryers, the ribbed (grooved) side faces inward against the drum, and those same ribs then ride in the grooves of the motor pulley for traction once you route the belt through the idler path. There are exceptions, so if you still have the old belt on, take a quick photo of the original routing, or check your model’s diagram.
Step 2: Open the dryer cabinet
Dryer access varies by design. Many common models open from the front, and some open from the top. If you are unsure, look up your model’s exploded parts diagram and you will see exactly what panels come off.
Typical front-access process
- Pull the dryer out so you can work comfortably behind and beside it.
- Remove the lint screen and the screws under the lint screen housing (often two).
- Release the top panel clips with a putty knife if needed, then lift the top.
- Remove screws holding the front panel. Disconnect the door switch plug carefully.
- Lift the front panel up and off the lower tabs.

Pro tip from my own bruised knuckles: Keep screws in a small cup and group them by panel. Dryer screws are notorious for being “almost the same” length, which is how you end up poking one through a plastic duct later.
Step 3: Remove the old belt and lift the drum
If the belt is broken
- Pull out the broken belt pieces.
- Vacuum lint from the base, motor area, and around the blower housing while you have access.
If the belt is still on but slipped
- Reach under the drum and release tension by pushing the idler pulley arm to relieve pressure.
- Slip the belt off the motor pulley.
Lift the drum out carefully
On most dryers, the drum rides on rear rollers and is supported at the front by the front bulkhead. Once the front panel and bulkhead are off, the drum will lift out.
- Support the drum with both hands.
- Lift slightly to clear the rear rollers and slide it out.
- Set it down on a clean surface so you do not dent it.
Step 4: Inspect parts that can destroy a new belt
This is the “while I am in here” moment. Belts often fail because something else started dragging.
Check the drum rollers
- Spin each roller by hand. It should spin smoothly and quietly.
- Replace rollers that wobble, feel gritty, stick, or have flat spots.
Check the idler pulley
- Spin the idler pulley. It should turn freely with no squeal.
- If it squeaks, binds, or has play, replace it. A failing idler is a belt-eater.
Check the motor pulley area
- Look for melted rubber on the motor pulley.
- Make sure lint is not packed around the motor and pulley.
When to stop and order more parts: If your rollers are worn or the idler pulley squeals, do those now. Reopening a dryer a second weekend because you ignored a $15 part is a special kind of regret.
Step 5: Install the new belt on the drum
- Wrap the belt around the drum with the ribbed (grooved) side facing inward against the drum and position it roughly where the old belt wear marks are.
- Keep the belt straight and untwisted.
Step 6: Put the drum back in place
- Guide the drum back into the cabinet.
- Seat the rear of the drum on the rear rollers. You should feel it settle into place.
- Make sure the belt stays in its groove position and does not slip off the drum as you push it in.
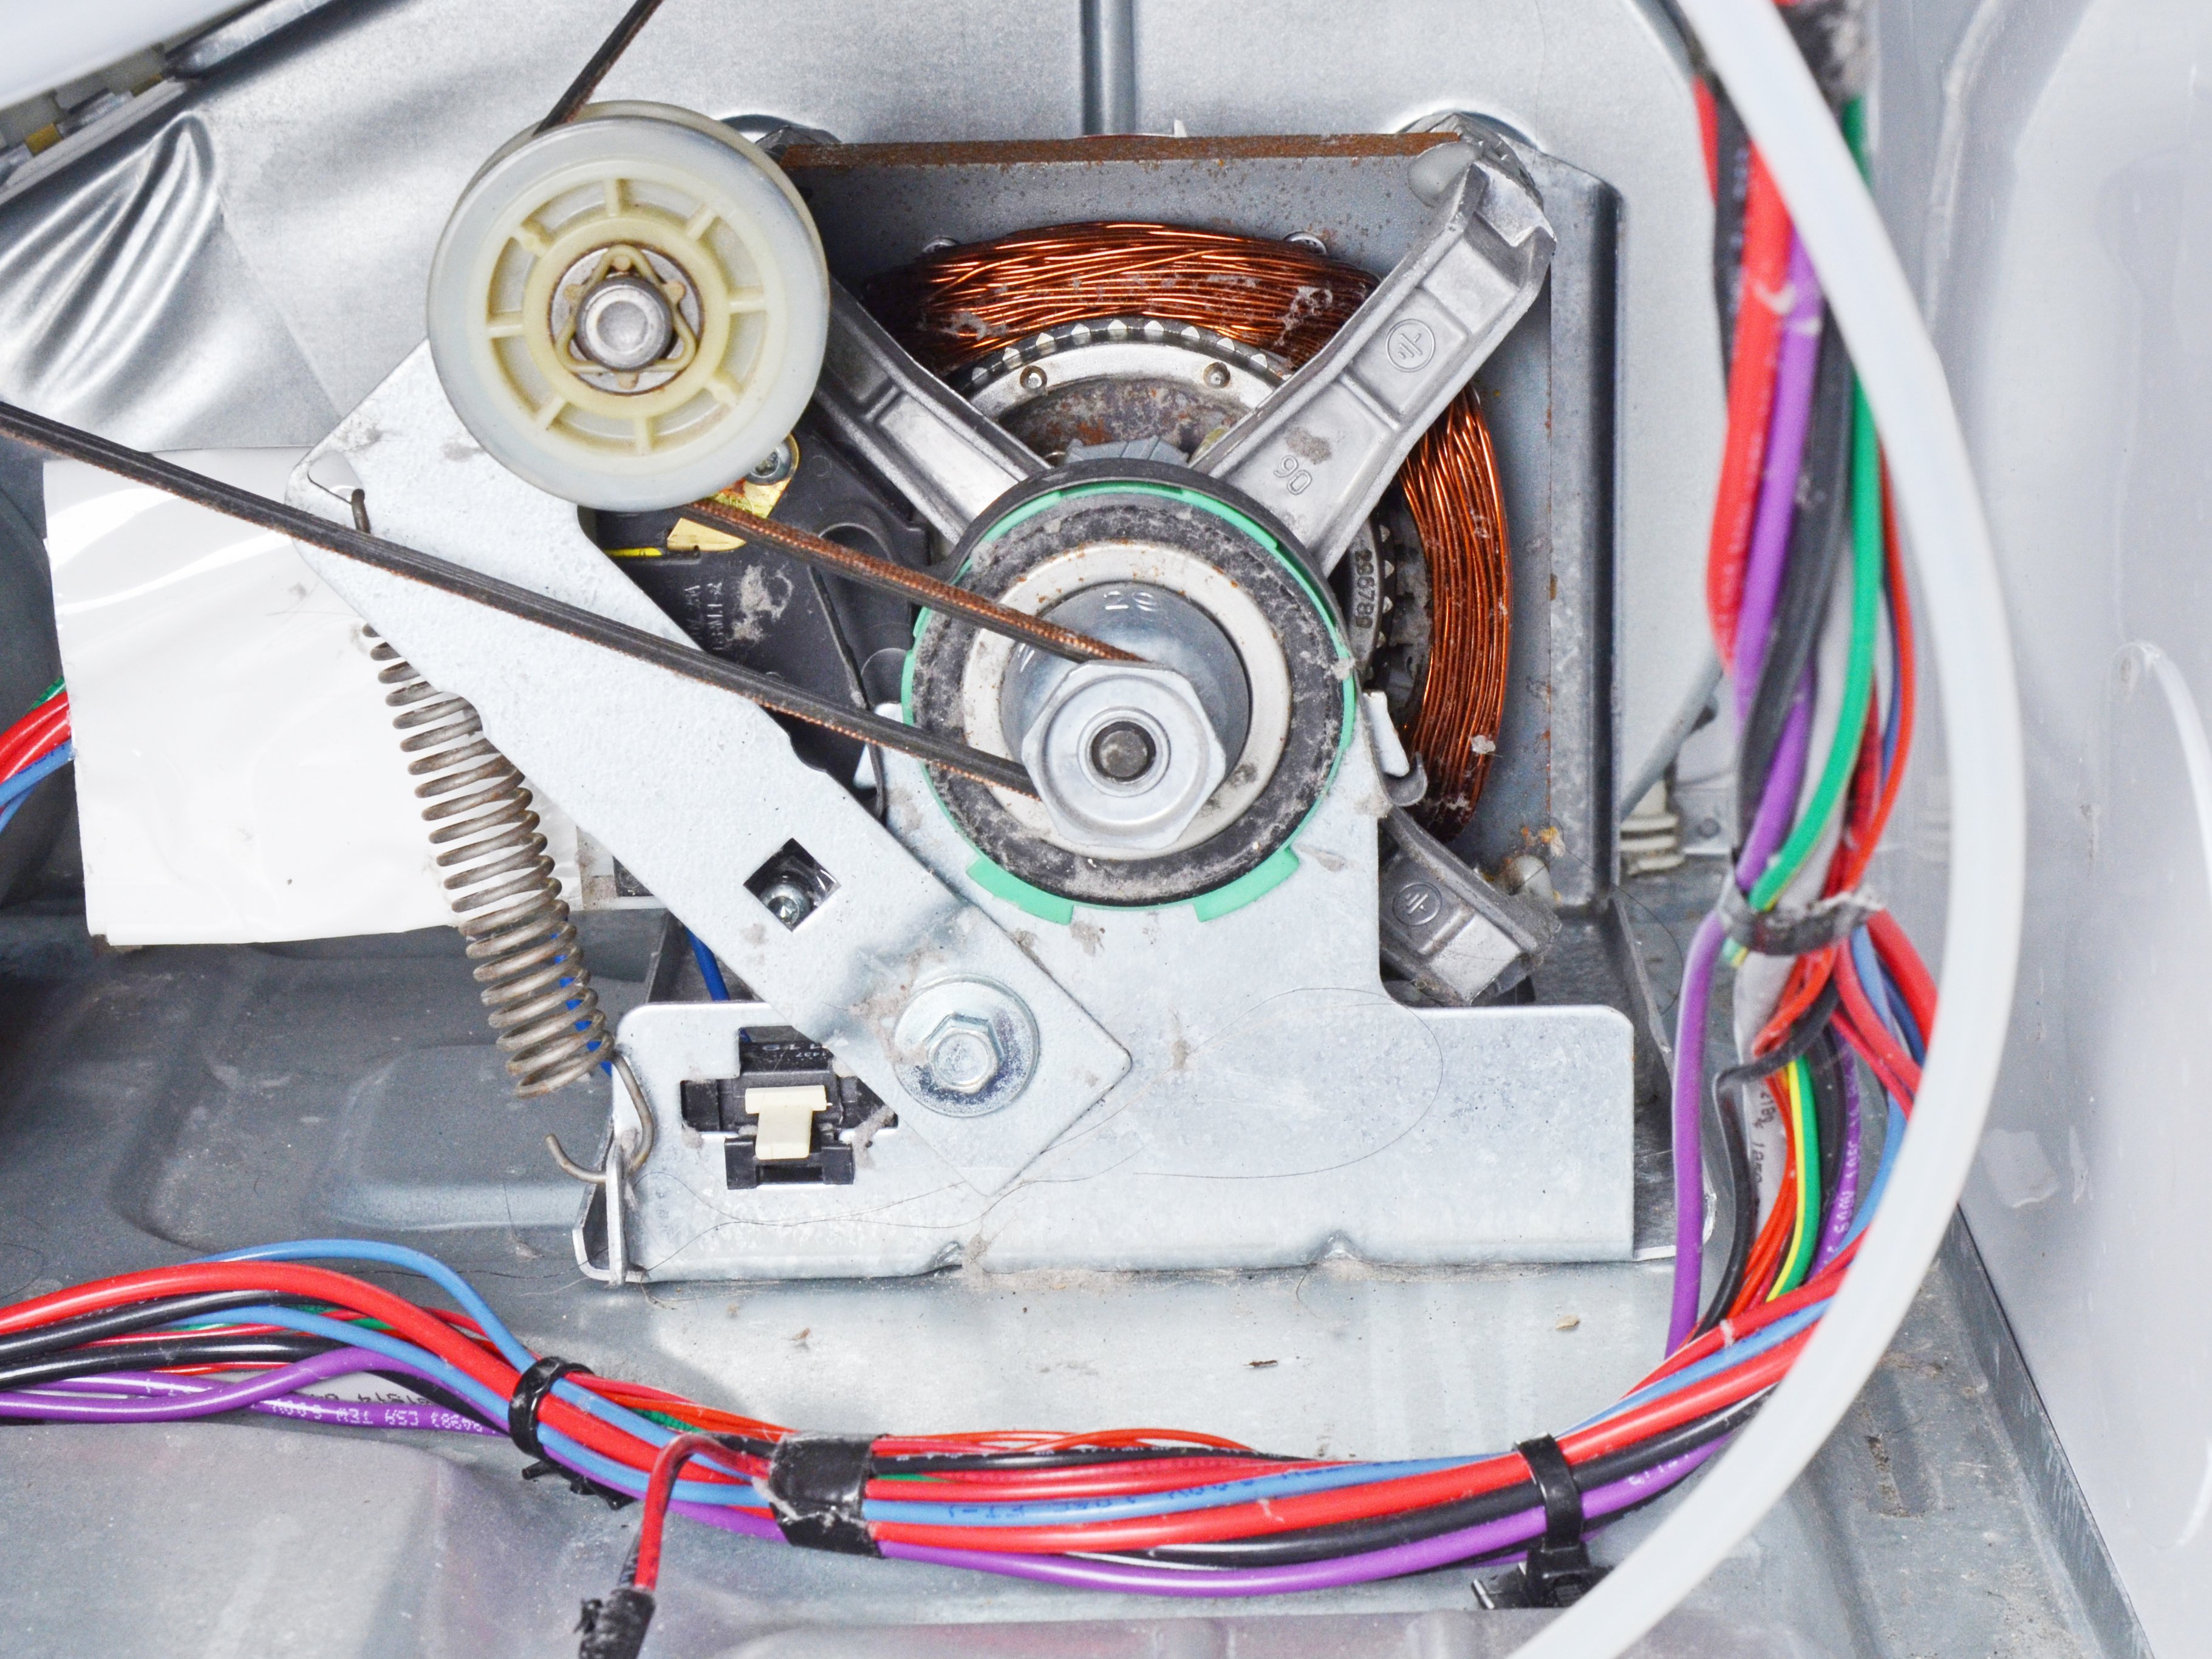
Step 7: Route the belt around the motor and idler pulleys
This is the part that feels like a magic trick the first time. The belt must make a tight loop around the motor pulley, with the idler pulley applying tension.
General routing
- Reach under the drum to find the motor pulley (small) and the idler pulley (spring-loaded arm with a wheel).
- Pull the idler arm to relieve tension.
- Route the belt so it goes around the motor pulley and under or over the idler pulley as designed, creating a “S” path that tightens when you release the idler arm.
- Release the idler slowly and confirm the belt is seated in the motor pulley grooves.
Important: Some brands route the belt on a different side of the idler wheel. If you have any doubt, look up your model’s belt routing photo or parts diagram. Two minutes of verifying beats tearing it back down.
Step 8: Tension check and hand-spin test
What proper tension feels like
- The belt should feel snug, not guitar-string tight.
- The idler arm should be applying steady pressure, not maxed out at the end of its travel.
Hand-spin the drum
- Rotate the drum by hand one to two full turns.
- Watch the belt tracking. It should stay in place and not twist.
- Listen for scraping or squealing. Address it now while it is open.
Step 9: Reassemble the dryer
- Reinstall the front bulkhead or front panel, making sure the drum is supported correctly at the front.
- Reconnect the door switch plug.
- Lower and secure the top panel.
- Reinstall lint screen housing screws and the lint screen.
Quick alignment tip: If the front panel fights you, the drum is usually not seated on the rear rollers or the front bulkhead is not catching the drum lip correctly. Do not force screws to “pull it into place.” Back up and reseat it.
Step 10: Short test run checklist
Once the cabinet is fully closed and screws are back in, you are ready to test.
- Plug the dryer back in (and turn gas back on if applicable).
- Run on timed dry for 30 to 60 seconds.
- Confirm the drum spins smoothly and starts promptly.
- Listen for squeaks, thumps, or a rubbing sound.
- Check that airflow at the exterior vent is strong after a minute or two.
Stop the test and reopen the dryer if you hear loud squealing, if the drum struggles to start, or if you smell burning rubber. Those are signs the belt is misrouted, the idler is not tensioning correctly, or a roller is binding.
Troubleshooting: common belt replacement hiccups
The drum spins by hand, but will not spin under power
- Belt is not seated in the motor pulley grooves.
- Belt routing around the idler is wrong, so it is not tensioned.
- Door switch connector is loose, preventing start on some models.
The dryer runs but makes a new squeal
- Idler pulley is worn and should be replaced.
- Rollers are dry, worn, or flat-spotted.
The belt keeps walking off the drum
- Drum not seated correctly on rear rollers.
- Belt is twisted.
- Wrong belt length or style for the model.
When to call a pro
- You smell gas or see damage to the gas line.
- The motor hums but will not turn even with the belt removed (possible motor or blower issue).
- The dryer trips the breaker after reassembly.
- You find scorched wiring, melted connectors, or obvious electrical damage.
There is no shame in tapping out on a safety issue. The goal is a working dryer and a safe house, not a heroic story.
My thrifty takeaway
A dryer belt is a classic sweat-equity win. The part is usually inexpensive, and the job is mostly careful disassembly and correct routing. If you take photos as you go, vacuum the lint while you are inside, and replace a squeaky idler or rough rollers before they fail, your “new belt” can last for years instead of months.
About Marcus Vance
Content Creator @ Grit & Home
Marcus Vance is a lifelong DIY enthusiast and self-taught home renovator who has spent the last decade transforming a dilapidated 1970s ranch into his family's dream home. He specializes in budget-friendly carpentry, room-by-room renovations, and demystifying power tools for beginners. Through his writing, Marcus shares practical tutorials and hard-learned lessons to help homeowners tackle their own projects with confidence.