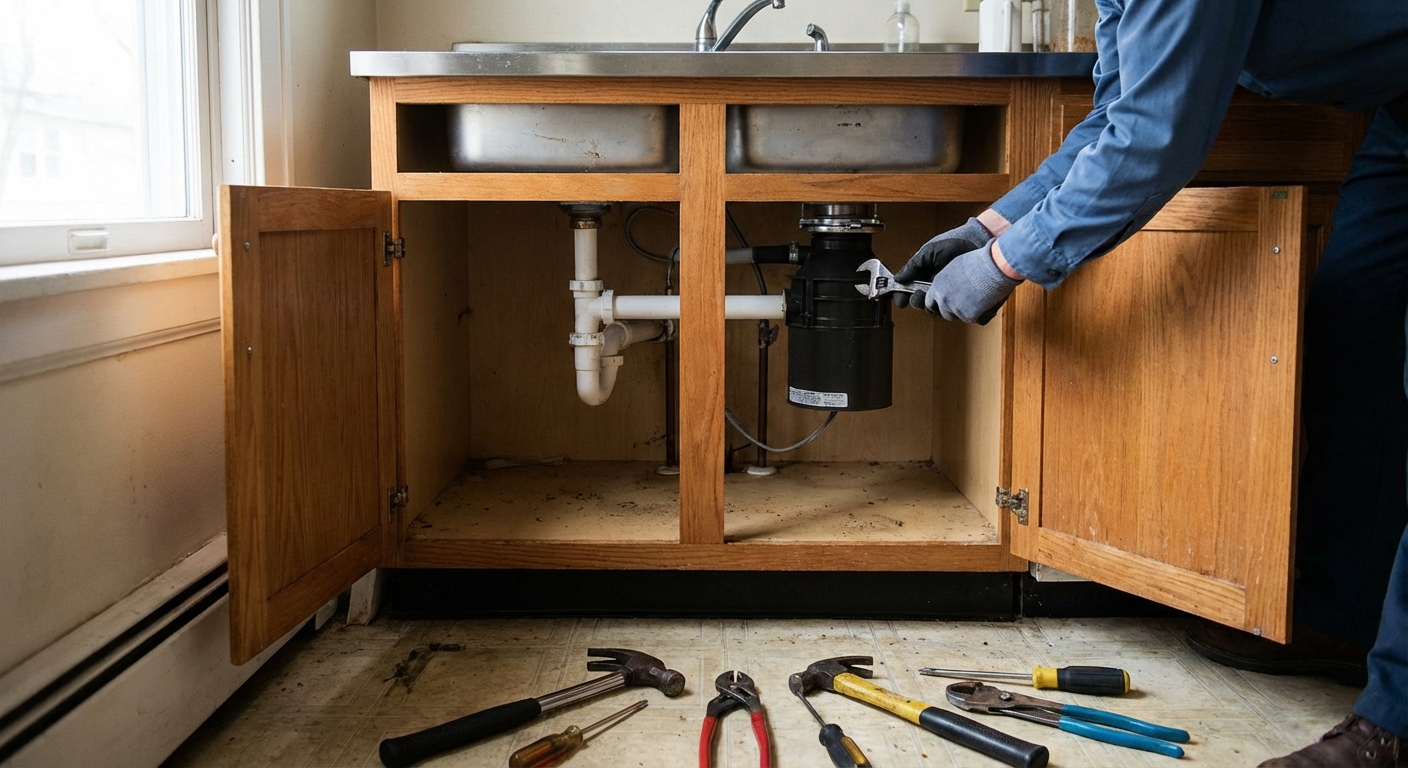
I still remember the first time I replaced a garbage disposal. I had the new unit sitting on the counter, full of confidence, and then I opened the cabinet and realized I was staring at a spaghetti bowl of pipes, wires, and a dishwasher hose. If you are feeling that way right now, you are in the right place.
This guide walks you through the whole job in plain language: shutting off power, disconnecting plumbing, removing the old disposal and mounting hardware, installing the new unit, reconnecting the dishwasher drain line, and testing so you do not discover a leak at 10 p.m.
Before you start: safety and quick checks
Kill power the right way
- Unplug it if your disposal is corded. Most are plugged into an outlet inside the sink cabinet.
- If it is hardwired, turn off the correct circuit breaker and verify with a non-contact voltage tester at the disposal wiring area.
- Do not rely on the wall switch alone.
Clear space and protect your cabinet
- Put a shallow pan or an old baking tray under the P-trap. Water will come out.
- Have towels ready. The “last cup of water” always turns into two cups.
- Turn off the faucet supply valves only if you are going to move supply lines around. For most disposal swaps, you do not need to.
Good to know: Garbage disposals are heavier than they look. Many are roughly 12 to 25+ pounds, and some insulated or higher power models can be heavier. A small step stool, paint can, or a stack of scrap wood under the unit can take the weight while you twist it off the mount.
Quick compatibility check
- Mount style: Same brand and mount style can be a quick swap. Different mount style usually means replacing the whole flange and mounting assembly.
- Sink opening: Most kitchen sinks use a standard 3.5 inch drain opening. If yours is non-standard, stop and confirm the new disposal flange will fit before you buy.
- Septic system: If you are on septic, be conservative with disposal use and follow local guidance. A disposal adds solids load, even when you are careful.
Tools and parts checklist
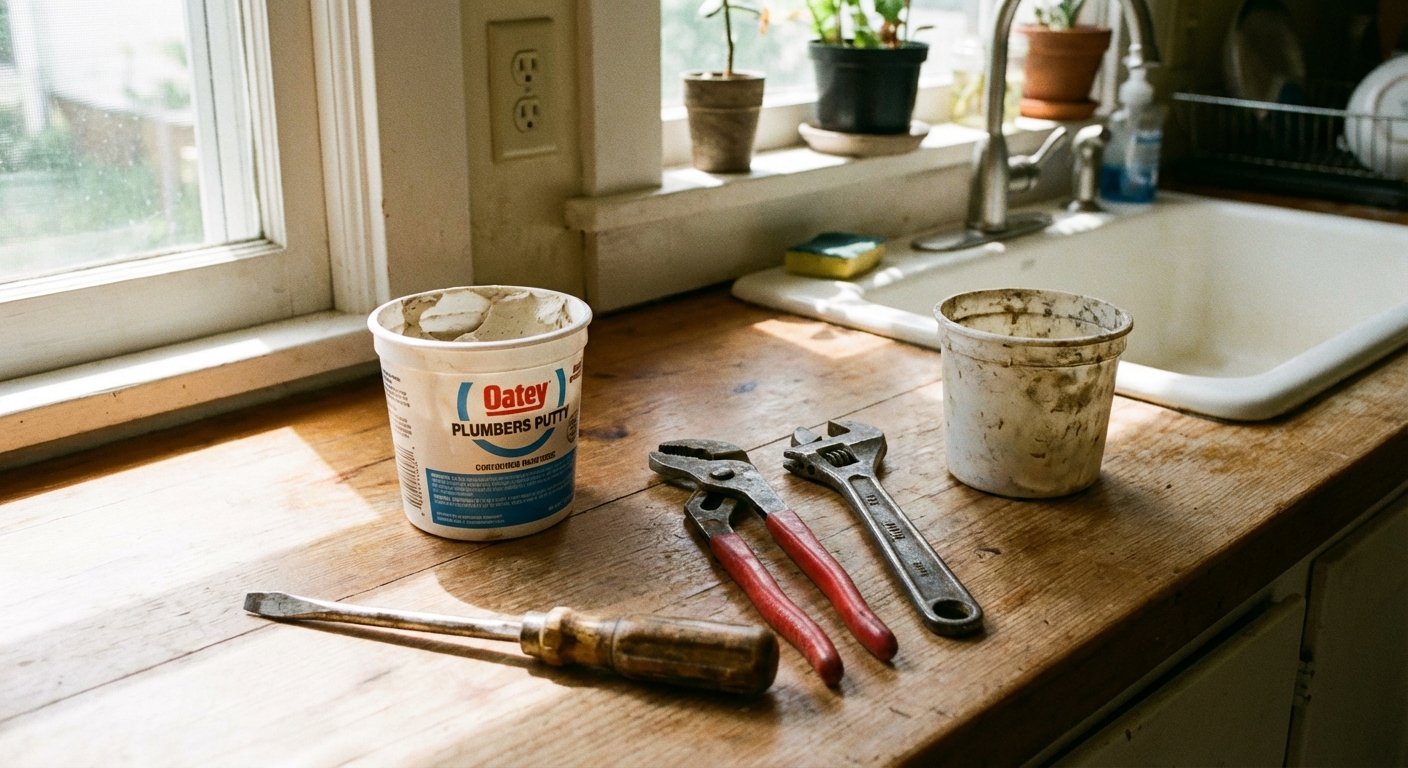
- Flathead screwdriver
- Channel-lock pliers or large adjustable pliers
- Adjustable wrench
- Bucket or pan
- Non-contact voltage tester (highly recommended)
- Plumber’s putty or silicone (use what your disposal manufacturer recommends for the sink flange)
- Optional but helpful: disposal mounting wrench (often included with new units) for turning the mounting ring lugs
- New disposal unit (and power cord if your new unit does not include one)
- New discharge tube and gasket (often included)
- Optional but smart: new P-trap washers if yours are old and crusty
Sealant note: Plumber’s putty is common for stainless steel sinks, but it can stain or react with some sink materials (certain composites, stone, and some finishes). If you have anything other than basic stainless, check the sink manufacturer guidance too. When in doubt, silicone is often the safer choice, but follow the disposal instructions.
Compatibility tip: If your new disposal uses a different mounting system, plan to replace the entire sink flange and mounting assembly. This guide covers that full replacement.
Choosing the right horsepower (HP)
Horsepower is not about “more is always better.” It is about matching your household and habits so you get fewer jams, less noise, and a longer lifespan.
- 1/3 HP: Light use, small households, minimal food scraps. Cheapest, but more prone to jams and slow grinding.
- 1/2 HP: The sweet spot for many homes. Handles daily use without spending premium money.
- 3/4 HP: Great for families and frequent cooking. Better at fibrous scraps and generally quieter in better models.
- 1 HP and up: Heavy use, lots of meal prep, or you just want extra headroom. Usually higher cost and often larger.
My thrifty rule: If you have ever had to unjam your disposal more than once a year, jump to 3/4 HP. The extra cost is usually cheaper than your time, frustration, and the “please do not leak” anxiety.
What HP does not fix: Disposals are not designed for grease, pasta, rice, big fibrous loads (corn husks, celery strings), or dumping a whole plate of scraps at once. For eggshells, avoid large quantities at one time. Even a 1 HP unit will complain if you treat it like a trash can.
Step 1: Disconnect plumbing and dishwasher hose
Remove the P-trap connection
Most disposals drain toward the wall or branch line through a P-trap. Put your pan under the trap, then:
- Loosen the slip nuts on the P-trap and trap arm (hand-tight is common, but pliers may help).
- Lower the trap carefully and drain it into your pan.
- Remove the discharge tube from the disposal outlet if it is a separate connection.
Disconnect the dishwasher drain line (if you have one)
If your dishwasher drains into the disposal, you will have a small hose clamped to the disposal’s dishwasher inlet.
- Use pliers or a screwdriver to loosen the clamp.
- Twist the hose gently to break it free, then pull it off.
- Point the hose into a cup or pan. There is often a little water in it.
Quick checkpoint: Take a photo before you disconnect everything. It is the cheapest insurance you can buy.
Step 2: Disconnect power
If it is plugged in
- Unplug the disposal cord from the outlet.
- Move the cord out of your way.
If it is hardwired
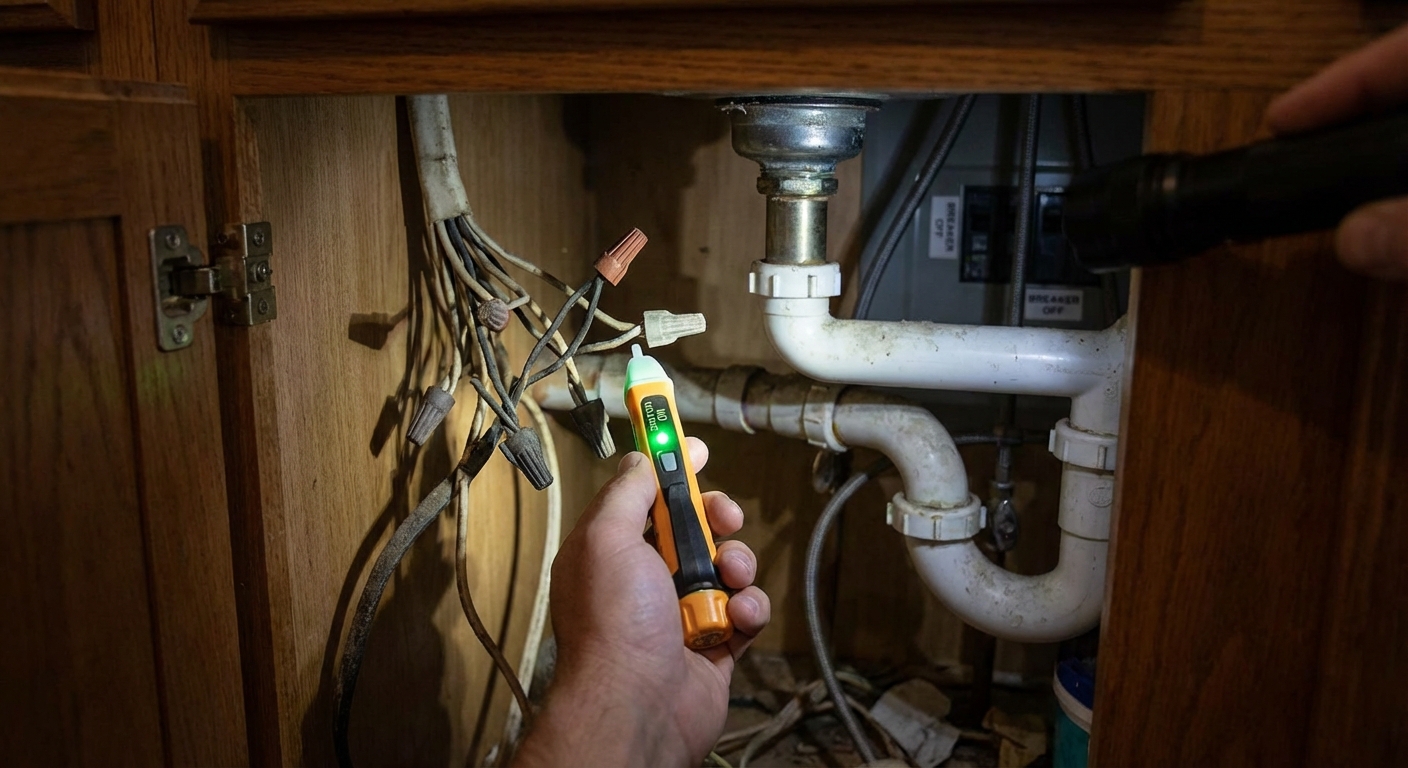
- Confirm the breaker is off.
- Remove the small wiring cover plate on the bottom or side of the disposal.
- Test for voltage before touching wires.
- Unscrew wire nuts, separate the wires, and remove the cable clamp if needed.
Reminder: If you are not comfortable with basic wiring, this is the point where calling an electrician is money well spent. Plumbing leaks are annoying. Electrical mistakes are dangerous.
Step 3: Remove the old disposal
Most disposals hang from a mounting ring under the sink. You usually remove the unit by twisting it off.
- Support the disposal from underneath with one hand or a small stack of wood.
- Use a screwdriver in the mounting ring’s lug, or use the disposal mounting wrench (often included) for better leverage.
- Turn the mounting ring until the disposal breaks free. Keep supporting it, because it can drop suddenly once it unlocks.
Set the old unit in your pan or on a towel. There will be water inside the grinding chamber.
Step 4: Remove the old flange (if needed)
If your new disposal uses a different mount system, or your old flange is corroded, replace the whole assembly. It is not hard, just a little messy.
- From under the sink, remove the mounting ring and any support rings, following your brand’s layout.
- Find the snap ring (also called a C-clip). This is the springy ring that locks the flange assembly together. Use a small flathead screwdriver to pry it off. This is often the most stubborn part, so take your time and keep your fingers clear.
- From above the sink, push the old sink flange down and out.
- Scrape away old plumber’s putty or silicone from the sink opening. A plastic putty knife helps.
Watch for this: If you have a stainless sink, clean the area until it is smooth. Old hardened putty can cause a slow leak that only shows up when the sink is full.
Step 5: Install the new flange and mounting ring
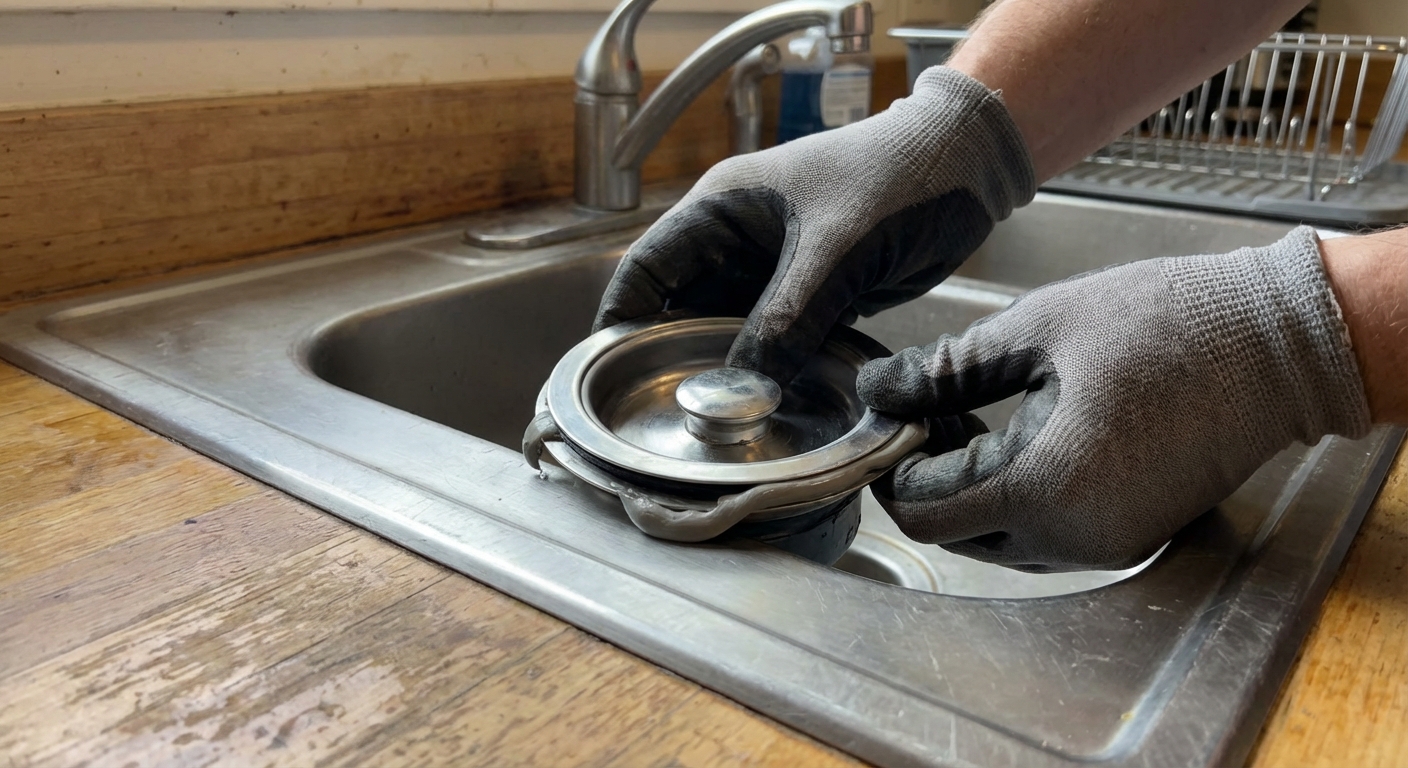
- Roll plumber’s putty into a rope and place it around the underside lip of the new sink flange, or apply silicone if your manufacturer calls for it.
- Press the flange down into the sink opening from above.
- From under the sink, install the rubber gasket, backup ring, and mounting ring in the correct order for your model.
- Reinstall the snap ring (C-clip) that locks the assembly together. It should snap fully into its groove. If it is half-seated, things will feel loose and frustrating later.
- Tighten evenly until the flange seats firmly and putty squeezes out slightly.
- Wipe away excess putty in the sink bowl.
Mistake I have made: I once tightened one side too much, then chased the leak by overtightening. Tighten evenly, a little at a time, so the flange stays level.
Step 6: Prep the new disposal
Install the discharge tube
- Attach the discharge tube to the disposal outlet with the included gasket and bolts.
- Do not overtighten. Snug is enough.
Knock out the dishwasher plug (only if you have a dishwasher)
This step is easy to forget and it is one of the most common reasons a dishwasher suddenly will not drain after a new disposal install.
- Locate the dishwasher inlet on the disposal.
- Use a screwdriver and hammer to tap the plug inward.
- Reach inside the inlet and remove the loose plug piece so it does not rattle around.
If you do not have a dishwasher: Leave the plug intact.
Install a power cord (if needed)
Some disposals do not include a cord. If yours is corded, you can often reuse the old cord if it is in good condition.
- Remove the wiring cover plate.
- Attach cord wires to disposal wires: typically black to hot, white to neutral, green to ground.
- Secure the cord with the strain relief clamp or proper connector so the cable cannot be pulled loose.
- Confirm a ground is present and connected.
- Reinstall the cover plate.
Important: Wire colors can vary by home and region, especially in older wiring. If anything looks unusual or you are unsure, stop and verify before connecting. Follow local electrical code.
Step 7: Hang the new disposal
This is the part that feels like you need a third hand. You do not. You just need a plan.
- Lift the disposal into place and align it with the mounting ring.
- Engage the tabs and rotate the mounting ring until it locks. A screwdriver can work, but the disposal mounting wrench is made for this and usually feels much safer.
- Rotate the disposal body so the discharge outlet points toward your drain plumbing.
Helpful trick: Set a small stool or paint can under the disposal to hold the weight while you twist the ring.
Step 8: Reconnect plumbing and dishwasher drain
Reconnect the drain
- Reattach the discharge tube to the trap arm or to the P-trap setup, depending on your configuration.
- Hand-tighten slip nuts, then give a gentle snug with pliers if needed.
- Make sure washers are seated correctly. A crooked washer equals a drip.
Reconnect the dishwasher hose
- Slide the hose onto the dishwasher inlet.
- Position the clamp over the barb and tighten it.
Drain hose note: Many dishwashers need a high loop under the counter or an air gap, depending on code and local practice. If you already had a high loop, keep it. Do not route the hose low and flat. Follow local plumbing code, since some jurisdictions require an air gap.
If you are not connecting a dishwasher to the disposal: Keep that dishwasher inlet plugged (do not knock it out), or cap it as required by the manufacturer so you do not create a leak path.
Step 9: Restore power and test
Leak test first (before you run it)
- Remove everything from the cabinet floor so you can see clearly.
- Run water in the sink for a minute.
- Check every connection by touch: the sink flange area, discharge tube gasket, slip nuts, and dishwasher inlet.
- Partially fill the sink, then let it drain while you watch the flange area. Some flange leaks only show up under standing water.
Function test
- With water running at a moderate flow, turn on the disposal for a few seconds.
- Listen for abnormal grinding or rattling (a small rattle can be the loose dishwasher knockout plug if you forgot to remove it).
- Turn it off and recheck for leaks.
If it hums but does not spin: Turn it off immediately. Many units include a reset button and can be freed with an Allen wrench from the bottom, but on a brand-new install it can also mean something is jammed or the wiring is wrong.
Fast unjam checklist
- Power off at the switch, then unplug or flip the breaker.
- Press the reset button on the bottom (if your model has one).
- Use the bottom hex socket with an Allen key to work the flywheel back and forth.
- Remove anything stuck using tongs or pliers, not your hand.
- Restore power and test with cold water running.
Common problems and quick fixes
My dishwasher will not drain
- Most likely you forgot to knock out the dishwasher plug in the new disposal.
- Also check for a kinked hose or a clogged air gap if you have one.
Slow drip at a slip nut
- Loosen the nut, reseat the washer squarely, and retighten.
- If the washer is stiff, cracked, or flattened, replace it. They are cheap.
Leak at the sink flange
- Usually uneven tightening or not enough putty or silicone coverage.
- Unfortunately, the fix is to remove and reseat the flange.
Disposal is too low and hits plumbing
- Some deeper disposals require adjusting the trap arm or using a different discharge tube angle.
- In tight cabinets, measure before you buy, especially if you have a shallow trap arm height.
When to call a pro
DIY is about confidence, not stubbornness. Consider calling a plumber or electrician if:
- Your drain lines are glued PVC with no slip joints and need cutting and reworking
- Your wiring is old, brittle, aluminum, or confusing
- You see signs of previous leaking and cabinet damage that needs repair
- You have a stubborn corrosion issue at the sink flange
Disposal care tips
- Run cold water while grinding and for 10 to 15 seconds after.
- Feed scraps gradually, not all at once.
- Avoid grease, fibrous peels, and starchy clumps (pasta, rice).
- Once a month, grinding a few ice cubes can help clean out buildup in many units, but check your manual since manufacturer guidance varies.
- If it jams, power off and use the bottom Allen socket or a wooden spoon handle to free it. Never put your hand inside.
If you want, tell me what HP your old unit was, whether you have a dishwasher hooked up, and if you are on septic. I can help you pick the right replacement and flag any fit issues before you buy.
About Marcus Vance
Content Creator @ Grit & Home
Marcus Vance is a lifelong DIY enthusiast and self-taught home renovator who has spent the last decade transforming a dilapidated 1970s ranch into his family's dream home. He specializes in budget-friendly carpentry, room-by-room renovations, and demystifying power tools for beginners. Through his writing, Marcus shares practical tutorials and hard-learned lessons to help homeowners tackle their own projects with confidence.