If your toilet randomly refills on its own, or you hear a faint trickle into the bowl long after flushing, there is a good chance the flapper is not sealing. The good news is that replacing a toilet flapper is one of the cheapest, most beginner-friendly plumbing fixes you can do. No special tools, no mystery parts, and usually no mess if you take it slow.
How to tell if the flapper is the problem
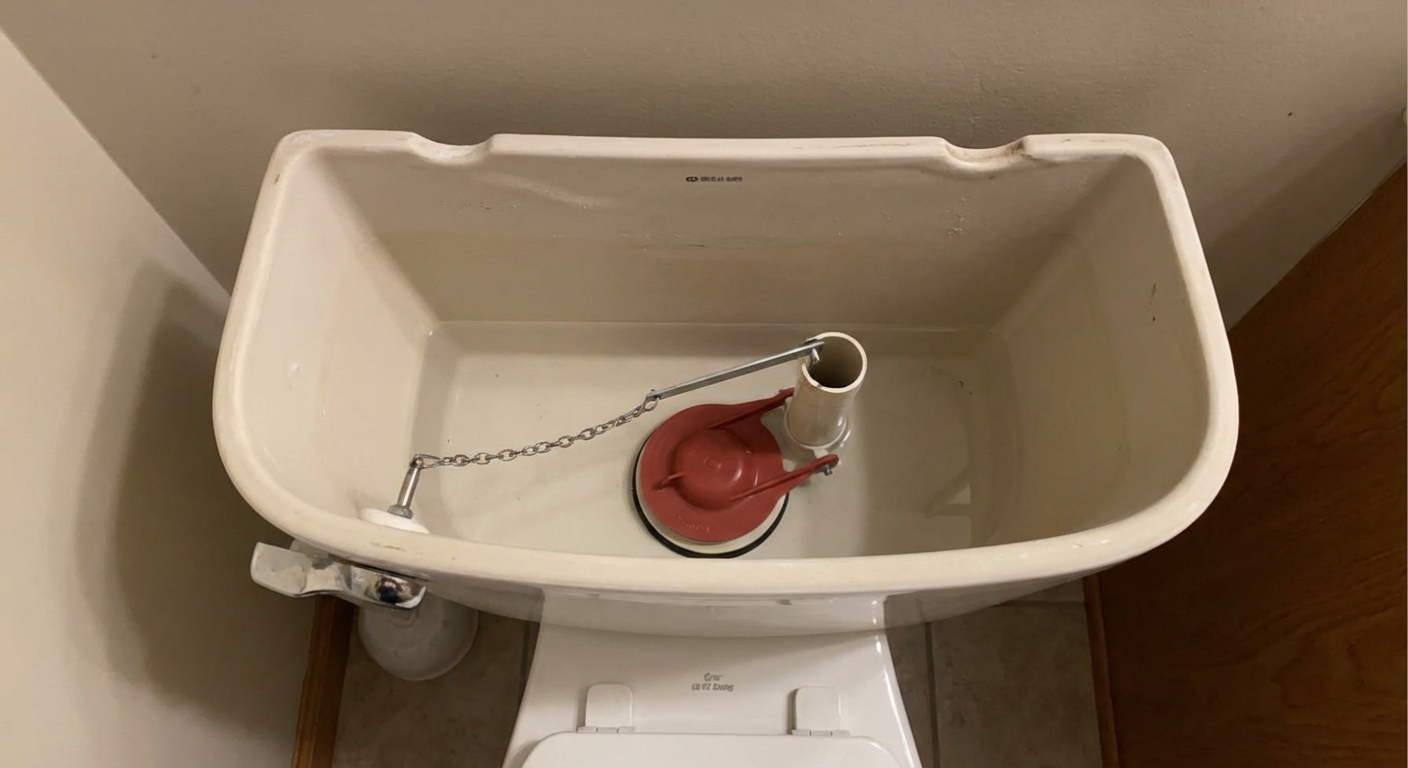
A toilet flapper is the rubber or silicone valve at the bottom of the tank that lifts during a flush and then seals the flush valve opening again. When it gets warped, slimy, cracked, or stiff, it can leak just enough water to keep the toilet running.
Common symptoms
- Phantom flushing: the toilet refills randomly even when nobody flushed.
- Constant trickling into the bowl: you can hear or see water movement in the bowl.
- Tank water level slowly drops: then the fill valve kicks on to top it off.
- You have to jiggle the handle: the chain is too tight, too loose, or the flapper is not seating.
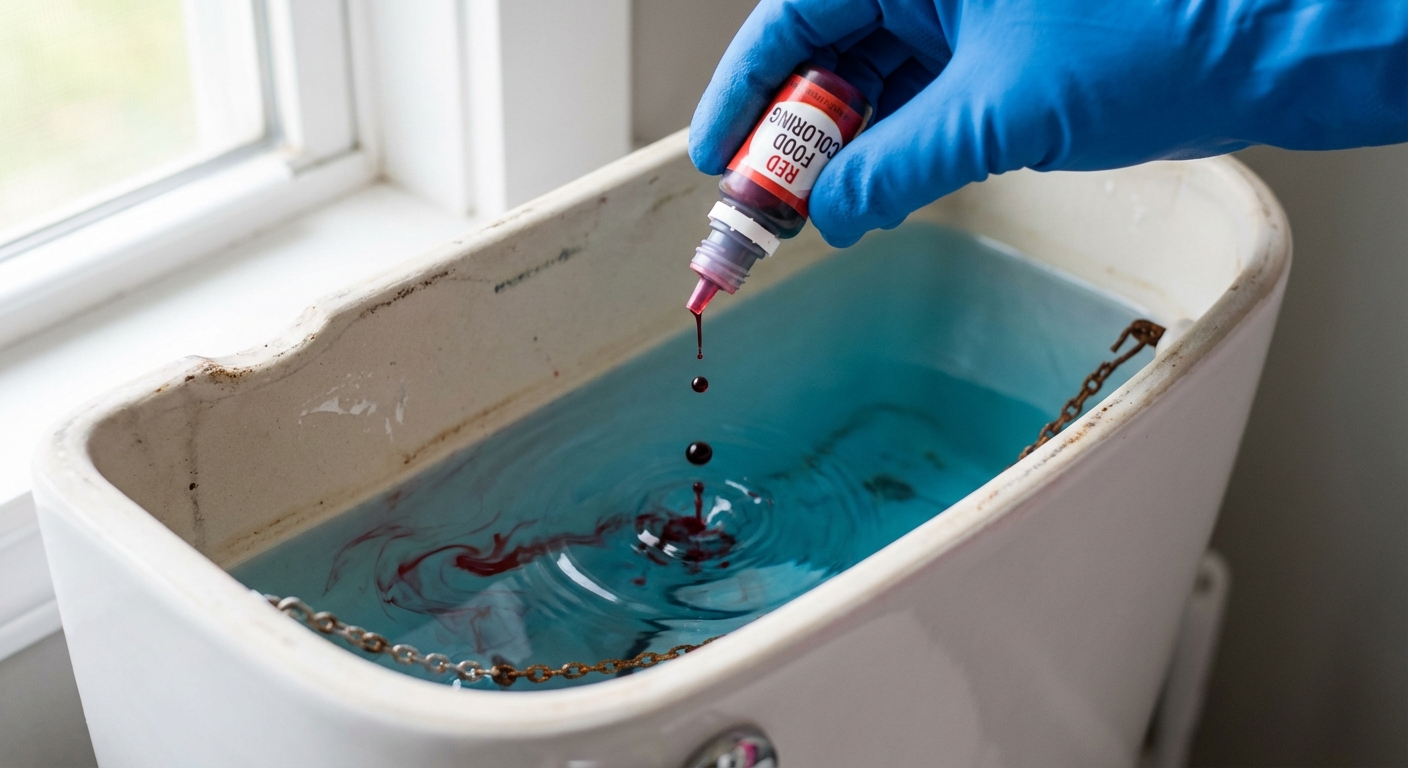
The 60-second dye test (my go-to)
- Remove the tank lid and set it somewhere safe.
- Add a few drops of food coloring into the tank water.
- Wait 10 to 15 minutes without flushing.
- If colored water shows up in the bowl, you have a leak past the flapper (or the flush valve seat).
Pick the right replacement flapper
This is the only part that can trip people up, because not all flappers fit all toilets. The goal is simple: get a flapper that matches your flush valve opening and your toilet style.
Most toilets use one of these sizes
- 2-inch flapper: the most common size in many homes.
- 3-inch flapper: common on some newer, higher-performance toilets.
How to confirm size without guessing
- Check the old flapper: many have “2” or “3” molded on the rubber.
- Measure the flush valve opening: use a tape measure across the opening the flapper seals. You are measuring the diameter.
- Look for a model label inside the tank: some toilets list replacement part info.
Quick tip: If you are unsure, take the old flapper to the store. I have done this more times than I want to admit, and it is still the fastest way to match the shape and mounting style.

Tools and supplies
You can do this with almost nothing. Here is what I keep on hand:
- New toilet flapper (2-inch or 3-inch, correct mounting style)
- Paper towels or a small rag
- Optional: small sponge or cup to remove leftover tank water
- Optional: white vinegar and a scrub pad for mineral buildup
Step-by-step: Replace a toilet flapper
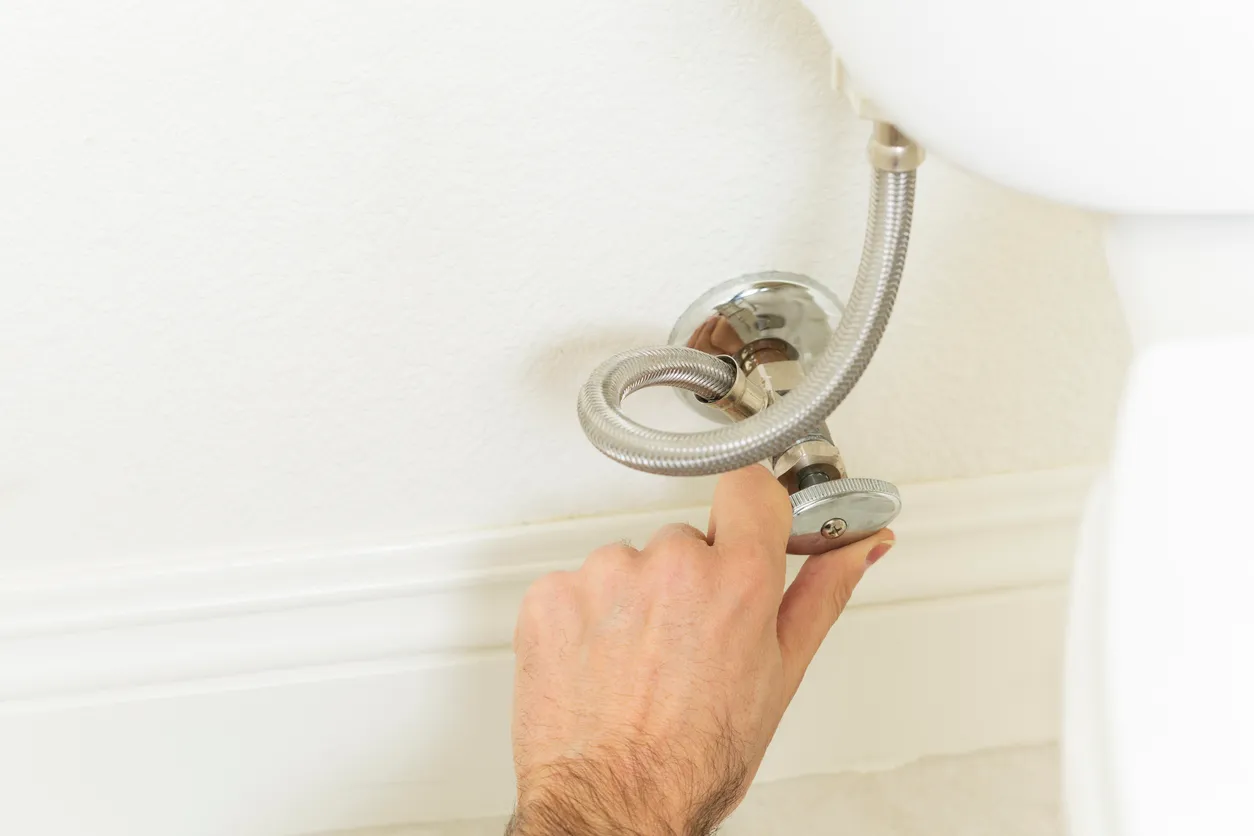
1) Turn off the water supply
Find the shutoff valve near the wall behind the toilet and turn it clockwise until it stops. If it feels stuck, do not force it like you are tightening lug nuts. Work it gently.
2) Flush and drain the tank
Flush the toilet and hold the handle down to let as much water out as possible. You do not need the tank bone dry, but the lower the level, the less splashy the job.
3) Disconnect the chain
Inside the tank, unclip the flapper chain from the handle lever arm. Remember where it was clipped, or snap a quick photo.

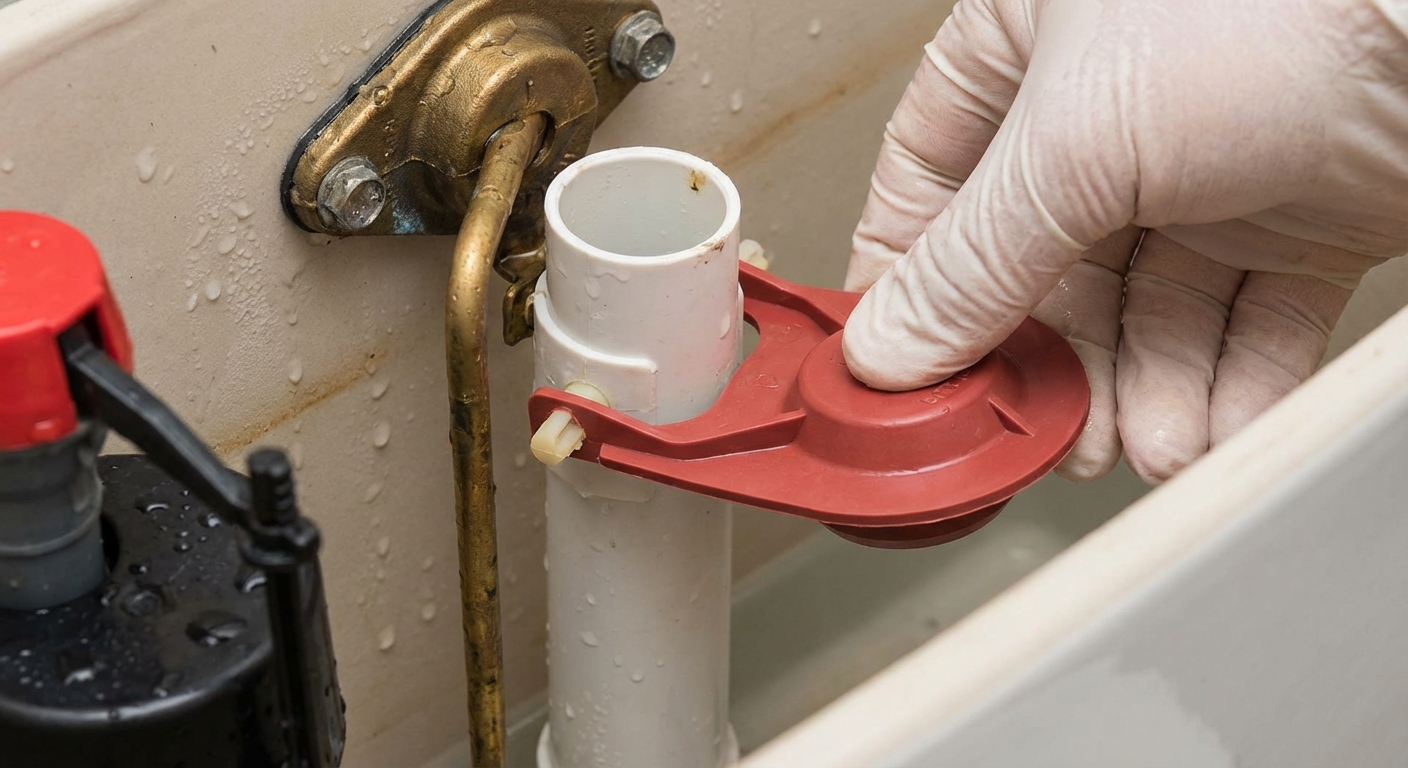
4) Remove the old flapper
Most flappers attach to two small pegs on the sides of the overflow tube or flush valve assembly. Slide each rubber ear off its peg and lift the flapper out.
If it feels gummy or deformed, that is a good sign you found the culprit.
5) Clean the flush valve seat
Run your finger around the rim where the flapper seals. If you feel grit, slime, or mineral buildup, wipe it clean. A little vinegar on a rag helps with crusty deposits. A clean seat is the difference between “fixed” and “still kinda running.”
6) Install the new flapper
Attach the new flapper the same way the old one came off. Make sure it sits centered over the opening and can move freely without binding on the overflow tube.
7) Reconnect the chain with the right slack
Clip the chain back onto the lever arm. You want a little slack so the flapper can fully close, but not so much slack that the chain gets caught under the flapper.
- Too tight: flapper stays slightly open and the toilet runs.
- Too loose: weak flush because the flapper closes too soon.
A good starting point is about 1/2 inch of slack in the chain when the flapper is closed.
8) Turn the water back on and test
Turn the shutoff valve counterclockwise. Let the tank fill, then flush a few times. Watch the flapper: it should lift cleanly and then drop straight down for a solid seal.
Do one last “quiet test.” After the tank refills, listen for 2 minutes. No trickle, no random refills, no hiss.
Quick troubleshooting after you replace it
The toilet still runs
- Chain too tight: add one extra link of slack.
- Flapper not seated: make sure both ears are fully on the pegs and the flapper is centered.
- Dirty or damaged flush valve seat: clean again. If the plastic seat is nicked or pitted, you may need a flush valve repair kit or to replace the flush valve.
- Water level too high: if water is going into the overflow tube, adjust the fill valve water level down.
Weak flush after replacement
- Chain too loose: shorten by one link so the flapper stays open a bit longer.
- Wrong flapper type: some toilets need a specific “tall” or “specialty” flapper to match the flush valve.
How long should a flapper last?
In my experience, a flapper can last anywhere from 3 to 7 years, sometimes less if you use in-tank cleaners. Those chlorine tablets are rough on rubber parts and can warp a flapper early.
If you want the flapper to live a longer life, skip drop-in tank chemicals and clean the bowl the old-fashioned way. It is cheaper in the long run.
When to call a pro
A flapper replacement is a great DIY win. But if you notice any of the issues below, it may be time for a plumber:
- The shutoff valve will not turn or it leaks when you touch it
- Water is dripping from the tank bolts or tank-to-bowl gasket
- The flush valve seat is cracked or badly damaged
- You have repeated leaks even with a new flapper and a clean seat
My last tip before you close the lid
Before you put the tank lid back on, flush once more and watch the chain. Make sure it does not snag on the overflow tube or slip under the flapper. I have “fixed” a running toilet only to create a new problem by clipping the chain one link off. Two extra minutes now saves you a second round of troubleshooting later.
About Marcus Vance
Content Creator @ Grit & Home
Marcus Vance is a lifelong DIY enthusiast and self-taught home renovator who has spent the last decade transforming a dilapidated 1970s ranch into his family's dream home. He specializes in budget-friendly carpentry, room-by-room renovations, and demystifying power tools for beginners. Through his writing, Marcus shares practical tutorials and hard-learned lessons to help homeowners tackle their own projects with confidence.