Baseboards are one of those details you stop noticing until they are chipped, wavy, or just plain tired. The good news is replacing them is a very learnable DIY. The even better news is that most “trim disasters” come from two things you can control: rushing removal and sloppy corners.
I learned this the hard way on my 1970s ranch. I pried too aggressively on my first room and spent the next day patching torn drywall paper. Since then, I have a simple rule: use the wall as little as possible for leverage. Let the tools do the work, and you will end up with clean lines and minimal patching.
Before you start
What this guide covers
- Baseboards: the long boards running along the bottom of the wall.
- Shoe molding or quarter round: smaller molding at the floor edge, often used to cover flooring gaps.
- Door and window casing: trim around doors and windows. The cutting concepts are the same, but the measuring details vary.
MDF or wood
Both can look great. The right choice depends on your room, your budget, and how hard life is on your baseboards.
- MDF (medium-density fiberboard): budget-friendly, very smooth for paint, stable and straight. Best for dry areas. Weak point: it swells if it gets soaked and dents a bit easier than hardwood.
- Finger-jointed pine: great paint-grade option, lighter than MDF, takes nails well, holds up better to small bumps. Can have minor knots or seams, but paints nicely with primer.
- Hardwoods (oak, maple): best for stain-grade or tough spots. More expensive, can move slightly with seasons.
- Poplar: technically a hardwood, but it is a popular paint-grade “upgrade” because it’s stable, smooth, and tougher than pine.
Time and cost
- One average room: 3 to 6 hours including removal, install, caulk, and touch-up. Painting can add another session.
- Budget range: depends heavily on profile and material, but MDF and finger-jointed pine usually keep costs reasonable.
Safety basics
- Eye and ear protection for the miter saw and nailer.
- Dust control: cutting MDF especially makes fine dust, so use a mask and a vacuum if you can.
- Nailing: keep hands clear of the nail path and never fire “blind.” When in doubt, reposition.
Tools and materials
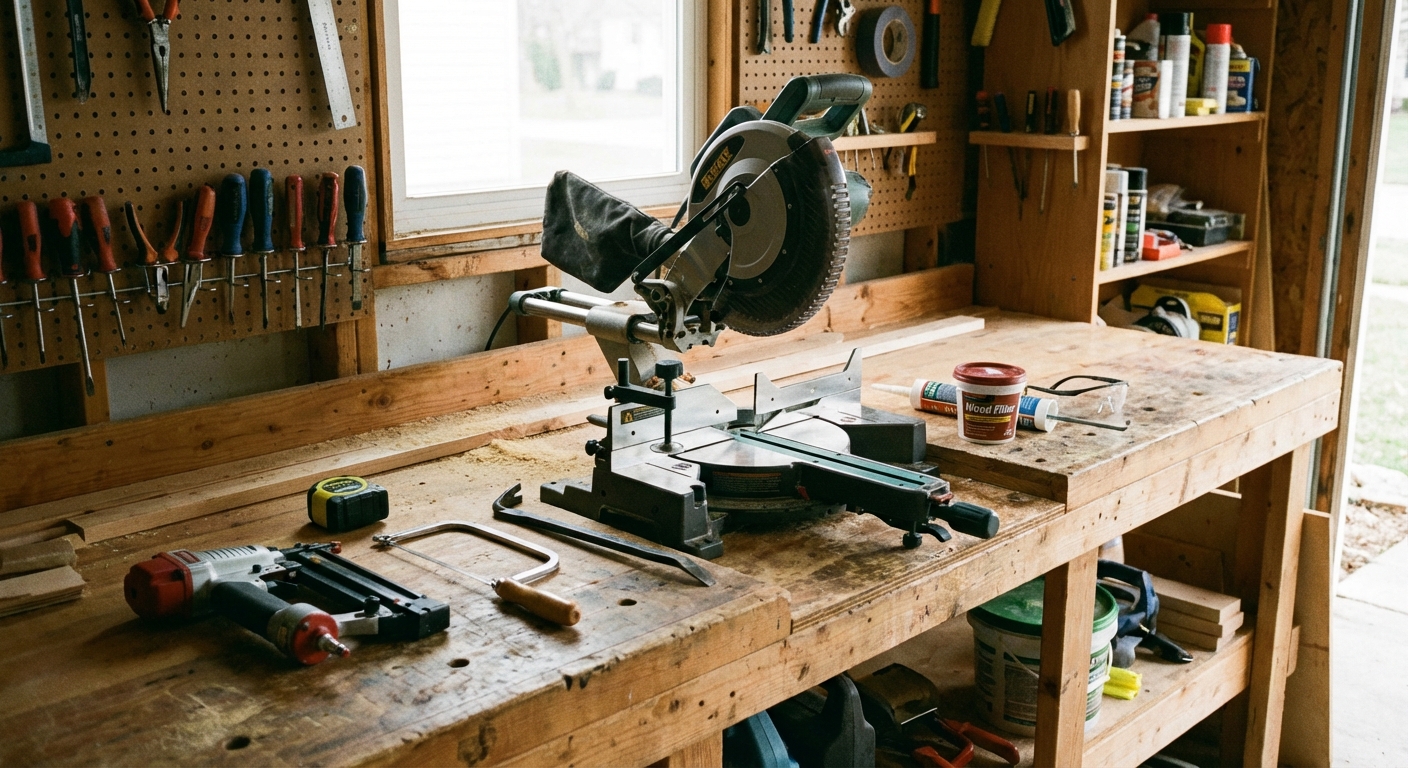
Tools
- Utility knife with sharp blades
- Putty knife or 5-in-1 tool
- Small flat pry bar (and a larger one for stubborn spots)
- Stud finder (optional but helpful)
- Tape measure and pencil
- Miter saw (a basic one works for many profiles)
- Coping saw (for coped inside corners)
- Brad nailer (18 gauge) or finish nailer (16 gauge)
- Hammer and nail set (for touch-ups)
- Caulk gun
- Sawhorses (for pre-painting, optional but amazing)
Materials
- Baseboard stock plus 10 to 15 percent extra for waste and learning cuts
- Shoe molding if you are replacing it
- Construction adhesive (optional)
- Wood filler or spackle (paint-grade)
- Paintable caulk (acrylic latex) for most rooms. For wet areas, use a paintable, mold and mildew resistant siliconeized acrylic or urethane acrylic (not 100 percent silicone, because it will not take paint).
- Primer and paint (or stain and clear coat for stain-grade)
- Painter’s tape and drop cloth
Nail length and gauge
- Simple rule: baseboard thickness + drywall thickness + about 1 inch into framing = nail length.
- Common example: 5/8 inch baseboard + 1/2 inch drywall + 1 inch embedment = about 2 1/8 inches, so a 2 inch nail is close, and a 2 1/2 inch nail gives a little more bite.
- 18 gauge brads: great for many standard baseboards and shoe molding, but can be marginal for very tall or heavy profiles or wavy walls.
- 16 gauge finish nails: better holding power for 5 1/4 inch+ baseboards, thicker stock, or walls that like to fight back.
- Tip: if you keep missing studs, the board will eventually pull away and crack your caulk line. Studs are the whole game.
Step 1: Remove old baseboards
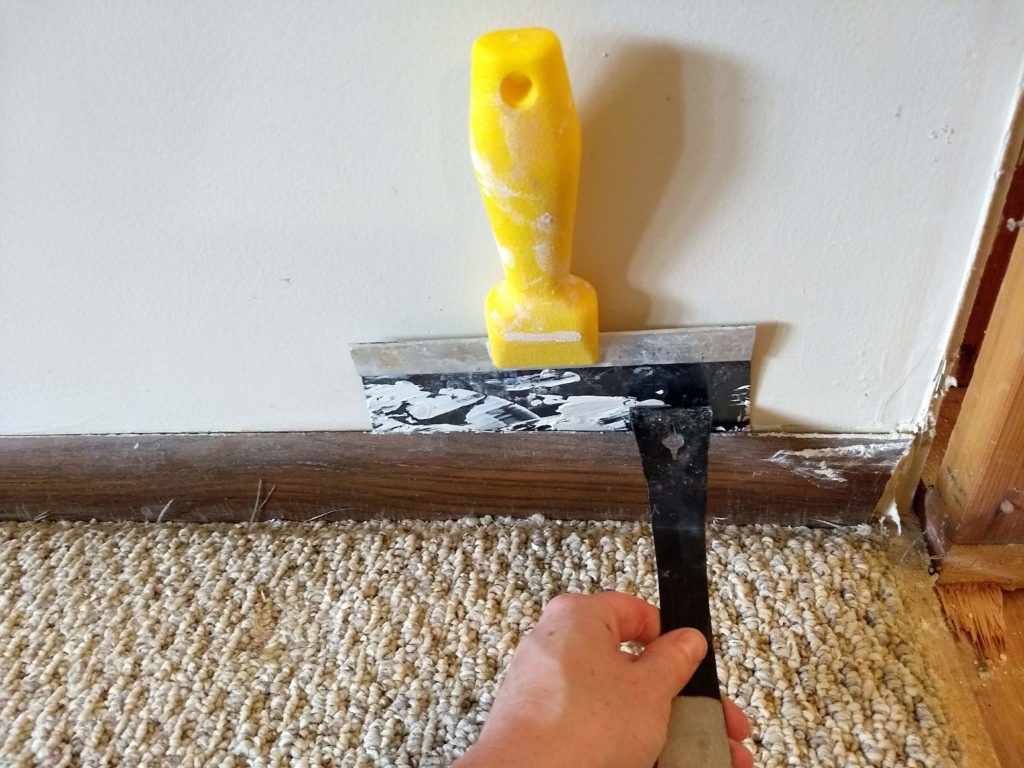
1) Score caulk and paint
Run a utility knife along the top edge where baseboard meets the wall. Do the same at joints. This breaks the paint film so the drywall paper does not tear when the board moves.
2) Create a safe gap
Slip a putty knife behind the baseboard and wiggle it to open a small gap. If it is glued hard, tap the putty knife in gently with a hammer.
3) Pry against the putty knife
Insert the pry bar behind the baseboard, but use the putty knife as a shield. Pry a little, move over 6 to 12 inches, pry again. Work your way down the board instead of trying to muscle one spot.
4) Deal with nails and glue
- If nails stay in the wall, pull them with end-cutting pliers or tap them back through the baseboard from behind.
- If the trim is glued, expect more drywall touch-up. Go slow and use more small pries instead of one big pry.
5) Label and clean up
If you are reusing pieces as templates, label them by wall. Then scrape any caulk ridges or glue blobs so your new boards sit flat.
Step 2: Prep the wall and floor
Patch first
Fill torn drywall paper and divots now. If you ripped drywall paper, seal it with a quick coat of primer or a sealer so it does not bubble under paint later.
Plan for flooring gaps
If your flooring has expansion gaps near the wall, you usually want shoe molding or quarter round to cover them. If your floors run tight to the wall and your baseboard sits cleanly, you can skip it for a more modern look.
Out-of-level floors
If the floor dips or rises, you have two clean options:
- Use shoe molding: the easiest way to hide a small, inconsistent gap while keeping the baseboard line looking straight.
- Scribe the baseboard: best when you want no shoe molding. Set the baseboard in place, use a compass to trace the floor’s shape onto the bottom edge, then trim to the line. It takes longer, but it looks custom when done right.
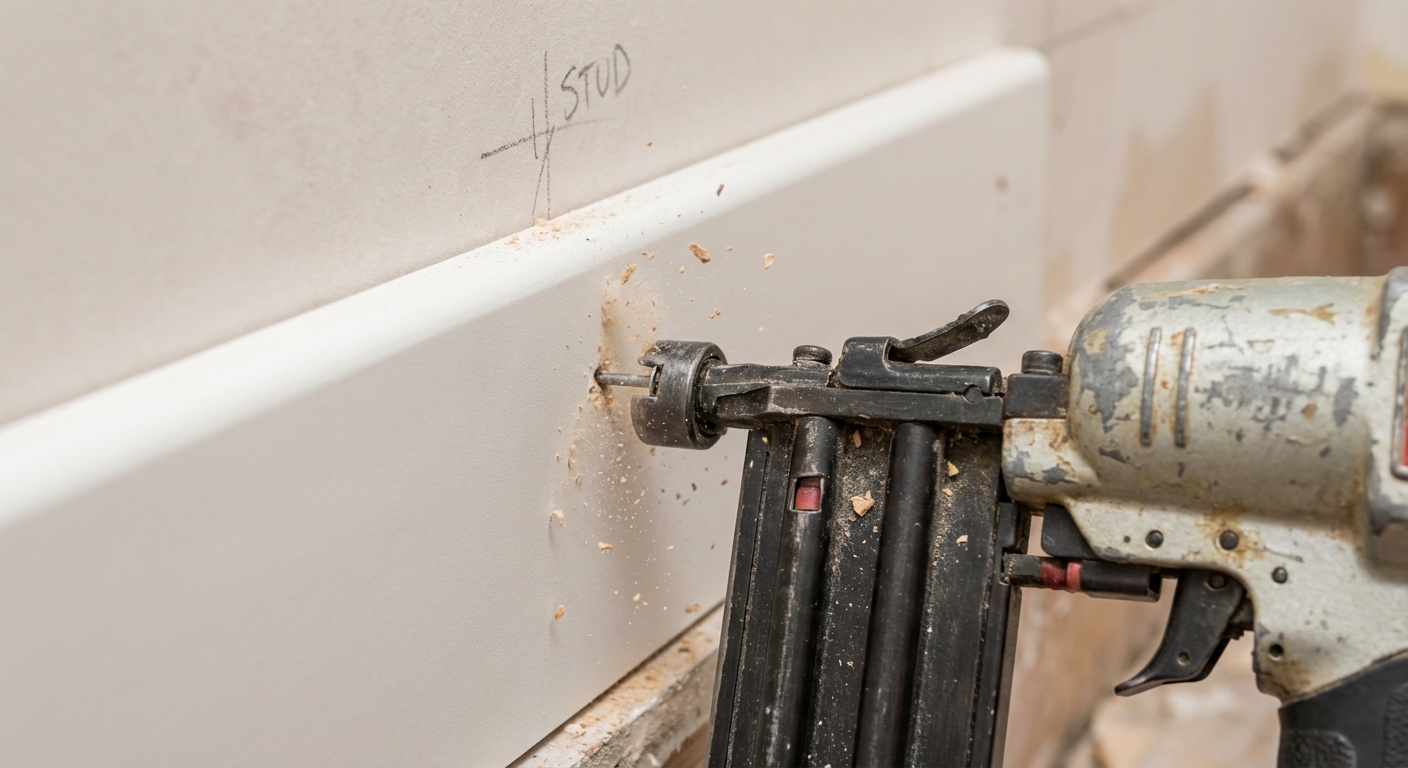
Mark studs
Mark studs lightly with pencil a few inches above where the baseboard will sit. These marks are easy to cover with paint later and they help you nail with confidence.
Step 3: Measure carefully
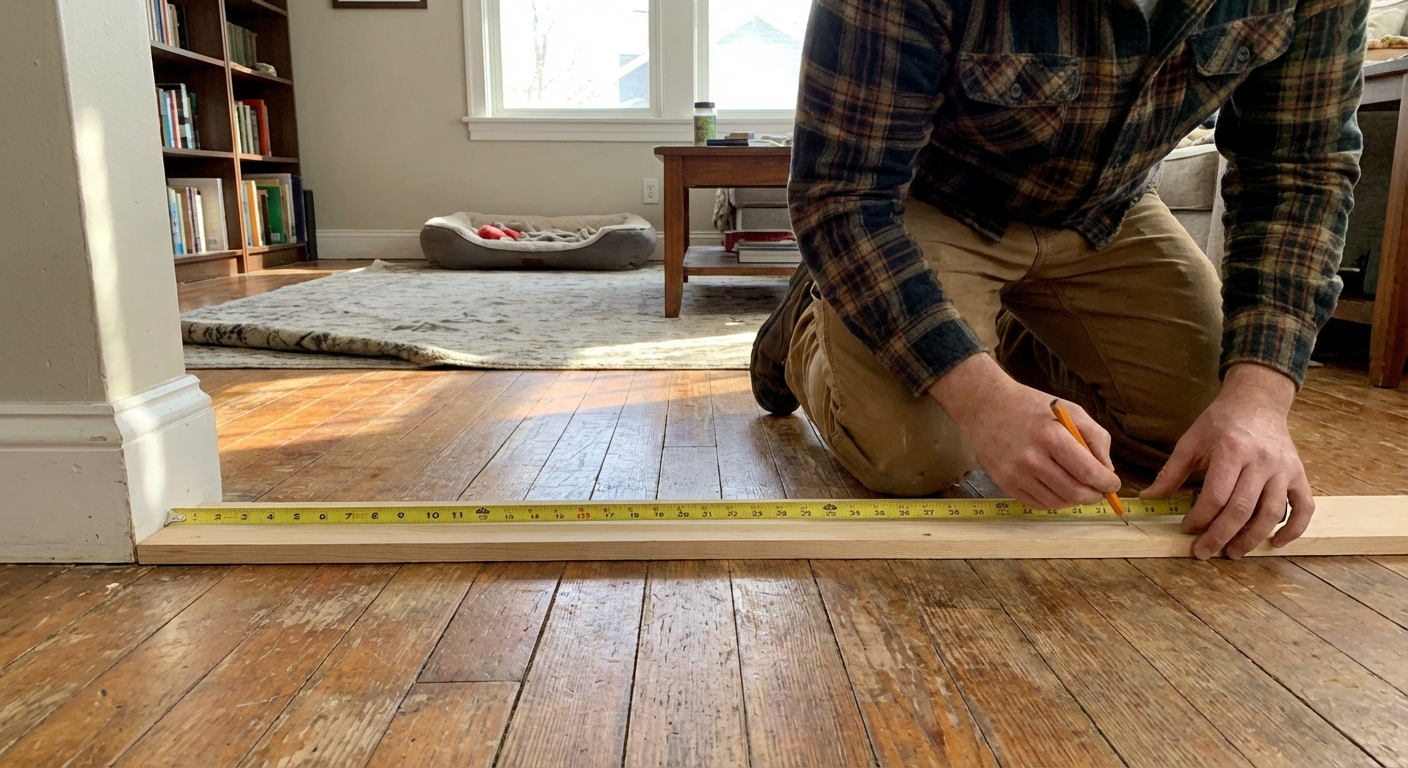
My no-drama method
- Measure each wall in place. Old trim is often a liar, especially in older houses.
- Write the measurement directly on the back of the board and include the location, like “North wall, left piece.”
- If you have outside corners, decide where the “long point” will be and measure to that long point.
Inside vs outside corners
- Inside corners: two walls meet and the corner points inward. Best practice is to cope one piece for a tight fit that stays tight.
- Outside corners: corner points outward. Usually two miters meet at 45 degrees, but your house might not be perfect.
Step 4: Cut the trim
Miter saw setup
- Cut with the baseboard sitting the same way it sits on the wall, usually “standing up” against the fence.
- Make sure the bottom edge is flat on the saw table each time.
- When in doubt, make test cuts on scrap.
Tall baseboards and saw limits
If you go with tall baseboards (around 5 1/4 inches and up), some basic miter saws do not have enough clearance to cut them standing up against the fence.
- If your saw hits the fence or will not clear the height, lay the board flat and use the saw’s bevel (and miter) settings to make the same cut.
- Do a couple of test cuts on scrap and label “left” and “right” so you do not have to think about it on the floor.
How to cope inside corners
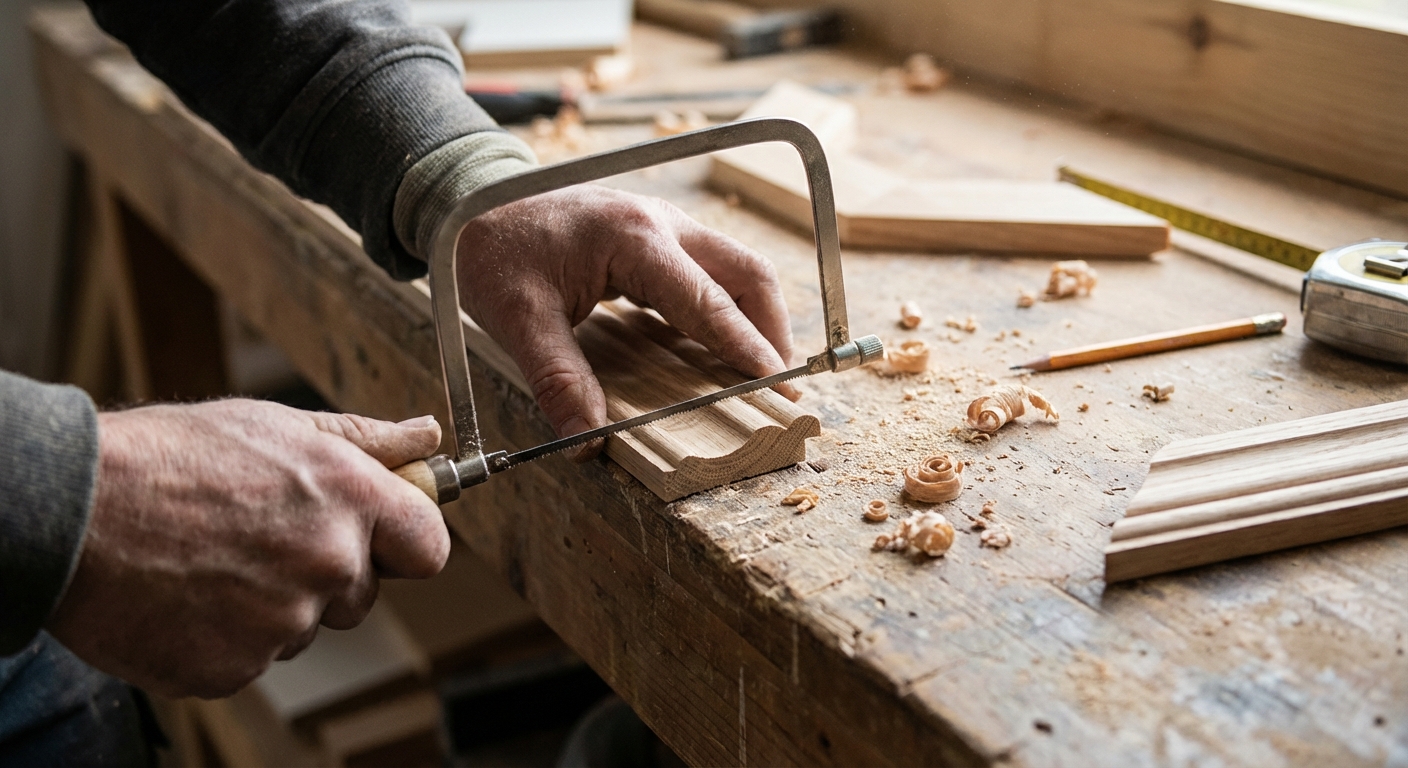
Coping sounds advanced, but it is basically tracing the profile so one board overlaps the other. This hides out-of-square corners and seasonal movement.
- Install the first piece into the corner with a square cut end.
- On the second piece, make a 45 degree inside miter at the end.
- Use the coping saw to cut along the exposed profile created by that miter cut. Angle the coping saw slightly back so the front edge stays crisp.
- Test fit. Fine-tune with a file or sandpaper if needed.
If you want a tiny “cheat code,” darken the cut line with a pencil before coping. It makes the profile easier to see under shop lighting.
Outside corners
Outside corners get bumped by vacuums, shoes, and life. Two tips help a lot:
- Check the angle: many corners are not a perfect 90 degrees. If your first test fit opens at the front, adjust your miter a degree or two until it closes.
- Glue the corner: add a small dab of wood glue on the miter faces so the joint stays tight.
Scarf joints for long walls
If a wall is longer than your baseboard stock, join two pieces with a scarf joint (a 30 to 45 degree overlapping cut) instead of a straight butt joint. It hides better and is stronger. For real wood stain-grade trim, leave the tiniest breathing room and avoid forcing pieces tight if the house is dry in winter. Wood likes to move.
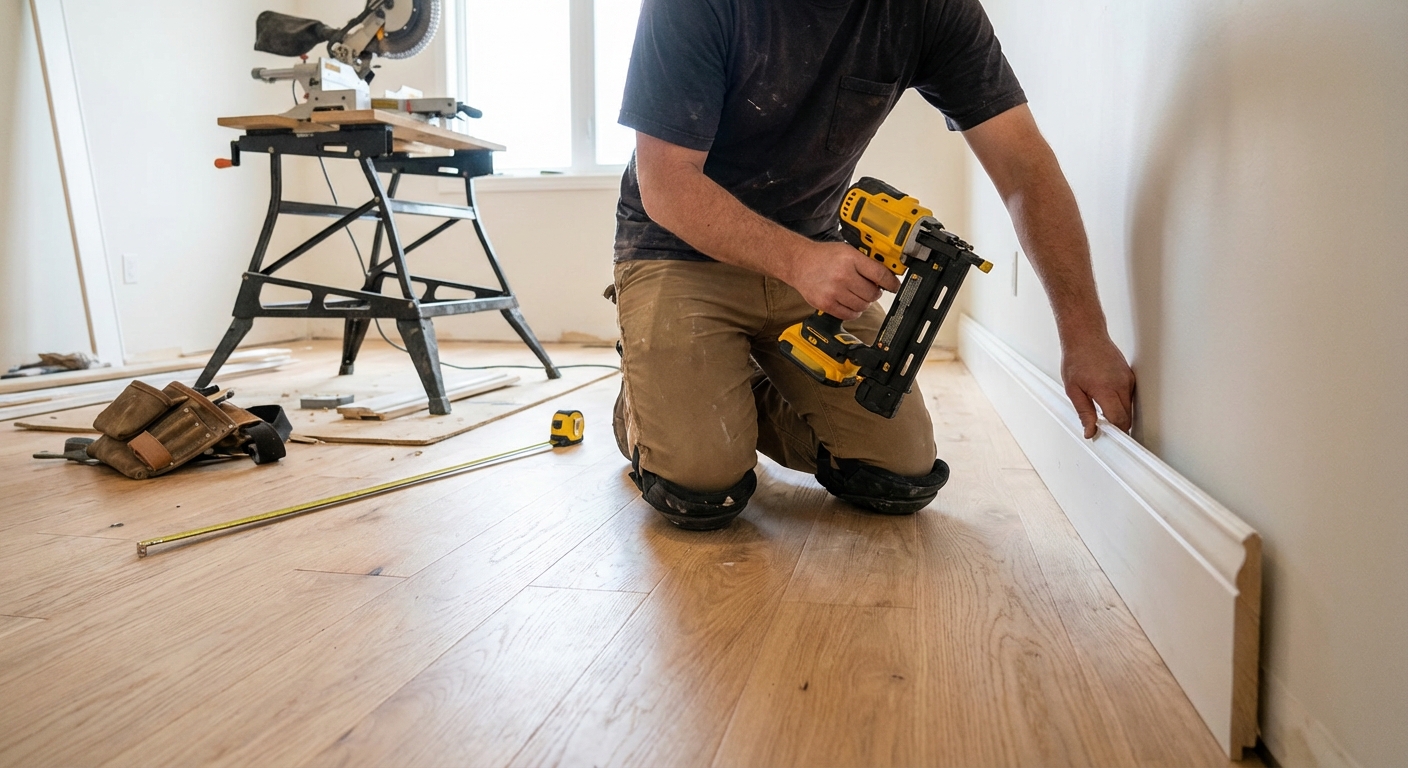
Step 5: Install the baseboards
Nails, adhesive, or both
- Nails into studs: the standard approach and usually all you need.
- Adhesive + nails: helpful for stubborn, wavy walls or when stud spacing is weird. Use sparingly. Too much adhesive makes future removal a mess.
- Adhesive only: I avoid it unless there is a specific reason. Nails give you mechanical strength and easier repairs later.
Adhesive note: Use construction adhesive behind the baseboard only (not on the floor). Avoid gluing trim to floating floors like LVP or laminate. Those floors need to move.
Placement and nailing
- Start with the longest, straightest wall if you can. It builds confidence.
- Press the baseboard tight to the wall and down to the floor.
- Nail into studs about every 16 inches, plus one nail within a few inches of each end.
- For tall baseboards, use two rows of nails: one high and one low to keep the board flat.
- Angle nails slightly (a small toe-in) on problem spots to help pull the board tight.
- If you are nailing hardwoods or thin profiles near an end, predrill to avoid splitting.
Shoe molding
Shoe molding gets nailed to the baseboard, not the floor. That way your floor can expand and contract without pushing the trim up.
Step 6: Fill, caulk, and sand
Fill nail holes
- For paint-grade trim, use wood filler or lightweight spackle. Let it dry fully.
- For stain-grade trim, use a stainable wood filler and test the color first.
Caulk the right gaps
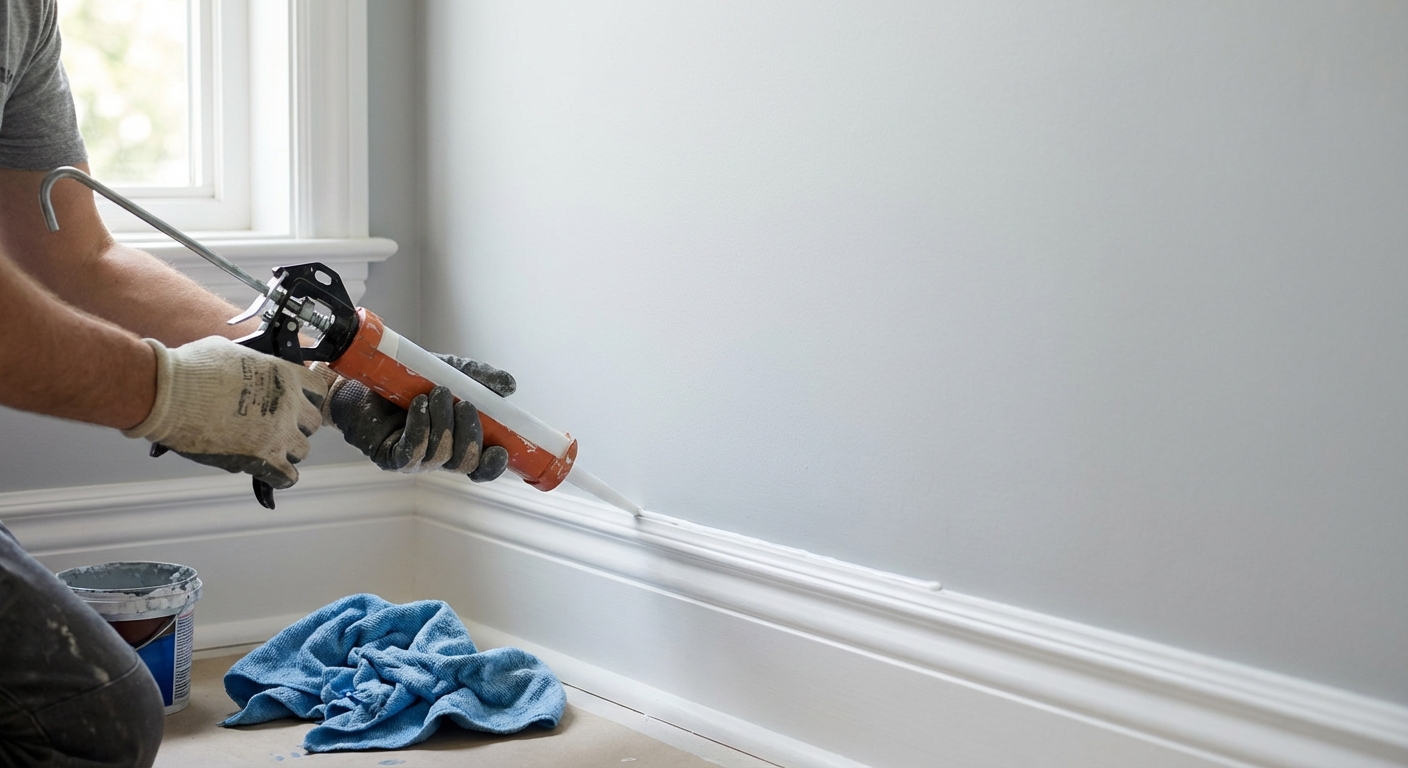
- Caulk the top edge where baseboard meets the wall for a seamless look.
- Caulk outside corner seams and scarf joints for paint-grade trim.
- Usually do not caulk the bottom edge to the floor. Floors move, and caulk can crack and look messy.
- Exceptions: in bathrooms (to help seal against water) or for drafty gaps on non-moving floors. Avoid caulking to floating floors like LVP or laminate.
Sand for the good finish
Once filler dries, sand nail spots flush with fine grit sandpaper. Run your hand over the trim. Your fingertips catch what your eyes miss.
Step 7: Prime and paint
Pre-paint first if you can
If you want the biggest time saver in the whole project, do this: paint your baseboard stock on sawhorses before you install it. You can prime and put on at least one finish coat while standing up, then you only have to touch up nail holes and caulk lines after install. Your knees will thank you.
Paint-grade checklist
- MDF: prime cut ends especially. MDF ends drink paint like a sponge unless sealed.
- Raw wood: prime before topcoat for consistent sheen.
- Two finish coats usually look better than one heavy coat.
Stain-grade checklist
- Skip caulk on visible seams. It will not take stain.
- Sand progressively and wipe dust before staining.
- Use a clear coat that matches the room’s wear level, especially in hallways.
Common mistakes
- Tearing drywall during removal: score caulk first and pry against a putty knife.
- Gappy inside corners: cope one side instead of relying on two miters.
- Outside corners that open later: glue the miter faces and nail close to the corner into solid framing if possible.
- Wavy baseboards: use a second row of nails and hit studs. If a wall bows, a small amount of adhesive behind the board can help.
- Caulk cracks: gaps were too large or the board was not secured well. Fix the attachment first, then recaulk.
- Bottom gap drama: if the floor is out of level, decide early: scribe the baseboard or plan for shoe molding.
Quick FAQ
Trim before or after flooring
Usually after flooring. You want baseboards to sit cleanly over the finished floor, and you can decide if shoe molding is needed.
Baseboard height
In many homes, 3 1/4 inch to 5 1/4 inch is common. Taller baseboards can make rooms feel more finished, but keep proportions in mind. If your door casing is narrow, super tall baseboards can look mismatched unless you upgrade casing too.
Brad nailer or finish nailer
An 18 gauge brad nailer is great for many standard baseboards and shoe molding. A 16 gauge finish nailer gives more holding power for thick or tall trim. If you are only buying one and you plan to do lots of trim, 16 gauge is a solid long-term choice.
One room checklist
- Score caulk and paint lines
- Pry off baseboards using a putty knife shield
- Patch and prime torn drywall paper
- Mark studs
- Measure wall-by-wall and label pieces
- Cope inside corners, miter outside corners
- Nail into studs, glue miters if needed
- Fill holes, caulk top edge and seams
- Sand, prime, paint (touch up if you pre-painted)
If you take your time on removal and corners, the rest is straightforward. And once you step back and see crisp new lines around the whole room, it is the kind of upgrade that makes everything else feel cleaner too.
About Marcus Vance
Content Creator @ Grit & Home
Marcus Vance is a lifelong DIY enthusiast and self-taught home renovator who has spent the last decade transforming a dilapidated 1970s ranch into his family's dream home. He specializes in budget-friendly carpentry, room-by-room renovations, and demystifying power tools for beginners. Through his writing, Marcus shares practical tutorials and hard-learned lessons to help homeowners tackle their own projects with confidence.