If you have a cracked concrete driveway, you are not alone. Mine looked great from the street until the afternoon sun hit it just right. Then the cracks lit up like a roadmap. The good news: a lot of driveway cracks can be improved with patient prep, the right filler, and a quality sealer. The more complicated news: cracks caused by ongoing movement can usually be managed, not magically cured forever.
This guide walks you through crack repair for different sizes, when backer rod matters, when resurfacer is the better move, and how to seal concrete to reduce water and salt intrusion that can make cracks and surface damage worse next season.
Before you start: what the crack means
Concrete cracks for a few common reasons: shrinkage as it cures, ground movement, heavy loads, and water getting under the slab and freezing. Plenty of cracks are cosmetic, but some are signs of movement that a tube of filler will not stop.
Quick crack check
- Is one side higher? If you can catch a toe on it, that is not just cosmetic.
- Is it getting wider fast? Mark the ends and measure it season to season.
- Does it open and close with weather? That points to movement, which calls for flexible products and realistic expectations.
- Do you see sinking, soft spots, or hollow sounds? You may have base issues under the slab.
Repair it yourself if
- The crack is mostly stable year to year (it is not getting wider fast).
- The slab is generally level with only small height differences at the crack.
- You are dealing with typical hairline to 1/2 inch cracks and minor spalling.
Consider calling a pro if
- One side of the crack is lifted more than about 1/2 inch (trip hazard and likely movement below).
- The crack is wider than 1/2 inch and continues to widen.
- You have sinking sections, pumping water, or multiple areas that feel hollow.
If you do repair it yourself, set expectations: crack filler and sealers reduce water intrusion and improve appearance, but they do not permanently “stop” concrete from moving.
Tools and materials (buy once, cry once)
You can do this with a basic kit. The biggest mistake I made on my first crack repair was skipping proper cleaning tools. Filler sticks to clean concrete, not to dust and driveway grit.
Tools
- Stiff wire brush or nylon masonry brush
- Shop vacuum (or a powerful blower)
- Flat screwdriver or crack cleaning hook tool
- Caulk gun (for cartridge-style fillers)
- Putty knife or margin trowel
- Utility knife and scissors (for backer rod)
- Pressure washer (optional but very helpful)
Materials
- Concrete crack filler (choose based on crack size below)
- Foam backer rod (for deep cracks)
- Concrete repair mortar (for missing chunks)
- Concrete bonding primer (if you plan to resurface)
- Concrete resurfacer (for widespread damage)
- Concrete sealer (penetrating or film-forming, explained below)
- Concrete cleaner and degreaser (for oil spots and adhesion problems)
Weather note: Most fillers and sealers want dry conditions and a minimum temperature (air and slab) that varies by product. Some are fine around 40°F, others really want 50°F to 60°F or higher. The rain-free window also varies and is often 24 to 48 hours. Check the label and plan around that, not my optimism.
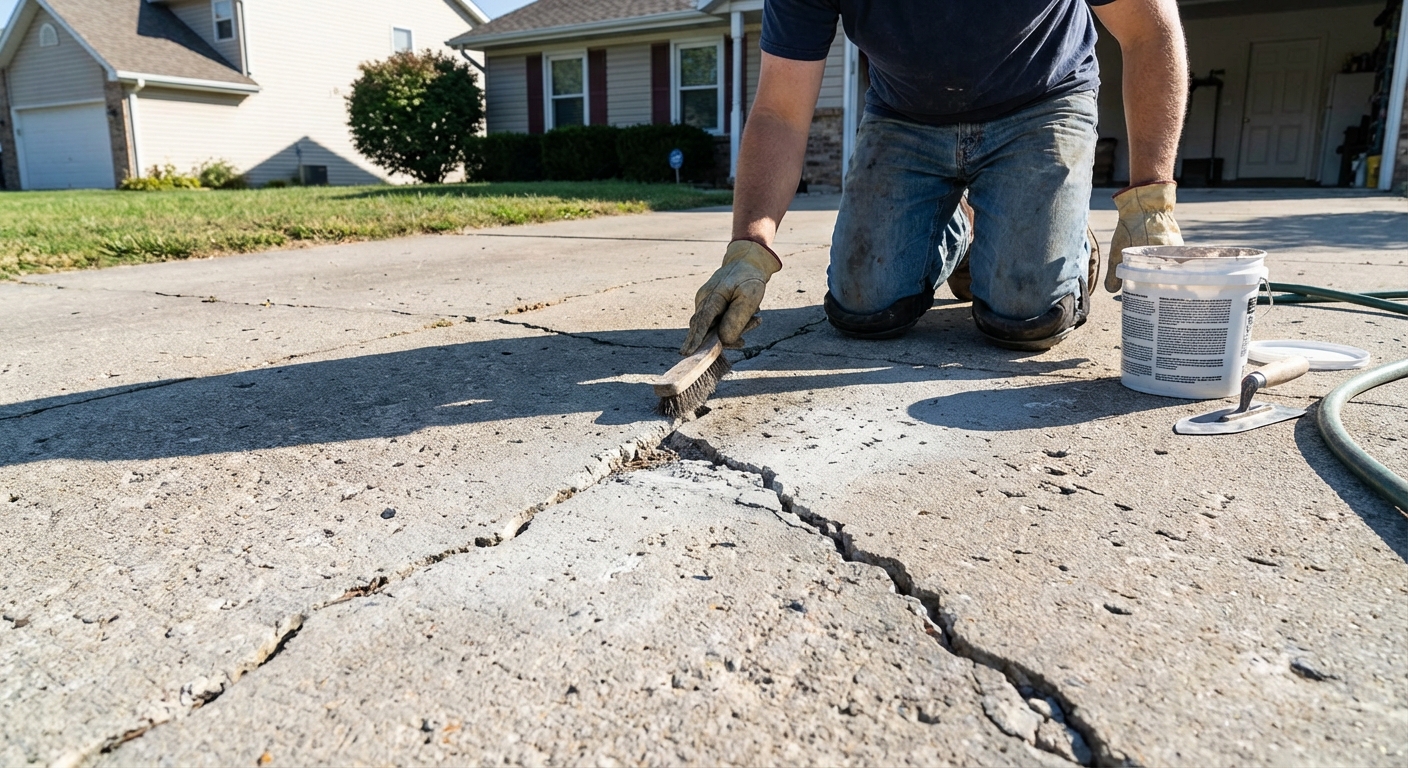
Step 1: Clean the cracks
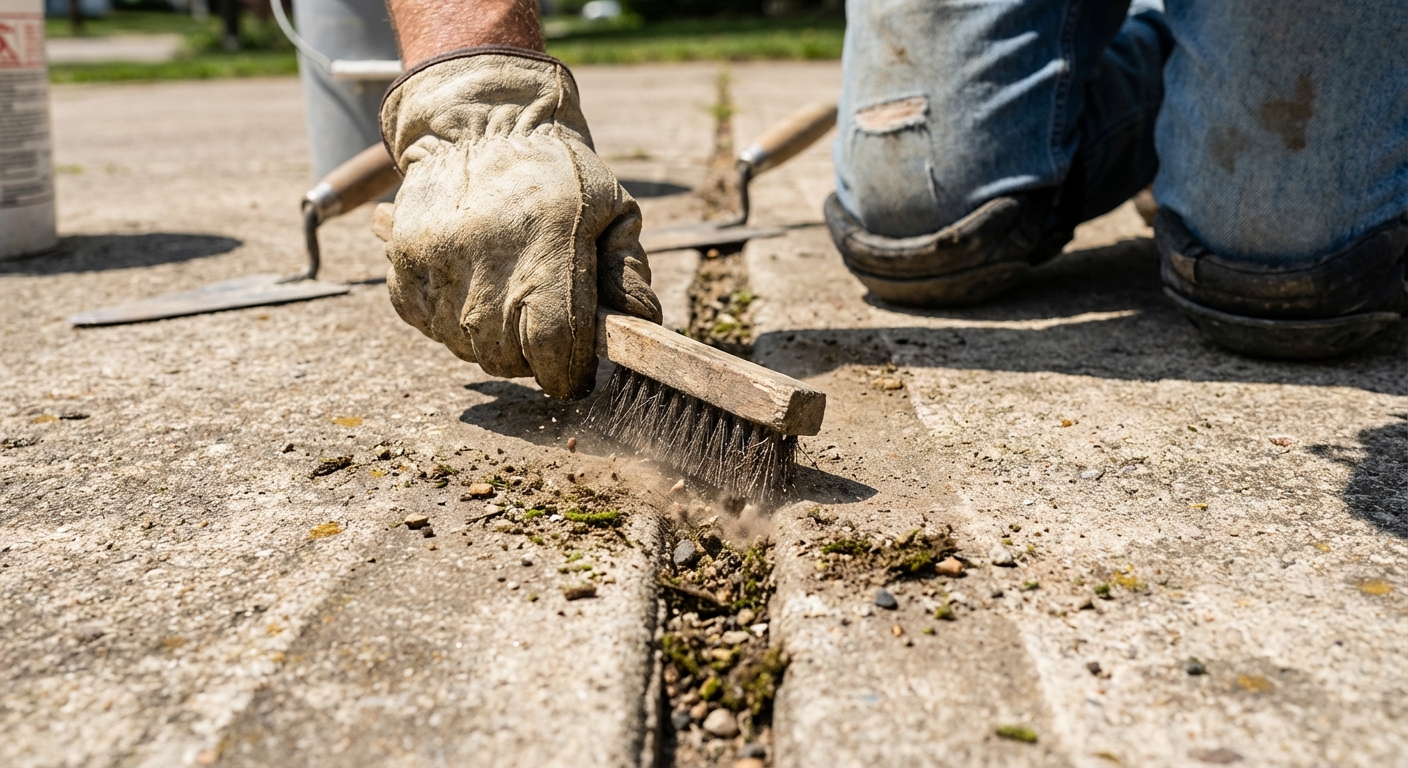
Cleaning is not the glamorous part, but it is the difference between a repair that lasts a season and one that lasts years.
How to clean
- Dig out loose stuff: Use a screwdriver or crack tool to pull out pebbles, old filler, and crumbling edges.
- Brush thoroughly: Scrub the crack walls so you are down to solid concrete.
- Vacuum: Shop vac the crack until no dust is coming up.
- Deal with oil: If there are oil or grease stains near the crack, treat them with a concrete degreaser and rinse well. Contamination is a top reason repairs and sealers fail.
- Wash (optional but great): Pressure wash the driveway and cracks, then allow it to dry fully.
Dry time matters: Pressure washing can force water deep into cracks and the slab. If you pressure wash, plan for at least overnight dry time in warm weather, and longer if it is cool, humid, shaded, or the cracks are deep. Many fillers can handle slightly damp concrete, but few like standing water.
Step 2: Pick the right repair product
Most driveway crack repairs fall into one of these buckets. Your goal is a well-bonded fill that sheds water and still has enough flexibility to handle seasonal movement.
Hairline cracks (up to about 1/8 inch)
- Best option: Liquid concrete crack filler that self-levels.
- Why: It flows into tight cracks better than thick caulk.
- Application tip: Work in short sections. Let it flow, then make one light pass with a putty knife if needed to help it wet the edges and scrape flush. Avoid overworking it.
Small cracks (about 1/8 inch to 1/2 inch)
- Best option: Polyurethane or polyurea concrete crack sealant in a caulk tube (often labeled self-leveling for horizontal surfaces).
- Why: These tend to stay more flexible than many cement-based patch products and handle seasonal expansion better.
- Application tip: Mask the edges with painter’s tape if you want cleaner lines, then pull tape right after tooling.
Wide cracks (over 1/2 inch) or missing chunks
- Best option: Patch missing concrete with a concrete repair mortar, then seal the top with a flexible sealant where appropriate.
- Why: Very wide gaps can swallow tube filler and may need a stronger bulk repair first.
- Reality check: If the crack is wide because the slab is actively moving, repairs may re-crack. Sealing still helps keep water out, but the movement issue remains.
Control joints vs random cracks
If your driveway has intentional grooves (control joints), those are supposed to “crack” there. Treating joints is a bit different: many homeowners leave them unfilled, while others clean and seal them with a flexible joint sealant to reduce water intrusion. If you fill them, choose a product rated for joints and horizontal surfaces.
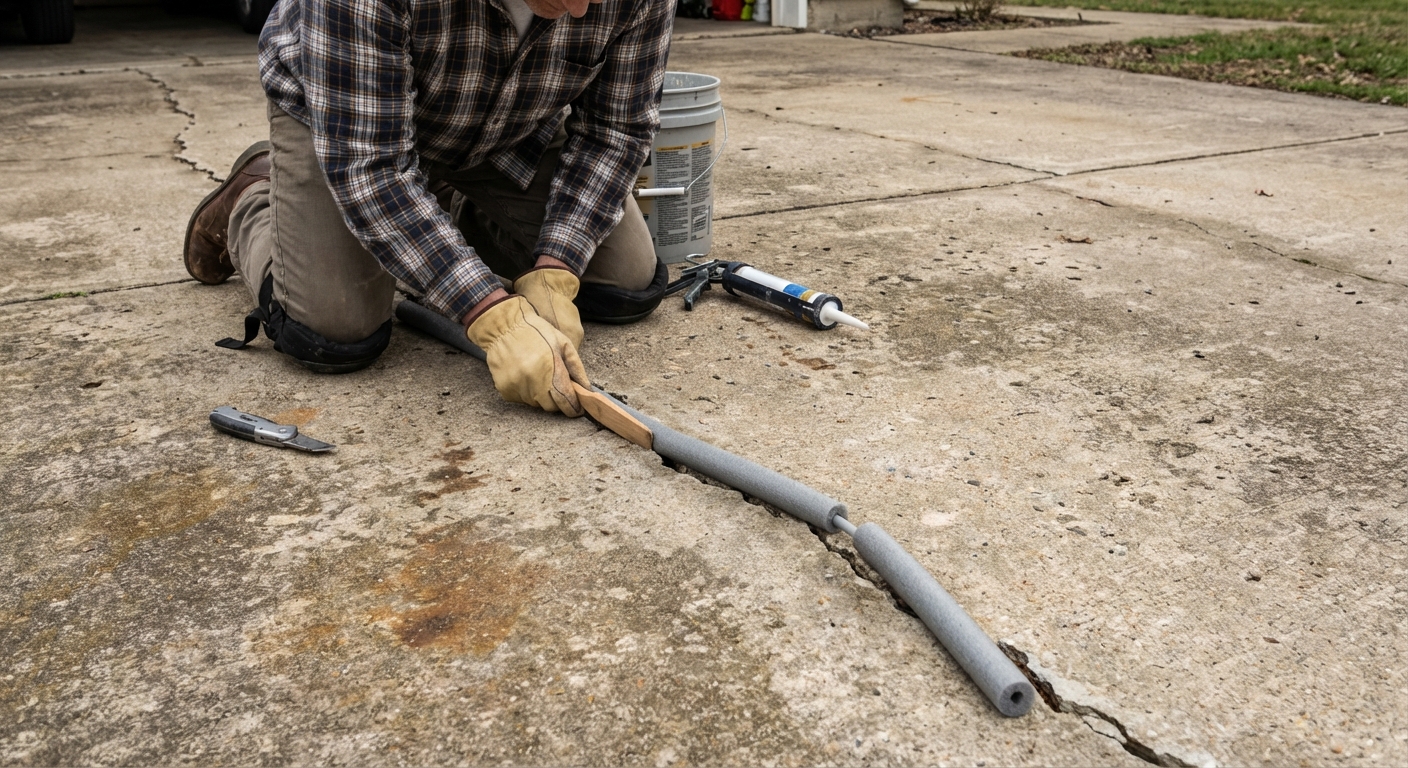
Backer rod: when and how
Backer rod is a cheap foam rope that saves you money on sealant and helps the sealant perform better.
Use backer rod when
- The crack is deep (roughly deeper than 1/2 inch).
- You can push sealant down into a void and it keeps disappearing.
- You want better long-term flexibility and less chance of the sealant splitting.
How to install it
- Pick a diameter slightly larger than the crack width so it fits snug.
- Press it in with a putty knife to a consistent depth.
- Leave space for sealant on top. Follow the manufacturer’s joint design guidance. A common target is sealant depth around half the crack width (within the product’s min and max depth limits), not a huge deep bead.
Thrifty tip: Backer rod is cheaper than polyurethane sealant. If a crack is deep, you can easily burn through multiple tubes without it.
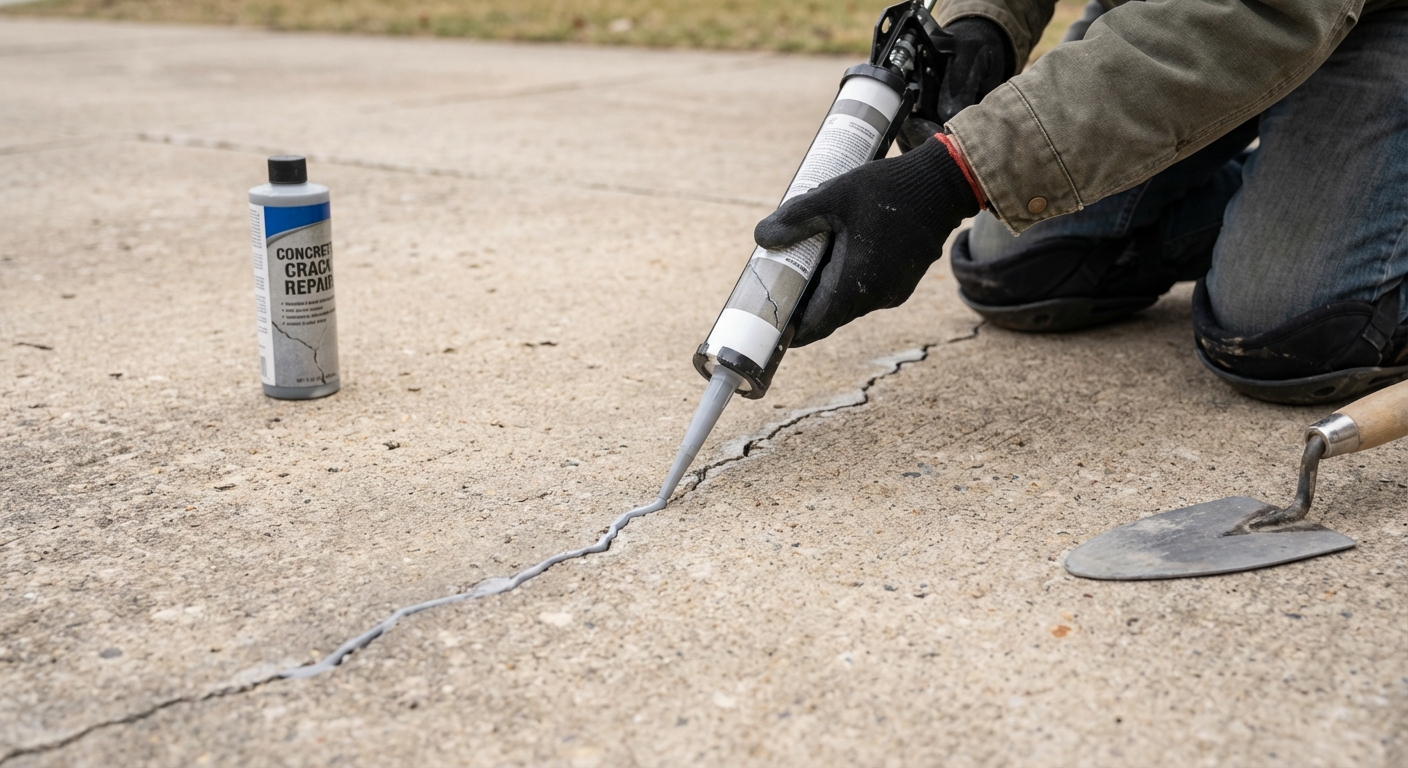
Step 3: Fill the crack
Once the crack is clean and dry, the goal is a full, flush fill with strong contact on the crack walls.
For self-leveling sealant
- Cut the nozzle to match the crack width.
- Pour or gun the product steadily, slightly overfilling.
- Let it level. Avoid over-tooling, which can trap air or make a mess.
For non-sag sealant (better on slopes)
- Gun the bead, then tool with a putty knife so it bonds to both sides.
- Feather edges slightly so water does not sit on a ridge.
Cure time: Some products skin over fast but need longer to cure through. Keep cars off the repair until the label says it is ready for traffic. When in doubt, wait another day. Patience is cheaper than doing it twice.
Optional: resurface for widespread wear
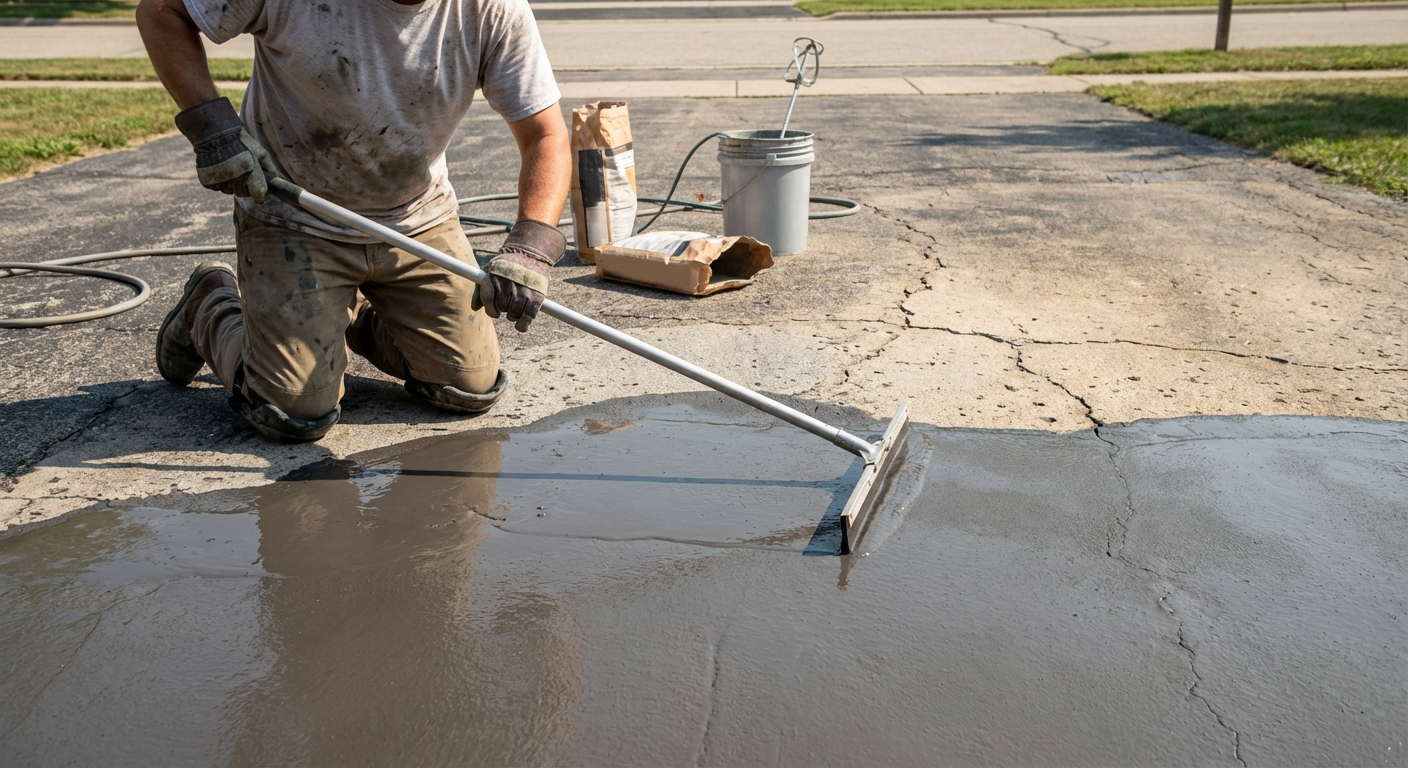
If your driveway has lots of small cracks, pitting, or a rough surface, crack-by-crack repairs can feel like playing whack-a-mole. That is where a concrete resurfacer can make sense. It is a thin cement-based overlay designed to bond to existing concrete and create a new wear surface.
Resurfacing is a good idea when
- The slab is structurally decent but looks tired: shallow spalling, light scaling, lots of hairline cracks.
- You want a more uniform look than spot repairs can provide.
Resurfacing is not a fix when
- Sections are heaving or sinking.
- You have major cracks with vertical displacement.
- The surface is flaking from serious freeze-thaw damage and de-icer abuse across large areas (you may need more intensive repair or replacement).
Basic resurfacing workflow
- Repair first: Fix larger cracks and holes before resurfacing.
- Clean aggressively: Pressure wash and remove oil stains. Resurfacers hate contaminants.
- Use bonding primer if required: Many systems call for a bonding agent or a pre-wet surface condition.
- Mix and apply: Follow bag ratios carefully. Spread with a squeegee or trowel in manageable sections.
- Cure: Protect from sun and wind if the product calls for it. Keep traffic off until fully cured.
My mistake to avoid: Mixing resurfacer too thick because I wanted it to “hide” more. It made the finish harder to work and more prone to texture issues. Follow the water ratio on the bag.
Step 4: Seal to reduce water damage
Sealing is how you protect all the work you just did. A good sealer reduces water absorption, helps resist salt and stains, and can slow freeze-thaw scaling and other water-related deterioration that can make cracks look worse over time.
Penetrating vs film-forming sealer
- Penetrating sealers soak in and protect from within. They usually look natural and are less likely to peel. Great for most driveways.
- Film-forming sealers leave a visible coating. They can deepen color and add sheen, but can be slippery when wet and may peel if moisture gets trapped or prep is poor.
Before you seal
- Clean the driveway again. Dust and pollen can mess with adhesion and appearance.
- Let repairs cure fully. Some fillers are ready in hours, others want days. Sealers also vary widely. Check the label for cure times and rain-free windows.
- Confirm compatibility: Not every sealer plays nicely over every filler or resurfacer, especially if anything is still curing. When in doubt, use products from the same system or confirm with the manufacturer.
How to apply sealer
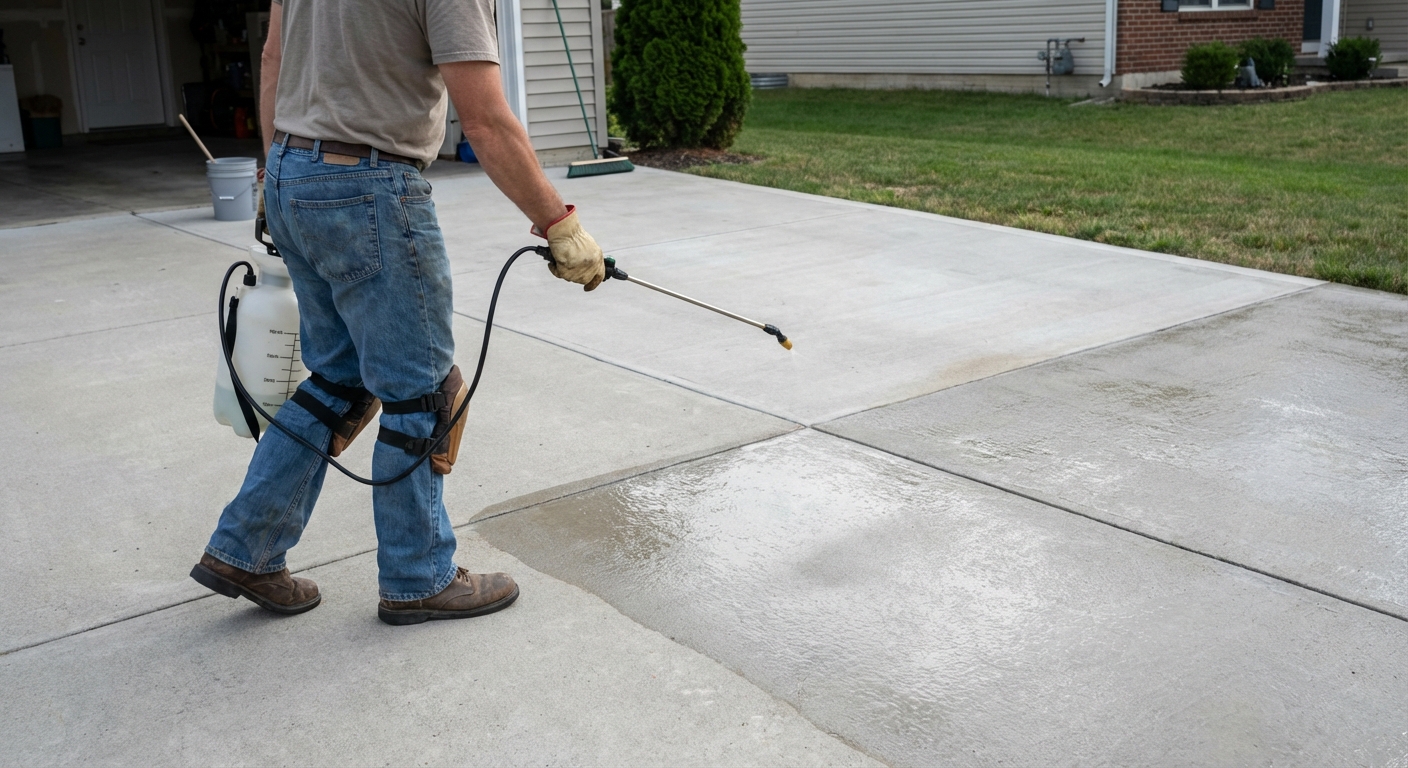
- Apply in thin, even coats. More is not better with most sealers.
- Use a pump sprayer or roller depending on product directions, and keep a wet edge to avoid lap marks.
- Block off the driveway until it is ready for foot traffic and vehicle traffic.
How often to reseal: Many homeowners reseal every 2 to 5 years depending on climate, sun exposure, and de-icer use. A simple test is the water bead test. If water soaks in quickly instead of beading, it is time to consider resealing.
Common questions
Can I just seal over cracks without filling them?
You can, but it is usually a short-term cosmetic fix. Sealer is not designed to bridge meaningful gaps. Water will still enter, and freeze-thaw can keep working the crack.
Do I need to widen the crack with an angle grinder?
Sometimes, but not always. For many driveway cracks, thorough cleaning and a quality flexible sealant is enough. Grinding can help when edges are crumbling or you need a consistent profile for patch mortar, but it adds dust and risk.
Why did my old filler pull away from the sides?
Usually one of three culprits: the crack was dusty or oily, the product was not the right type for horizontal concrete, or the bead was too deep without backer rod so it tore as it cured and moved.
What about expansion joints near the garage or sidewalk?
Those are designed to move. If you seal them, use a joint sealant rated for expansion joints and install backer rod so the sealant can flex instead of bonding to the bottom of the joint.
A simple weekend plan
Here is a realistic schedule that matches real-world dry times.
- Option A (best results): Friday evening or Saturday morning: Pressure wash (if needed) and degrease oil spots. Let it dry overnight.
- Saturday: Final vacuum, install backer rod, and fill cracks.
- Sunday or next dry day: Seal only after the filler is cured enough for sealer (check the label). If cure times say wait longer, wait longer.
- Option B (same-day repair): Skip pressure washing. Dry clean thoroughly with brushing and vacuuming, then fill cracks. Pressure wash another time when you have a full dry window.
If you take nothing else from this page, take this: the best crack repair is 70 percent prep and patience. Clean it well, choose the right product for the crack size, and seal once your repairs have cured. Your future self will thank you when winter shows up.
Quick safety notes
- Wear gloves and eye protection. Many sealants are sticky and irritating.
- Use knee pads. Driveway work is hard on joints, ask me how I know.
- If you grind concrete, treat it like the silica-dust situation it is. Use a respirator rated for silica, and use a HEPA vac or wet cutting method if your tool supports it.
- Mind pressure-washer safety: eye protection, closed-toe shoes, and do not blast joints or edges you do not want to damage.
- Mind ventilation if you are using solvent-based products, and keep kids and pets away until fully cured.
About Marcus Vance
Content Creator @ Grit & Home
Marcus Vance is a lifelong DIY enthusiast and self-taught home renovator who has spent the last decade transforming a dilapidated 1970s ranch into his family's dream home. He specializes in budget-friendly carpentry, room-by-room renovations, and demystifying power tools for beginners. Through his writing, Marcus shares practical tutorials and hard-learned lessons to help homeowners tackle their own projects with confidence.