
A sharp mower blade is one of those small maintenance chores that pays you back every single week. When your blade is sharp, it slices grass cleanly. When it is dull, it smacks and tears the tips instead. That torn, ragged look is more than cosmetic. It stresses the lawn, invites disease, and makes your mower work harder than it needs to.
I put off sharpening my first season because I assumed it required some mysterious shop equipment. Turns out you can get excellent results at home with a file, a bench grinder, or an angle grinder, as long as you take safety seriously and you finish by balancing the blade.
How to know it needs sharpening
You do not need a microscope or a perfect schedule. Look for a few reliable clues:
- Grass tips look frayed or brown a day or two after mowing.
- The lawn looks uneven even though your deck height is set correctly.
- The mower vibrates more than usual, especially if the blade also has nicks.
- You hit sand, sticks, or a hidden rock. One surprise impact can dull an edge fast.
Timing varies a lot by yard conditions and blade type, so treat this as a guideline, not a rule. Many homeowners sharpen once or a few times per season, and heavy use or sandy soil can push you closer to every 20 to 25 mowing hours. When in doubt, follow your mower or blade manufacturer guidance and let the cut quality be the final judge.
Safety first (seriously)
Mower blades are simple, but they can bite in two different ways: the engine can start unexpectedly, and the metal edge can cut you even when it is dull. Slow down and do these steps every time.
Before you touch the blade
- Disconnect the spark plug wire (gas mowers) and tuck it away so it cannot spring back.
- Remove the battery (battery electric mowers) and remove the safety key if your model has one. Some designs can retain a brief residual charge or have interlocks, so follow the manual.
- For corded electric mowers, unplug from the outlet.
- Let the engine cool if you were just mowing.
When tipping the mower
- For many walk-behind gas mowers, tip it so the air filter and carburetor stay facing up to reduce fuel and oil leaks. Check your manual first because some engines specify a different tipping direction (often related to muffler or carb orientation).
- If the tank is full, consider running the mower a few minutes first to lower the fuel level.
Protective gear
- Safety glasses (a must for grinders).
- Work gloves.
- Hearing protection if grinding.
- A dust mask if you are in a dusty shop.
Tools and supplies
You have three solid sharpening routes. Pick what matches your budget and comfort level.
Common items (for all methods)
- Socket wrench or breaker bar (blade bolts are usually tight).
- Scrap wood block to wedge the blade.
- Wire brush or putty knife for caked grass.
- Permanent marker or paint pen.
- Bench vise or sturdy clamps.
- Blade balancer (cone style) or a simple nail-in-a-stud method.
Sharpening options
- Hand file (best for beginners, quiet, low risk of overheating).
- Bench grinder (fast and consistent once you get the feel).
- Angle grinder with flap disc (fast, portable, easy to overdo if you rush).
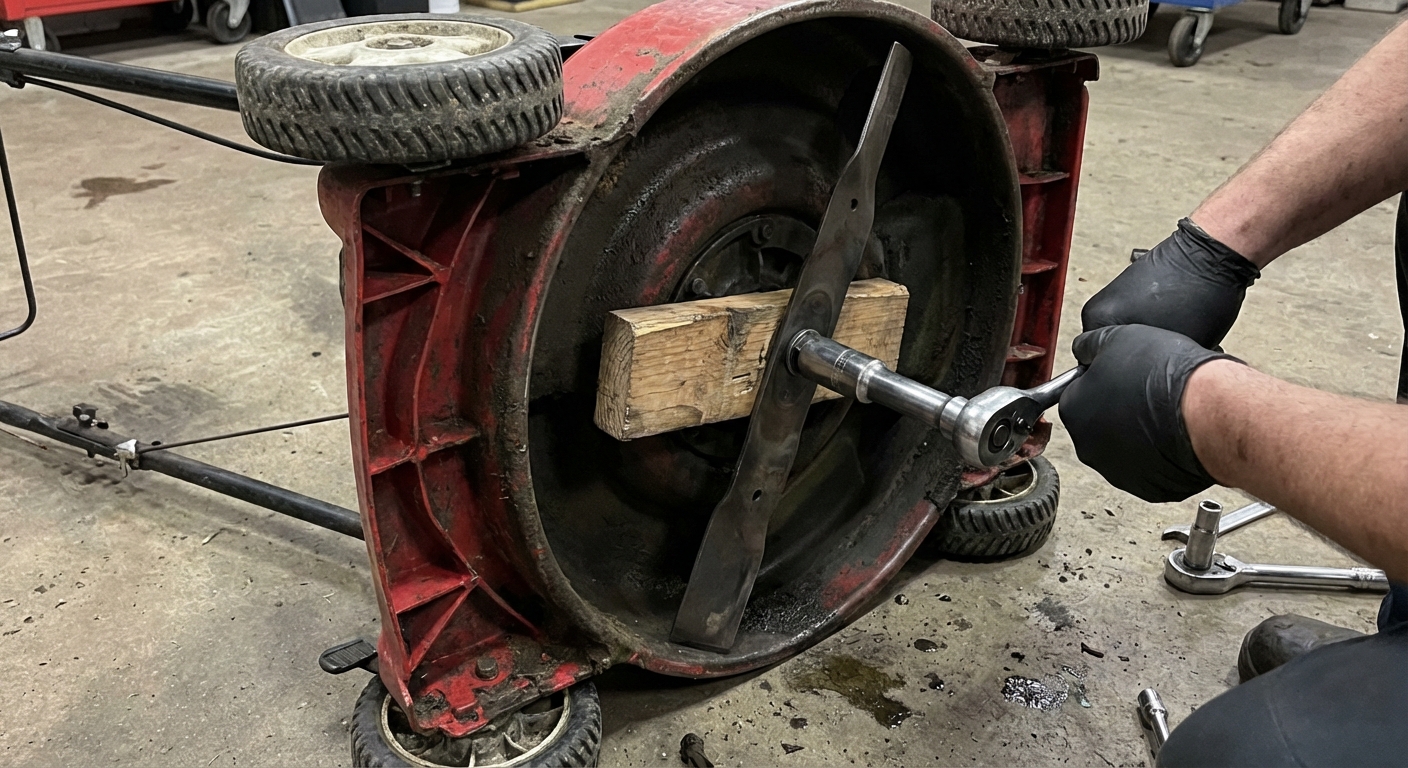
Step 1: Remove the blade
1) Disconnect power
Do the spark plug, battery, key, or unplug step first. Every time.
2) Tip the mower safely
Tip it in the direction your manual recommends. For many mowers that means the air filter side up. Set it on a stable surface so it cannot roll.
3) Block the blade
Wedge a short piece of 2x4 between the blade and the deck to keep the blade from spinning.
4) Mark the blade orientation
Use a marker to put a dot on the side facing you, or mark which end points forward. This prevents reinstalling it upside down, which happens more often than people admit.
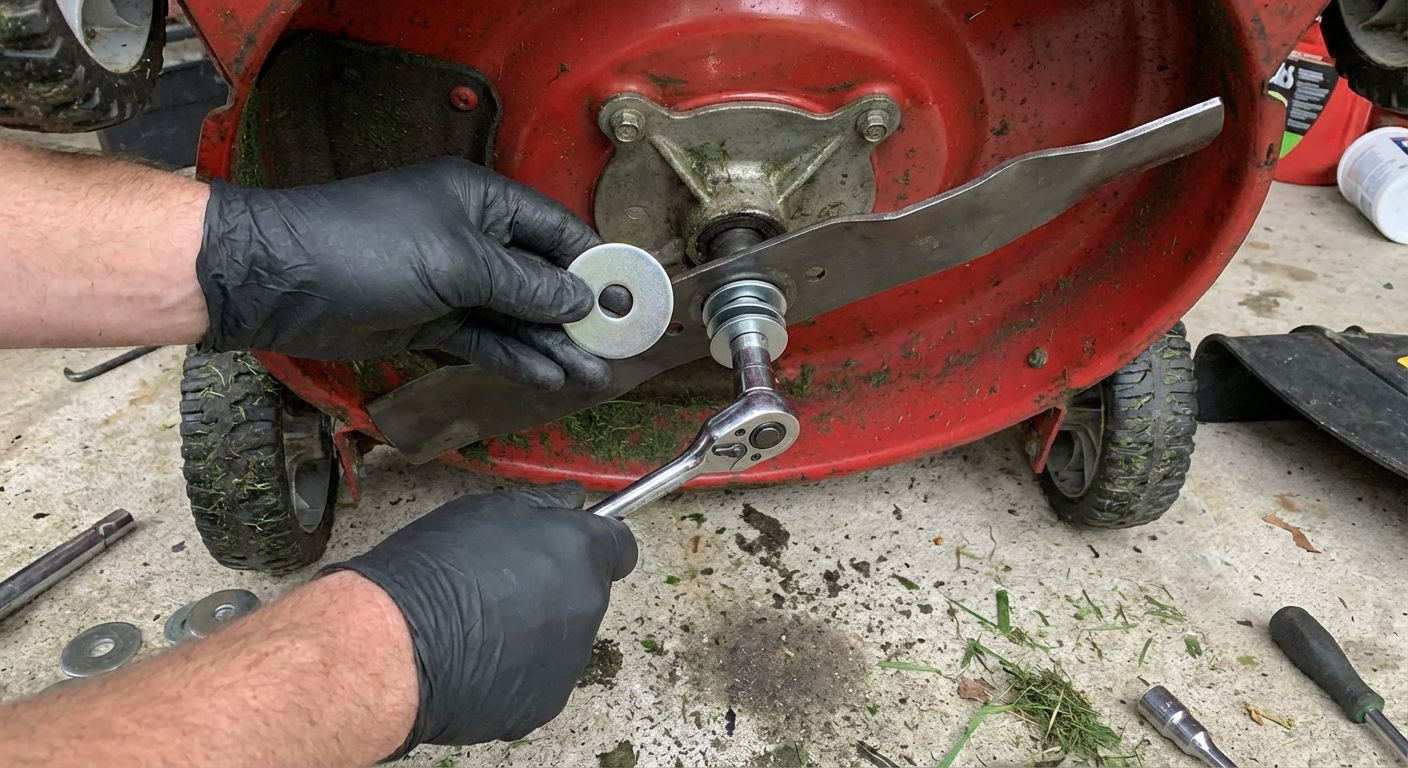
5) Remove the bolt
Use the correct socket and steady pressure. If it is stubborn, a breaker bar helps. Keep track of any washers or adapters in the exact order they came off.
Tip: Snap a quick phone photo of the blade stack (washers, cups, adapters). It makes reassembly almost foolproof.
Step 2: Clean and inspect
Sharpening over clumps of dried grass is like sanding over mud. Clean first.
- Scrape off caked-on grass with a putty knife.
- Wire brush the cutting edge so you can see the metal clearly.
What to look for
- Major cracks near the center hole or along the blade body: replace the blade.
- Severe bends or twisted ends: replace the blade.
- Deep chunks missing from the cutting edge: replacement is usually safer than grinding away a ton of metal.
- A blade that is getting “too thin” over time: if you have sharpened it many times and it has clearly lost a lot of material, replace it. When in doubt, compare to a new blade or follow the blade maker’s guidance.
If the blade is only nicked and dull, you are good to sharpen.
Step 3: Sharpen the blade
The goal is a clean, consistent edge at the existing factory angle. Most mower blades are often around 30 to 40 degrees, but it is not universal, so the best move is simple: match the existing bevel. You do not need a razor edge. Think crisp and even, not chef-knife sharp.
Quick blade style note: Mulching, high-lift, and standard blades look different, but the idea is the same. Sharpen only the cutting edge on the ends. Do not grind the lift wings or change the blade shape.
Method A: Hand file
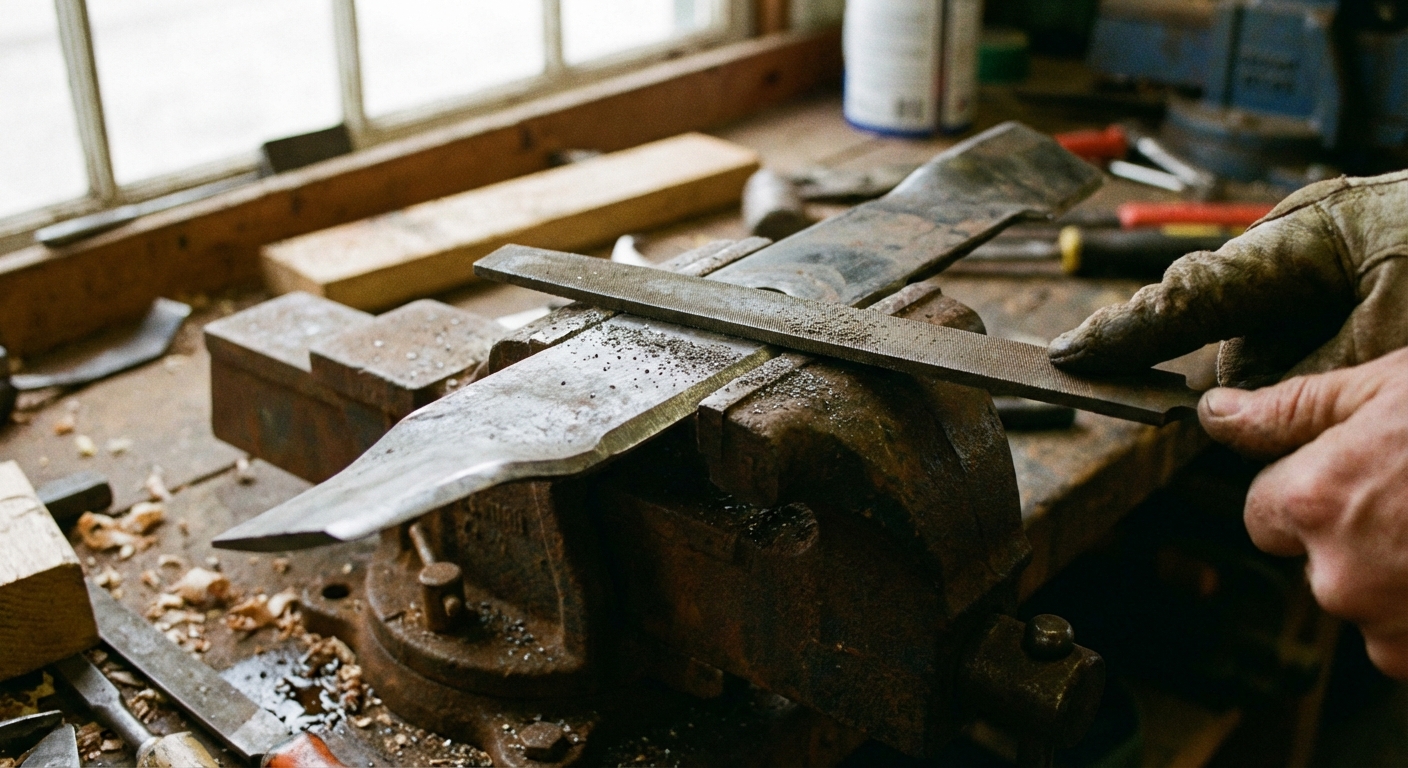
- Clamp the blade in a vise with the cutting edge facing up and away from you.
- Match the file to the existing bevel angle. Let the bevel guide you.
- File in one direction, pushing across the edge from inside to outside. Do not saw back and forth.
- Count your strokes and repeat roughly the same number on the other end.
- Stop when nicks are cleaned up and the edge looks uniform.
Mistake I made early on: I chased a perfect shiny edge and removed more metal than needed. With a file, stop as soon as the edge is consistent.
Method B: Bench grinder
- Stand firmly and keep a light grip. Let the grinder do the work.
- Touch the bevel to the wheel at the same factory angle.
- Make short, gentle passes. Do not hold one spot long.
- Dip the blade in water occasionally to keep it cool.
- Sharpen the other end with similar time and pressure.
Overheating warning: If you see the edge turning blue or straw-colored, it can be a sign you overheated the steel and may have reduced its hardness. Light passes and cooling breaks help prevent that.
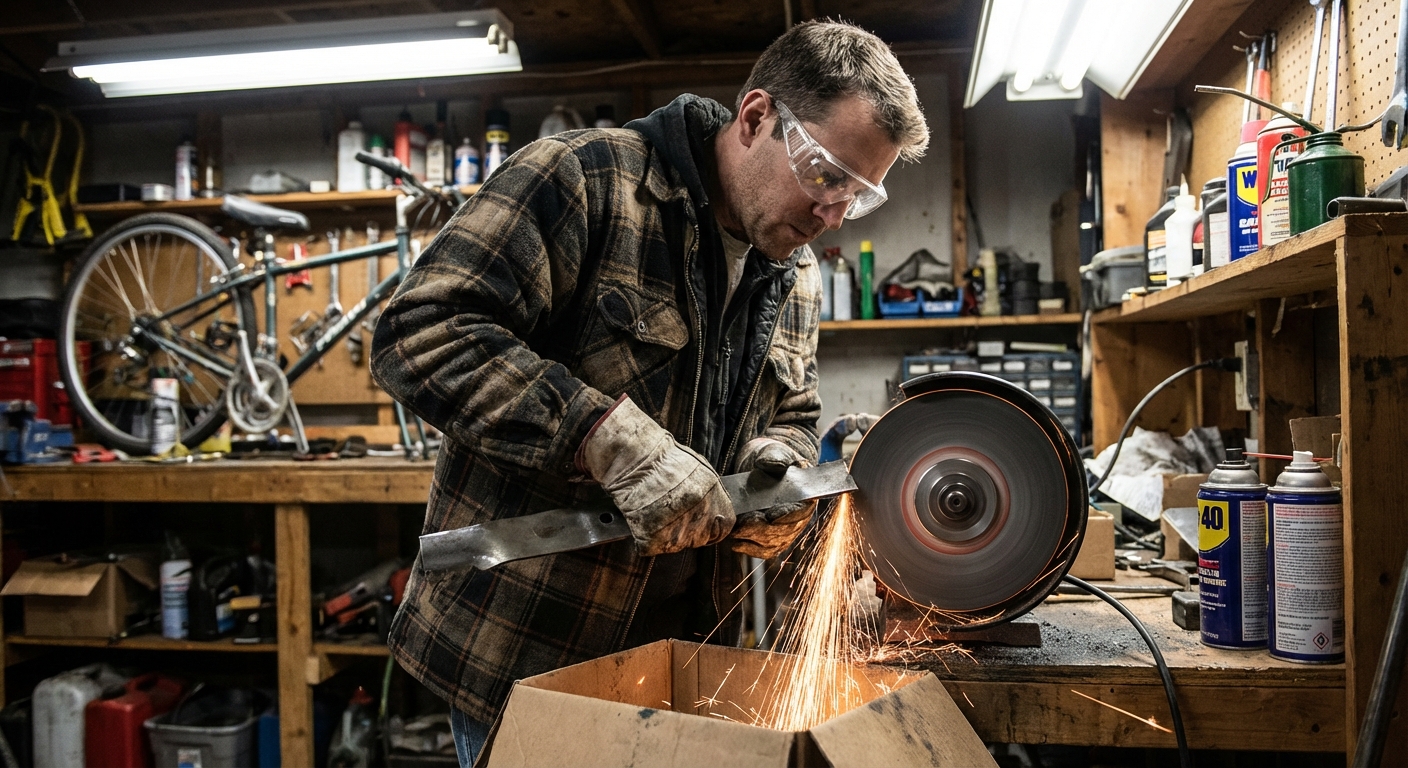
Method C: Angle grinder
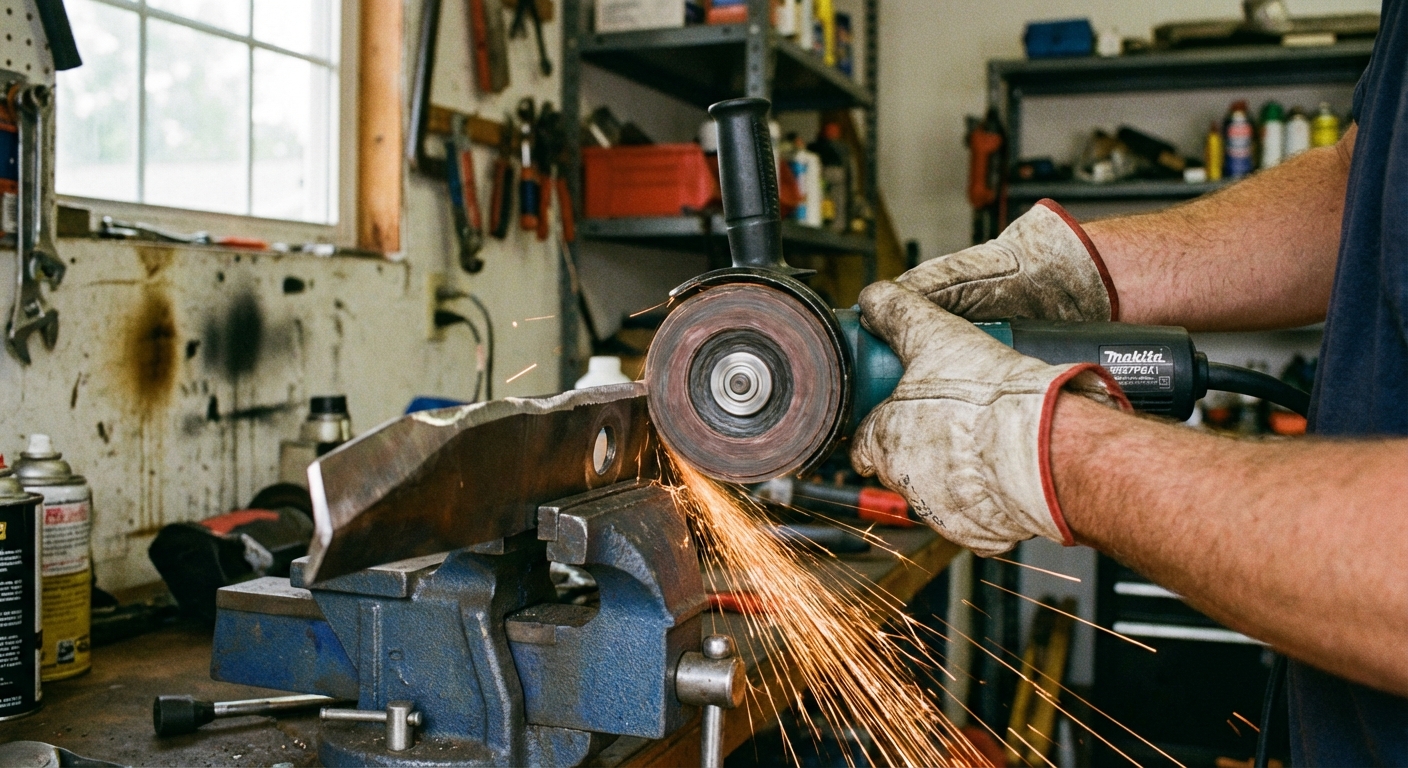
- Use a flap disc or grinding disc meant for metal.
- Secure the blade firmly. A moving blade is how accidents happen.
- Follow the bevel with smooth passes from inside to outside.
- Keep the grinder moving to avoid heat buildup.
- Repeat on the other end, trying to remove a similar amount of metal.
How sharp is sharp enough?
- The edge should look even and clean, with no big chips.
- It should feel crisp to the touch (carefully), but not razor sharp.
- If you can see a thin bright line reflecting along the very edge, that usually means the edge is still flat or rolled and needs a little more work.
Step 4: Balance the blade
Balancing is what separates “I sharpened it” from “my mower now shakes like a paint mixer.” An unbalanced blade can cause vibration, uneven cuts, extra bearing wear, and in extreme cases can damage the mower.
Option 1: Blade balancer
Set the blade on the balancer cone through the center hole. If one end drops, that end is heavier.
Remove a small amount of metal from the heavier end only, then test again. I usually take a couple light file strokes at a time.
Option 2: Nail method
Hammer a nail into a wall stud or a sturdy post and hang the blade by the center hole. If one side consistently swings down, it is heavier.
Rule: Always remove metal from the heavy side. Never “fix” balance by over-sharpening the light side.
Step 5: Reinstall the blade
1) Install it the right way up
Your mark from removal helps here. Generally, the lift wings (the raised back edges) face up toward the deck, and the sharp cutting edges face the direction of rotation. If you are unsure, check the manual or your “before” photo.
2) Reinstall washers and adapters
Put everything back in the same order. These parts help center the blade and keep it from slipping.
3) Tighten the bolt properly
Use a torque wrench if you have one and follow your mower’s spec. Many walk-behind mowers land somewhere around 35 to 60 ft-lb, but it varies, so treat that as a ballpark and trust the manual. If you do not have a torque wrench, tighten it firmly with a standard-length ratchet, not a cheater pipe. Too loose is dangerous. Too tight can strip threads or make the next removal miserable.
4) Final check and test run
Remove any wood blocks and tools, set the mower back upright, and make sure nothing is left under the deck. Reconnect the spark plug wire, reinstall the battery and key, or plug the mower back in. Then do a brief test run and listen for unusual vibration before you mow the whole yard.
Quick troubleshooting
It vibrates after sharpening
- Recheck blade balance.
- Make sure the blade is seated correctly on the adapter.
- Inspect for a bent blade or damaged spindle if vibration is severe.
The cut still looks ragged
- Confirm the blade is installed right-side up.
- Check mowing height. Cutting off more than one-third of the grass height stresses the lawn.
- Slow down. Mowing too fast can tear grass even with a sharp blade.
I hit a rock and a chunk is missing
If you would need to grind a lot of metal to “make it even,” replace the blade. Blades are cheaper than mower repairs and a whole lot cheaper than an injury.
My seasonal routine
If you want a no-fuss plan you can actually stick with, this is mine:
- Early spring: Sharpen and balance before the first real mow.
- Mid-season: Touch-up with a file or quick grinder pass if cuts start looking frayed.
- Late fall: Sharpen again before storage, clean the deck, and you are ready for next year.
It is one of those chores that feels small until you see the lawn respond. Cleaner stripes, less browning, and a mower that sounds happier doing its job.
FAQ
Should I sharpen both ends?
Yes. Most walk-behind and riding mower blades have two cutting ends, and they should be sharpened evenly to maintain balance.
Can I sharpen without removing it?
Some people do, but I do not recommend it for beginners. Removal makes it easier to sharpen evenly, inspect for cracks, and balance the blade properly.
Do I need to remove nicks completely?
Small nicks are fine if the edge is mostly even. If you chase every tiny ding, you remove extra metal and shorten blade life. Deep chips are a replacement call more often than a sharpening call.
Is sharper always better?
No. Mower blades do not need to be razor sharp. What you want is a consistent, clean edge that slices grass without tearing, and a balanced blade that runs smooth.
About Marcus Vance
Content Creator @ Grit & Home
Marcus Vance is a lifelong DIY enthusiast and self-taught home renovator who has spent the last decade transforming a dilapidated 1970s ranch into his family's dream home. He specializes in budget-friendly carpentry, room-by-room renovations, and demystifying power tools for beginners. Through his writing, Marcus shares practical tutorials and hard-learned lessons to help homeowners tackle their own projects with confidence.