Basement water problems feel personal. One minute you're carrying laundry downstairs, the next you're staring at a dark damp line on the wall thinking, “How long has that been there?” I've been there. When I bought our 1970s ranch, the basement was the unofficial storage room for everything we didn't want to deal with. It also happened to be where water showed up first.
The good news is you can usually solve basement moisture without a full excavation or a massive budget. The key is doing it in the right order: identify the source, fix exterior water management, then choose interior waterproofing methods that match the problem. This page walks you through that process like a patient neighbor, step by step.
Start here: what waterproofing means
Most basements aren't truly “waterproof” in the way a cooler is waterproof. Concrete is porous, block walls have mortar joints, and every penetration is a potential leak. Basement waterproofing is really a layered system that does two jobs:
- Keep water from reaching your foundation (grading, gutters, exterior drainage).
- Handle water that still makes it to the foundation (interior drains, sump pumps, vapor control).
If a contractor promises a single product that fixes every wet basement, be skeptical. The right fix depends on why the water is there.
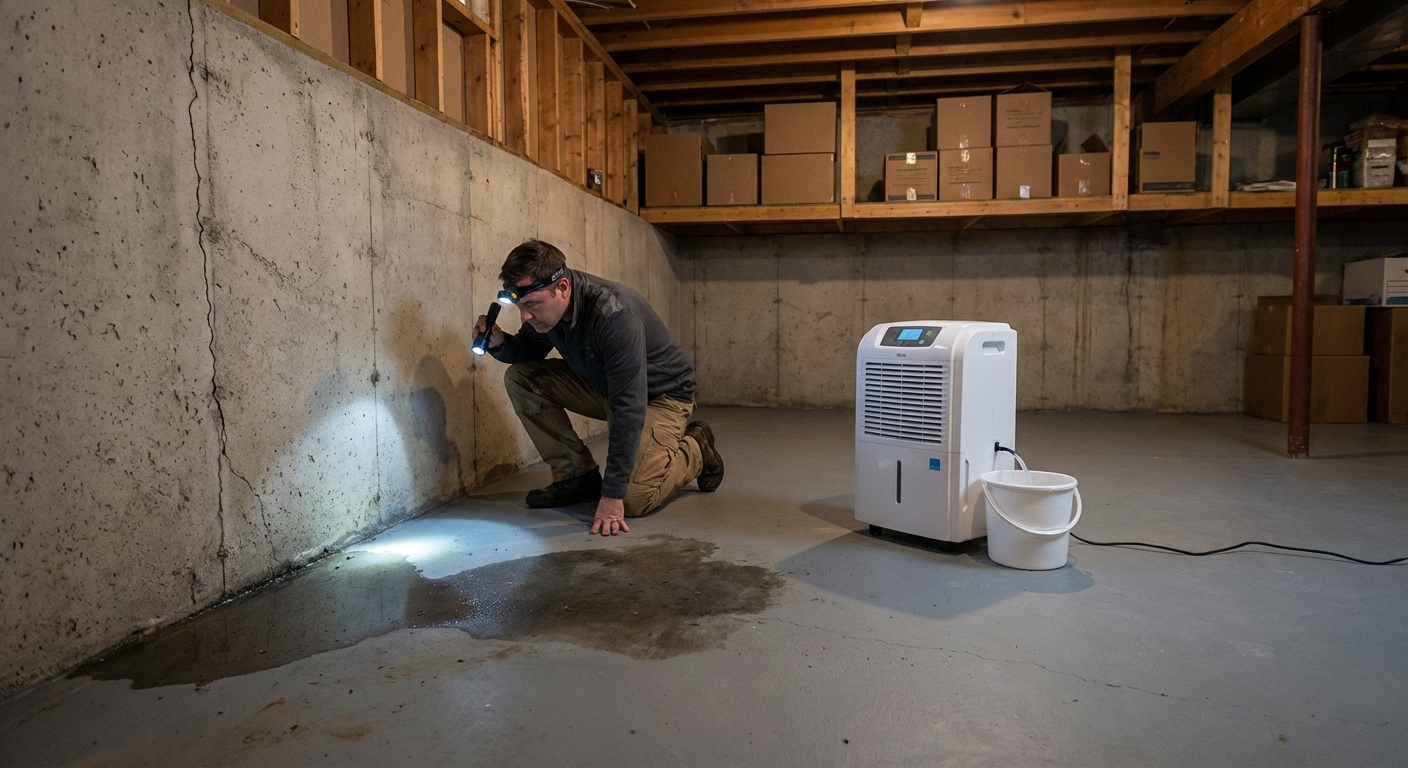
Find the water source first
I know it's tempting to grab a bucket of “waterproof paint” and hope for the best. But coatings often fail if the issue is hydrostatic pressure or active seepage. Negative-side coatings can help with dampness and moisture vapor, but they're unreliable when water is actively pushing in. Spend one evening diagnosing. It can save you weeks.
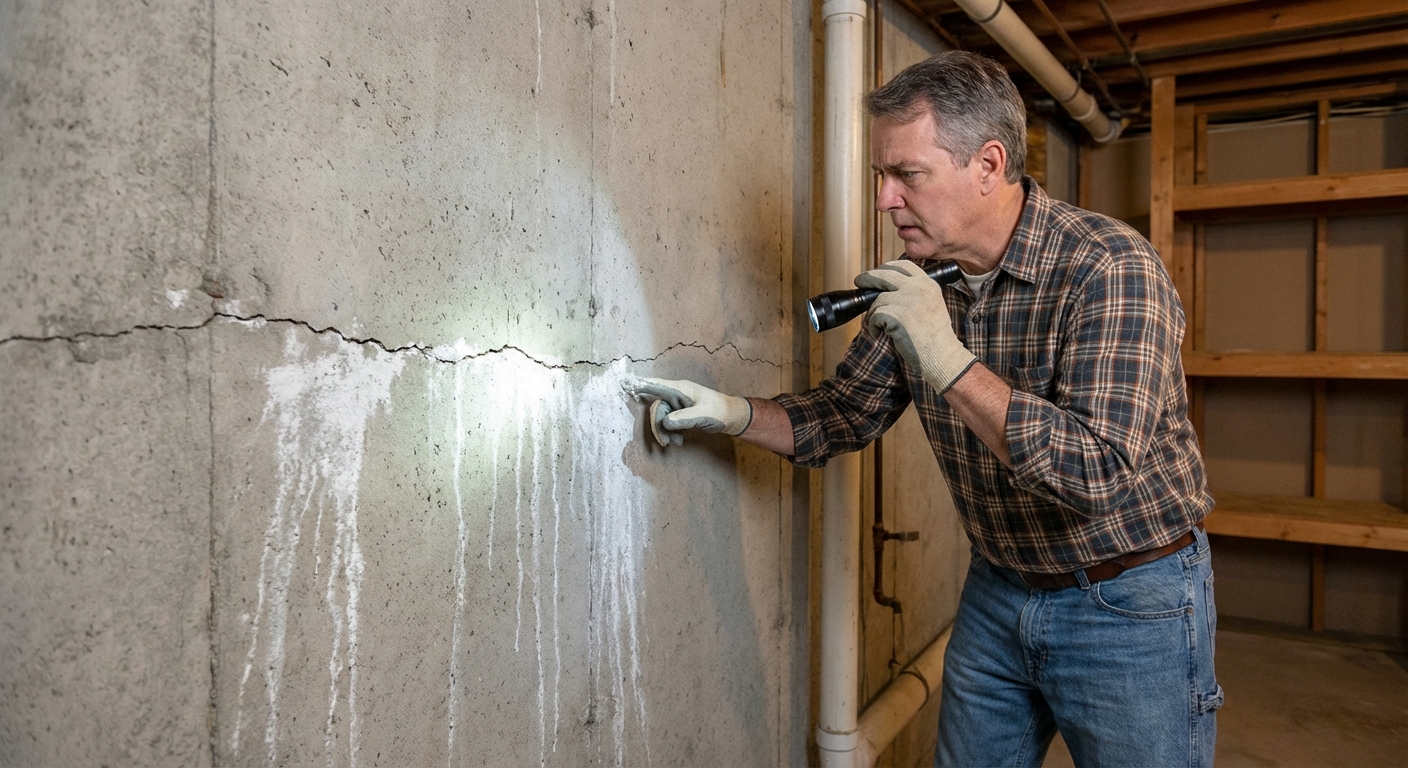
1) Cracks and gaps
Water often enters through:
- Shrinkage cracks in poured concrete (usually thin and vertical).
- Cold joints where the wall meets the slab.
- Penetrations for plumbing, hose bibs, radon pipes, HVAC lines.
Clue: You see a clear path, like a crack with white mineral streaks (efflorescence) or a wet “track” during rain.
2) Hydrostatic pressure
When the soil around your foundation is saturated, water pushes against the wall and slab. That pressure finds weak points and can even force moisture right through concrete.
Clues:
- Water shows up after heavy rain or snow melt, especially along the wall-to-floor edge.
- Dampness is widespread, not just one crack.
- You have a high water table, poor exterior drainage, or downspouts dumping near the house.
3) Condensation
Sometimes the “wet basement” is actually humid air condensing on cool surfaces like ducts, pipes, and uninsulated walls.
Clues:
- Moisture is on the surface, not coming from a crack.
- You notice musty smells in summer, with little or no rain correlation.
- Water droplets form on metal ducts or cold water lines.
Quick DIY tests
- Chalk line test: Dry the area as best you can, then draw a chalk line that crosses the suspected entry point (for example, across a crack, or along the wall-to-floor seam). Check after the next rain. If moisture consistently appears starting at one side of the line, you're closer to a true entry path instead of random surface dampness.
- Plastic square test: Tape a 2 ft by 2 ft sheet of plastic to a bare wall or floor (seal all four edges). If moisture forms behind the plastic, you're likely dealing with moisture coming through the concrete. If moisture forms on the room side, it's more likely condensation. It's not definitive, so repeat it in a couple spots and treat it as a clue, not a verdict.
- Rain log: Note rain dates and when the basement gets wet. Patterns matter.
Exterior water management first
Even if you're planning an interior drain, don't skip the basics outside. Reducing water at the foundation means fewer leaks, less humidity, and less work for whatever system you install later.
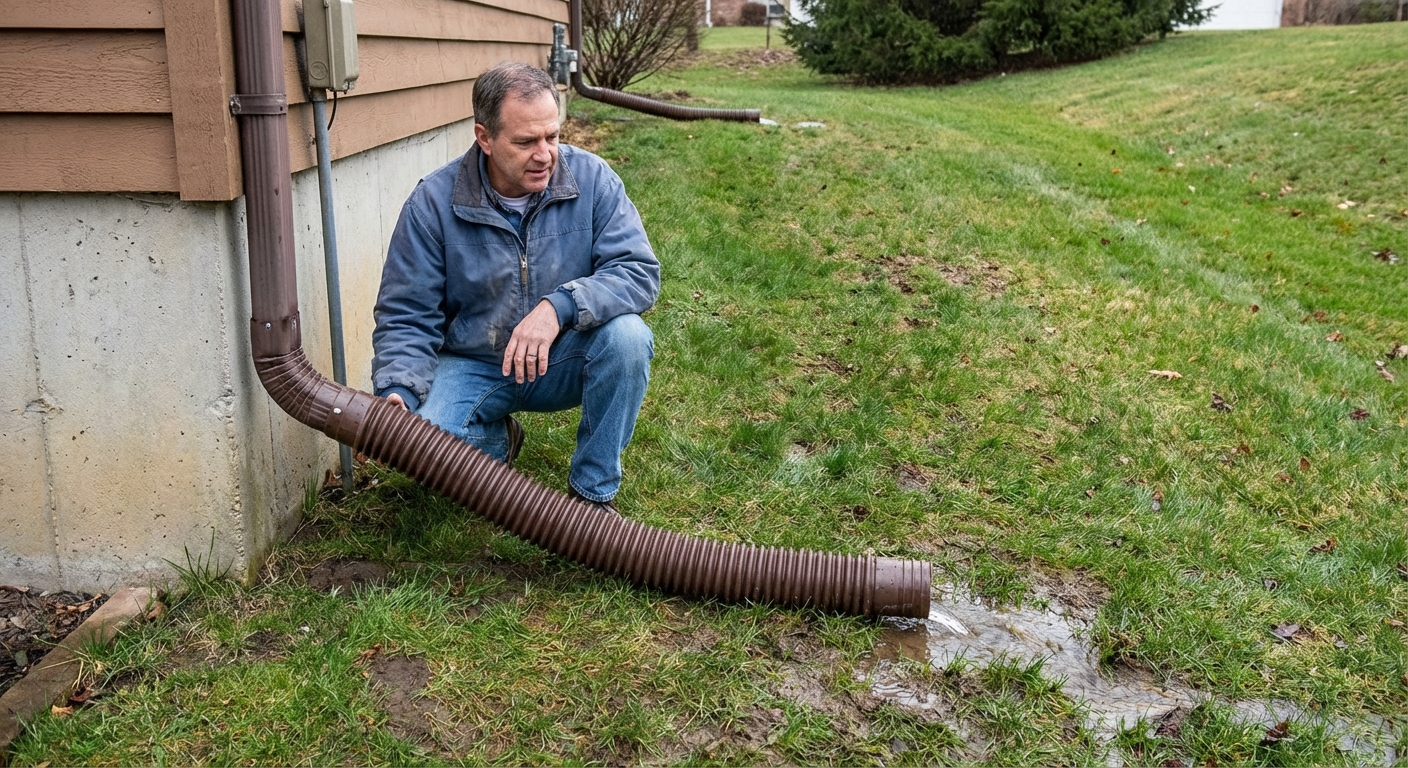
Gutters and downspouts
- Clean gutters so water doesn't overflow at the foundation line.
- Make sure downspouts discharge well away from the home. A common target is 6 to 10 feet, and more is often better, or pipe it to daylight or an approved storm system where allowed.
- Confirm splash blocks or buried drain lines actually carry water away, not into a clogged spot.
Grading and runoff
- The ground should slope away from the house. A common target is about 6 inches of drop over the first 10 feet (about a 5 percent slope), where practical.
- Fill low spots that collect water near the foundation.
- Keep mulch and flower beds from building up above the siding or top of foundation.
Window wells and stairwells
Basement window wells are notorious. If they fill up, the water will look for a way inside.
- Confirm the well has drainage (gravel base and a drain tied into proper drainage, if applicable).
- Add a clear cover if your well routinely fills during storms.
- Don't pile soil or mulch into the well.
Yard drainage (a good middle step)
If your yard naturally funnels water toward the house, you can sometimes avoid bigger work by redirecting it. A shallow swale, a small catch basin tied to a drain line, or improving a low spot can take a surprising load off the foundation.
Interior waterproofing options
Interior methods are about managing water once it's at the foundation. Think “control and redirect,” not magic barriers. Here are the big five, in the order I typically evaluate them.
1) Crack repair and seam sealing
If you've got a specific leak path, fix that first.
- Epoxy or polyurethane crack injection: Best for poured concrete cracks. Polyurethane is commonly used for active leaks because it can remain slightly flexible.
- Hydraulic cement: Useful for patching small holes or mortar joint gaps, but it's not a full-system solution for pressure issues.
- Seal penetrations: Use an appropriate sealant around pipe penetrations. If there's movement, choose a flexible sealant designed for concrete and masonry.
My honest lesson learned: I once “fixed” a leak with masonry coating only. It looked great until the next big storm, when the water simply found the next easiest spot. Cracks and seams are worth addressing, but recurring seepage usually needs drainage.
2) Interior coatings
Interior coatings can reduce moisture vapor and minor dampness, but they're not a dependable fix for active seepage or water pressure. If you choose to use them:
- Prep matters more than the product. Remove efflorescence and loose material so the coating can bond.
- Use coatings intended for masonry and follow cure times strictly.
- Don't trap wet walls. If water is actively moving through, coatings can blister or peel.
Best use: After you've improved exterior drainage and fixed obvious leaks, coatings can be a finishing layer to reduce damp smell and moisture migration.
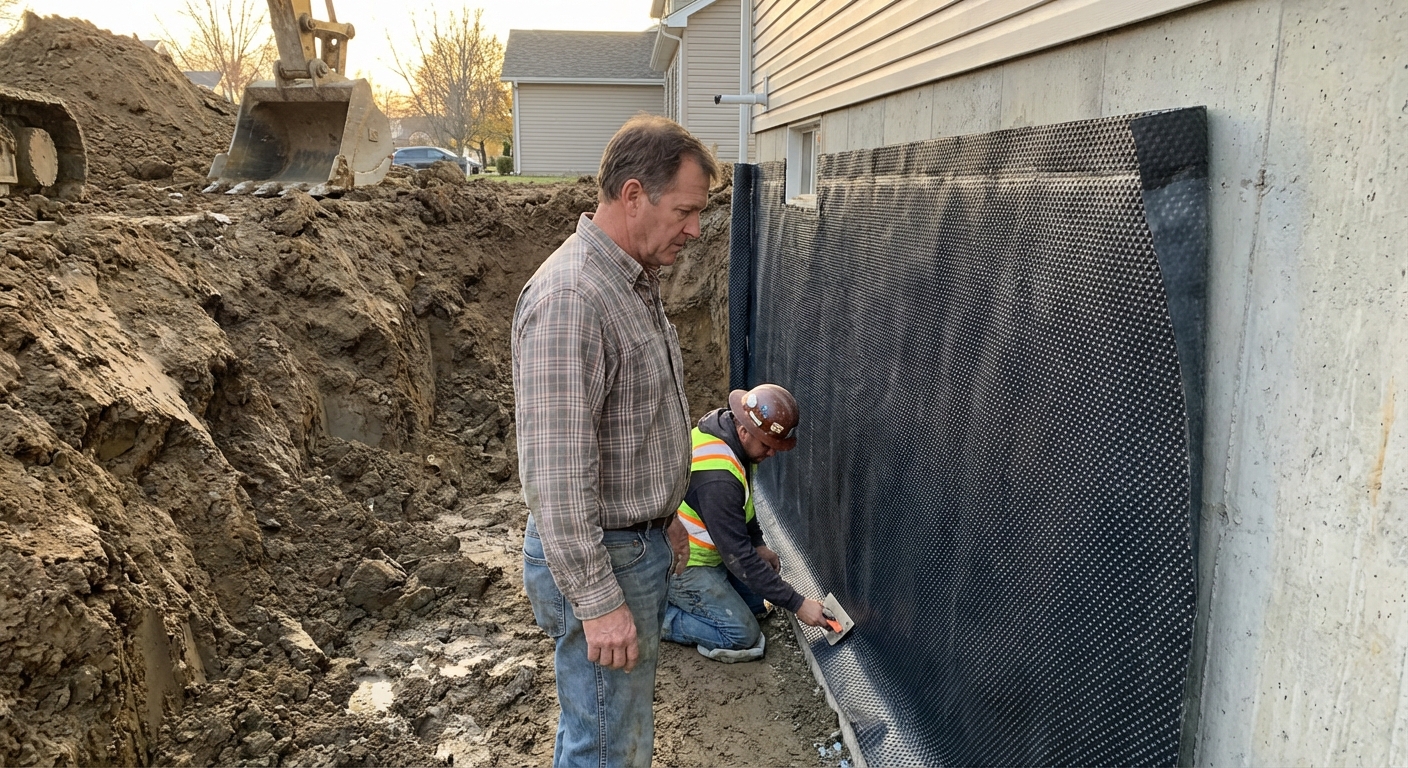
3) Drainage matting on walls
Drainage matting (dimpled membrane) creates an air gap and a pathway for moisture to travel down into a drain system instead of pushing into your finished wall materials.
- Often used with interior perimeter drains.
- Helps protect finished basement builds by keeping framing and insulation away from wet concrete.
- Works best when you give the water a destination, like a perimeter drain and sump.
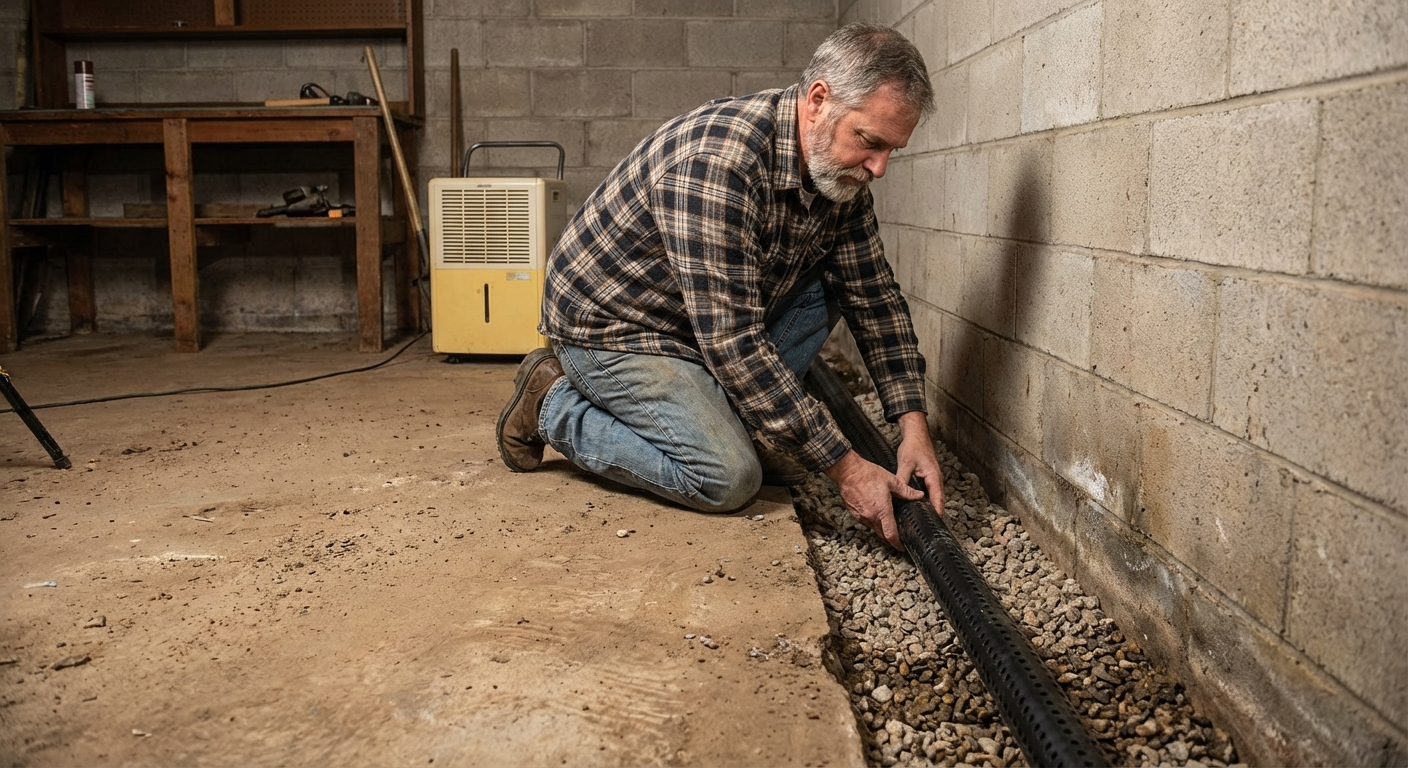
4) Interior perimeter drains
If water is coming in at the cove joint (where the floor meets the wall) or you see widespread seepage, an interior perimeter drain is one of the most reliable options. The concept is simple: you collect water at the edge and under the slab and move it to a sump before it spreads across the floor. This doesn't “eliminate” outside pressure on the wall the way true exterior drainage can, but it can dramatically reduce seepage at the joint and keep the space usable.
Most systems involve:
- Cutting and removing a strip of concrete along the basement perimeter.
- Installing perforated drain pipe in gravel (or a proprietary channel system).
- Connecting that drain to a sump basin.
- Re-pouring concrete over the trench.
Why it works: It doesn't need to stop water from reaching the wall. It just needs to collect it and move it away before it becomes a floor problem.
5) Sump pump reliability upgrades
A sump pump is only as good as its setup. If your basement relies on a sump, upgrading it can be the difference between “we had a storm” and “we replaced carpet.” Consider these upgrades:
- Battery backup sump pump: Keeps pumping during power outages, which often happen during big storms.
- Secondary pump: A second pump set slightly higher can kick in if the primary fails or can't keep up.
- Proper check valve: Prevents water from draining back into the pit after each cycle.
- Discharge routing and freeze protection: Make sure the discharge sends water far from the home and is protected from freezing in cold climates. Also, don't route sump discharge into a sanitary sewer unless your local code explicitly allows it (it's often illegal).
- Sealed sump lid: Reduces humidity, radon entry, and that “swampy” basement smell.
If you want a deep dive on testing and basic upkeep, see our sump pump maintenance content. Waterproofing is about the strategy and system, not just checking if it turns on.
Exterior waterproofing overview
Exterior waterproofing is the most disruptive and often the most expensive option, but it can be the right call when:
- You have persistent water intrusion despite good gutters, grading, and a strong interior system.
- The foundation wall has significant cracking or deterioration from outside pressure.
- You're already excavating for another reason (foundation repair, addition, major landscaping redo).
Exterior solutions typically include:
- Excavation to the footing to expose the foundation wall.
- Waterproof membrane applied to the exterior wall, sometimes paired with a protection board.
- Exterior footing drain (drain tile) in gravel wrapped with filter fabric, routed to daylight or a sump.
- Backfill with proper material and restore grading to move water away.
My budget-minded take: If you can solve the problem with exterior water management plus an interior drain and good humidity control, that's usually the best value. Save full excavation for cases where the outside needs structural attention or water volume is extreme.
After water: dry out and prevent mold
Stopping the leak is step one. Step two is making sure the basement doesn't become a mold farm. Mold is less about one wet day and more about materials staying damp.
Safety first
If there's standing water, treat the area like an electrical hazard. If you can do it safely, shut off power to the basement or affected circuits before you start cleanup. If you're not sure, call an electrician.
Dry-out checklist (first 24 to 72 hours)
- Remove wet porous materials (cardboard, carpet padding, damaged drywall, insulation) quickly if they can't be fully dried.
- Move air with box fans aimed across wet surfaces, not straight at one spot.
- Dehumidify hard. Set a dehumidifier to 45 to 50 percent relative humidity and keep it running.
- Heat helps. Slightly warmer air holds more moisture, which helps dehumidifiers work.
- Check hidden areas like behind baseboards, under laminate, and inside wall cavities near the leak.
Clean-up basics
For small, clean-water events (like seepage after rain), cleaning non-porous surfaces with a household cleaner and drying thoroughly is often enough. Wear gloves and eye protection if you're dealing with unknown grime or anything musty. If water contacted sewage, or if the water sat for a long time, treat it as contaminated and consider professional remediation.
Long-term mold prevention
- Control humidity: Keep basement RH ideally under 50 percent.
- Insulate cold surfaces: Wrap cold water pipes to reduce condensation.
- Use basement-friendly materials: Foam board insulation, metal studs in problem areas, mold-resistant drywall where appropriate, and flooring that tolerates moisture.
- Keep storage off the floor: Shelving or pallets make a big difference.
If you're finishing the basement
A finished basement needs a plan for air sealing and vapor control, not just “drywall and hope.” Your insulation approach depends on your climate and wall type, but the big idea is consistent: keep interior air from reaching cold concrete surfaces where it can condense, and keep moisture-tolerant materials against foundation walls.

Quick decision guide
If you see one or two clear leaks
- Start with crack injection or targeted sealing.
- Improve gutters and downspout discharge.
- Add a dehumidifier if humidity is high.
If water shows up at the wall-to-floor edge
- Expect hydrostatic pressure to be part of the story.
- Consider an interior perimeter drain tied to a reliable sump system.
- Use drainage matting if you plan to finish the basement.
If it's musty and wet in summer without rain
- Focus on condensation control: dehumidification, air sealing, insulating cold surfaces.
- Check dryer vents, bath fans, and HVAC supply and return balance.
If your sump runs constantly or you get repeated flooding
- Upgrade sump capacity, add battery backup, and verify discharge routing.
- Talk to a pro about water table conditions and whether exterior drainage is needed.
Common mistakes
- Painting first: Coatings often fail when pressure is the real issue.
- Ignoring gutters: The cheapest fix gets skipped the most.
- Finishing too soon: If you don't have a dry baseline, new drywall becomes a sponge.
- Dumping sump water next to the house: That water often cycles right back to the foundation.
- Storing stuff on the slab: Even a small seepage event becomes a ruined-box event.
When to call a pro
DIY is powerful, but some situations deserve expert eyes:
- Foundation cracks that are wide, growing, or stair-stepped in block walls.
- Walls that bow, shift, or show significant movement.
- Flooding that involves sewage or contaminated water.
- Persistent water that doesn't respond to drainage and sump improvements.
If you bring someone in, ask about their diagnosis process. The best pros will talk about water management outside and drainage inside, not just one product.
A weekend plan
- Document it: photos, rain timing, where water appears first.
- Handle the exterior basics: gutters, downspout extensions, grading touch-ups.
- Control humidity: run a dehumidifier and address obvious condensation points.
- Seal obvious entry points: cracks and penetrations.
- Decide on drainage: if seepage persists, plan an interior perimeter drain and sump upgrades.
Basement waterproofing isn't glamorous. But it's one of the highest return projects you can do, because a dry basement unlocks everything else: finishing, storage, indoor air quality, and peace of mind.
About Marcus Vance
Content Creator @ Grit & Home
Marcus Vance is a lifelong DIY enthusiast and self-taught home renovator who has spent the last decade transforming a dilapidated 1970s ranch into his family's dream home. He specializes in budget-friendly carpentry, room-by-room renovations, and demystifying power tools for beginners. Through his writing, Marcus shares practical tutorials and hard-learned lessons to help homeowners tackle their own projects with confidence.