🚨 In a DIY emergency or rush?
Skip the details and jump straight to our 30-second cheat sheet for the most crucial info.
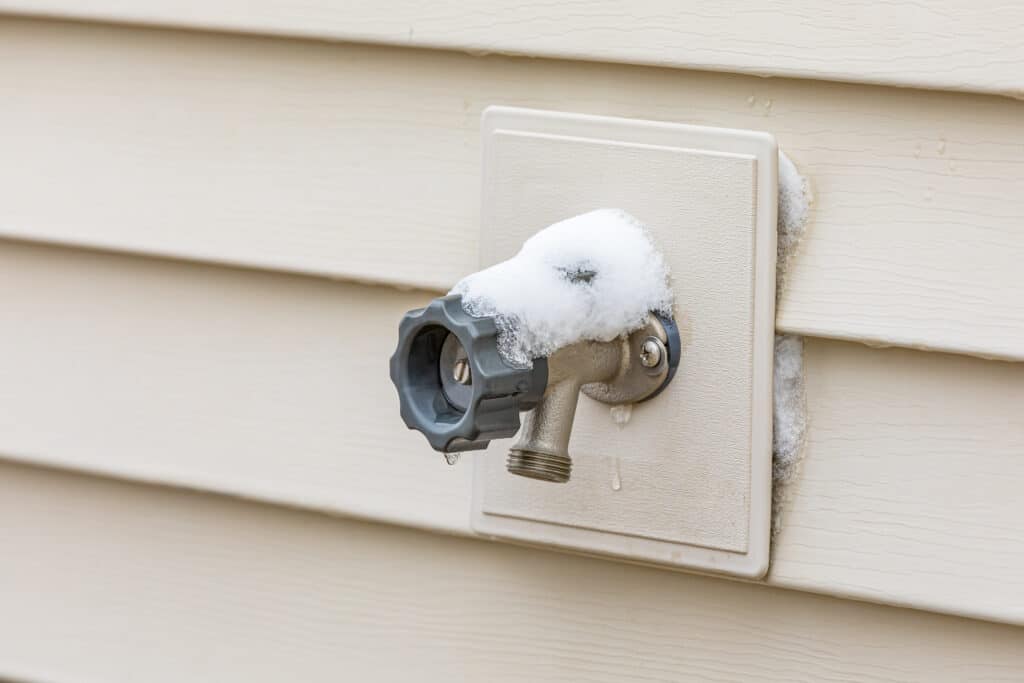
If you have ever walked outside on the first warmish day of spring, turned on the hose bib, and heard that sickening hiss of water where it should not be, you already know the stakes. A frozen outdoor faucet can crack the faucet body, split the pipe inside the wall, or both. The good news is winterizing is mostly a simple routine: shut off, drain, and protect.
Below is the approach I use every fall at our 1970s ranch. It is organized, beginner-friendly, and focused on the stuff that actually prevents freeze damage, not just making things look “covered.”
What you are protecting and why freezing causes damage
When water freezes, it expands. In a trapped section of pipe, that expansion creates pressure that can split copper, CPVC, PEX, fittings, and even the faucet body itself. The split often happens behind the wall where you cannot see it, so the first clue is frequently a leak inside when you turn water back on in spring.
Your goal is to remove as much water as possible from the faucet and the short run of pipe feeding it, then reduce how quickly that area loses heat.
Tools and supplies
- Adjustable wrench or channel-lock pliers (for stubborn caps or fittings)
- Flathead screwdriver (for some shutoff valve handles or access panels)
- Bucket or small pan
- Old towel or rag
- Foam hose bib cover (the dome style) or insulated wrap kit
- Zip ties or Velcro straps (helpful if wind knocks covers loose)
- Optional: air compressor with blowout adapter (only for isolated lines, and only at low pressure)
What not to rely on: a “cover” alone, with the hose still attached, and the line still full of water. That is how faucets freeze in perfectly nice-looking foam domes.
Quick compressor safety note: blowing out a typical hose bib branch is not always necessary, and too much pressure can damage old valves or fittings. If you use air, keep it low pressure and do it only after the branch is shut off and can drain. If you are unsure, skip it and focus on shutoff, drainage, and insulation.
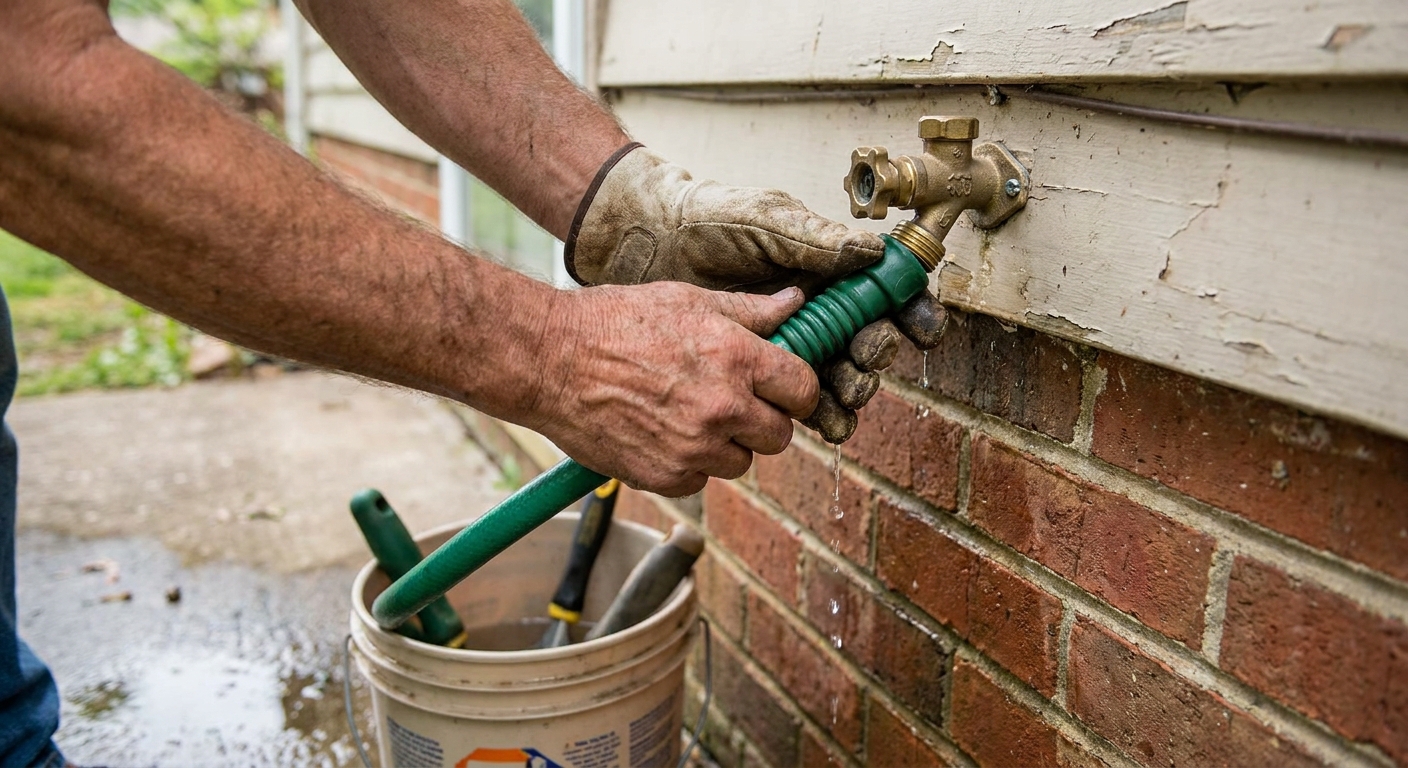
Step 1: Disconnect everything outside
Before you do anything inside, go outside and remove anything that traps water at the faucet.
- Disconnect hoses.
- Remove temporary add-ons like splitters, Y-adapters, timers, quick-connects, and pressure washer fittings.
- Leave permanently installed anti-siphon/vacuum breakers in place (many are lock-on for code compliance). Just make sure the hose is removed so the faucet can drain.
- Drain and store hoses so they do not split.
Why this matters: if a hose or attachment is left on, the faucet cannot drain properly. That trapped water is a top cause of freeze damage.
Step 2: Identify your setup
Outdoor faucets are usually one of three setups. If you are not sure which you have, go inside and look for a small shutoff valve on the pipe heading toward the exterior wall near the faucet location. No nearby valve usually means you are on a whole-house-only setup, or the valve is hidden behind an access panel.
Scenario A: Dedicated indoor shutoff
This is the best case. Often it is a small ball valve on a line in the basement, crawlspace, or utility room. Sometimes there is a little access panel near the faucet inside.
Look for: a valve on the pipe that leads toward the exterior wall near the faucet location. Some homes have separate shutoffs for the front and back faucets, so check both sides of the house.
Pro habit: once you find them, label them. Future-you will thank you.
Scenario B: Whole-house shutoff only
You can still reduce freeze risk, but here is the key limitation: without a dedicated shutoff that isolates the hose bib branch , you cannot drain it and then turn the house water back on and expect it to stay drained. The moment you restore water, that outdoor line refills and becomes pressurized again.
In mild climates, people often get by with insulated covers and good habits. In colder climates, adding a dedicated shutoff with a small bleeder is a very worthwhile upgrade.
Scenario C: Frost-free sillcock
A frost-free faucet is designed so the shutoff point (the seat) is deeper inside the warm side of the wall, not at the handle outside. It is still not magic. It must be able to drain, and the pipe feeding it cannot be sitting in a cold, drafty cavity.
How to spot one: the faucet body is usually longer (often 8 to 14 inches) and the handle sits farther from the wall than an old-school hose bib.
Step 3: Shut off the water
If you have a dedicated shutoff valve, close it fully.
- Ball valve: handle perpendicular to the pipe is OFF.
- Gate or stop valve: turn clockwise until it stops, gently. Do not muscle it.
Marcus note: I have broken an old gate valve handle by over-tightening. “Snug and closed” beats “cranked and cracked.”
Step 4: Drain the line and faucet
Dedicated shutoff with a bleeder or drain
Many dedicated shutoffs have a small bleeder cap or a tiny drain screw on the valve body.
- Put a bucket under the shutoff.
- Turn the outdoor faucet ON (outside).
- Open the indoor bleeder or drain cap slowly. Let water drain until it stops.
- Leave the outdoor faucet open (not closed tight) for the winter, since the branch is isolated.
Dedicated shutoff but no bleeder
You can still drain the faucet pretty well:
- Turn the outdoor faucet ON.
- With the indoor shutoff OFF, let the faucet run until it stops and only drips.
- Once it stops dripping, confirm the indoor shutoff is fully OFF and leave the outdoor faucet open (not closed tight) for the winter since the branch is isolated.
- If the pipe run is long or sags, you may still have water sitting in a low spot. Consider adding a bleeder next season.
Whole-house shutoff only
This is where a lot of winterizing advice gets sloppy, so here is the straight plumbing logic: if there is no valve that isolates the outdoor faucet branch, you cannot drain it for the season and then turn the house back on. Restoring the main water refills and repressurizes that outdoor line immediately. Also, leaving the outdoor faucet “slightly open” in that situation is not winterizing. It is just an ongoing leak.
So what can you do? You have three realistic options, depending on your climate and how risk-tolerant you are.
- Best fix: have a plumber (or a confident DIYer) add a dedicated shutoff and bleeder inside for each outdoor faucet. This turns Scenario B into Scenario A, which is the setup you actually want in freeze country.
- Better than nothing: remove hoses, install a good insulated cover, and reduce drafts inside where the pipe runs. Think rim joist air sealing, pipe insulation in crawlspaces, and keeping garage walls warmer if the line runs there.
- Deep-freeze workaround: when temperatures are expected to stay well below freezing, some homeowners let the outdoor faucet drip slightly to keep water moving. This is common in hard-freeze events, but it wastes water and is not as reliable as proper isolation and drainage. If you do it, do it only during the cold snap and keep an eye on where that water is going so it does not create an ice rink.
Tip: If you are in a hard-freeze area and you only have a whole-house shutoff, the “right” answer is usually the upgrade. Covers help, but they are a backup layer, not a shutoff valve.
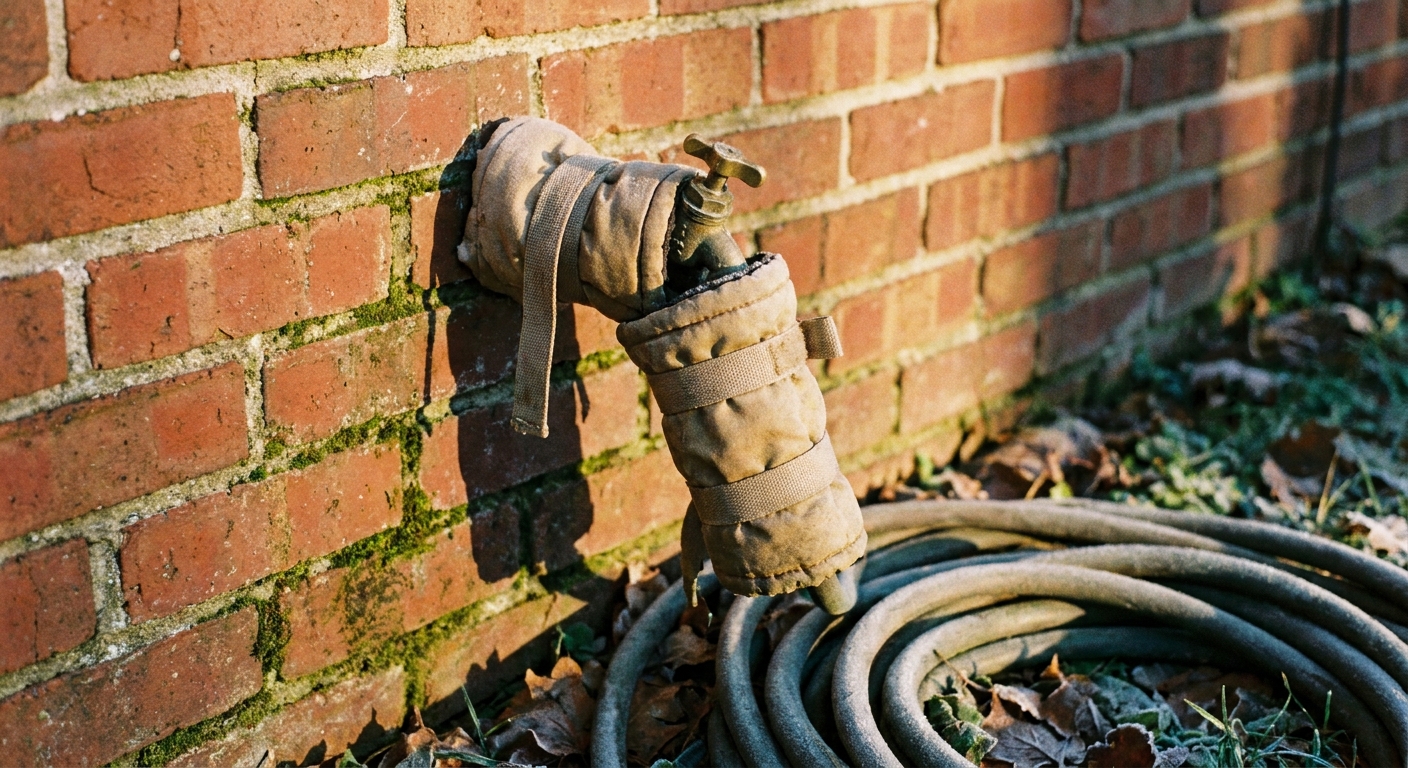
Step 5: Add an insulated cover
Once the line is shut off and drained, the cover is the extra layer, not the main defense.
Foam dome cover
- Choose a size that fully covers the faucet body and the wall penetration.
- Make sure it sits flat against the siding or brick.
- Tighten the strap so wind cannot pull it off.
Wrap-style insulation
- Wrap the faucet body and the first few inches of exposed pipe.
- Secure it firmly so water and wind do not work their way in.
Do not do this: stuff a rag in a plastic bag and call it good. It can hold moisture against the faucet and does not block wind well.
Frost-free sillcock gotchas
Frost-free faucets are great, but they are not maintenance-free. Here are the common problems.
You left the hose attached
Frost-free sillcocks need to drain after you shut them off. A hose holds water in the barrel and can freeze the internal tube.
The faucet is installed with the wrong pitch
These faucets should be installed with a slight downward slope to the outside so they drain. If the faucet slopes back toward the house, water can sit and freeze. That is a fix-it project, not a cover-it project.
The pipe feeding it is in a cold cavity
If your sillcock is fed by piping in an uninsulated rim joist bay, a vented crawlspace, or a drafty garage wall, the shutoff point inside can still get cold enough to freeze.
What helps: air sealing and insulating the rim joist area, and insulating the supply line. This pairs well with overall freeze-prevention steps, especially if you have had frozen pipes elsewhere.
Common mistakes
- Hose left on: prevents drainage and traps water.
- Cover used without shutting off: a cover cannot save a full, pressurized line in a deep freeze.
- Thinking a whole-house shutoff lets you “drain it for the season”: without a dedicated branch shutoff, the line refills as soon as the house water is back on.
- Forgetting the inside leak check in spring: small splits often show up when you restore water. You want to catch it fast.
- Assuming “frost-free” means “maintenance-free”: it still needs to drain and it still needs a reasonably warm interior.
- Cranking old valves too hard: causes valve failure right when you need it.
Spring startup check
When freezing season is over:
- Go outside and make sure the hose bib is OFF.
- Open the indoor shutoff to the faucet slowly.
- Go inside and inspect the pipe run feeding that faucet for a few minutes. Look and listen for drips.
- Only then, go outside and turn the faucet on.
If you see moisture, shut the valve back off and address it before it becomes a bigger leak.
When to call a plumber
DIY-friendly winterizing is usually straightforward, but I would bring in a pro if:
- You cannot locate a shutoff and you live in a hard-freeze climate.
- Your existing shutoff valve will not close fully or is corroded.
- You only have a whole-house shutoff and want a real winterizing setup. Adding a dedicated shutoff and bleeder is the clean fix.
- You suspect the frost-free sillcock is installed with the wrong pitch.
- You had freeze damage before and want a long-term fix like moving piping out of cold cavities.
Quick checklist
- Remove hose and temporary attachments.
- If you have a dedicated shutoff, close it.
- Open the outdoor faucet.
- If you have an indoor bleeder or drain, open it and let it empty.
- If the branch is isolated, leave the outdoor faucet open (not closed tight) for the season.
- Install a tight, windproof insulated cover.
- If you only have a whole-house shutoff, plan on insulation plus an upgrade if you are in serious freeze territory.
Do those steps once a year and you will avoid most hose bib freeze problems homeowners deal with.
The 30-Second Cheat Sheet
Essential takeaways for: How to Winterize Outdoor Faucets and Hose Bibs
Do this in order
- Disconnect everything outside: hose, splitter, timer, quick-connect, anything threaded on and removable. Leave any permanently installed anti-siphon/vacuum breaker in place (many are code-required); just make sure the hose is off so it can drain.
- Shut off the supply: use the dedicated indoor shutoff if you have one (best). If not, consider adding one.
- Drain it: open the outdoor faucet, then open the indoor bleeder or drain cap at the shutoff and let water empty into a bucket.
- Leave it able to expand: after draining and isolating, leave the outdoor faucet open (not closed tight) for the winter so any leftover water is not trapped.
- Cover it: install a foam dome cover or wrap insulation snugly so wind cannot pull it off.
Frost-free sillcock rules
- No hose attached, ever, in freezing weather. A frost-free faucet must drain to work.
- Cover is still fine, but drainage is the main protection.
- If it freezes anyway, suspect backward pitch or a cold interior cavity feeding the faucet.
Top mistakes
- Leaving the hose on.
- Relying on a cover without shutting off and draining when you have a dedicated shutoff.
- Assuming you can “drain it for the season” with only a whole-house shutoff.
- Skipping the spring leak check inside before using the faucet.
Spring restart
Close the outdoor faucet, open the indoor shutoff slowly, and watch the interior pipe for leaks for a few minutes before you use the spigot.
💡 Tip: Scroll up to read the full article for detailed, step-by-step instructions.
⬆️ Back to topAbout Marcus Vance
Content Creator @ Grit & Home
Marcus Vance is a lifelong DIY enthusiast and self-taught home renovator who has spent the last decade transforming a dilapidated 1970s ranch into his family's dream home. He specializes in budget-friendly carpentry, room-by-room renovations, and demystifying power tools for beginners. Through his writing, Marcus shares practical tutorials and hard-learned lessons to help homeowners tackle their own projects with confidence.