
🚨 In a DIY emergency or rush?
Skip the details and jump straight to our 30-second cheat sheet for the most crucial info.
If you have in-ground sprinklers, winterizing is not optional in freezing weather. One cold snap with water trapped in a lateral line or manifold can turn spring start-up into a treasure hunt of cracked PVC, split fittings, and soggy spots in the yard.
I have learned this the hard way. The first year at our 1970s ranch, I figured, “I drained what I could, we are probably fine.” We were not fine. Come April, one zone would not stop running, the valve box looked like a miniature swimming pool, and the manifold had a hairline crack that only showed itself under pressure.
This guide covers the two main methods, how to choose based on your climate and setup, and the exact shutdown order so you can put the system to bed with confidence.
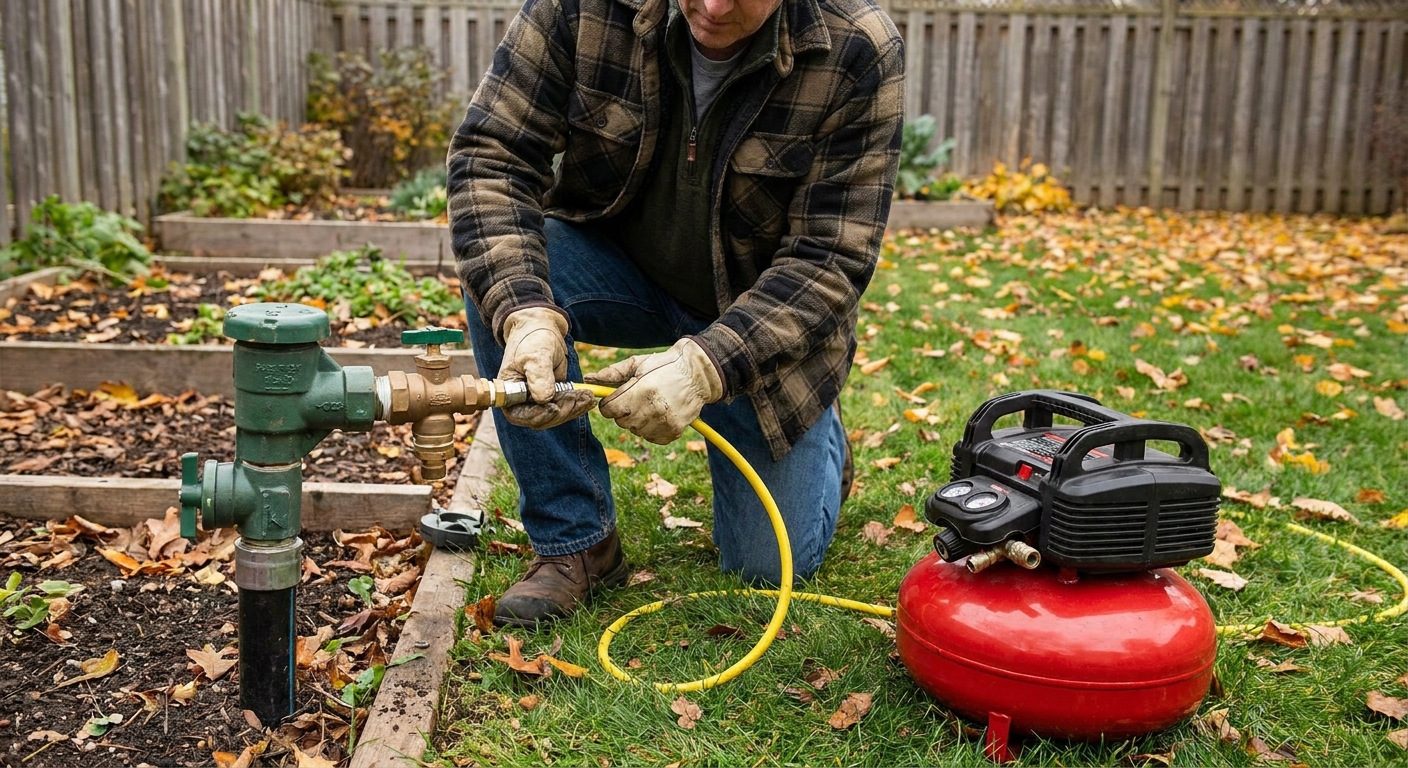
Before you start
Winterizing is about removing water from places it can freeze. When water freezes, it expands. That expansion is what cracks pipes, splits valve bodies, and pops fittings apart. The goal is not perfection, it is risk reduction. You want lines as dry as practical and you want the system off so it cannot refill accidentally.
Parts that matter most
- Backflow preventer above ground: usually the most freeze-prone piece.
- Manifold and valves in the valve box: cracks here are common and annoying.
- Lateral lines from valves to heads: these trap water in low spots.
- Sprinkler heads: usually safe if lines are cleared, but they can crack if water sits right at the top.
- Mainline from shutoff to backflow: depends on depth, insulation, and whether it self-drains.
When to winterize
Do it after your last real watering of the season and before the first hard freeze, not after. Once the forecast starts flirting with overnight freezes, you want to be in “shutdown mode,” especially if your backflow is above ground.
Climate rules of thumb help, but they are not the whole story. Burial depth, wind exposure, shaded side yards, and microclimates can make one house freeze while the neighbor stays fine. Local requirements and how your system was installed matter more than a single temperature.
Blowout vs manual drain
There are two approaches: manual draining and blowout with compressed air. Many homeowners do a hybrid. The “right” method depends mostly on freeze severity, yard slope, and whether your system was designed with drain valves at low points.
Manual drain
Best for: mild climates where hard freezes are rare or shallow, and systems designed with drain valves at low points.
What it does: you shut off the water and open drains so water can leave the lines by gravity.
Pros: no compressor needed, lower risk of damaging components from air pressure.
Cons: water can remain trapped in sags and low spots, and that is where freeze cracks happen. Also, automatic drain valves can clog or only partially drain. Do not assume they did their job just because they exist.
Blowout
Best for: climates that see freezing temps for sustained periods, and for yards with lots of elevation changes where lines hold water.
What it does: you shut off the water, then use compressed air to push water out of each zone through the sprinkler heads.
Pros: typically the most reliable way to clear laterals.
Cons: easy to do wrong if you use too much pressure, the wrong compressor type, or blow air through the backflow device. Blowout reduces freeze risk for valves and manifolds when done correctly, but it can also stress them if you overdo it.
Quick rule of thumb
- Regular freezes: plan on a blowout.
- Occasional light frost only: manual drain may be enough if your system has proper drains and the backflow is drained and protected.
- Long deep-freeze stretches: blowout plus careful backflow draining is the safe play.
If you are unsure, lean toward blowout or hire it out. Repairs cost more than winterization.
Tools and supplies
- Flathead screwdriver (for test cocks and some valves)
- Adjustable wrench or channel-lock pliers
- Shop towels and a small bucket
- Insulating cover or wrap for backflow (if it stays outdoors)
- For blowout: air compressor with sufficient CFM, air hose, the correct blowout adapter fitting, and a regulator
Compressor note (important): Sprinkler winterization is mostly about volume (CFM), not high PSI. A small pancake compressor can work on tiny systems if you are patient, but many systems need more air volume to clear zones effectively.
If you want a practical target, many homeowners have better luck with a “hotdog” or wheelbarrow-style compressor that can deliver roughly 5+ CFM at 40 PSI. That is not a universal requirement, just a helpful benchmark. If you find yourself waiting forever for pressure to rebuild, you are underpowered and you risk leaving water behind.
If you have one, a moisture filter or water separator is a nice bonus. It helps keep excess water out of your airline and fittings. Also avoid running a small compressor continuously until it is screaming hot. Use shorter cycles and let it recover.
Step 1: Shut off the water
First, locate the irrigation shutoff. It might be:
- A dedicated ball valve inside the house or basement
- A valve in a crawlspace
- An in-ground box near the street (curb stop) or near the backflow
Close the irrigation shutoff fully. If your valve is indoors, look for a small drain or bleeder on the irrigation line. If you have one, open it to drain the pipe segment between the house shutoff and the exterior piping.
Also check the above-ground section between the house line and the backflow (where applicable). If that section can trap water, drain it per your setup and local practice. This is a common “mystery freeze” spot.
Relieve pressure
After shutting off the water, run one irrigation zone manually for 30 to 60 seconds to relieve pressure. You will get a short burst, then it will fade as pressure drops. This keeps you from getting surprised by a blast of water when you open drains or fittings later.
Step 2: Turn off the controller
Your controller can refill the system if a master valve is present or if someone turns the shutoff back on by mistake. You want it truly off for winter.
How to shut it down
- Set the controller to Off or Rain Mode depending on model.
- If your area loses power in winter, consider switching to Off rather than relying on seasonal adjustment settings.
- For battery-backed units, replace the backup battery if it is old. A dead backup battery often wipes schedules after outages.
What not to do
- Do not just “zero out” runtimes. It is easy to forget in spring.
- Do not unplug a controller that has a pump start relay or special settings unless you know it retains programming.
Step 3: Drain and set the backflow
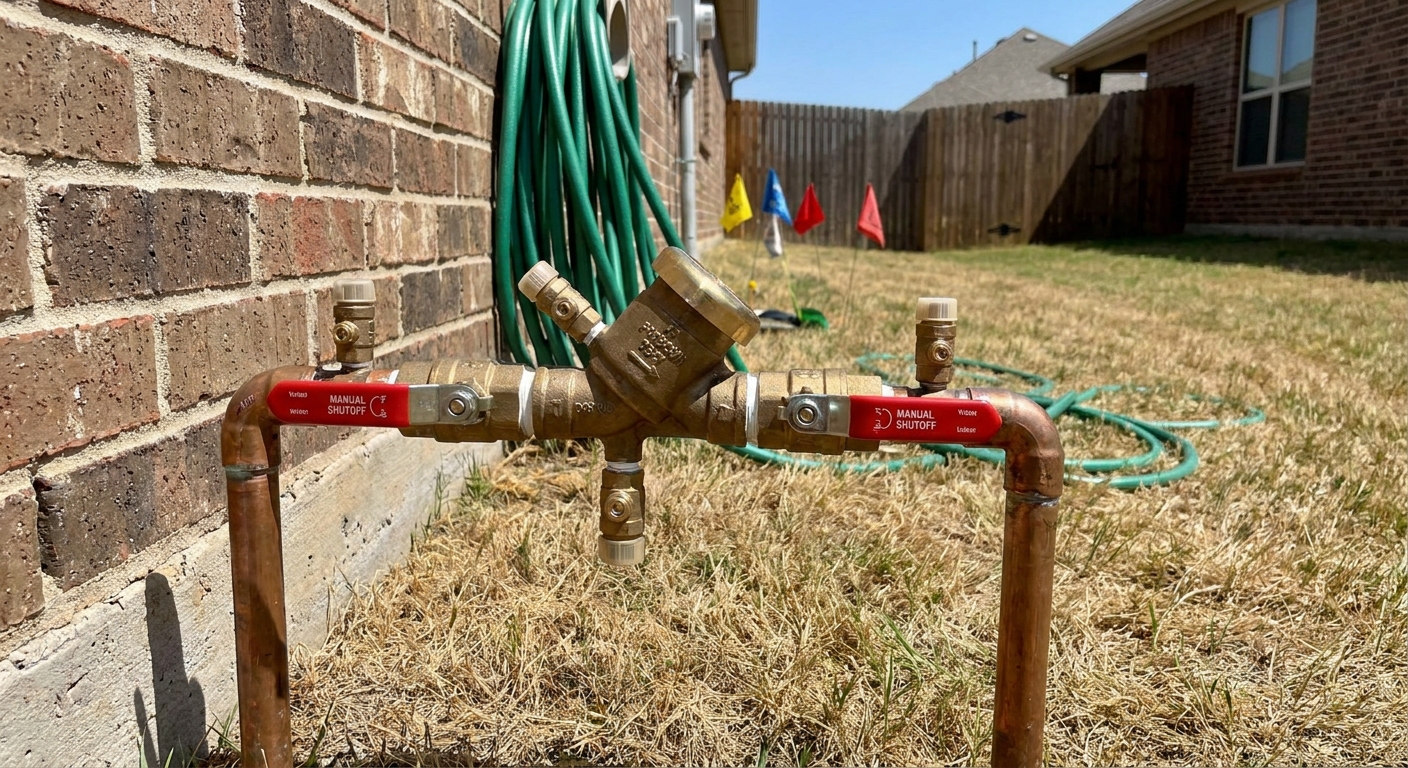
The backflow preventer is often the piece most likely to crack because it is above ground and full of small chambers that trap water.
Common types
- PVB (Pressure Vacuum Breaker): common above ground with a bonnet top.
- DCVA (Double Check Valve Assembly): often above ground, compact, with two check modules.
- RPZ (Reduced Pressure Zone): has a relief valve, often used where required by code.
The exact “winter position” can vary by model, so if you can find the manufacturer instructions, follow them. That said, these steps match what most assemblies want.
Basic steps
- Shut off the irrigation water upstream (done already).
- Close the two shutoff ball valves on the backflow.
- Open the test cocks fully or to the manufacturer-recommended position so trapped water can drain.
- If your assembly has drain plugs, remove them and let it drain. Reinstall loosely if you prefer not to lose parts.
- Set the ball valves to a 45-degree angle for the winter (common recommendation) so trapped water has room to expand and seals are not compressed all season.
Important: Do not push compressed air through the backflow device unless you are trained and know the manufacturer allows it. Many pros connect air downstream of the backflow at a blowout fitting to reduce risk of damage.
Should you insulate it?
If the backflow stays outdoors, insulation helps, but it is not a substitute for draining. Use a purpose-made backflow cover or wrap with insulation and a weather-resistant outer layer. Do not use a plastic bag by itself. It traps moisture and can make freeze damage worse.
Manual drain steps
If your system is set up for manual draining, you will usually have one of these:
- Manual drain valves at low points (you open them by hand)
- Automatic drain valves that open when pressure drops
Steps
Shut off irrigation water (done above).
Open a zone briefly at the controller to relieve pressure.
Open manual drain valves at the lowest points. Let them run until they stop.
Do not assume automatic drains worked. If you rely on them, still spot-check low points and the valve box for standing water.
Open the backflow test cocks and drain plugs as applicable, then set valves to the recommended winter positions.
Open the valve box and inspect for standing water. If it is full of water, pump it out or sponge it out so the valve bodies are not sitting in an ice bath all winter.
Reality check: Manual drain works great when everything slopes correctly and drains are in the right spots. In real yards, you often have bellies in the pipe where water sits. If you have ever had a freeze crack before, switch to blowout or hire a pro.
Blowout steps
This is the method most homeowners mean when they say “winterize the sprinklers.” Done correctly, it clears water out of the laterals and reduces freeze risk.
Safety and setup
- Wear eye protection. Sprinkler heads can spit debris.
- Keep people and pets away from active zones.
- Use regulated air pressure. You want controlled, moderate pressure, not maximum.
- Know your pipe type. PVC and poly both work with blowout, but both can be damaged by excessive pressure or long dry spinning.
Pressure guidance
Exact allowances vary by manufacturer, component ratings, and local practice. A safe homeowner approach is to treat these as typical ranges many contractors use, not universal guarantees:
- Poly pipe: often around 40 to 50 PSI
- PVC pipe: often around 60 to 80 PSI
Many DIYers and some contractors cap residential blowouts around 50 PSI regardless of pipe type and use shorter cycles. If you do not know what your components are rated for, stay conservative and follow local guidance.
Connection point
Connect your compressor to the system using the designated blowout fitting, typically downstream of the backflow. Common connection points include:
- A dedicated quick-connect fitting on the irrigation line
- A capped tee or hose-thread adapter installed for blowouts
- In some setups, a fitting at the end of the backflow assembly on the irrigation side
If you do not have a safe connection point, this is one of the clearest signs to hire a pro or have a fitting installed next season.
Zone-by-zone procedure
Set the controller to manual. You will run one zone at a time.
Open the first zone before introducing full air. This avoids deadheading the compressor into a closed system, which can spike pressure at the wrong moment.
Set the compressor regulator to a conservative PSI (see guidance above).
Introduce air slowly and let the zone spit water.
Run until spray becomes light mist. Usually 1 to 3 minutes per zone for a typical residential zone, sometimes longer with a small compressor. Stop before it is bone dry. You are not trying to heat the pipe with friction or spin rotors at full speed with no water.
Turn off the zone and let the compressor rebuild as needed.
Repeat for each zone. Work through the whole yard methodically.
Blow out drip zones carefully. Drip is easy to damage. Use lower pressure, and if your drip has end caps or flush valves, open them briefly to let water escape instead of forcing everything through emitters. Drain filters and pressure regulators if you have them.
Shut off the air, disconnect the compressor, and cap the fitting.
Drain and set the backflow (test cocks open, valves at 45 degrees, drain plugs handled per the assembly).
Manifold-cracker mistakes
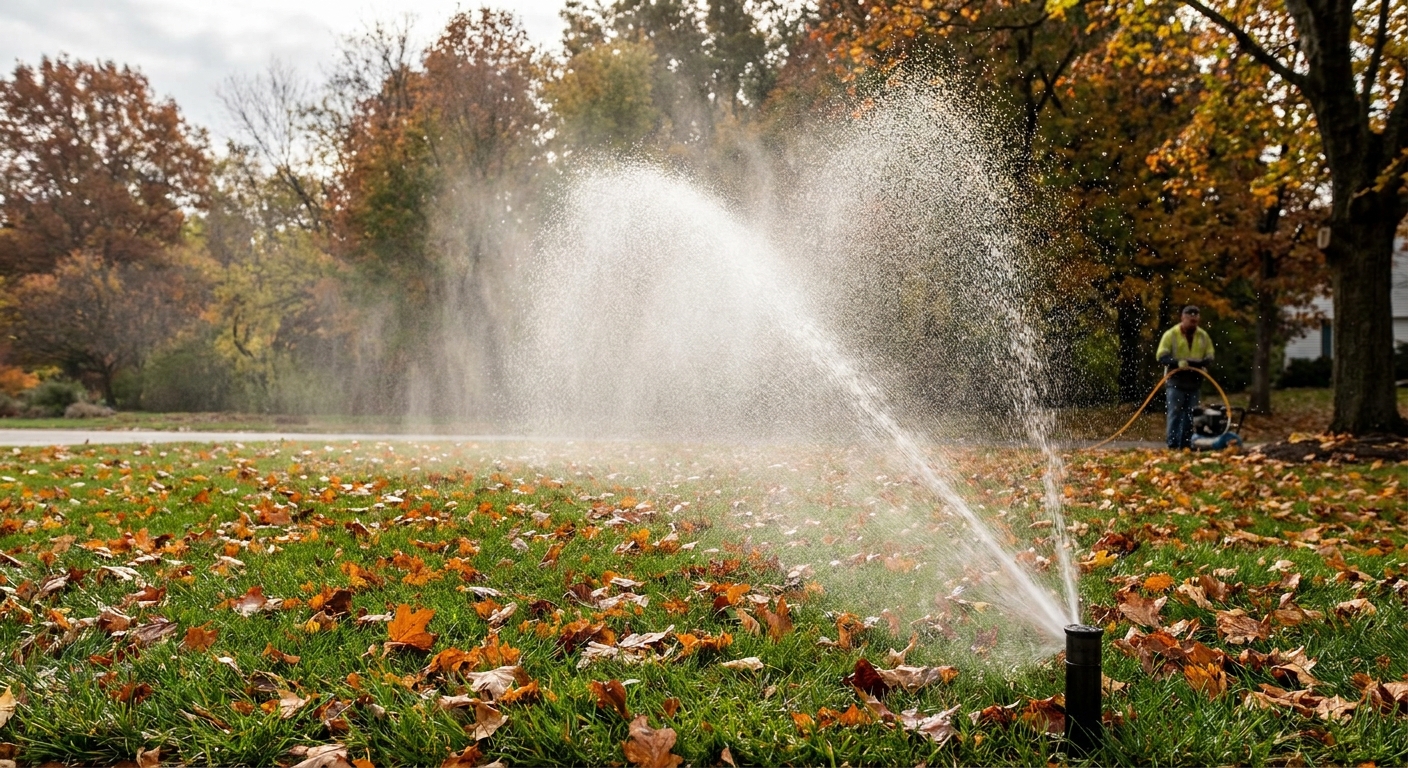
If there is one place DIY winterization goes wrong, it is around the valves and manifold. That assembly is a cluster of fittings that can crack in sneaky ways.
Mistake 1: Leaving it pressurized
Shutting off the water is not enough if the system is still holding pressure. A pressurized mainline can keep water trapped in the manifold and valve bodies. Always relieve pressure and drain correctly.
Mistake 2: Too much air or too long
When you overdo it, two bad things happen: you can damage valve diaphragms, and you can stress fittings at the manifold. The goal is “water mostly out,” not “desert dry.” Shorter cycles with controlled pressure are safer.
Mistake 3: Deadheading the mainline
If you pressurize a closed system with air, pressure can spike fast in the mainline and at fittings. Open a zone first, then introduce air slowly.
Mistake 4: Forgetting low spots
Your yard is not level, even if it looks level. Low spots in lateral lines hold water. That water freezes, expands, and the nearest weak point can be a fitting near the valve box.
Mistake 5: A flooded valve box
If your valve box collects water, that standing water can freeze around valves. Pump it out or bail it out. Also check drainage around the box next season. A simple gravel base can help.
Mistake 6: Skipping backflow steps
Backflow parts crack easily and are expensive. Drain it, open test cocks, and set the valves to the recommended winter positions. Insulate only after it is drained.
Drip, hose timers, and pumps
Drip zones
Drip can be winterized, but it needs a gentler touch. Use lower pressure, open end caps to flush, and drain filters and pressure regulators. Many drip systems have their own low-point drains or flush ends that make winterizing easier.
Hose bib timers
Remove timers, splitters, and vacuum breakers from hose bibs. Drain and store them indoors. Anything above ground full of water is a freeze risk.
Pump-fed irrigation
If you have a pump, you may also need to winterize the pump housing, intake line, and any above-ground components. This varies a lot by setup. If you are on a well system and do not have documentation, it is often worth calling a local irrigation company for a one-time walkthrough.
When to hire it out
DIY winterization is doable, but there are times it makes sense to pay a pro, especially if the cost of a mistake is high.
Hire a pro if
- You do not have a safe blowout connection point downstream of the backflow
- Your system is large with many zones and you have a small compressor
- You have a pump, complex backflow setup, or mixed drip and turf zones
- You have had freeze damage before and want it done right
- Your backflow device is in a spot that is difficult to drain or access
Questions to ask
- Will you blow out each zone individually?
- What pressure do you use and why?
- Do you drain and set the backflow valves and test cocks for winter per the manufacturer?
- Do you handle drip zones differently?
- Do you note issues like broken heads, stuck valves, or flooded valve boxes for spring?
A good tech will sound methodical, not rushed. Winterization is a process, not a quick blast of air and a wave goodbye.
Spring reminder
Winterizing is half the story. De-winterizing gently in spring prevents its own set of problems.
- Open the irrigation shutoff slowly to reduce water hammer.
- Close test cocks and set backflow valves correctly before pressurizing.
- Run each zone and check heads, valves, and the manifold for leaks.
If you do those three things, you will usually catch issues early, before they turn into a mud pit.
The 30-Second Cheat Sheet
Essential takeaways for: How to Winterize Your Sprinkler System
Pick the right method
- Regular hard freezes: use the blowout method (most reliable for clearing laterals).
- Mild winters + proper drain valves: manual drain can work, but do not assume auto drains fully empty the lines.
- If you have had freeze damage before, switch to blowout or hire a pro.
When to do it
- Winterize after your last real watering, before the first hard freeze.
- Temperature rules of thumb help, but depth, wind exposure, and microclimates matter more than one number.
Correct shutdown order
- Shut off irrigation water at the dedicated shutoff.
- Run a zone 30 to 60 seconds to relieve pressure.
- Turn controller to Off or Rain Mode for the season.
- Drain and set the backflow per manufacturer guidance: open test cocks, remove drain plugs if present, and leave ball valves at 45 degrees for winter.
Blowout basics (safe approach)
- Connect air downstream of the backflow at the blowout fitting.
- Use a regulated pressure and follow local and manufacturer guidance.
- Typical contractor ranges many homeowners use: around 40 to 50 PSI (poly) and around 60 to 80 PSI (PVC). When in doubt, cap around 50 PSI and use shorter cycles.
- Blow out one zone at a time until heavy spray becomes light mist, then stop. Do not overdo it.
- Handle drip zones gently: lower pressure, open flush ends if possible.
Top mistakes that crack manifolds
- Leaving the system pressurized after shutting off the water.
- Using too much air pressure or running each zone too long.
- Deadheading the compressor into a closed system.
- Ignoring low spots that trap water.
- Letting the valve box sit full of water all winter.
- Skipping backflow draining and correct winter positions.
Hire a pro if
- You do not have a proper blowout connection point.
- Your compressor cannot keep up (low CFM) or you have many zones.
- You have a pump, complex backflow, or mixed turf and drip zones.
💡 Tip: Scroll up to read the full article for detailed, step-by-step instructions.
⬆️ Back to top
About Marcus Vance
Content Creator @ Grit & Home
Marcus Vance is a lifelong DIY enthusiast and self-taught home renovator who has spent the last decade transforming a dilapidated 1970s ranch into his family's dream home. He specializes in budget-friendly carpentry, room-by-room renovations, and demystifying power tools for beginners. Through his writing, Marcus shares practical tutorials and hard-learned lessons to help homeowners tackle their own projects with confidence.