What an ice dam is (and why it causes leaks)
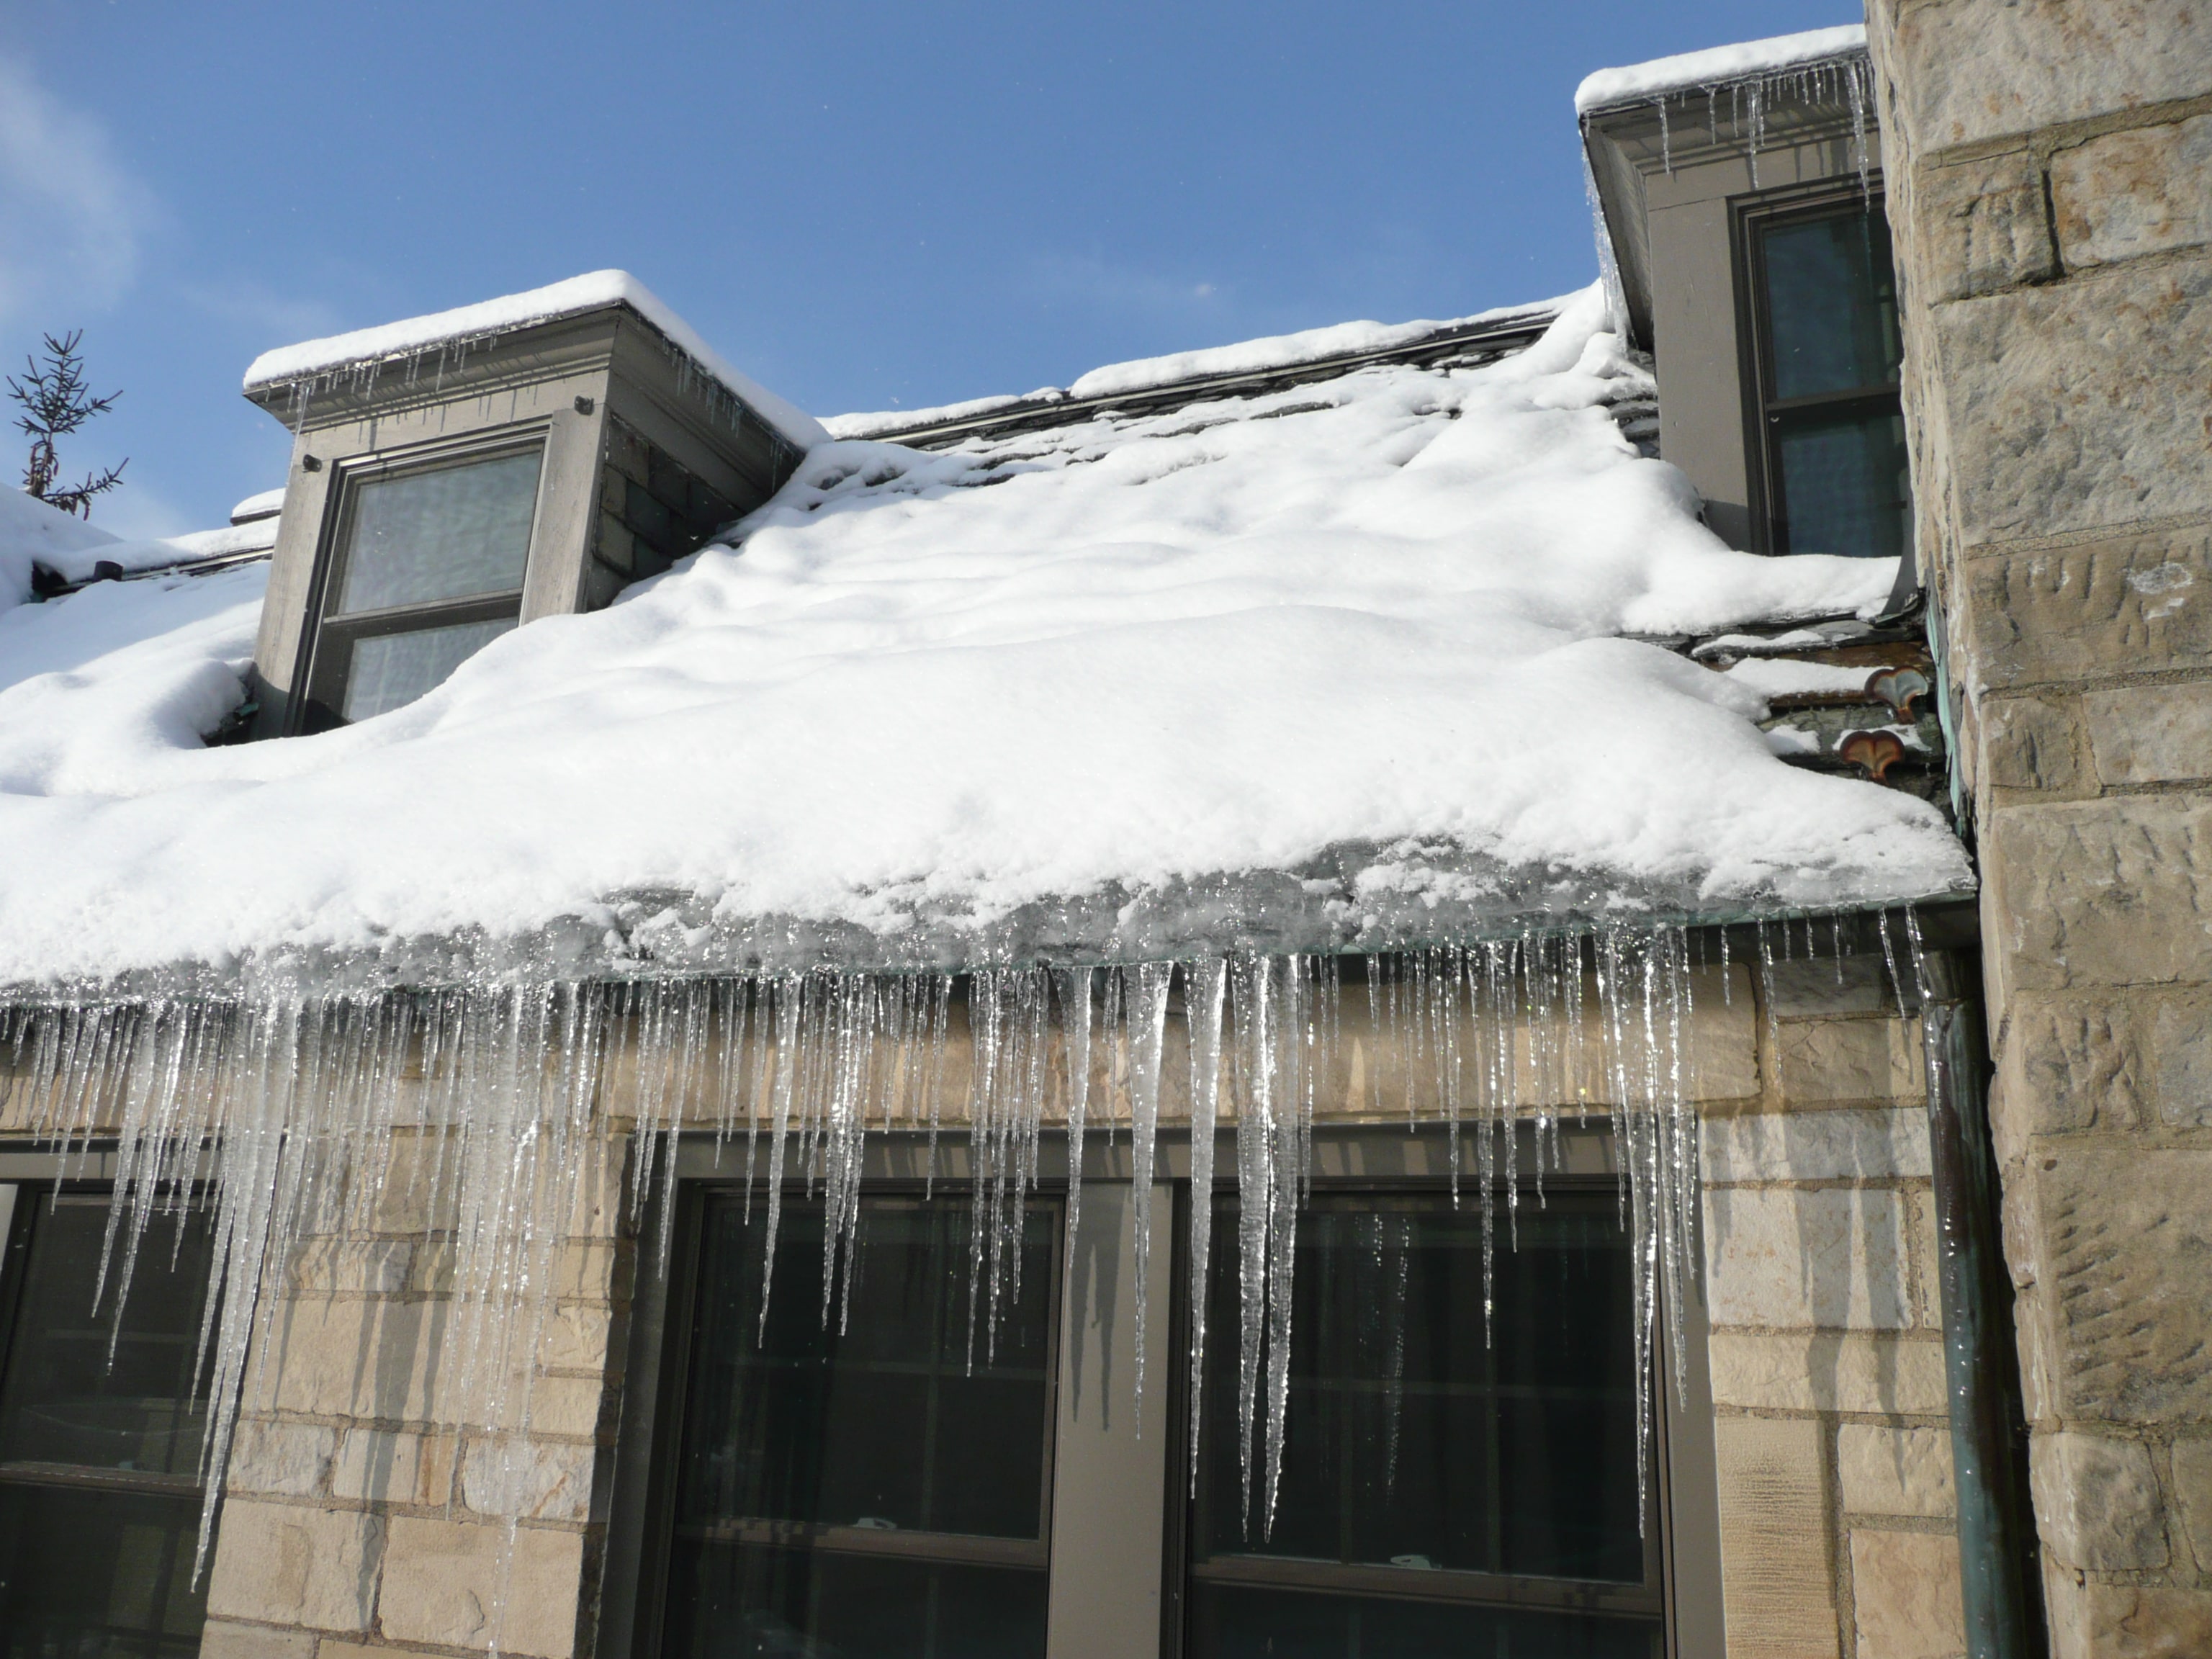
An ice dam is a ridge of ice that forms along the lower edge of your roof, usually at the eaves above the exterior wall. It acts like a tiny frozen curb. Snowmelt runs down the roof, hits that curb, and backs up under shingles. That backed-up water can soak roof decking, drip into insulation, stain ceilings, and rot trim.
Here is the part most homeowners miss: ice dams are usually a heat loss problem, not a gutter problem. The ice is just the symptom you can see from the yard.
Quick gutter reality check: gutters do not create the core problem, but they can make icicles and ice buildup look worse by catching runoff, freezing solid, and holding a cold edge at the eaves. The fix is still about controlling heat and meltwater, not “fixing the gutters.”
How ice dams form
The simple three-step chain reaction
- Heat escapes into the attic (through gaps, thin insulation, or warm air leaks).
- Snow on the upper roof melts because the roof surface warms above freezing.
- Water refreezes at the eaves where the roof overhang is colder, creating a dam that keeps growing with each melt and refreeze cycle.
Seasonal snapshot
Early winter: A light snow comes in. If your attic is leaking heat, you get small melt paths on the roof even when it is cold outside.
Mid-winter cold snap: That meltwater freezes hard at the eaves, then the next sunny day or daily heating cycle adds another layer.
Late winter: The dam is thick enough that water pools behind it. This is when ceiling stains and dripping often show up.

Common causes in real homes
In a perfect world, your roof stays consistently cold and as uniform as practical from ridge to eave. In the real world, solar gain, wind, and roof details create hot and cold spots. Most ice dams come from one or more of these:
- Air leaks into the attic: recessed lights, plumbing vents, chimney chases, attic hatches, bath fan housings, and top plates.
- Not enough insulation: especially in older homes where the attic floor never got topped up.
- Compressed or missing insulation: around eaves, in the corners, or where storage has crushed it.
- Blocked soffit vents: insulation shoved tight to the roof deck stops intake airflow.
- Bathroom or dryer vents dumping into the attic: warm moist air speeds melting and can frost the underside of the roof deck.
- Complex rooflines: valleys, dormers, and low-slope sections collect snow and concentrate runoff.
Prevention that works
Now the good news. The long-term play is simple and it is the same for most homes: air seal, then insulate, then ventilate (when the roof system is meant to be vented). Ventilation helps, but it cannot fix a big heat leak by itself.
1) Air seal the attic floor
Air sealing is boring, messy, and ridiculously effective. You are trying to stop warm indoor air from washing into the attic.
- Attic hatch or pull-down stairs: add weatherstripping and a rigid foam cover box.
- Plumbing stacks and wires: seal small gaps with fire-rated caulk and larger ones with foam (use fire-block foam where required).
- Recessed can lights: swap to sealed, insulation-contact rated fixtures if needed, then seal the trim to the drywall.
- Chimney and flue chases: use metal flashing and high-temp sealant, not spray foam.
DIY boundary (important): if you have a chimney, furnace vent, or any combustion appliance, be cautious about sealing and ventilation changes. Improper air sealing can contribute to backdrafting in some setups. If you are not sure what you are looking at, get a pro to assess it.
2) Add the right amount of insulation
Many ice-dam homes are simply under-insulated. The target R-value depends on your climate zone, but a common improvement is bringing an attic up to modern levels with blown-in cellulose or fiberglass.
- Do air sealing first, or you will bury leaks under insulation.
- Keep insulation fluffy. Compressed insulation performs worse.
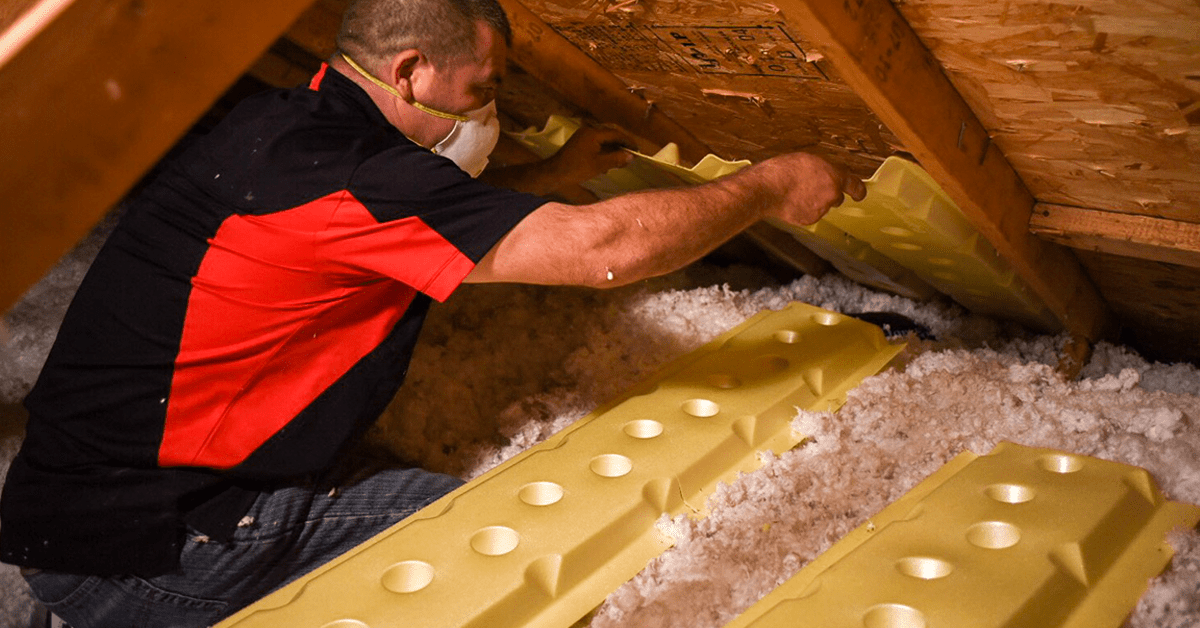
- At the eaves, use baffles so insulation does not block soffit vents.
3) Keep ventilation paths clear (if applicable)
For a vented attic, you want intake at the soffits and exhaust at the ridge or roof vents, with a clear air channel from eave to ridge.
- Soffit vents: confirm they are open and not painted shut or blocked by insulation.
- Baffles: install in each rafter bay at the eaves to maintain airflow.
- Exhaust vents: make sure ridge vents, box vents, or gable vents are not clogged with debris.
Quick qualifier: not every home uses a vented attic. Some roofs are designed as sealed or conditioned assemblies, and many cathedral ceilings have limited venting options. If you are not sure what you have, do not guess. An insulation or roofing pro can tell you what your roof system is designed to do.
4) Roof edge defenses
- Ice and water shield: a self-adhered membrane installed under shingles along eaves and valleys during re-roofing. It helps prevent leaks when dams happen.
- Heated cables: can create a melt channel in chronic trouble spots, but they cost money to run and do not fix the attic heat problem.
If you use heat cables, follow the manufacturer layout, avoid crossing cables, and plug into a GFCI-protected outlet. Poor installation can create hot spots and failure points.
Warning signs
- Big icicles along the gutter line (icicles alone do not prove a dam, but they are a clue).
- A thick band of ice right at the eaves.
- Water stains on ceilings or exterior walls after snow.
- Dripping at a window head, inside a closet on an exterior wall, or around skylights.
- Frost or damp insulation in the attic.
If water is getting in
If you have active leaking, you are in damage-control mode. The goal is to reduce water backup and protect the inside until conditions improve or a pro can arrive.
Inside the house
- Catch the water: buckets and towels, and move furniture away from the drip line.
- Relieve a bulging ceiling (carefully): if drywall is bowing and you are confident it is water weight, you can carefully poke a small hole with a screwdriver over a bucket to drain it. Stop if you see signs of structural damage, and remember older homes may have asbestos-containing textures or materials. When in doubt, call a pro.
- Shut off power if needed: if water is near light fixtures, outlets, or a ceiling fan, turn off the circuit and call an electrician if you are unsure.
Outside, from the ground
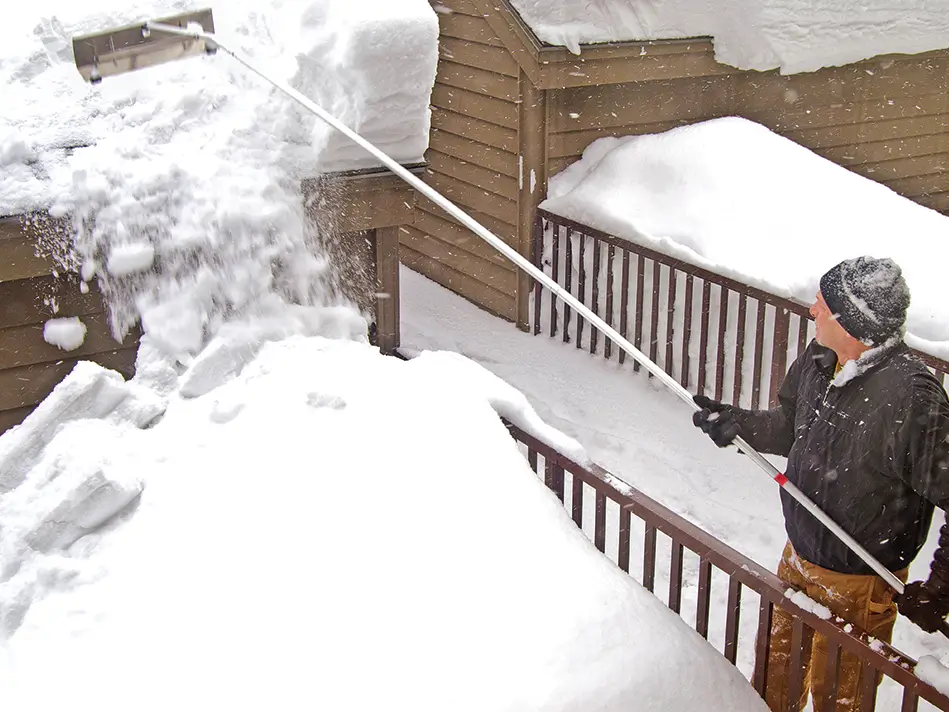
Use a roof rake to remove snow from the first 3 to 6 feet of roof above the eaves. That reduces the amount of meltwater feeding the dam.
- Stand well back and watch for falling ice chunks.
- Use a plastic rake head to reduce shingle damage.
- Work in sections. Do not yank upward on shingles.
What not to do
- Do not chip ice with a hammer or hatchet: it is a fast way to destroy shingles and puncture the roof.
- Do not climb onto an icy roof: the fall risk is real, even for experienced DIYers.
- Do not aim a pressure washer at shingles: it can force water under roofing and damage granules.
Safe removal options
If you cannot fully prevent ice dams yet, here are the safer ways to manage them.
Roof rake plus time
This is the best first step for most homeowners. Removing snow reduces meltwater and often stops the leak cycle.
Calcium chloride melt socks
A common tactic is laying a permeable tube or old pantyhose filled with calcium chloride perpendicular to the dam so it melts a channel for water to escape.
- Use calcium chloride, not rock salt. Sodium chloride is typically harder on metal and can damage plants and surfaces.
- Place it from the roof edge up over the dam so meltwater has a path out.
- Expect runoff. Protect landscaping and avoid dumping chemicals where pets walk.
Important: any de-icer can corrode metal, stain finishes, and damage vegetation. Use sparingly, rinse affected areas when conditions allow, and skip this method if you are worried about gutters, flashing, or delicate landscaping.
Steam removal (pro method)
Many ice dam removal services use low-pressure steam to melt the dam without beating up your roof. It is often one of the least destructive professional methods for thick ice when leaks are active, but results still depend on the operator and the roof type.
Ladder and roof safety
I love a good DIY win, but ice season is when smart homeowners get hurt. A few non-negotiables:
- Stay off the roof if there is ice. Even a slight pitch is dangerous when slick.
- If you use a ladder, set it correctly: solid ground, 4:1 angle, and extend it at least 3 feet above the eave.
- Keep your body centered: do not reach sideways. Climb down and move the ladder.
- Watch the drop zone: falling ice can seriously injure you or anyone nearby.
- Work with a spotter whenever possible.
Special cases
Cathedral ceilings and finished attics
If you have a cathedral ceiling (no accessible attic) or a finished attic, the strategy is still about controlling heat loss and moisture, but the work is different. Air sealing and insulation may need to happen from the interior during a remodel, or from the exterior during a re-roof. This is where a quick pro evaluation can save you from throwing money at the wrong fix.
What to expect after fixes
Air sealing and insulation upgrades can make a dramatic difference, but do not expect perfection overnight. Extreme weather can still produce some ice, especially with complex rooflines. The real win is fewer dams, smaller dams, and far fewer leaks. Track what happens after the next couple of snow events so you can fine-tune trouble spots.
When to call a pro
Call a roofing or ice dam removal pro if any of these are true:
- You have active interior leaking and it is not improving after raking the lower roof.
- The dam is thick and widespread, especially on a steep roof or multi-story home.
- You have a complex roof with valleys, dormers, or skylights where water can travel.
- You suspect attic mold, soaked insulation, or damaged roof decking.
- You need air sealing, insulation upgrades, or ventilation corrections and want it done quickly and correctly.
If you are seeing ice dams every winter, treat it like a home performance project. A few hours of air sealing and a thoughtful insulation upgrade can save you from repeated drywall repairs, stained paint, and that sinking feeling of hearing water drip when it is 10 degrees outside.
Quick checklist
- After a heavy snow, rake the first 3 to 6 feet above the eaves.
- Check the attic for obvious warm air leaks and fix the easiest ones first.
- Confirm bath fans vent outside, not into the attic.
- Make sure soffit vents are not blocked by insulation (for vented attics).
- If you see new ceiling stains, act the same day and document what you find.
About Marcus Vance
Content Creator @ Grit & Home
Marcus Vance is a lifelong DIY enthusiast and self-taught home renovator who has spent the last decade transforming a dilapidated 1970s ranch into his family's dream home. He specializes in budget-friendly carpentry, room-by-room renovations, and demystifying power tools for beginners. Through his writing, Marcus shares practical tutorials and hard-learned lessons to help homeowners tackle their own projects with confidence.