🚨 In a DIY emergency or rush?
Skip the details and jump straight to our 30-second cheat sheet for the most crucial info.
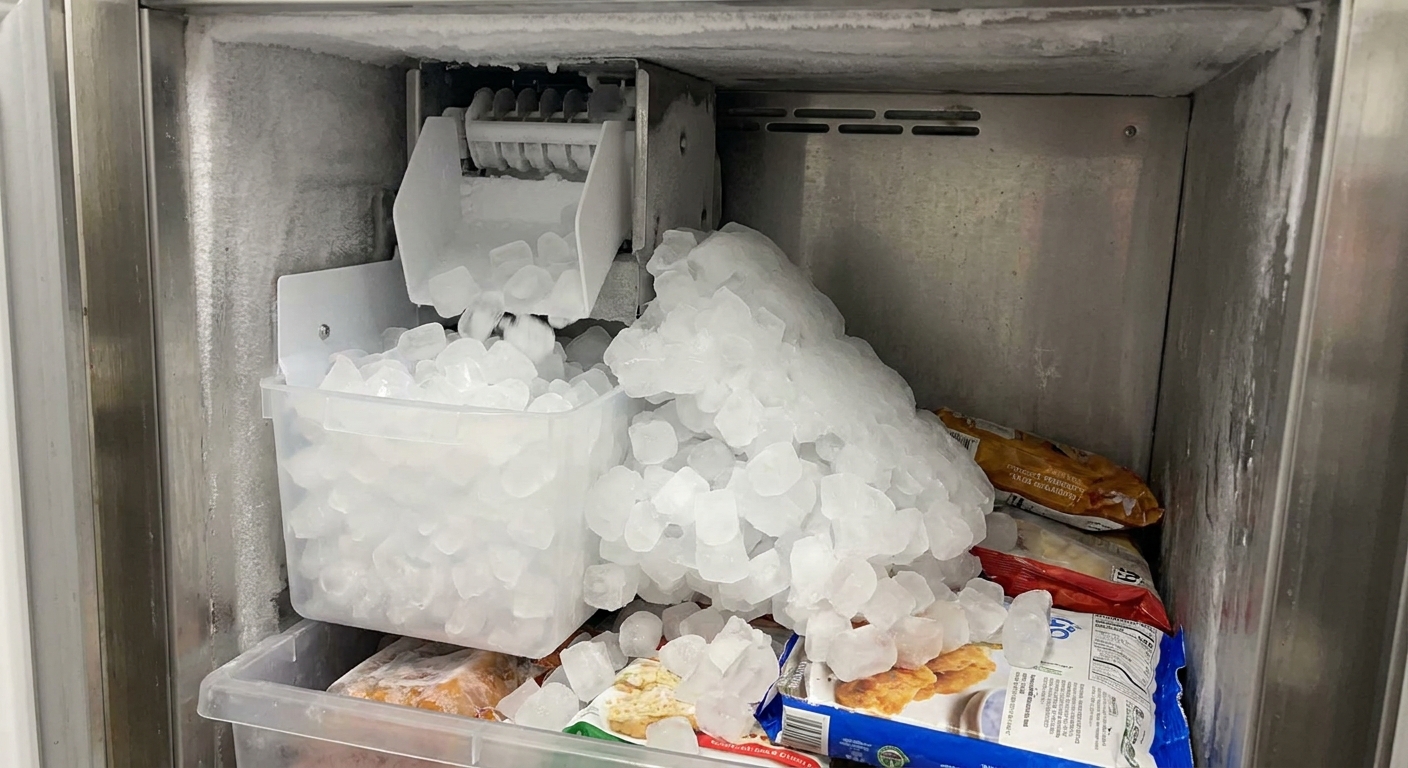
If your ice maker will not stop making ice, you are not dealing with a “cute bonus” problem. You are dealing with an overflow risk. When an ice maker ignores the shutoff signal, it can pile ice into the bin until cubes jam the mechanism, melt water spills, or the fill system keeps adding water when it should not.
I have learned this the annoying way: the fix is usually simple, but only if you pause production first and then work through the likely culprits in a calm order.
Quick note: Ice maker designs vary a lot by brand and model. Use your model number (usually on the door frame) when you need exact diagnostics or LED blink patterns.
First: Pause ice production safely
Your goal is to stop new water from entering the ice maker and stop the ice maker from cycling while you diagnose.
Rule of thumb: Do the checks below with the ice maker turned off unless a step specifically says otherwise.
Quick ways to shut it off
- Wire shutoff arm (older top-freezer and many basic units): Lift the metal or plastic arm to the UP position. It should click and stay up.
- On or Off switch: Flip the switch to Off.
- Control panel setting: Turn Ice Maker Off in the fridge menu.
If it is actively overfilling with water
- Turn off the refrigerator water supply at the shutoff valve (usually under the sink, behind the fridge, or in the basement).
- Put towels down and pull the ice bin to prevent cubes from jamming the mechanism.
Tip: If you need an immediate hard stop, unplug the fridge and close the water supply valve. Keep the valve closed until you have ruled out a leaking inlet valve.
What “nonstop ice” usually means
Ice makers stop when they believe the bin is full. If yours keeps going, one of these is typically happening:
- The shutoff device is stuck or blocked (feeler arm cannot move, the bin is not seated correctly, or the sensor cannot “see” the ice level).
- The ice maker is calling for water too often due to a control issue.
- The water inlet valve is not sealing and is letting water seep in even when the ice maker is off.
- Cubes are jamming the harvest cycle, causing abnormal cycling or repeated attempts depending on the design.
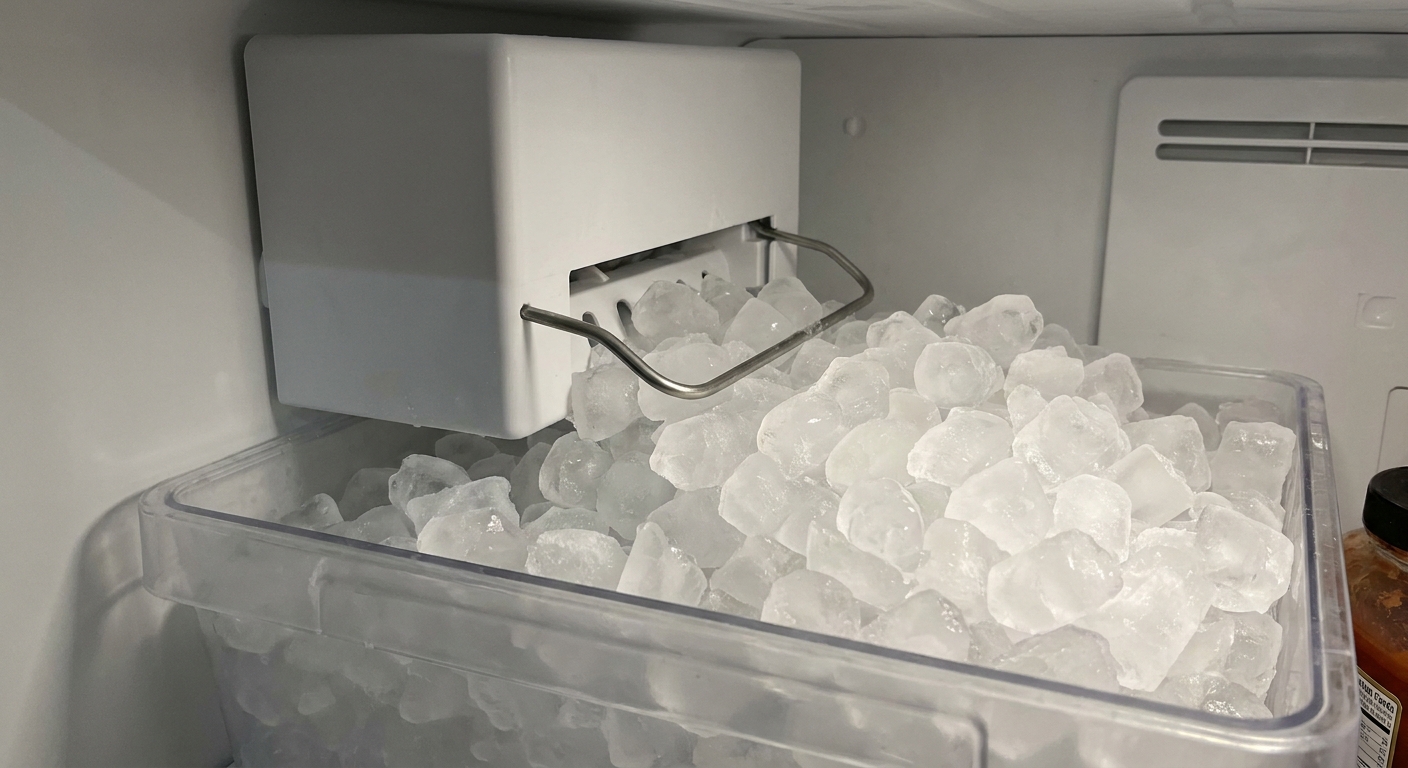
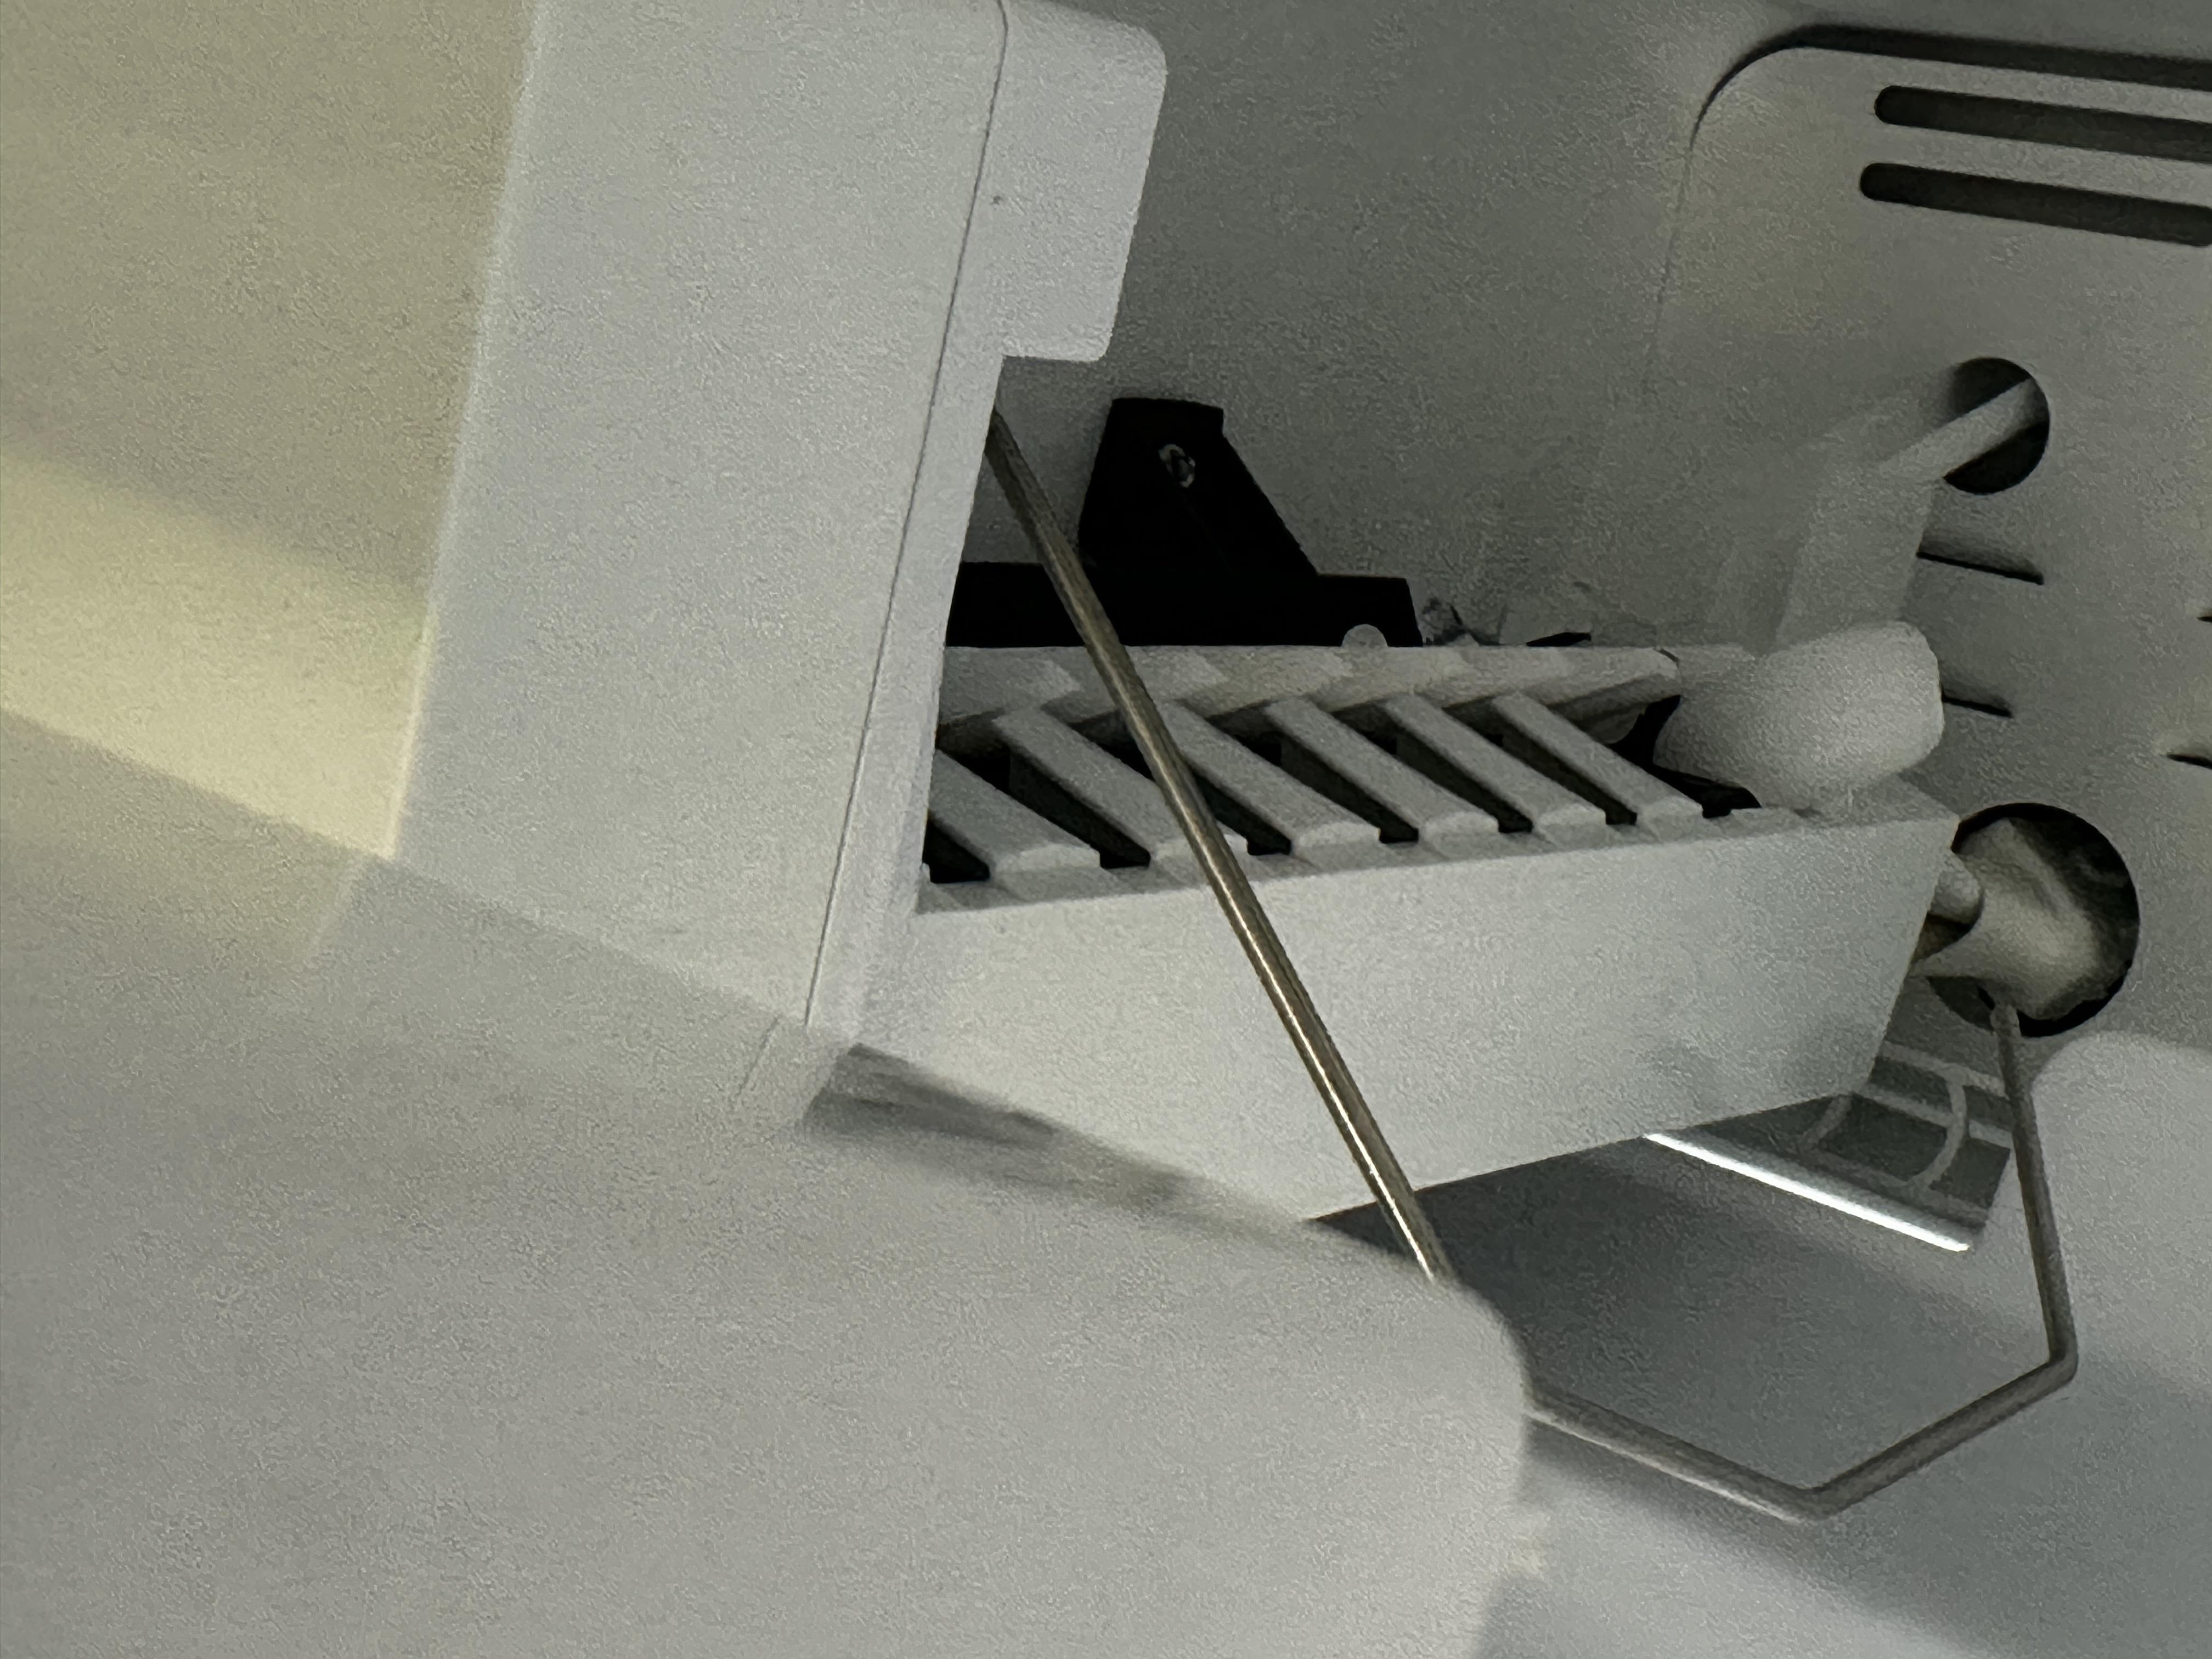
Fix 1: Check the shutoff arm for binding
If your ice maker has a wire or plastic arm that rides on top of the ice pile, this is the first thing I check. When the bin fills, the arm lifts and tells the ice maker to stop.
What to look for
- The arm is stuck under ice or pinned by a misshapen mound of cubes.
- The arm is not fully seated in its hinge slot (common after cleaning the bin).
- The bin is not fully seated, so the arm is not riding where it should.
- The arm feels gritty or stiff, like it is rubbing plastic.
What to do
- Remove the ice bin and dump excess ice.
- Reinstall the bin fully. A half-seated bin can cause weird shutoff behavior.
- With the ice maker turned off, gently move the arm up and down. It should swing freely.
- Clear any ice chunks that are wedged near the arm hinge or the ejector area.
My mistake to avoid: Do not force the arm past its normal travel. If it feels like it is hitting something solid, there is probably ice behind the assembly that needs thawing, not brute force.
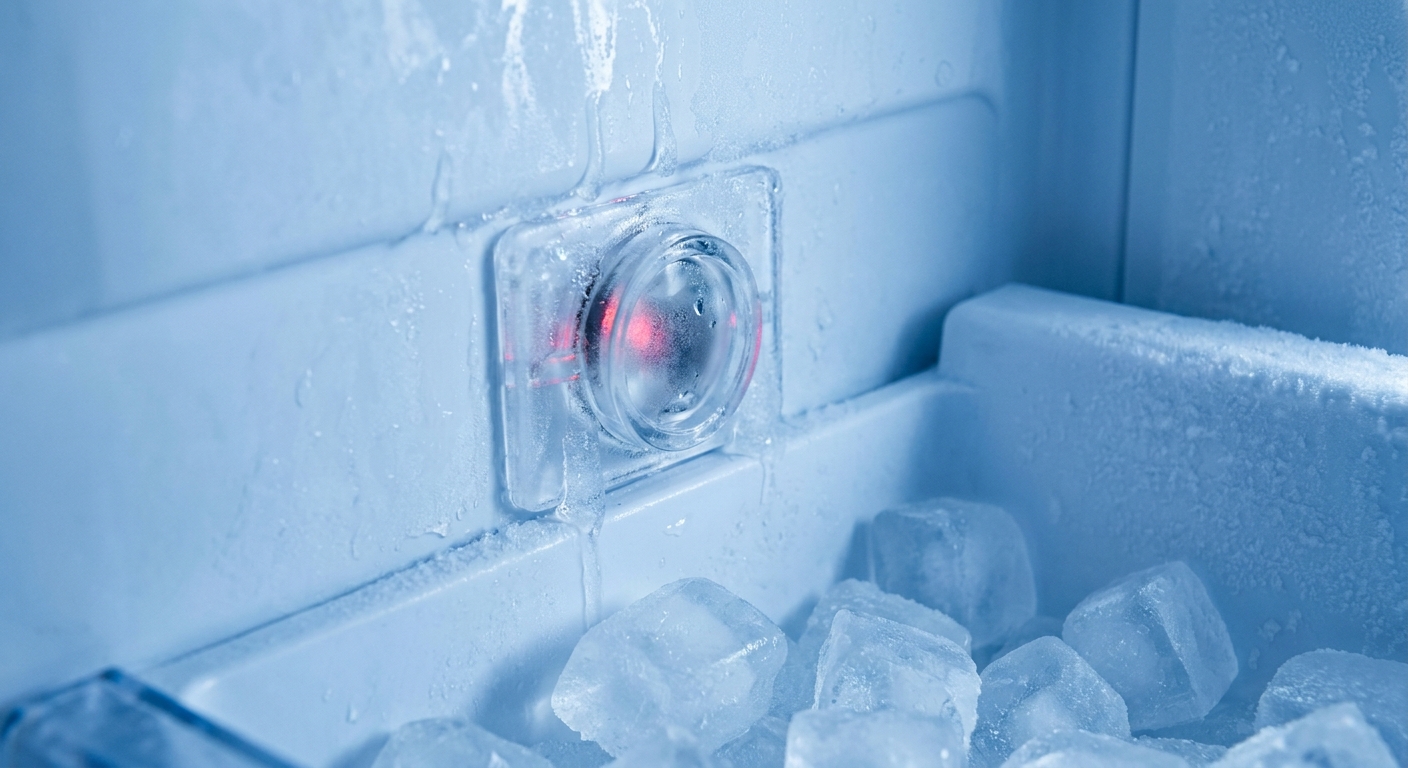
Fix 2: Clean or unblock the ice level sensor
Many newer side-by-side and French door refrigerators do not use a feeler arm. They use an optical sensor system that “looks” across the bin. When ice blocks the beam, it stops production.
Depending on the model, a dirty or frosted sensor window, a blocked beam path, or a weak emitter or receiver can cause incorrect “bin full” or “bin empty” readings. That can show up as either not making ice at all or running too long.
Signs you have an optical system
- No shutoff arm.
- Small plastic “windows” on the freezer wall, usually near the top right or left side of the ice bin area.
- A blinking status LED on the emitter board in some models.
Steps
- Turn the ice maker off.
- Remove the ice bin.
- Wipe the sensor windows with a soft cloth and warm water. Dry fully.
- Clear any frost buildup around the sensor area. If it keeps frosting, look for a door seal leak or frequent door openings.
Note: Many models have a simple LED diagnostic that changes behavior when you block the beam with your hand. Check your owner’s manual for your exact blink pattern before you assume the sensor is “fine.”
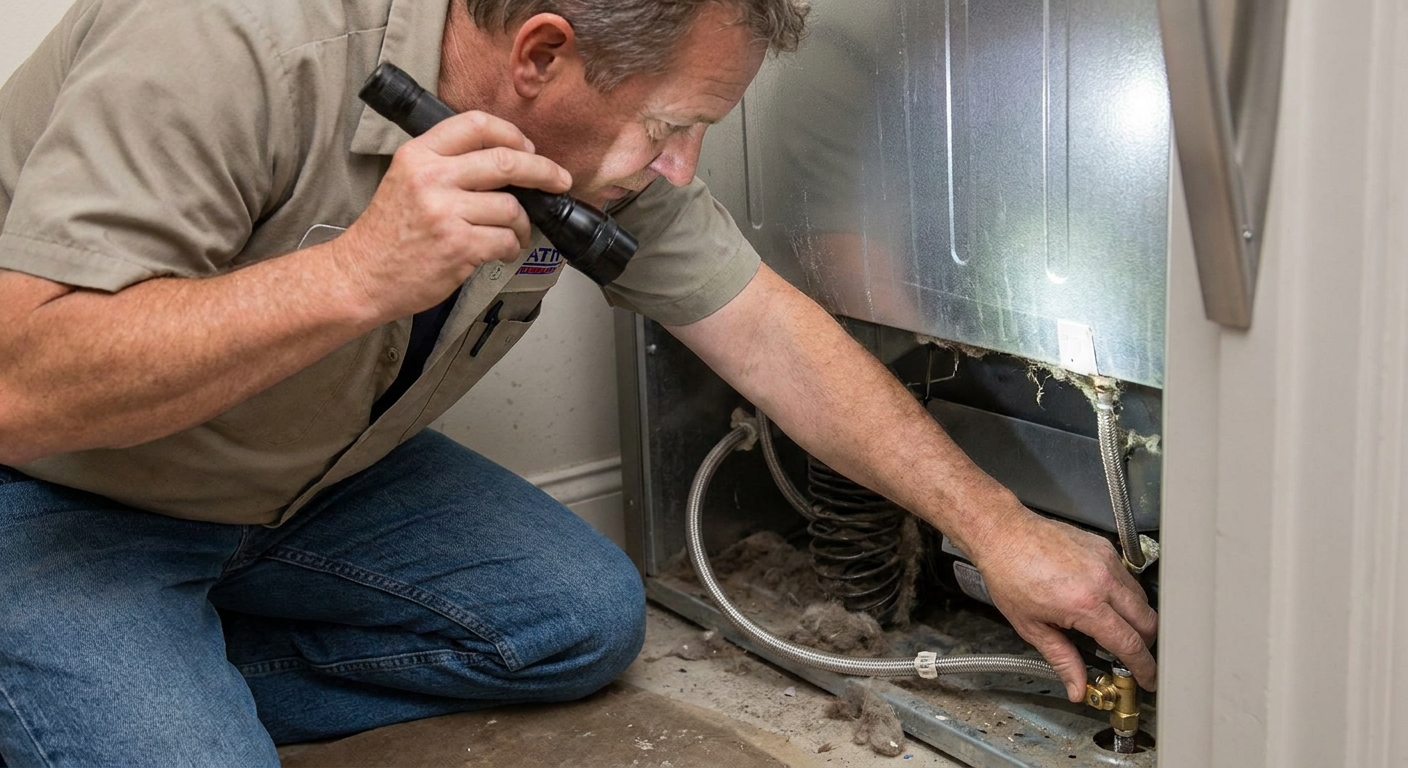
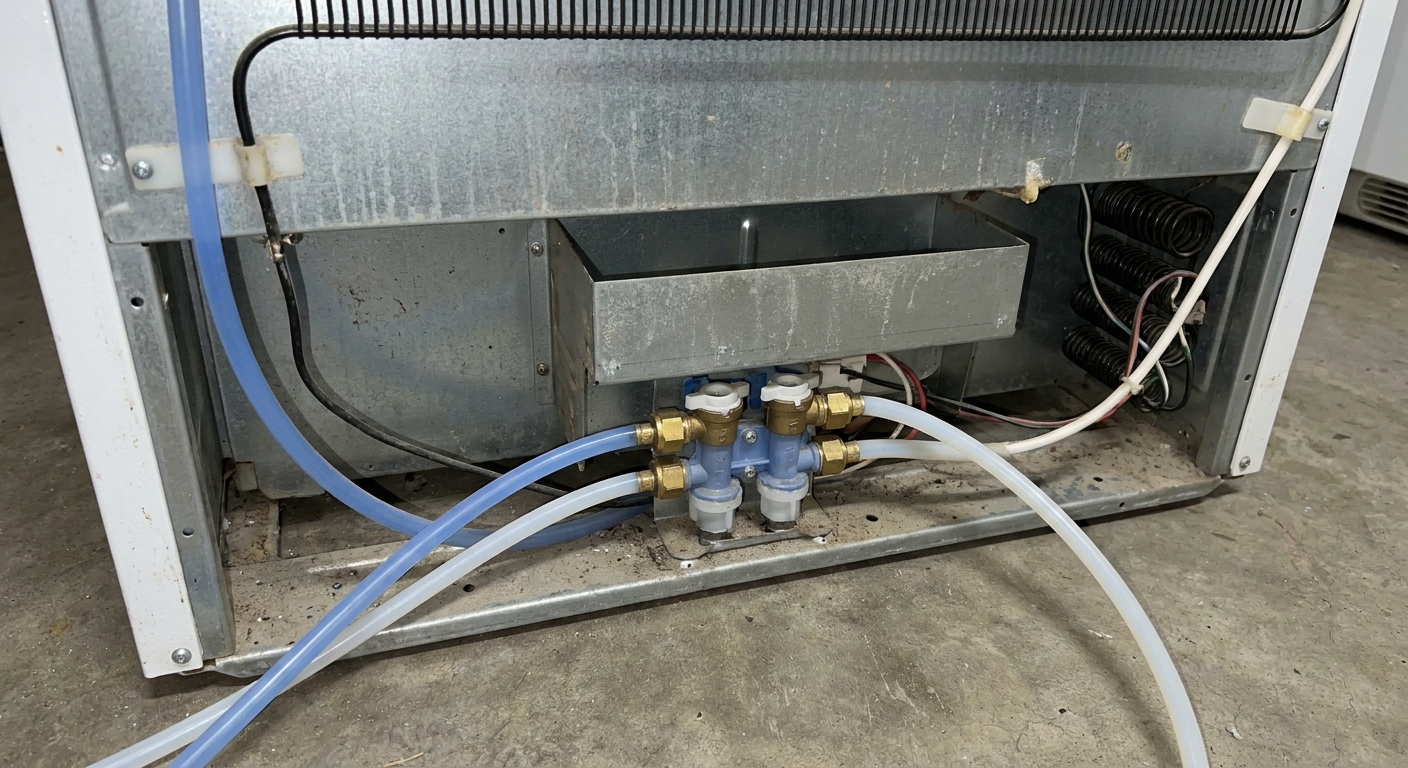
Fix 3: Rule out a leaking water inlet valve
This one surprises people: an ice maker can be “off” and still overfill if the dual water inlet valve at the back of the fridge is not sealing. A worn valve can drip water into the fill tube. Over time, that can create oversized cubes, fused sheets in the tray, or a fill tube that keeps freezing up.
Extra detail that matters: If your household water pressure is low (often below about 20 psi), some inlet valves do not close as crisply. That can contribute to seepage and slow drips that later freeze. (It is not the only cause, but it is a common one.)
Clues the inlet valve is the problem
- The ice maker is off, but you still see icicles or a frozen fill tube.
- Ice cubes are very large or fused together.
- You hear an occasional hiss or trickle even when the ice maker should be idle.
- Turning off the house water supply stops the issue completely.
What you can do without parts
- Turn off the fridge water supply and leave it off for a few hours. If the problem disappears, the valve is a prime suspect.
- Inspect the fill tube and fill cup for ice blockage or misalignment. If the tube is slightly out of position, water can splash and freeze where it should not.
- If the fill tube is frozen, thaw it with the freezer unplugged and the door open.
Thawing safety
- Avoid heat guns. Be cautious with hair dryers near plastic liners and wiring.
- My safer go-to is time, towels, and a warm (not boiling) towel held against the icy area.
- Do not chip aggressively with metal tools.
When replacement is likely
If the valve is leaking internally, cleaning will not fix it. The typical solution is replacing the inlet valve assembly. It is usually a moderate DIY job, but it involves water lines and electrical connectors. If you are not comfortable, this is a good handoff point to an appliance tech.
Fix 4: Look for a jammed tray or stuck ejector
Sometimes “nonstop” ice is really abnormal cycling caused by a jam. In some designs the unit stalls. In others it makes repeated attempts to harvest and reset.
Common causes
- A cube wedge preventing ejector fingers from turning.
- A frozen sheet of ice in the mold.
- Bin ice piled into the path of the ejector chute.
Steps
- Turn the ice maker off.
- Remove the bin and clear all loose ice.
- Inspect the ice maker mold area for a frozen block. If present, thaw the freezer section enough to clear it.
- Check for a blocked or misaligned fill cup or fill tube that is redirecting water and causing misformed ice.
Thrifty pro tip: A small plastic scraper is safer than a screwdriver for chipping ice. Metal tools can puncture plastic liners or crack the mold.
Fix 5: Adjust the fill level (if allowed)
If the ice maker is making ice normally but the cubes are too big and keep bridging together, your issue may be overfilling per cycle, not the shutoff signal.
Some ice makers have a small adjustment screw or electronic setting for water fill time.
How to approach it
- Find your model number (usually inside the fridge door frame) and look up “ice maker fill adjustment” for that exact unit.
- If your model has a screw, it is often located under the removable front plastic cover of the ice maker module.
- Make small changes only. A quarter-turn can matter.
- Give it a few cycles to judge results.
If you cannot find a legitimate adjustment method for your model, do not guess. Many newer units are not meant to be adjusted manually.
Fix 6: Control issues
If the shutoff arm moves freely or the optical sensor is clean and confirmed working, and you have ruled out a leaking inlet valve, the remaining suspects are control problems.
Possible control-related causes
- Defective ice maker module or motor that does not “park” correctly.
- Failed emitter and receiver boards (optical systems).
- Main control board fault keeping the ice maker energized.
Best next step
At this stage, I recommend using your model number to pull the service manual or tech sheet and follow the manufacturer’s diagnostic checks. If you do not have a multimeter or do not want to work around energized circuits, it is reasonable to call a pro. Control parts can get expensive fast, and misdiagnosis is common.
Prevent problems while you troubleshoot
- Keep the water shutoff valve accessible. If your fridge is packed into a tight alcove, consider adding an in-line shutoff where you can reach it.
- Check freezer temperature. Aim for about 0°F (-18°C). Too warm can cause melting and refreezing messes. Too cold can contribute to freeze-ups.
- Make sure the bin is seated. A bin that is not fully installed can interfere with feeler arms or optical readings.
- Do not ignore a frozen fill tube. It can point to valve seepage, misalignment splashing, airflow issues, or temperature that is set too cold.
- Replace the water filter on schedule. A clogged filter usually shows up as low flow and small or hollow cubes, but in some designs it can affect fill consistency and put extra strain on the system.
- Level the refrigerator. If the unit is out of level, ice can pile unevenly and interfere with shutoff mechanisms.
When to call for service
Call an appliance tech (or schedule warranty service) if:
- You confirm the inlet valve is leaking and you cannot comfortably replace it.
- The optical sensor boards fail the built-in diagnostic or show inconsistent behavior.
- The ice maker continues abnormal cycling with the bin removed and the sensor verified.
- There is evidence of water reaching electrical components, or you see burn marks, melted plastic, or a strong electrical odor.
Until the repair is completed, leave the ice maker off and keep the water supply valve closed if you suspect valve seepage.
Quick order (the way I do it)
- Pause ice making. If water is involved, shut off the water supply.
- Dump excess ice, confirm the bin is seated, and clear obvious jams.
- Check the shutoff arm for free movement or clean and test the optical sensor windows.
- Inspect for a frozen fill tube, misalignment splashing, and signs of inlet valve seepage.
- Only then chase control board or module problems.
That order prevents the two big headaches: a wet floor and an expensive parts swap that did not need to happen.
The 30-Second Cheat Sheet
Essential takeaways for: Ice Maker Won’t Stop Making Ice: Overfill and Shutoff Fixes
Stop it now (30 seconds)
- Turn Ice Maker Off (switch, control panel, or lift the shutoff arm).
- If it is still adding water or you see active overfilling, turn off the refrigerator water supply valve immediately.
- Pull the ice bin and dump excess ice to prevent jams and melting overflow.
Most common causes
- Stuck shutoff arm: Arm cannot lift because ice is piled, the bin is not seated, or the hinge is binding.
- Dirty, frosted, blocked, or failing ice level sensor (optical): Frost, grime, a bag of food, or a weak emitter/receiver can misread the bin level. Symptoms vary by model.
- Leaking water inlet valve: Water seeps even when the ice maker is off, causing overfill, giant cubes, frozen fill tube. Low water pressure can contribute.
- Jam in the mold or ejector: Cube wedge or frozen slab causes abnormal cycling or repeated attempts (depends on design).
Fast checks and fixes
- Feeler arm style: Move the arm up and down. It should swing freely. Clear ice around the hinge and confirm the bin is fully seated.
- Optical style: Wipe sensor windows dry and clear frost. Make sure nothing blocks the beam path. Use the manual’s LED test to confirm “full/empty” readings.
- Suspect inlet valve: Leave the water supply off for a few hours. If the problem stops, the valve likely needs replacement. If your water pressure is low (often below ~20 psi), address that too.
- Frozen fill tube: Thaw gently with the fridge unplugged and door open. If it refreezes, suspect valve seepage, misaligned fill tube/fill cup splashing, low freezer temps, or airflow issues.
When to call a pro
- Optical sensor boards or control board diagnostics point to an electrical failure.
- You see water near wiring, burn marks, or melted plastic.
- You are not comfortable replacing the inlet valve or working behind the fridge.
💡 Tip: Scroll up to read the full article for detailed, step-by-step instructions.
⬆️ Back to topAbout Marcus Vance
Content Creator @ Grit & Home
Marcus Vance is a lifelong DIY enthusiast and self-taught home renovator who has spent the last decade transforming a dilapidated 1970s ranch into his family's dream home. He specializes in budget-friendly carpentry, room-by-room renovations, and demystifying power tools for beginners. Through his writing, Marcus shares practical tutorials and hard-learned lessons to help homeowners tackle their own projects with confidence.