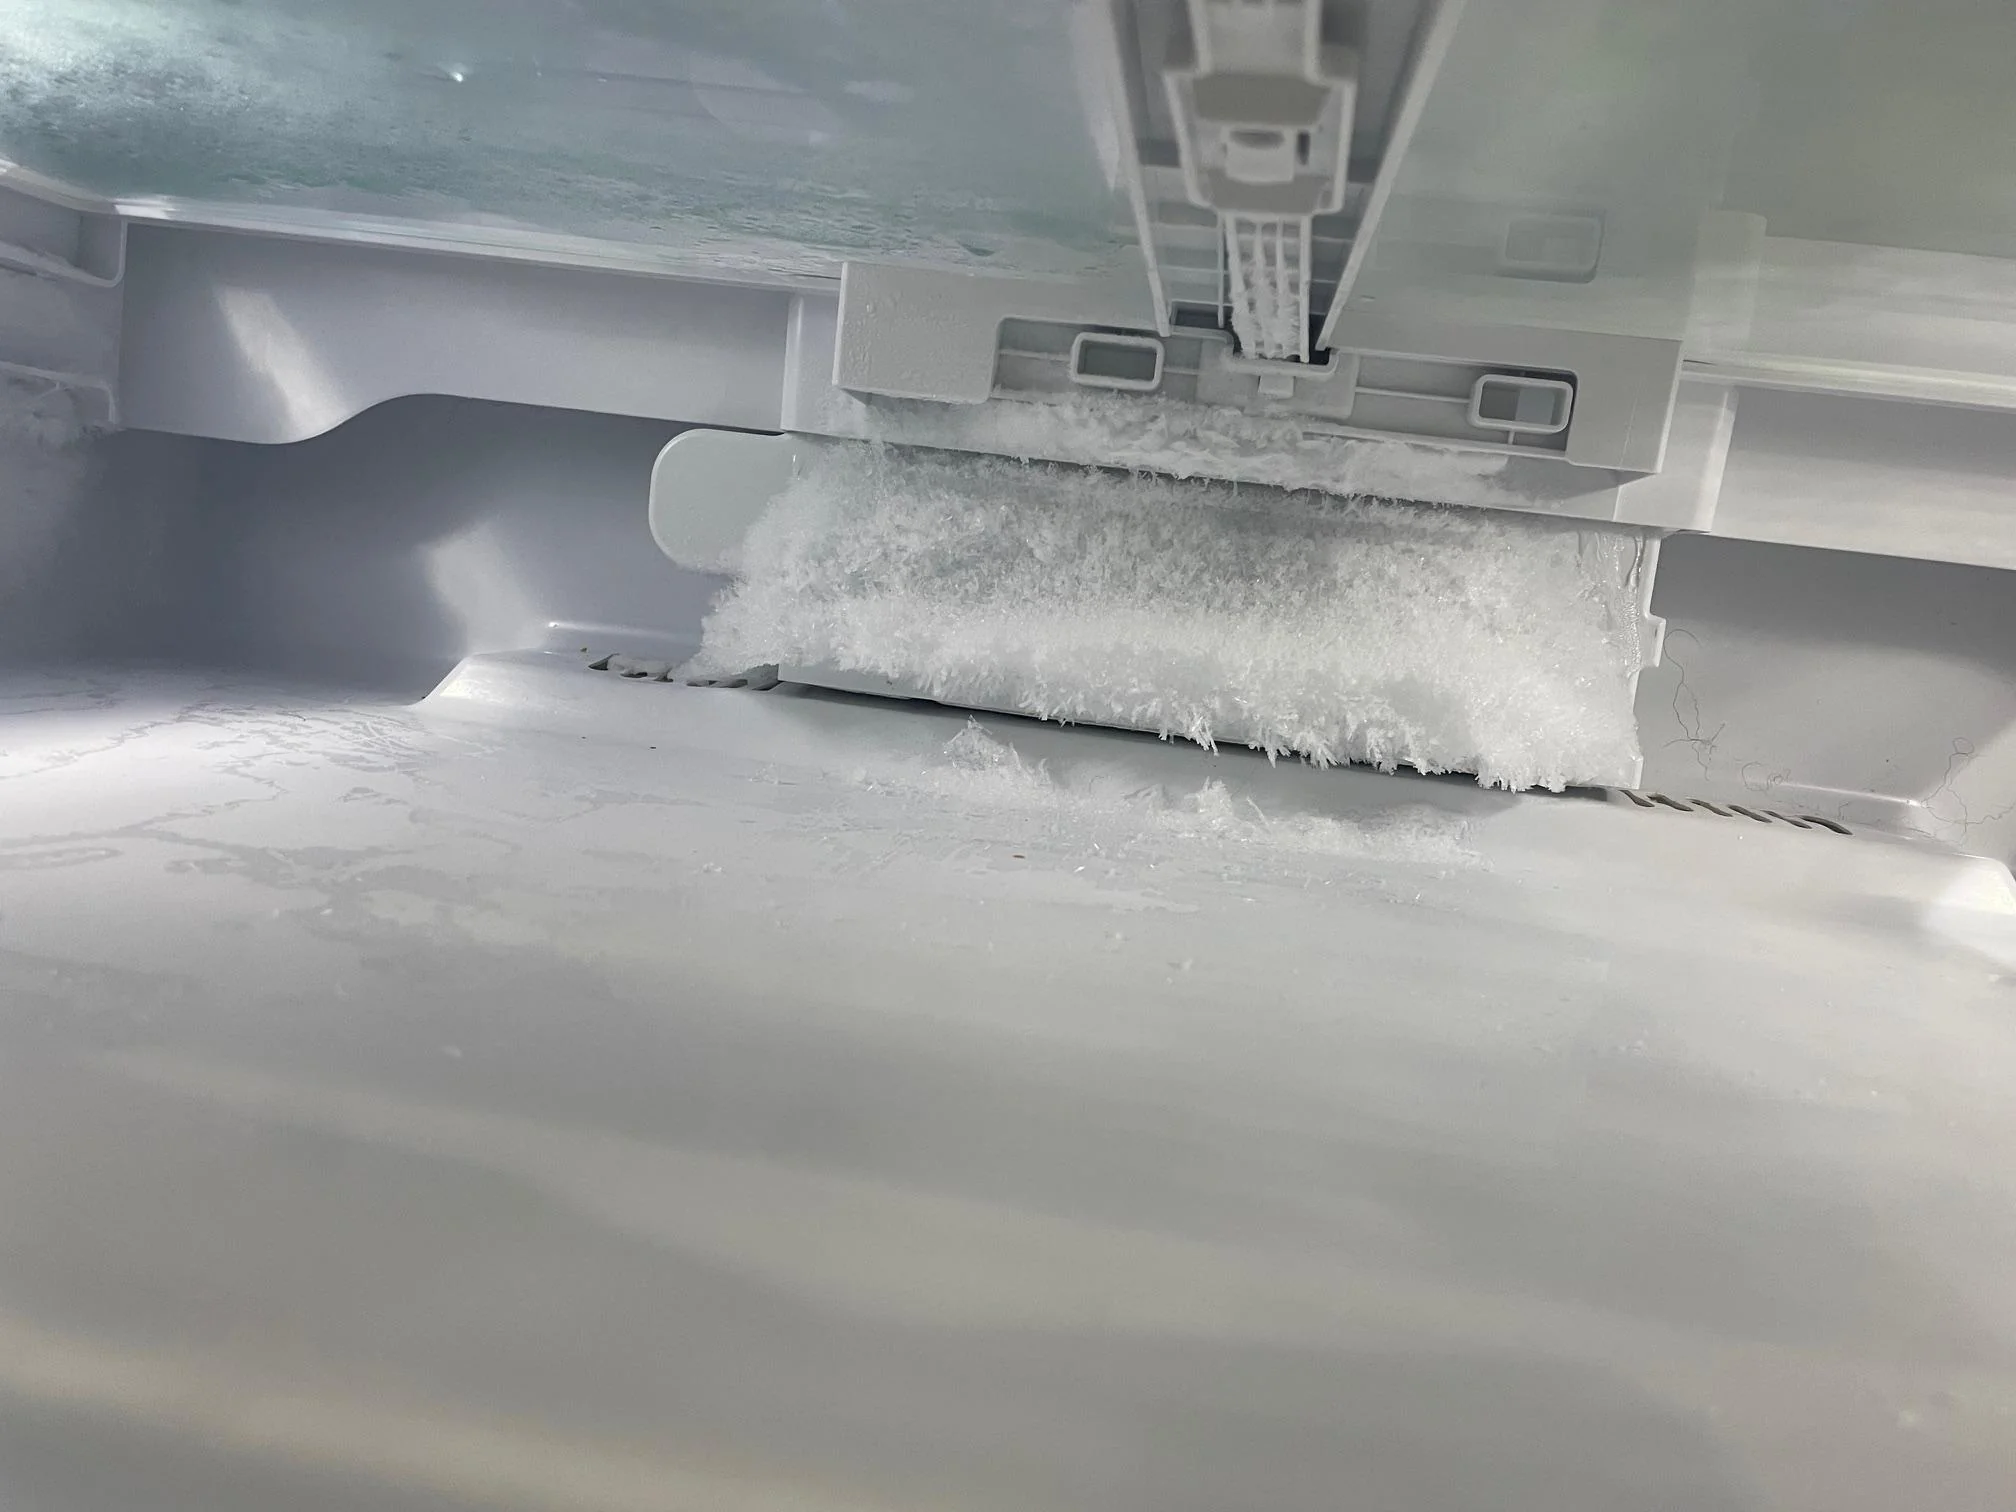
If you keep pulling out your crisper drawers and finding a skating rink underneath, you are not alone. In many refrigerators, that ice is not a random leak. It is often defrost water that has nowhere to go, so it runs down, pools under the drawers, and freezes into a stubborn slab.
The good news: the fix is often a careful thaw and a little drain cleaning. The better news: in many cases you can narrow down the cause pretty quickly with a few visual checks.
Why ice forms under the crisper drawers
Refrigerators with auto-defrost melt frost off the evaporator coil on a schedule. That meltwater is supposed to flow into a drain, down a tube, and into a pan under the fridge where it evaporates.
When that pathway fails, water takes the easiest route. In many top-freezer, bottom-freezer, and some French-door designs, that route ends up under the crispers.
Important detail: On a lot of single-evaporator refrigerators, the defrost drain you need to clear is actually in the freezer, behind the rear panel. When it clogs or freezes, defrost water can overflow into air channels and trickle down into the fresh food section, pooling under the crisper drawers.
Most common causes
- Frozen or clogged defrost drain: The drain hole or tube is blocked by ice, slime, or debris, so meltwater backs up and spills where it should not. These two issues look the same and are often solved the same way.
- Door seal issues: A torn, dirty, or warped gasket lets humid air in. That adds excess frost and defrost water, which can overwhelm a partially restricted drain.
- Fridge not level: If the cabinet is out of level, water can run away from the drain trough and toward the crisper floor. Not every model is picky, but it is an easy thing to rule out.
- Blocked air vents or an overpacked fridge: Poor airflow can create extra-cold pockets that freeze small puddles before they reach the drain.
Other causes to keep in mind (especially on water-line models)
- Ice maker or dispenser leak: A cracked or loose water line, a leaking valve, or a fill tube that is icing up and overflowing can drip water that finds its way into the fridge.
- Water filter housing leak: Some filters or housings seep slowly and create intermittent puddles.
- Cracked drain pan or mis-seated drain tube: If water is making it to the bottom but not staying in the pan, it can end up on the floor or in odd places.
Quick checks before you start taking things apart
1) Look for these clues
- Ice only under crispers, freezer seems fine: commonly a partial drain restriction or a cold spot that keeps refreezing a small amount of water.
- Lots of frost on the freezer back wall: can point toward a door seal leak, prolonged door openings, or a defrost system issue. A clogged drain can still be involved.
- Water on the floor in front of the fridge: may be overflow during defrost, a drain pan issue, or a water line leak on ice-maker or dispenser models.
2) Check the door gasket in 60 seconds
Wipe the gasket clean with warm soapy water and dry it. Then do the “paper test”: close the door on a dollar bill and tug. You should feel steady resistance all around.
- If it slips out easily in one area, that spot is leaking air.
- If the gasket is torn, stiff, or warped, plan on replacing it.
3) Confirm the fridge is slightly tilted back
Many fridges are happiest when the front is just a hair higher than the back, so doors self-close. On some models, being slightly tilted back can also help water stay in the intended drain trough instead of creeping forward.
4) If you have an ice maker or water dispenser, do this quick leak check
- Look for drip trails around the water filter housing, the back wall fittings, and any visible tubing.
- Check the ice maker fill area (usually in the freezer) for a frozen fill tube or an icicle that suggests overflow.
- Inspect the shutoff valve area and the line behind the fridge for slow seepage.
Safety first: power, water, and food
- Unplug the refrigerator before thawing or removing interior panels. If you cannot reach the plug, switch off the breaker.
- Protect your floor with towels. Meltwater will travel.
- Move food to a cooler if you expect the door to be open more than 20 to 30 minutes. Prioritize meat, dairy, and anything you need to keep below 40°F.
- Skip sharp tools for ice removal. No knives, no screwdrivers. Puncturing the liner, wiring, or a sealed-system line can be a very expensive mistake.
- If you use a hair dryer: plug it into a GFCI-protected outlet and keep it well away from any standing water. Keep the cord dry, keep the dryer moving, and stop if you cannot keep the area controlled.
Fix #1 (most common): thaw the ice and clear the defrost drain
This is the repair I have done most often for friends and neighbors. It is messy, but it is usually straightforward.
What you’ll need
- Towels and a shallow pan
- Hair dryer on low or a bowl of hot water
- Turkey baster or squeeze bottle
- Flexible plastic tubing or a zip tie (for gently probing a drain)
- Warm water mixed with a little dish soap
- Optional: a small amount of vinegar for odor and slime control
Step-by-step
- Empty the bottom shelf area. Remove the crisper drawers and any glass shelf above them.
- Thaw the ice sheet. Use a hair dryer on low, held moving and several inches away, and keep it away from puddles and wet towels. Do not concentrate heat on gaskets, sensors, or plastic edges. Or set a bowl of hot water on a towel and close the door for 10 minutes at a time to let steam do the work.
- Soak up meltwater as you go. Keeping water from refreezing makes the job faster.
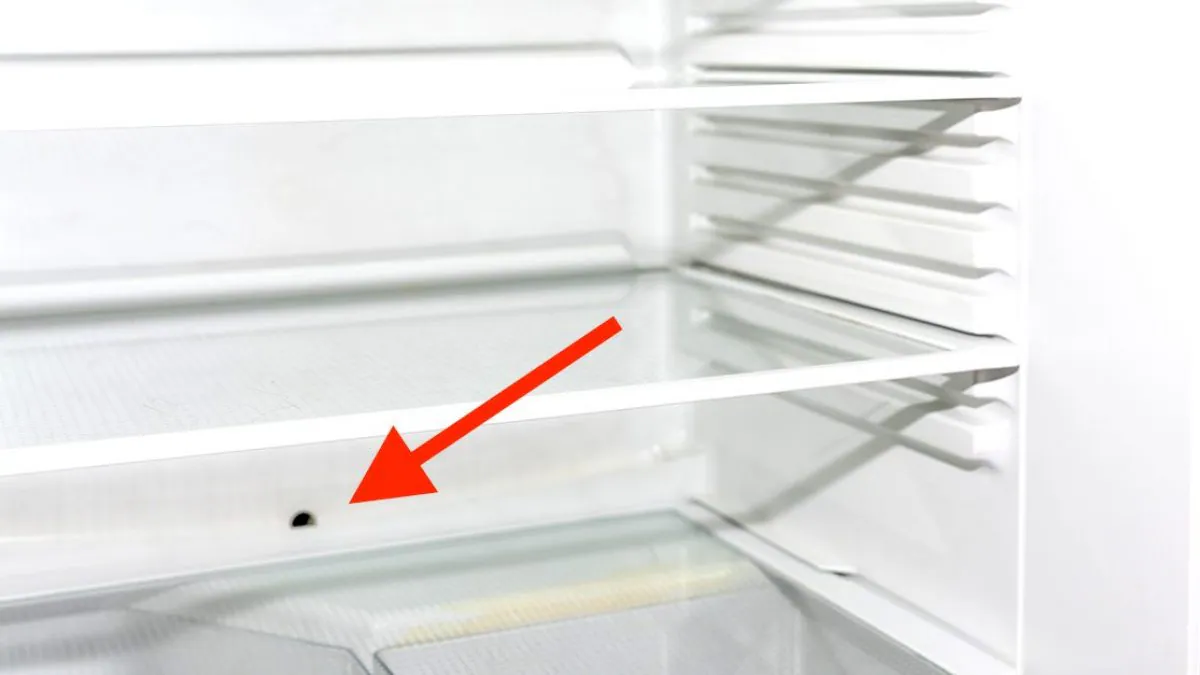
- Find the drain location. Many models have a drain hole or trough at the back of the fresh food compartment, sometimes behind a small cover. But on many single-evaporator units, the drain is in the freezer behind the rear interior panel. If you cannot find a drain in the fridge section, check your freezer.
- Flush the drain. Use a turkey baster to force warm soapy water into the drain. If it backs up, you have a clog or an ice plug.
- Gently probe if needed. Use flexible plastic tubing or a zip tie to loosen sludge. Do not use metal that can puncture the drain tube.
- Confirm it is truly clear. When the drain is open, water should flow away quickly. If you can, listen for water dripping into the drain pan underneath.
- Clean up and reassemble. Dry the area thoroughly before putting shelves and drawers back.
If the drain keeps freezing
A recurring frozen drain can happen if the first section of the tube is in a very cold spot or if the heater does not keep up. Some manufacturers sell an updated drain kit or a small heat probe that helps keep the drain opening warm during defrost. If you clear it and it freezes again within a week or two, that is a clue you may need a model-specific fix.
Fix #2: clear the drain tube from the back
Sometimes the blockage is lower in the tube or at the rubber end cap near the drain pan. If flushing from inside does not solve it, go from the other end.
Steps
- Unplug the fridge.
- Pull it out carefully. Watch the water line if you have an ice maker or dispenser.
- Remove the lower rear access panel. Usually a few screws.
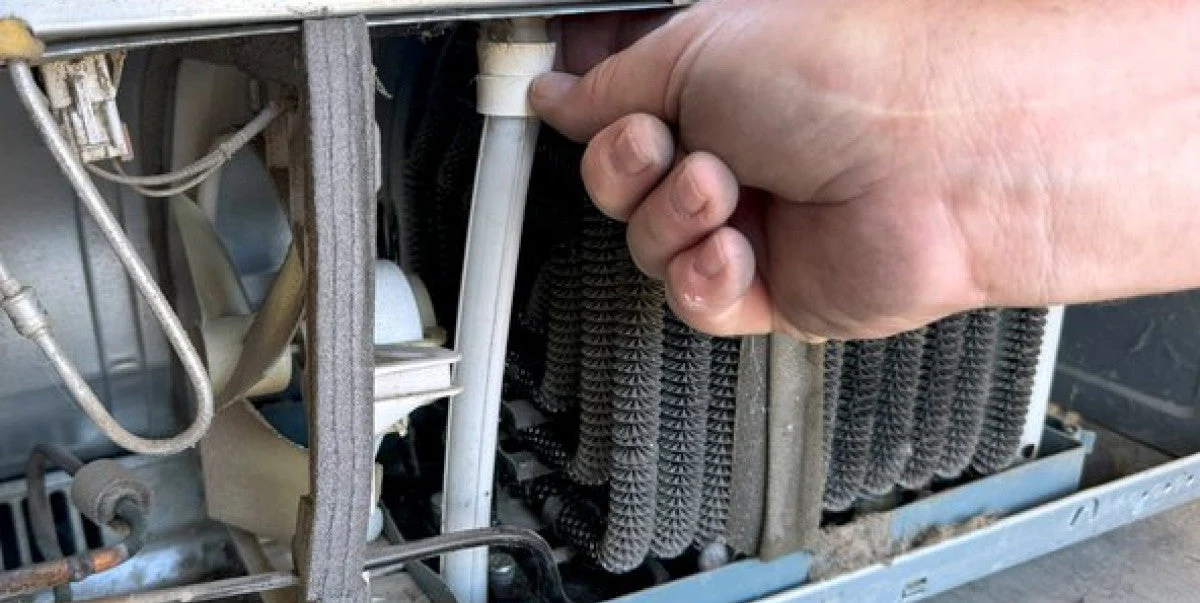
- Locate the drain tube and drain pan. You should see a tube that empties into the pan.
- Check the tube end for gunk. Some have a rubber “duckbill” style end that clogs easily.
- Clean and flush. Rinse the tube with warm water. If the duckbill is glued shut with slime, clean it thoroughly or replace it if it is deformed. Make sure the tube is properly seated so it drains into the pan.
- Give the drain pan a quick look. If it is unusually dirty or moldy, clean it and confirm it is not cracked.
Fix #3: address door seal leaks and humidity
If your drain is clear but ice returns, humidity is often the silent partner in the problem. A slightly leaky gasket introduces warm, moist air. That moisture turns into frost, then extra defrost water, then the puddle under your crispers.
What to do
- Clean the gasket and the mating surface on the cabinet with warm soapy water.
- Warm and reshape minor gasket waves with a hair dryer on low, then gently press it into shape as it cools.
- Replace torn or hardened gaskets. Use your model number to order the correct one.
- Reduce door-open time. It sounds obvious, but it matters when you are chasing recurring ice.
Fix #4: airflow and temperatures
Overpacked shelves and blocked vents can create cold zones where water refreezes before it drains.
- Do not block return vents in the fresh food compartment, often on the back wall.
- Set temps to normal ranges: about 37°F to 40°F in the fridge and 0°F in the freezer.
- Let leftovers cool before refrigerating when possible. Steam adds moisture.
When to call a technician
I am all for DIY, but there is a point where paying for a service call is cheaper than guessing.
Call a tech if you see any of these
- The back wall of the freezer is heavily frosted and temperatures are unstable
- You clear the drain and it refreezes repeatedly within days
- You suspect a failed defrost heater, defrost thermostat, or control board
- You find cracked plastic liners, damaged insulation, or you cannot access the drain without removing complex panels
- Water appears to be coming from a supply line, valve, filter housing, or ice-maker components
Tip: Before you call, write down your refrigerator model number and take a couple photos of the ice pattern and the drain area. It saves time and helps the tech bring the right parts.
Prevent it from coming back
- Flush the drain once or twice a year with warm water to prevent slime buildup.
- Keep the gasket clean so it seals well.
- Watch produce debris like onion skins and spinach bits that end up in the drain trough.
- Level the fridge after moving it or replacing flooring.
That ice under the crispers feels like a big problem because it shows up where you store food. In reality, it is often one clogged drain away from being fixed. Take it slow, keep the water under control, and you will usually have your fridge back to normal in an afternoon.
About Marcus Vance
Content Creator @ Grit & Home
Marcus Vance is a lifelong DIY enthusiast and self-taught home renovator who has spent the last decade transforming a dilapidated 1970s ranch into his family's dream home. He specializes in budget-friendly carpentry, room-by-room renovations, and demystifying power tools for beginners. Through his writing, Marcus shares practical tutorials and hard-learned lessons to help homeowners tackle their own projects with confidence.