🚨 In a DIY emergency or rush?
Skip the details and jump straight to our 30-second cheat sheet for the most crucial info.
If your basement smells musty, your crawlspace stays damp, or your mulch bed turns into a moat every time it rains, there is a good chance the real culprit is simple: your downspouts are dumping roof water too close to the house.
Downspout extensions are one of the cheapest foundation protection upgrades you can make, and they work immediately. You are not “fixing drainage forever” with one product, but you are stopping the biggest, most concentrated source of water from saturating the soil right next to your foundation.
Why extensions matter
Your roof collects a surprising amount of water. During a heavy storm, each downspout can discharge gallons per minute. For a quick sense of scale: a 1,000 sq ft section of roof getting 1 inch of rain produces about 623 gallons of water. That water has to go somewhere.
If that “somewhere” is the foundation line, it can:
- Increase hydrostatic pressure on basement walls
- Feed settlement issues by repeatedly wetting and drying the soil
- Erode mulch, wash out pavers, and carve trenches along walkways
- Keep siding and trim wet longer, which invites rot and pests
I learned this the hard way on my 1970s ranch. I kept blaming the yard grading, but the real problem was a short downspout that dumped right beside a corner of the house. Extending it stopped the puddle the same day.
Two rules: distance and slope
Rule 1: Get water far enough away
Most homes do well when the discharge point is at least 4 to 6 feet from the foundation. If you have clay-heavy soil, a basement, or you see water pooling, 6 to 10 feet is a better target where space allows.
Quick reality check: follow local code, HOA rules, and stormwater regulations. Some areas restrict discharge across sidewalks, into streets, or anywhere that creates icing hazards or nuisance runoff.
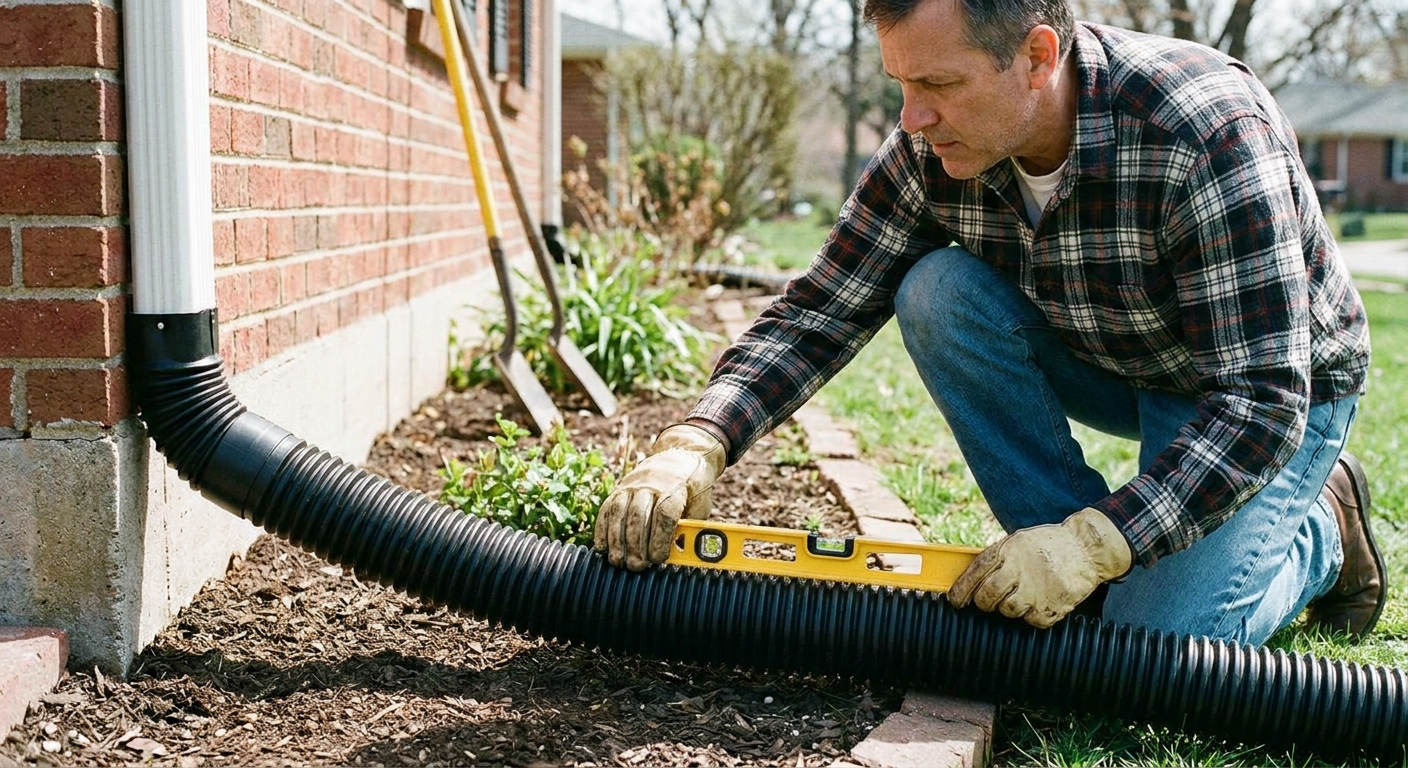
Rule 2: Maintain a steady slope
Your extension has to actually drain. A good target is about 1/8 to 1/4 inch of drop per foot of run. Treat 1/8 inch per foot as the minimum, and go steeper if you can do it neatly and safely.
If an extension holds water, it becomes a mosquito tube in summer and an ice plug in winter. Both problems lead to overflow right back at the house.
Pick a style
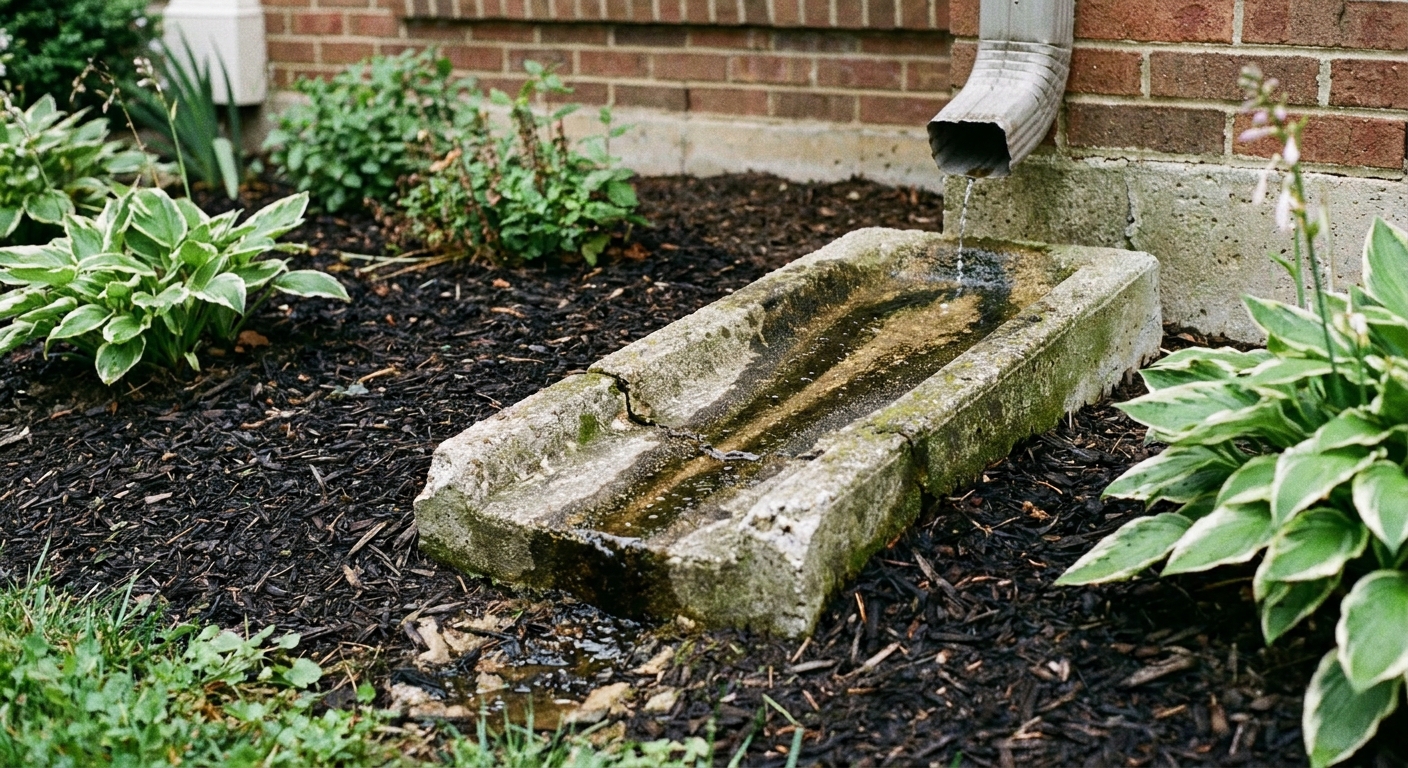
Splash blocks
A splash block is the simplest option. It reduces erosion and pushes water a short distance away from the wall.
- Best for: short runs where grading already carries water away
- Pros: cheap, nothing to clog, easy to mow around
- Cons: limited distance, can shift over time
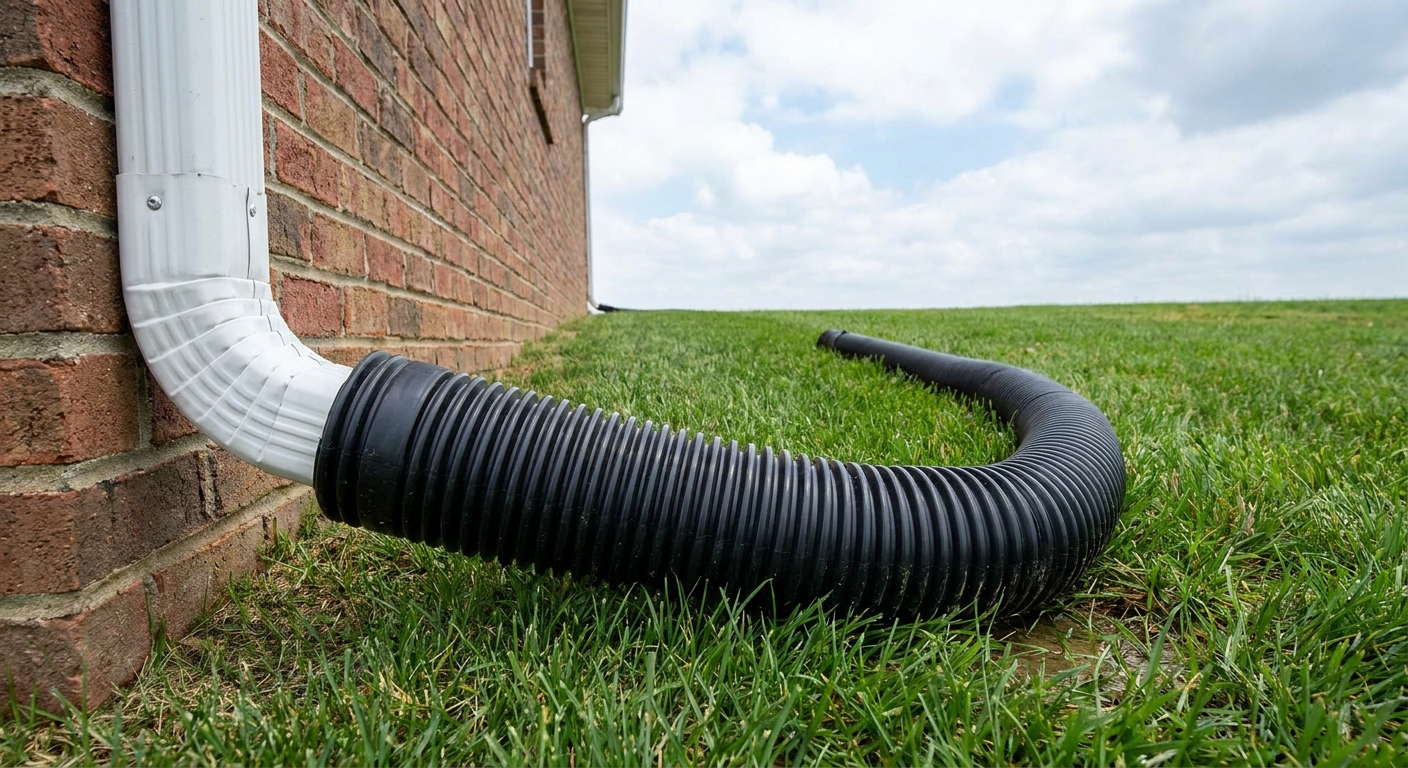
Flexible or hinged extensions
These are the most common add-ons. Flexible corrugated tubes are fast and forgiving. Hinged extensions flip up for mowing.
- Best for: quick improvements and tight budgets
- Pros: fast install, adjustable length, widely available
- Cons: corrugations trap debris, can look sloppy if not staked
Above-grade drainpipe runs
If you want a cleaner look and better flow, consider a straight run of smooth drainpipe or PVC on top of the ground that carries water to a safe discharge point. This stays “above-grade delivery” and avoids the complexity of a buried system.
- Best for: longer runs to daylight where you want fewer clogs
- Pros: better flow, easier to flush, more durable
- Cons: needs careful placement to avoid trip hazards and mower hassles
My neighbor-style advice: If you are currently dumping water at the foundation, do not overthink the first step. Install something today, then upgrade the look later.
Tools and materials
- Downspout extension (flex, hinged, or rigid)
- Adapter to match your downspout size (commonly 2x3 or 3x4)
- Sheet metal screws (or self-tapping gutter screws)
- Nut driver or drill with bit
- Tin snips (if trimming aluminum downspout)
- Cut-resistant gloves (fresh-cut aluminum edges are razor sharp)
- Safety glasses (especially when snipping metal or drilling)
- Level (torpedo level is perfect)
- Optional: downspout strap, zip ties, or landscape stakes to keep it aimed
- Optional: splash block at the discharge point to prevent erosion
Ladder note: If you are also cleaning gutters, use a stable ladder, keep it on level ground, and do not overreach.
Install steps
1) Watch water during a real rain
Before you buy anything, confirm where the water is going. Run a hose into the gutter near that downspout for a few minutes and see where it exits, and whether it pools.
2) Choose a discharge spot that will not cause a new problem
You want water to leave the house and continue traveling away. Avoid dumping:
- Across a sidewalk where it can ice up
- Into a neighbor’s yard
- Right into a mulched bed that turns into soup
- Against a fence line where it will rot posts
Also think about what is nearby. Keep discharge away from things that do not like extra water, like retaining walls, septic areas, wells, and property lines.
If you can, aim toward a gentle slope or a lower area of your yard that already drains well. If local rules prohibit street discharge, do not aim it that way even if it is tempting.
3) Confirm your downspout size and shape
Most downspouts are 2x3 inches or 3x4 inches (rectangular). Buy the extension and any adapter that matches. A sloppy connection leaks right where you do not want it.
4) Clean the bottom elbow and outlet
Pull out leaves and gritty roofing debris. If the elbow is packed, the extension will not save you because the downspout will overflow above the clog.
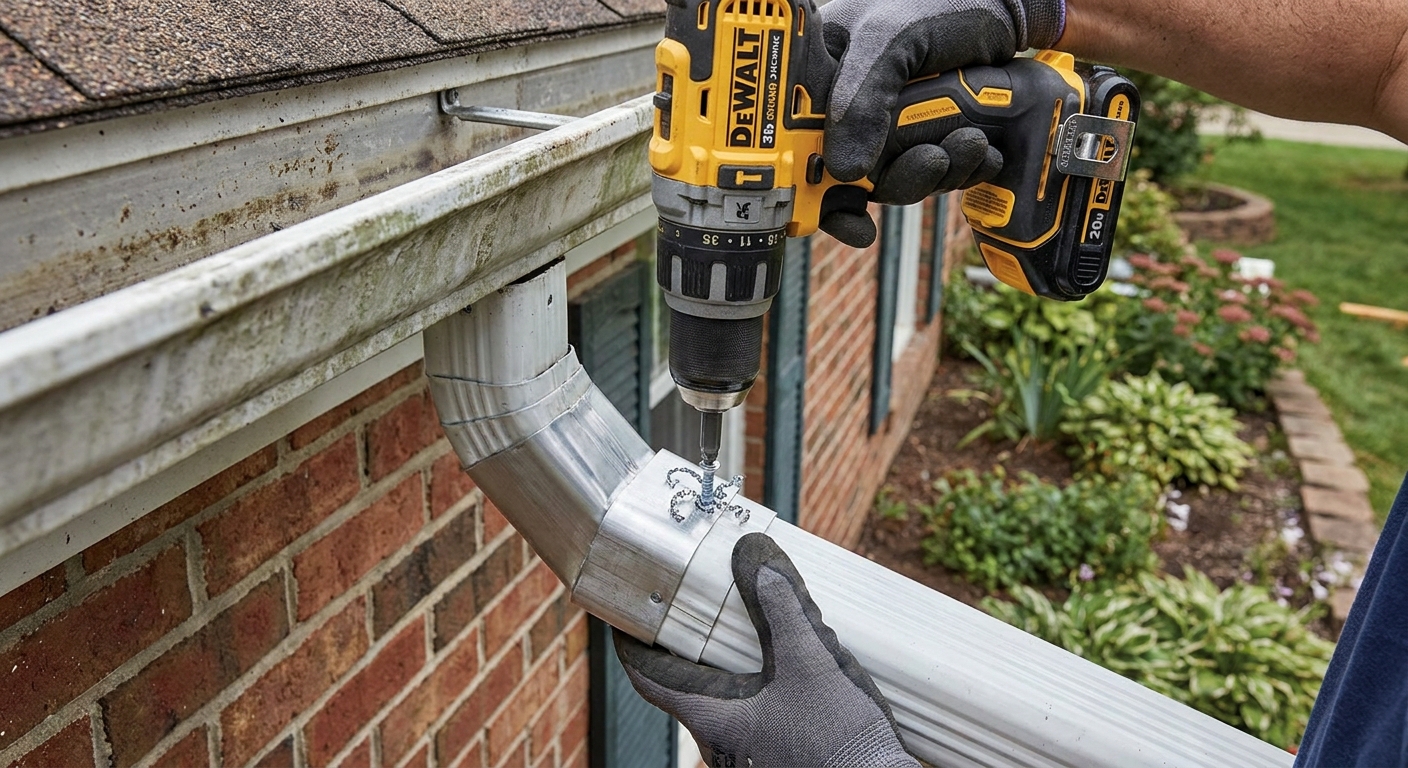
5) Attach the extension and secure it
Dry-fit first. Then fasten the connection with 1 to 3 sheet metal screws. You do not need a dozen screws. You just need it to stay put during a storm and when you bump it with a mower.
6) Set slope and lock in the direction
Lay your level on the extension and adjust until it slopes away. Stake flexible extensions so they do not curl back toward the wall over time.
Do not step on corrugated flex tubing. It crushes easily, and a flattened section slows flow and catches debris.
7) Protect the exit point
Add a splash block, a small section of pavers, or a patch of gravel where the water hits to prevent a muddy crater.
8) Test again
Run the hose and confirm:
- No leaks at the connection
- Water exits where you planned
- No pooling near the foundation after a few minutes
How long should it be?
If you want a simple rule of thumb:
- Minimum: 4 feet away from the foundation
- Better: 6 to 10 feet where space allows
- Go longer if: you have clay soil, a basement, a history of water intrusion, or visible pooling
Also look at what the water does after it exits. A long extension that dumps onto a flat spot can still create a swamp. In that case, the fix might be as simple as redirecting the discharge a few feet to the left or right to catch a natural slope.
Winter notes
In freezing climates, downspout extensions can create ice problems fast. Here is how to keep them from backfiring.
Prevent ice at the outlet
- Do not discharge onto walkways, driveways, or steps
- Make sure the extension drains fully and does not sag
- Keep the end open, not shoved into soil or mulch
Hinged or removable helps
If you get heavy snow, a hinged extension that flips up can save you from snapping it with a shovel or snowblower. For flexible extensions, consider disconnecting them for winter if they regularly freeze solid. Just remember to add a splash block temporarily so water is not hammering the foundation.
Check after thaw
When things thaw, check that the extension did not shift and that the discharge path did not turn into a rut. Frozen ground can force water to run across the surface in weird directions.
Extensions, gutters, French drains
Extensions and gutter cleaning go together
Think of downspout extensions as the delivery route. Clean gutters and clear downspouts are the supply line. If the supply line is clogged, water will overflow at the gutter edge, often right next to the foundation, and you will still have problems.
I recommend:
- Clean gutters at least twice a year (more if you have overhanging trees)
- Flush each downspout with a hose after cleaning
- Add a simple downspout screen if you constantly find big leaves in the elbow
French drains: related, not identical
A French drain is a subsurface drainage system. It helps manage water in the soil and can be used to intercept water near problem areas, including around foundations when properly designed.
Downspout extensions prevent roof runoff from becoming “soil water” right beside your foundation in the first place. If you already have a French drain system, extending downspouts can reduce how hard that system has to work.
Also true: in some setups, downspouts can be routed into a solid underground line that discharges to daylight or another approved outlet, and a French drain may be part of that broader system. Done wrong, buried downspouts can become invisible clogs.
If you bury it
This guide stays above-grade, but here is the quick warning paragraph because people do this every weekend: if you bury a downspout run, use solid pipe, keep a cleanout where you can access it, and make sure it has a real outlet to daylight or another approved discharge point. Avoid perforated pipe for downspouts. You do not want to dump roof water into the soil next to the foundation.
Common mistakes
- Too short: the extension ends in the mulch bed right at the house.
- No slope: the tube holds water and turns into a clog and freeze point.
- Aiming at concrete: creates slick ice in winter or algae stains in summer.
- Creating a new swamp: water is “away from the house” but still pooling because the yard is flat.
- Loose connections: the extension pops off in a storm and you do not notice for weeks.
- Ignoring the real issue: gutters overflowing from clogs will bypass your extension entirely.
Buying checklist
- Measure your downspout size (2x3 or 3x4)
- Decide on flexible, hinged, or rigid above-grade pipe
- Pick a target discharge spot 4 to 10 feet away (and allowed by local rules)
- Plan for mowing and foot traffic
- Grab stakes or straps so it stays aimed
- Add a splash block or gravel at the exit if erosion is likely
When to call a pro
Downspout extensions are DIY-friendly, but you may want a pro opinion if:
- You see stair-step cracks, bowing basement walls, or serious settlement
- Water enters the basement during storms even after extending downspouts
- Your lot drains toward the house and regrading might be needed
- You cannot find any safe place to discharge without creating ice or neighbor runoff
That is not a failure. It is just knowing when the problem is bigger than a $20 fix.
Bottom line
If you do one foundation-protection project this weekend, extend your downspouts. Keep the water moving, keep the outlet far enough from the wall, and make sure the extension drains fully. Clean gutters plus properly aimed extensions is a simple combo that prevents a lot of expensive headaches.
The 30-Second Cheat Sheet
Essential takeaways for: Install Downspout Extensions to Protect Your Foundation
What to do (fast)
- Extend each downspout so water discharges at least 4 to 6 feet from the foundation (6 to 10 feet is even better if you have space, clay soil, or a basement). If local code or an HOA says otherwise, follow that.
- Set slope so the extension drains fully. Aim for roughly 1/8 to 1/4 inch drop per foot (1/8 is a minimum, more is usually better).
- Secure the connection with 1 to 3 sheet metal screws so it does not pop off in a storm.
- Protect the exit point with a splash block, gravel, or a couple pavers to prevent erosion.
- Do not step on flex extensions. Corrugated tubing crushes easily, and a flattened spot becomes a clog point.
Splash block vs extension
- Splash block: best when your yard already slopes away and you only need a little push from the wall.
- Extension (flex or hinged): best for getting water several feet away on a budget.
- Above-grade rigid pipe run: best for longer, cleaner-looking runs with fewer clogs than corrugated tubing.
Winter notes
- Do not discharge onto sidewalks or driveways where it can freeze.
- Avoid sags that hold water (ice plugs cause overflow).
- Consider hinged or removable extensions if you shovel or snowblow near them.
How this fits with other fixes
- Gutter cleaning: required. If gutters or elbows are clogged, water will overflow before it ever reaches the extension.
- French drains: complementary. Extensions reduce roof runoff soaking into soil near the foundation, which reduces load on any subsurface drainage. In some designs, French drains can also carry roof runoff, but that is a different project with cleanouts and a proper outlet.
My quick test
Run a hose into the gutter near the downspout for a few minutes. If water pools near the foundation, extend farther or redirect to a spot with better natural slope.
💡 Tip: Scroll up to read the full article for detailed, step-by-step instructions.
⬆️ Back to topAbout Marcus Vance
Content Creator @ Grit & Home
Marcus Vance is a lifelong DIY enthusiast and self-taught home renovator who has spent the last decade transforming a dilapidated 1970s ranch into his family's dream home. He specializes in budget-friendly carpentry, room-by-room renovations, and demystifying power tools for beginners. Through his writing, Marcus shares practical tutorials and hard-learned lessons to help homeowners tackle their own projects with confidence.