🚨 In a DIY emergency or rush?
Skip the details and jump straight to our 30-second cheat sheet for the most crucial info.
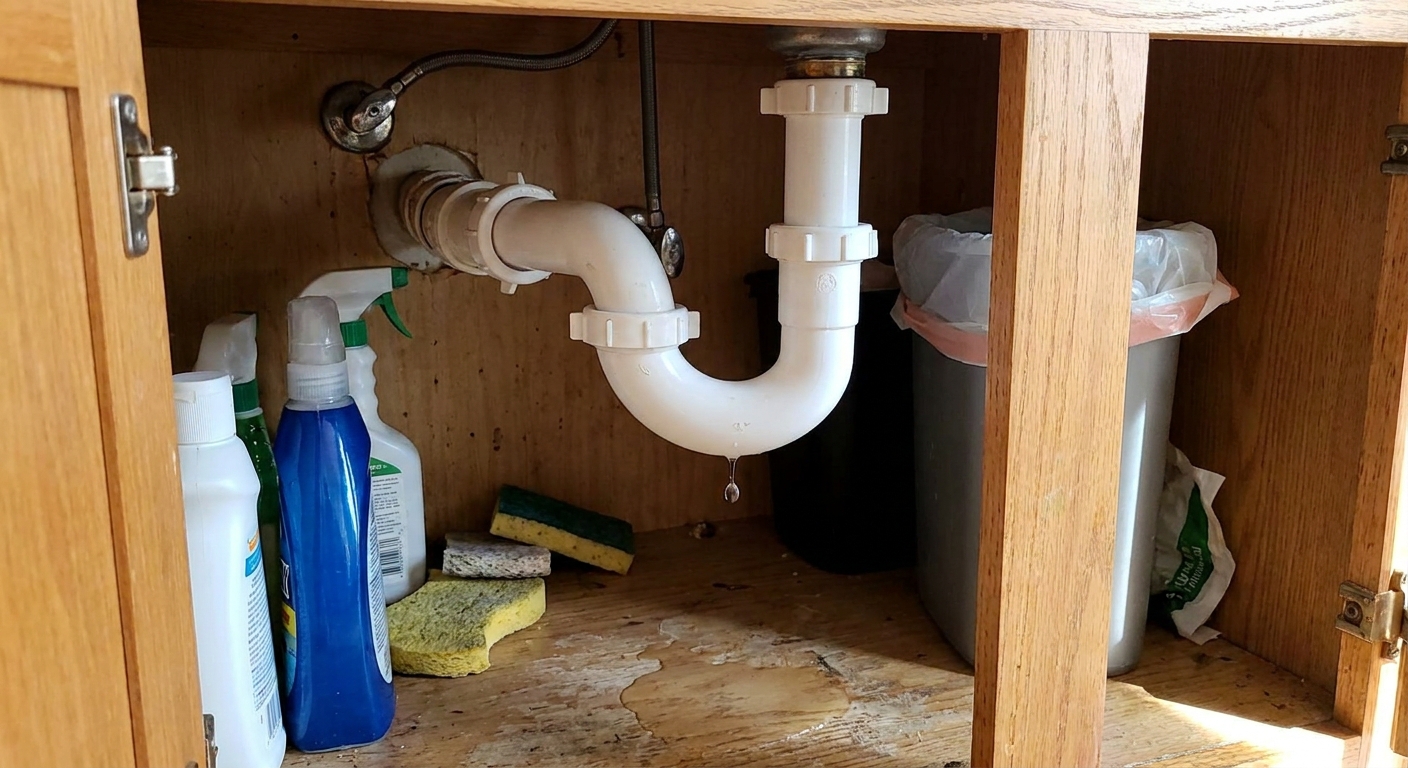
A leaking kitchen sink drain at the P-trap is one of those problems that looks like a big plumbing failure, but is usually a small sealing issue. Many under-sink leaks you can actually see and reach happen at the slip-joint connections, where a nut squeezes a tapered washer against a pipe. If the washer is flipped, cocked, cracked, or the nut is cross-threaded, you get the classic slow drip that turns your cabinet floor into a science experiment.
In this guide, I will help you spot exactly where the leak starts, tighten things in the right order, and decide when you can simply reseat a washer versus when it is time to replace the trap.
First, set up for a clean test
What to grab
- Bucket and a few rags or paper towels
- Flashlight or headlamp
- Gloves (optional, but you will thank yourself)
- Tongue-and-groove pliers (Channellock-style) for metal nuts, or your hands for most plastic nuts
- Replacement slip-joint washers (assorted 1-1/4 inch and 1-1/2 inch are handy)
- New P-trap kit if yours is old, cracked, or badly corroded
- Plumber's grease (optional) for washer seating
Clear the area
- Clear out everything under the sink.
- Lay down a dry towel or paper towels under the trap. This makes new drips obvious.
- Put a bucket under the P-trap. Even “small” drips love to turn into a steady stream once you start loosening things.
Quick note: A P-trap leak is usually a drain leak, not a pressurized leak. It will often show up when water is running or just after the sink drains, but a trap can also weep slowly if water is left sitting in it, and some “leaks” turn out to be condensation or water that traveled along a pipe before dripping.
Make sure it is really the P-trap
Before you start turning nuts, take 60 seconds to rule out the stuff that looks like a trap leak because water runs down and drips off the lowest point.
- Sink strainer or drain flange: Check for water around the strainer locknut area and the underside of the sink bowl.
- Faucet or supply lines: A tiny drip from a supply stop or faucet can run along tubing and end up dripping off the trap.
- Disposal or dishwasher hose: Look for moisture on the disposal body, at the discharge outlet, and at the dishwasher barb and clamp (or air gap connections if you have one).
Find the leak before you touch anything
The biggest DIY mistake here is cranking on every nut you see. That can warp washers, strip plastic threads, or crack a brittle trap. Instead, find the exact starting point.
Common leak spots
- Tailpiece to trap inlet: Where the vertical tailpiece (or disposal outlet pipe) meets the trap inlet, often through a short extension tube.
- Trap bend slip nuts: The two nuts that hold the curved P-trap section to the vertical and horizontal pieces.
- Trap arm to wall: Where the horizontal pipe slides into the wall stub-out (trap adapter).
- Dishwasher branch: Barb nipple and clamp connection if your drain setup includes one.
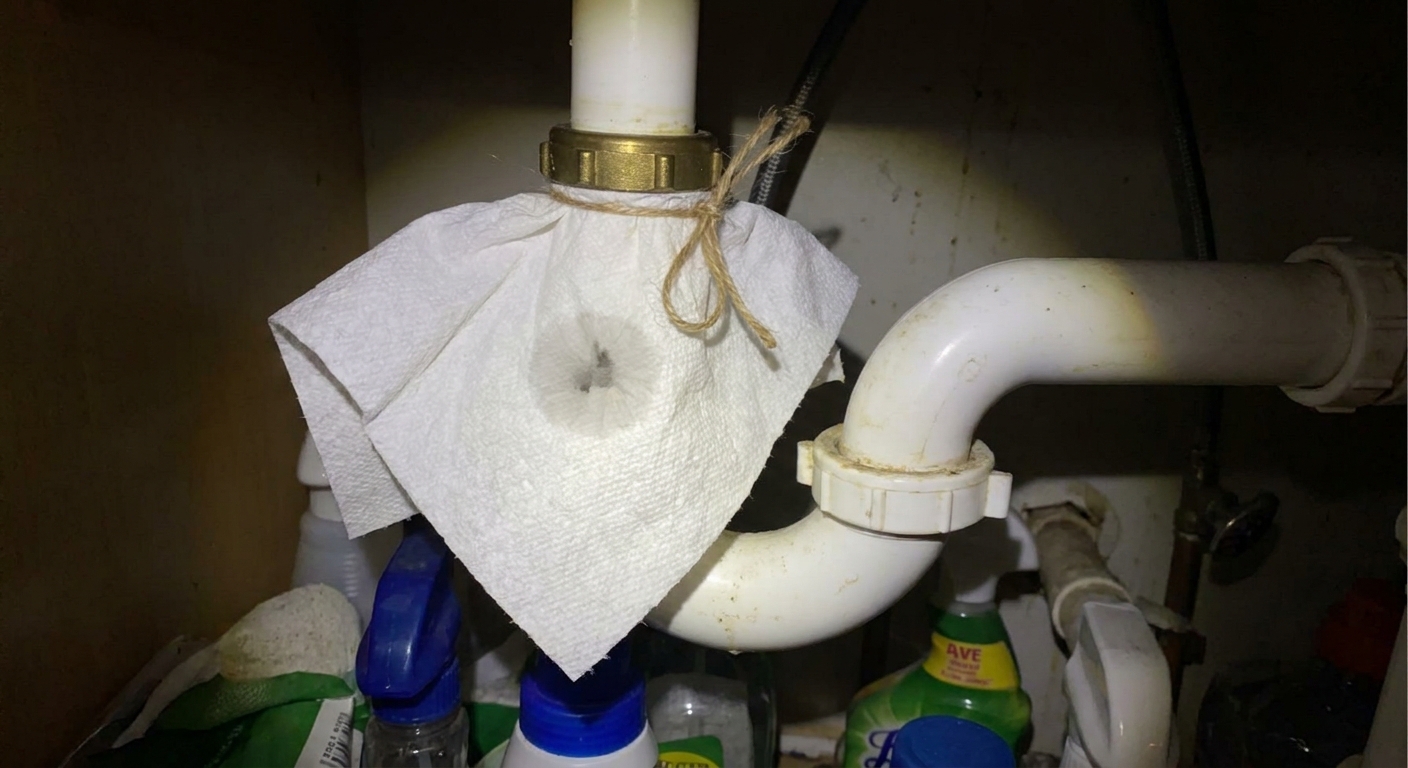
Pinpoint the drip in 2 minutes
- Dry everything with a rag.
- Wrap a dry paper towel around one joint at a time.
- Run water for 20 to 30 seconds, then stop it and watch as the basin drains.
- The first towel to get wet is your culprit.
Know what you are tightening
Most under-sink drains use slip-joint connections. They seal with a tapered washer, not with pipe thread tape. The nut’s job is to compress the washer evenly. If the washer is not seated square, tightening harder does not fix it. It often makes it worse.
Plastic vs metal
- Plastic (PVC or polypropylene): Very common and beginner-friendly, but easy to strip if overtightened or cross-threaded.
- Metal (chrome-plated brass): Can corrode, pit, and develop pinhole leaks. Nuts may seize, and old washers can harden.
If your trap is chrome and looks “crusty” or greenish, replacement is often the fastest and most reliable fix.
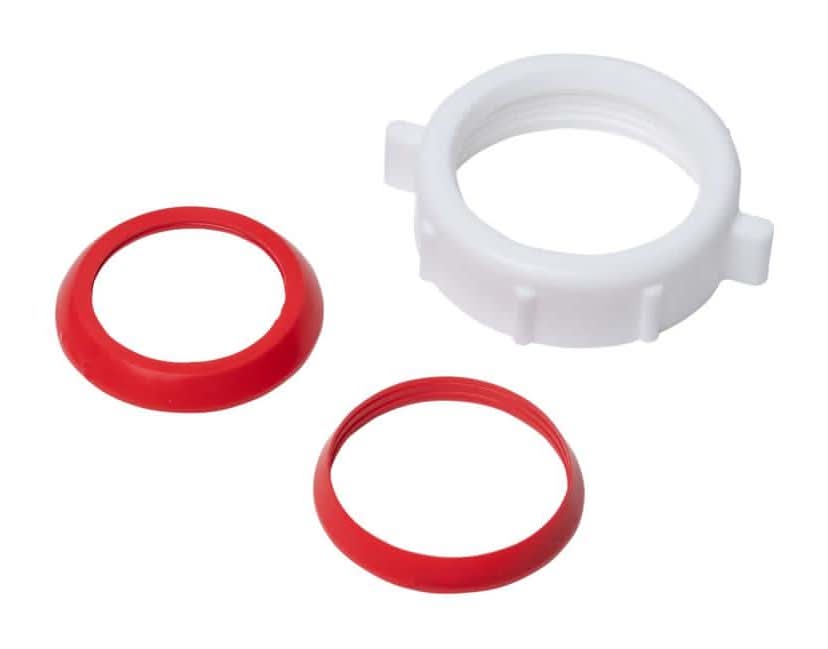
Washer types
Slip-joint washers come in different shapes and materials (often nylon or rubber). Matching the size and style you already have usually saves a lot of frustration.
Tighten in the right order
When you tighten one joint, you can slightly rotate or shift the pipes. That can open up a different joint. The goal is to get everything aligned first, then snug things down without stressing the plastic.
Sequence
- Hand-loosen the slip nuts slightly (yes, loosen). Give each nut about a quarter to a half turn loose so the parts can settle.
- Align the trap: The vertical section should be roughly plumb, and the trap arm should slope slightly downward toward the wall so it drains by gravity. A typical target is about 1/4 inch per foot. Avoid creating a belly or sag.
- Snug the wall connection first (trap arm into the trap adapter). Hand-tighten the nut until it stops, then go another 1/8 to 1/4 turn.
- Snug the tailpiece connection next (from sink drain or disposal outlet down into the trap inlet).
- Snug the trap bend nuts last (the ones on the curved section).
- Test for leaks with running water and a full basin drain.
How tight is “tight enough” on plastic?
For plastic slip nuts: hand-tight plus about a quarter turn is a good target. If you need pliers, use them gently and only for tiny adjustments. If you crank down hard enough to leave deep tooth marks, you are in the danger zone.
My own mistake, more than once: I have overtightened a plastic nut, thought I fixed the leak, and then discovered a hairline crack a week later. If the leak stops only when you go gorilla-tight, it is usually telling you the washer is wrong, damaged, or not seated square.
Reseat or replace the washer
If the joint still drips after proper snugging, you are almost always dealing with a washer issue.
Reseat steps
- Put the bucket under the joint.
- Loosen the slip nut and slide it up the pipe.
- Remove the washer.
- Inspect it: look for cracks, flattening, deformation, or a hardened slick feel.
- Check orientation: most conical washers seat with the tapered side toward the receiving fitting and the flatter side toward the nut. In plain English, the bevel usually faces into the piece it is sealing against.
- Wipe the mating surfaces clean. Grit or gunk can create a leak path.
- Reinstall the washer, making sure it sits evenly all the way around.
- Thread the nut on by hand to avoid cross-threading, then snug it.
Optional pro move: A tiny smear of plumber's grease on the washer can help it slide into position without twisting. Avoid using Teflon tape or pipe dope as the primary “fix” on slip joints. The seal is the washer, not the threads.
Replace the trap if needed
Sometimes the right fix is not “more tightening.” It is new parts. Luckily, P-traps are one of the more forgiving DIY plumbing swaps.
Replace it if
- The trap has cracks, even tiny ones near the nut seats.
- Chrome trap is pitted, flaking, or corroded.
- The slip nuts are cross-threaded or the threads are stripped.
- You cannot stop a leak without overtightening.
- The trap was previously “fixed” with lots of sealant, tape, or mismatched parts.
Pick the right kit
- Match size: in the U.S. and Canada, most kitchen sinks are 1-1/2 inch, while many bathroom sinks are 1-1/4 inch.
- Match material: plastic is easiest and resists corrosion. Metal looks nicer but can corrode depending on water and cleaners.
- If you have a disposal, you may need an extension tube to line everything up.
Take a quick photo of your existing setup before you pull it apart. That photo has saved me more than once on a second trip to the hardware store.
Avoid repeat leaks
1) Cross-threading plastic nuts
Start every plastic nut by hand, turning it backwards a half turn until you feel the threads “drop,” then tighten forward. If it feels crunchy or tight immediately, back off and try again.
2) Overtightening to “make it stop”
Overtightening can:
- Warp the washer so it no longer seals
- Crack the trap hub
- Strip the nut
If you are past hand-tight plus a quarter turn and it still drips, reseat or replace the washer.
3) Misalignment and stress
The P-trap should not be acting like a spring. If you have to push pipes sideways to make them meet, add an extension tube or adjust lengths so everything lines up naturally.
4) Tape where it does not belong
Slip-joint connections seal on the washer, not the threads. Tape on the threads usually does nothing and can actually make it harder to get proper compression.
5) Creating a “bad” trap setup
If you are rebuilding parts, avoid corrugated flex drain pieces, and do your best not to accidentally create an S-trap. If the only way to make it connect is a weird loop or a forced angle, stop and rethink the layout.
Leak at the wall
If the leak is at the wall connection, it is often one of three things: the washer is missing or backwards, the trap arm is not inserted far enough, or the trap adapter in the wall is cracked.
Checklist
- Confirm there is a washer inside the nut at the wall.
- Make sure the trap arm is inserted straight and deep enough to seat.
- Look for cracks in the trap adapter. If it is cracked, you are moving beyond a simple under-sink repair and may want a plumber.
When to call a plumber
I am all for DIY, but here are the lines I do not like to cross under a kitchen sink:
- Water appears to be coming from inside the wall or around the wall stub-out even when the trap is dry
- You find soft, damaged cabinet floor and suspect long-term leakage and mold
- The drain piping is glued PVC that is misaligned and would require cutting and re-gluing
- Multiple fixtures back up, suggesting a bigger clog or venting issue
Final leak test
- Run hot water for 60 seconds.
- Fill the sink halfway, then pull the stopper and let it drain fast.
- Wipe each joint with a dry paper towel.
- Check again 10 minutes later. Some slow leaks show up after the water film has time to creep.
Once it stays dry through those tests, you are good. And your cabinet floor can go back to being a cabinet floor instead of a drip pan.
The 30-Second Cheat Sheet
Essential takeaways for: Kitchen Sink P-Trap Leak: Tighten, Reseal, or Replace?
Find the leak fast
- Dry all pipes, then wrap a paper towel around one joint at a time.
- Run water, then drain a full sink. The first wet towel marks the leak point.
Tighten in the right order
- Loosen each slip nut slightly so parts can settle.
- Align pipes with no stress.
- Snug wall connection first, then tailpiece, then P-trap bend nuts.
Plastic rule: hand-tight + about 1/4 turn. If you need to reef on it, stop and reseat the washer.
Reseat or replace washers
- If it still drips after snugging, remove the nut and check the tapered washer.
- Replace washers that are cracked, flattened, twisted, or hardened.
- Reassemble clean and square. Start threads by hand to avoid cross-threading.
Replace the whole trap if
- There are cracks in plastic, or pitting/corrosion in chrome.
- Threads are stripped or nuts are cross-threaded.
- The leak stops only with overtightening.
Do not do this
- Do not rely on Teflon tape for slip joints. Washers make the seal.
- Do not overtighten plastic. It can crack or strip.
- Avoid corrugated flex drain pieces as a “quick fix.” They trap gunk and often cause repeat leaks.
Call a plumber if
- Water seems to come from inside the wall or the wall fitting is cracked.
- You need to cut and re-glue drain piping.
💡 Tip: Scroll up to read the full article for detailed, step-by-step instructions.
⬆️ Back to topAbout Marcus Vance
Content Creator @ Grit & Home
Marcus Vance is a lifelong DIY enthusiast and self-taught home renovator who has spent the last decade transforming a dilapidated 1970s ranch into his family's dream home. He specializes in budget-friendly carpentry, room-by-room renovations, and demystifying power tools for beginners. Through his writing, Marcus shares practical tutorials and hard-learned lessons to help homeowners tackle their own projects with confidence.