🚨 In a DIY emergency or rush?
Skip the details and jump straight to our 30-second cheat sheet for the most crucial info.
If your kitchen sprayer suddenly feels like it is whispering instead of blasting, you are not alone. In my old 1970s ranch, I have chased this exact problem more than once, and almost every time the culprit was something simple: a clogged sprayer head, a kinked hose, or a valve that was not fully switching over.
The key is figuring out whether the low pressure is only at the sprayer or if the whole faucet is weak. That one detail narrows the list of causes fast and keeps you from taking half the sink apart for no reason.

First: Sprayer only or whole faucet?
Before you grab tools, run two quick tests. This saves a lot of guesswork.
Test A: Compare sprayer to faucet flow
- Sprayer weak, faucet strong: most likely a clogged sprayer head, kinked hose, an inline screen clog, or a diverter issue (on many faucets).
- Both sprayer and faucet weak: more likely a supply valve not fully open, clogged faucet aerator or cartridge, a clogged inlet screen, or a broader home water pressure problem.
Test B: Hot vs cold
- Sprayer weak on both hot and cold: points to a sprayer head clog, hose restriction, inline screen, or diverter path issue.
- Faucet weak on both hot and cold: points to the aerator, cartridge, inlet screens, or overall supply pressure.
- Weak only on hot or only on cold: points to that side’s shutoff valve, supply line, or debris lodged where that water enters the faucet.
My rule of thumb: if the main faucet stream is healthy, start at the sprayer head and work backward. That is where the highest percentage of easy wins lives.
Safety and tools
No heavy-duty gear needed. Here is what I keep within arm’s reach:
- Adjustable wrench or basin wrench
- Towel and a small bowl (you will spill a little water)
- Needle-nose pliers (optional)
- Old toothbrush
- White vinegar (for mineral scale)
- PTFE thread tape (optional, and only for tapered pipe-thread connections, not compression or most quick-connect fittings)
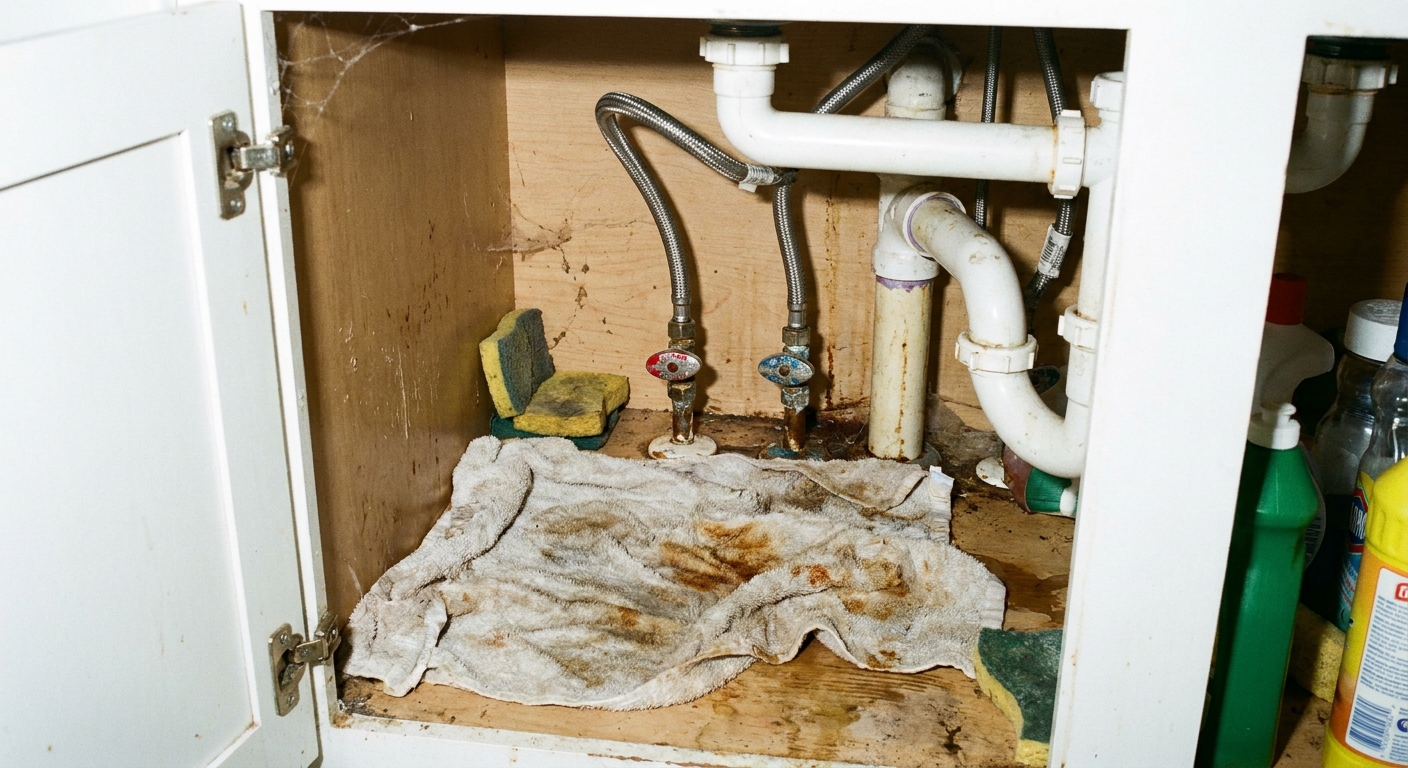
Before you start: clear out the cabinet and set a towel down. If you plan to disconnect lines, shut off the hot and cold supply valves under the sink, then open the faucet to relieve pressure. If you are working over the basin, plug the drain so tiny parts do not disappear forever.
Cause 1: Clogged sprayer head
Sprayers pick up mineral scale, sand-like grit, and tiny rubber bits from old washers. If your faucet is fine but the sprayer is weak, start here.
Fix: Clean the sprayer head
- Unscrew the sprayer head from the hose. Most hand sprayers twist off by hand, others need a gentle wrench turn. Wrap with a towel to avoid scratching.
- Check the screen and flow restrictor inside the sprayer head. Look for grit, flakes, or scale.
- Rinse and brush the parts with an old toothbrush.
- Soak in vinegar for 30 to 60 minutes if you see white crusty buildup, then rinse again.
- Reassemble and test.
What not to do: do not drill out restrictors or permanently remove parts unless you are sure it is legal in your area and you are okay with higher water use. Cleaning usually gets you back to full strength.

Cause 2: Kinked or pinched hose
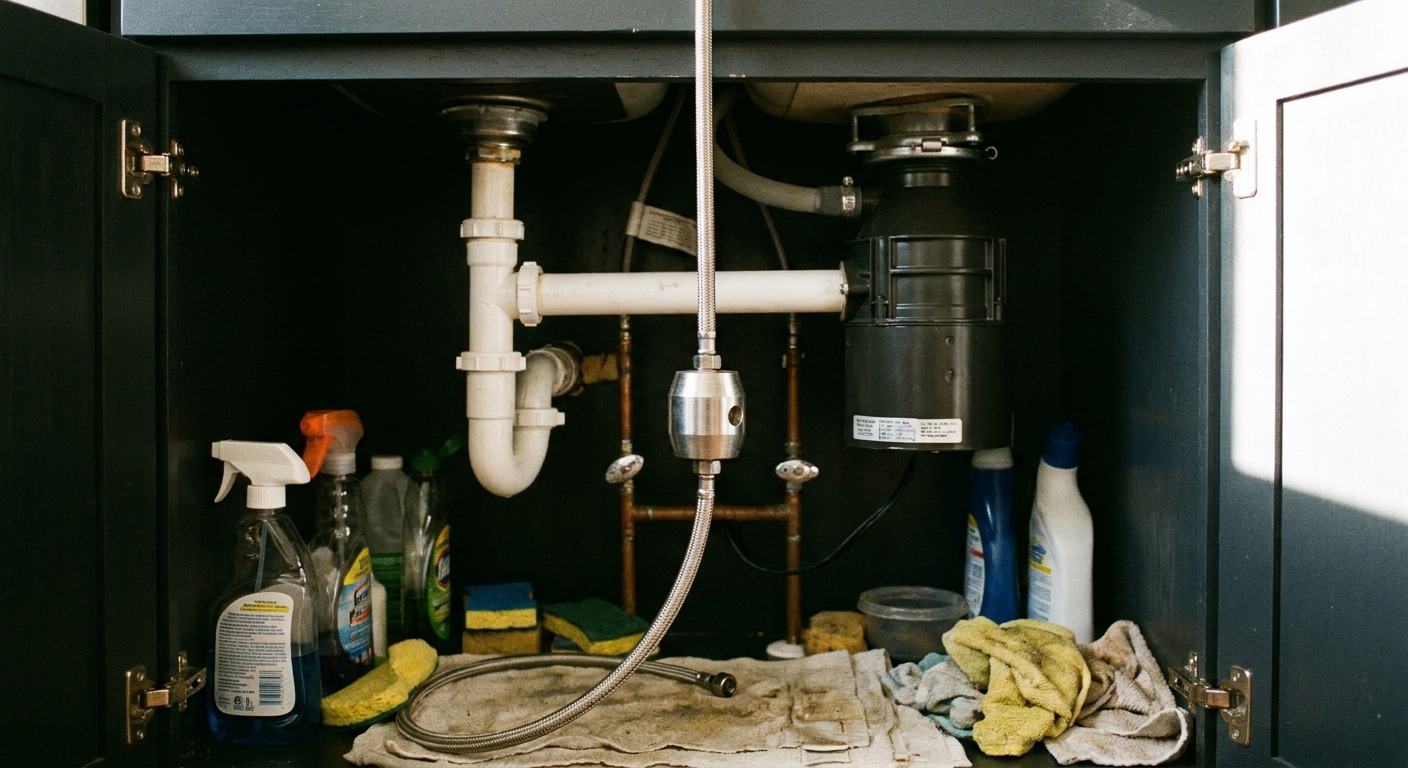
Pull-out and side sprayer hoses love to snag on cleaning bottles, the garbage disposal, or the cabinet wall. A single sharp bend can cut flow way down.
Fix: Inspect the hose run
- With the sprayer pulled out, look under the sink and follow the hose from the faucet to where it connects.
- Clear obstructions like spray bottles, bin edges, or a bundle of rags.
- Look for pinch points where the hose rubs a sharp hole in the cabinet or gets trapped behind the P-trap.
- If your faucet uses a counterweight on the hose, make sure it is not jammed against another pipe or set too low.
Quick confirmation: if the sprayer pressure changes as you wiggle the hose, you have found your problem.
Cause 3: Diverter not switching
In many faucets, a diverter is the internal gate that routes water toward the sprayer when you squeeze the trigger or switch spray modes. In other designs, the spray head itself does more of the directing. Either way, if that routing is sticking or partially blocked, sprayer flow can drop.
Signs it is the diverter
- Sprayer is weak and the faucet stream changes when you use the sprayer.
- You get a delay before the sprayer reaches full flow.
- The sprayer used to be strong, then gradually got worse even after cleaning the head.
Fix options
- Flush it: remove the sprayer head, point the hose into a bucket, and briefly run water. This may push debris out of the line and routing path. Hold on tight and aim low because it can splash.
- Clean the diverter: depending on your faucet brand, the diverter may be under the spout, under a cap near the base, or integrated into the cartridge. Shut off water, relieve pressure, then follow the manufacturer’s steps to pull and rinse the diverter.
- Replace the diverter or cartridge: if it is worn, swollen, or cracked, replacement is often cheaper than fighting it.
My tip: take a quick phone photo before removing small parts. Diverters have a talent for going back in one wrong way and making you doubt your sanity.
Cause 4: Shutoff valves partly closed
Under-sink shutoff valves are easy to bump, especially if you store stuff in the cabinet. Also, older valves can clog internally with sediment.
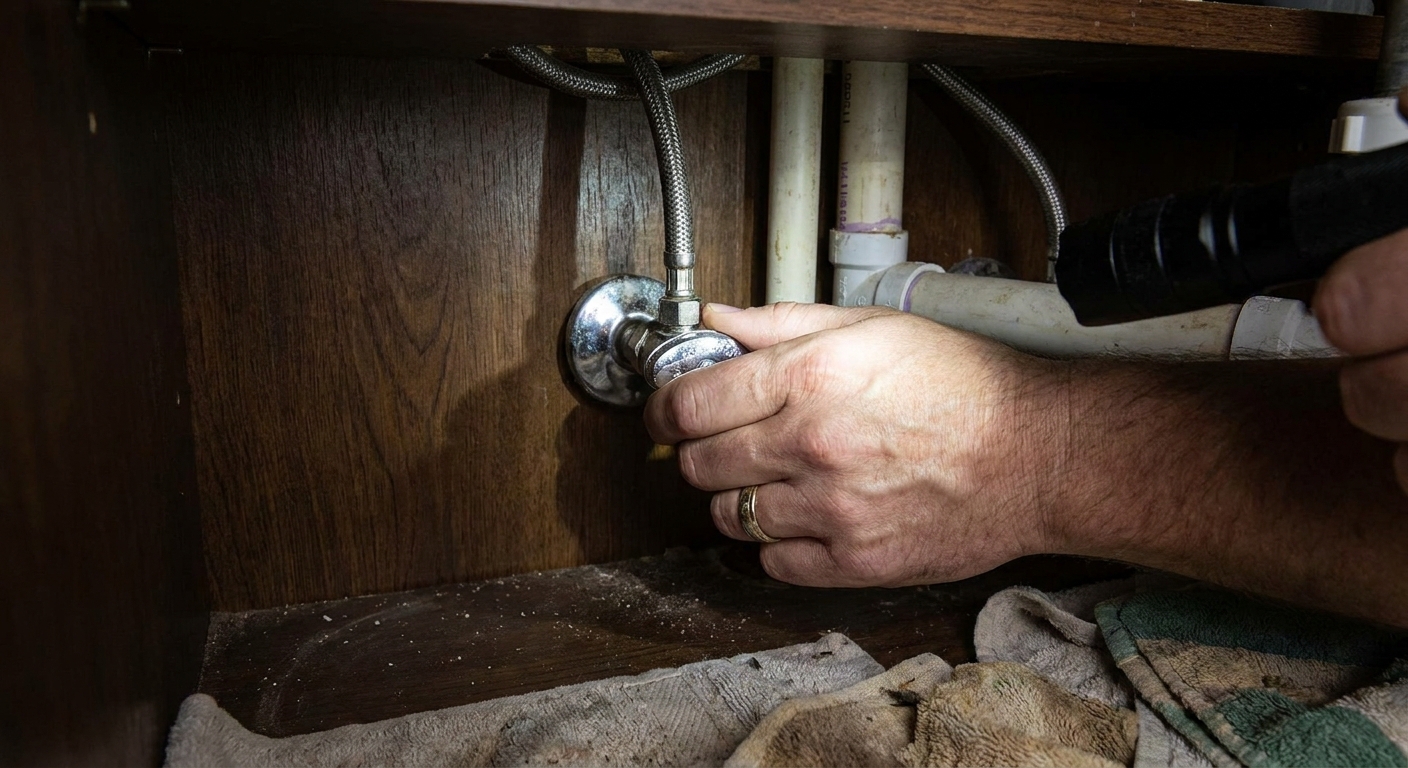
Fix: Verify hot and cold shutoffs
- Open each valve fully without forcing it. Most multi-turn valves open by turning counterclockwise to the stop.
- If you have quarter-turn valves: the lever is typically parallel to the pipe when open and perpendicular when closed.
- If a valve feels stiff, turn it closed gently, then open it again to full. Sometimes this clears minor buildup.
- Test faucet flow and sprayer flow again.
If only one temperature is weak: that valve or that supply line is the prime suspect.
Cause 5: Aerator or cartridge clog
If the entire faucet is weak, the sprayer is not necessarily the bad guy. Many faucets collect grit at the aerator screen, especially after plumbing work or a water main break.
Fix: Clean the aerator
- Unscrew the aerator at the tip of the faucet spout.
- Rinse and brush debris off the screen.
- Soak in vinegar for mineral scale, then rinse.
- Reinstall and test.
If the aerator is clean: suspect the cartridge
Single-handle faucets use a cartridge or ceramic disk that can clog or wear. Cartridge replacement is brand-specific, but the overall steps look like this:
- Shut off hot and cold supply valves, then open the faucet to relieve pressure.
- Remove handle and retaining hardware.
- Pull the cartridge, rinse the body, and replace the cartridge if it is damaged.
Practical shortcut: looking up your faucet brand and model online will usually point you to the right cartridge style. Manufacturer parts diagrams and videos are especially helpful.
Cause 6: Hidden inlet screen clog
If you have cleaned the sprayer head and things are still anemic, check for the “hidden clog” that gets a lot of people: a tiny screen at a quick-connect, check valve, or inlet fitting under the sink. Some pull-down faucets have a small screen right where the sprayer hose connects.
Fix: Check and rinse screens
- Shut off hot and cold supply valves and relieve pressure at the faucet.
- Disconnect the quick-connect or inlet fitting per your faucet’s instructions.
- Look for a small screen, rinse it, and brush off debris.
- Reconnect and test for leaks.
Note: this is one place people reach for PTFE tape out of habit. Most quick-connects and compression fittings seal with an O-ring or ferrule, not tape.
Cause 7: Low home water pressure
If every fixture in the house is weak, it is time to zoom out.
Quick checks
- Is it only your kitchen? If bathrooms are fine, this is probably not a whole-house pressure issue.
- Any recent work? Plumbing repairs can stir up debris that clogs aerators and sprayers.
- Check pressure with a gauge: a cheap hose-bib pressure gauge on an outdoor spigot gives you a real number. Many homes sit around 40 to 80 psi. A sudden big drop suggests a supply or PRV issue.
Reality check: diagnosing PRV problems, main shutoff issues, or municipal supply problems is where calling a plumber can be money well spent, especially if pressure dropped suddenly and dramatically.
Troubleshooting order
If you just want the most efficient checklist, this is what I would do at your sink:
- Compare faucet vs sprayer to identify sprayer-only or whole-faucet weakness.
- Clean the sprayer head (including screen and any flow insert).
- Inspect hose for kinks and snags, confirm the counterweight moves freely if you have one.
- Flush the hose into a bucket with the sprayer head removed.
- Verify shutoff valves are fully open (multi-turn vs quarter-turn).
- Check hidden screens at quick-connects or inlet fittings.
- Clean the faucet aerator if the main stream is weak too.
- Investigate diverter or cartridge if symptoms persist.
Replace the sprayer or not?
Replacement makes sense if:
- The sprayer head is cracked or leaking around the seams.
- The trigger is sticky or broken.
- Cleaning and flushing helped briefly, then pressure drops again quickly.
Try cleaning first if:
- You have hard water and see scale.
- The sprayer still switches modes but just has weak flow.
Budget note: universal replacement sprayer heads exist, but matching thread size and hose connection style matters. If your faucet is a major brand, an OEM sprayer head often fits better and lasts longer.
When to call a plumber
DIY is great, but I also like dry cabinets and predictable outcomes. Bring in help if:
- You see active leaking at the faucet body, diverter area, or supply connections.
- Shutoff valves do not fully shut off or the stems are corroded.
- You suspect a whole-house pressure problem or PRV failure.
- The faucet is under warranty and disassembly could void coverage.
Common questions
Why is my sprayer weak but my faucet is fine?
Most often it is a clogged sprayer head screen, a kinked hose, a clogged inline screen, or debris in the routing path. Clean the head first, then inspect the hose, then flush and consider the diverter.
Can a clogged aerator affect the sprayer?
Usually a clogged aerator mainly hurts the regular faucet stream. But if the faucet has debris in the cartridge, inlet screens, or routing path, you can see low flow at both.
My sprayer pressure is weak only on hot water. What does that mean?
That usually points to the hot shutoff valve not being fully open, a partially blocked hot supply line, or debris on the hot side of the faucet cartridge.
The 30-Second Cheat Sheet
Essential takeaways for: Kitchen Sink Sprayer Has Weak Water Pressure? Causes and Fixes
Fast diagnosis
- Sprayer weak, faucet strong: clogged sprayer head, kinked hose, a clogged inline screen, or a diverter that is not fully switching (on many faucets).
- Both sprayer and faucet weak: shutoff valves not fully open, clogged faucet aerator or cartridge, a clogged inlet screen, or low home water pressure.
- Weak only on hot or only on cold: that side’s shutoff valve, supply line, or debris at the cartridge inlet.
Fix in this order (quickest wins first)
- Clean the sprayer head: unscrew, rinse the screen, brush, and soak in vinegar 30 to 60 minutes for scale.
- Check for hose kinks/snags: clear cabinet clutter, ensure the hose is not pinched, and the counterweight moves freely.
- Flush the hose: remove sprayer head, aim into a bucket, and run water for 10 to 20 seconds to push debris out (it may splash).
- Open shutoff valves fully: hot and cold under the sink. Multi-turn valves go counterclockwise to the stop; quarter-turn levers go parallel with the pipe for “open.”
- Clean faucet aerator if the main stream is weak too.
- Check hidden screens: look for a small inlet screen at the sprayer hose quick-connect or faucet inlet (common after plumbing work).
- Diverter or cartridge: if symptoms persist after cleaning and flushing, clean or replace the diverter or cartridge (brand-specific).
When to stop and call a plumber
- Visible leaking under the sink or at the faucet body.
- Shutoff valves are seized or will not fully shut off.
- Pressure dropped across the whole house (possible PRV or main supply issue).
💡 Tip: Scroll up to read the full article for detailed, step-by-step instructions.
⬆️ Back to topAbout Marcus Vance
Content Creator @ Grit & Home
Marcus Vance is a lifelong DIY enthusiast and self-taught home renovator who has spent the last decade transforming a dilapidated 1970s ranch into his family's dream home. He specializes in budget-friendly carpentry, room-by-room renovations, and demystifying power tools for beginners. Through his writing, Marcus shares practical tutorials and hard-learned lessons to help homeowners tackle their own projects with confidence.