When a kitchen sink sprayer starts leaking under the sink or suddenly refuses to spray, it feels like the faucet is “possessed.” In reality, it is most often one of a handful of usual suspects: a loose connection, a cracked or kinked hose, a tired sprayer head, or a diverter that is stuck with mineral gunk. Less common but still real culprits include a partially closed shutoff valve, a clogged aerator or flow restrictor, low house pressure, or debris caught in a small inlet screen or check valve. The good news: most sprayer problems are diagnosable in 10 to 20 minutes with a flashlight and a towel.
I have chased every one of these problems in my 1970s ranch. The first time, I replaced the sprayer head because it was the easiest part to see. Turns out the diverter was the culprit and I still had a leak. Let’s save you that extra trip to the hardware store.
Safety and tools first
Quick safety checklist
- Clear out the cabinet so you can see every connection.
- Put a towel down and keep a small bowl handy to catch drips.
- Shut off the hot and cold stops under the sink if you are disconnecting anything. If you are only doing visual checks, you can leave them on.
- Turn off power to the garbage disposal if you are working near the outlet, switch, or any wiring under the sink.
- Do not overtighten plastic nuts. Hand tight plus a small snug is plenty.
- Do not test with an open hose unless you have it aimed into a bucket and you are ready for a fast, messy blast.
Tools that make this easier
- Flashlight or headlamp
- Adjustable wrench or basin wrench
- Tongue-and-groove pliers (use gently)
- Old toothbrush and a cup of white vinegar (for mineral buildup)
- PTFE thread tape (for tapered pipe threads, not washer or O-ring seals)
- Small bucket (for any controlled flow tests)
Identify your sprayer type
Sprayer troubleshooting is easier when you know the setup:
- Side sprayer: a separate sprayer sits in its own hole next to the faucet, connected by a thin hose under the sink.
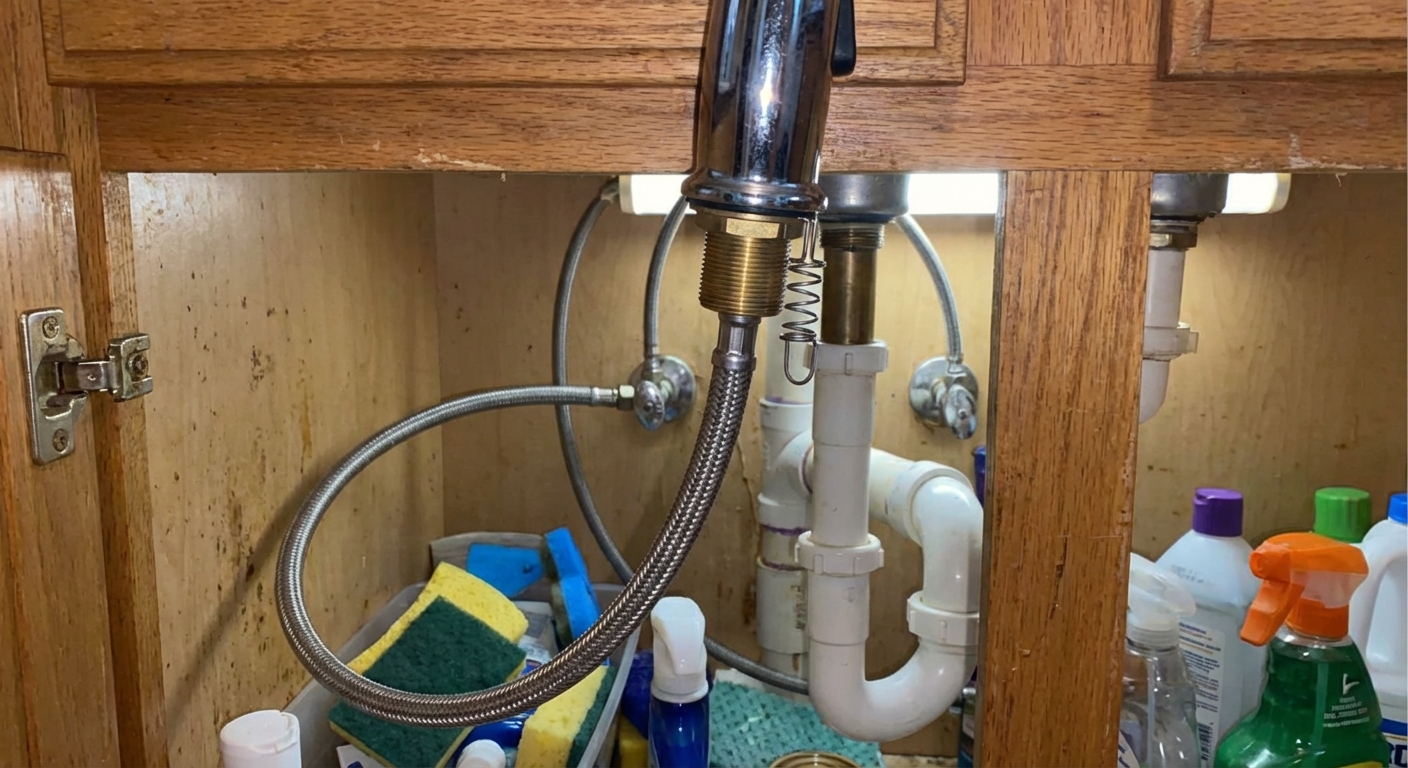
- Pull-out or pull-down sprayer: the spray head is the faucet spout, and the hose runs up through the faucet body.
One important nuance: on many side sprayer faucets, the diverter is in the faucet body or spout. On many pull-down/pull-out faucets, the switching function is often in or near the spray head (sometimes along with a check valve or flow restrictor). Same symptoms, different parts.
Fast diagnosis
Test 1: Find the real leak spot
Dry everything you can see under the sink with a towel, then run water and use the sprayer. Watch closely.
- Drips at a connection: usually a loose nut, worn O-ring, or damaged washer.
- Water along the hose length: hose is cracked, pinholed, or rubbing through, often near bends.
- Water at the sprayer head: worn head, split casing, or a clogged head causing backpressure.
- No spray, but water still flows from spout: diverter or spray head valve is not switching, or the spray hose/head is blocked.
- Weak flow at both spout and sprayer: aerator clog, cartridge issue, partially closed stop, or low supply pressure.
Test 2: Check the easy supply stuff
- Make sure both shutoff valves are fully open.
- For pull-down/pull-out: look for a kink in the hose loop or the hose snagging on stored items.
Test 3: Does the sprayer button feel normal?
If the trigger or button sticks, feels gritty, or does not spring back, the sprayer head may be failing internally or packed with mineral deposits.
Test 4: Is it weak only on hot or only on cold?
If the sprayer is weak on both, think clog, hose kink, diverter, or head. If the issue shows up more on one temperature, you might be looking at debris in the faucet cartridge, a partially blocked shutoff valve, or a clogged inlet screen (some faucets have them where the supply lines connect).
Fix 1: Tighten and reseat connections
This is the most common leak, and also the cheapest fix.
What to look for
- Loose coupling where the sprayer hose connects to the faucet, diverter, or spray head
- Cracked plastic nut (common on older side sprayers)
- Missing or flattened rubber washer
- Quick-connect fitting not fully seated
- Damaged O-ring in a pull-down/pull-out wand quick-connect
How to fix it
- Hand tighten first.
- If it still leaks, snug it with a wrench just a bit. Overdoing it can crack plastic.
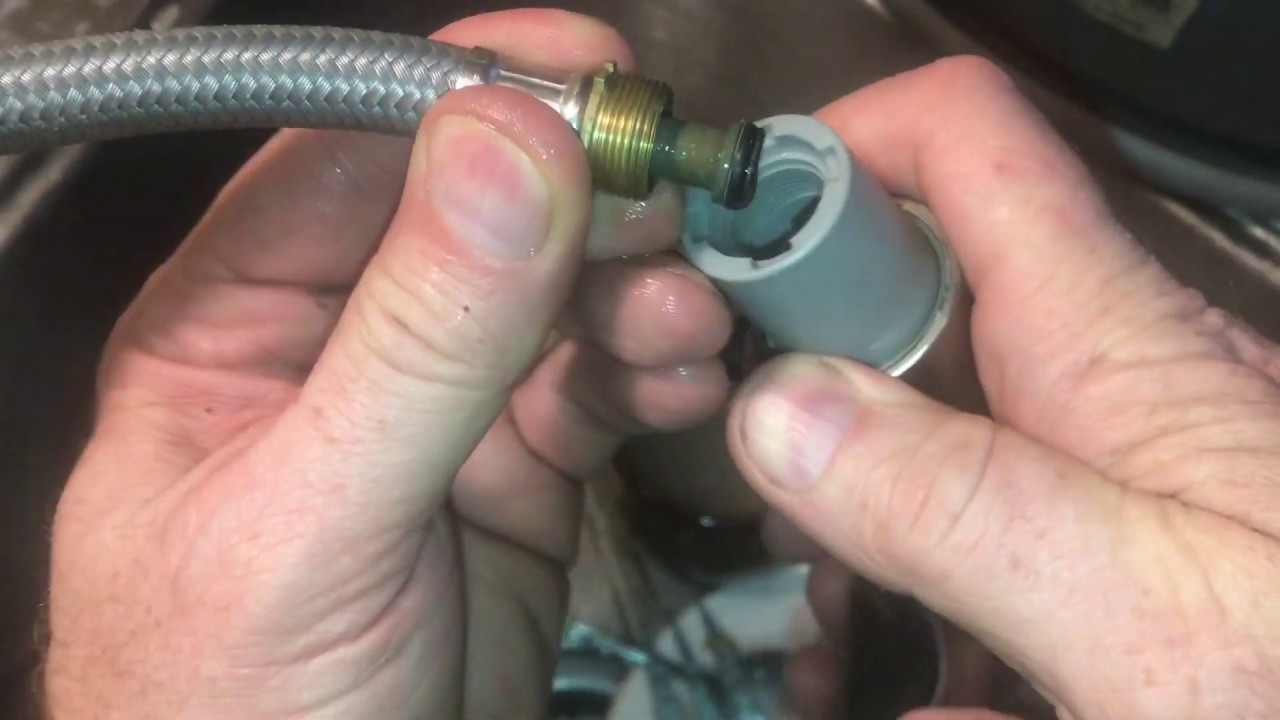
- If it is a threaded swivel that seals with a washer, disconnect it and check for a rubber washer inside the female end. Replace the washer if it is hard, split, or deformed.
- If it is a quick-connect, shut off water, release the collar or clip, remove the hose, inspect the O-ring, then push the hose back in until it clicks and will not pull out.
Tip from my own mistake: PTFE thread tape does nothing if the fitting seals with a rubber washer or O-ring. Tape is for tapered pipe threads (like NPT) where the threads do the sealing. Most sprayer swivel nuts are straight threads that rely on the washer.
If it still leaks: move to Fix 2 if the leak seems to start at the head, or Fix 3 if the hose itself is wet.
Fix 2: Clean a clogged sprayer head
Minerals clog sprayer nozzles and create backpressure that finds the weakest seal. That can look like a leak even when the hose is fine. Some spray heads also hide a small flow restrictor or check valve that can clog with grit.
Quick cleaning steps
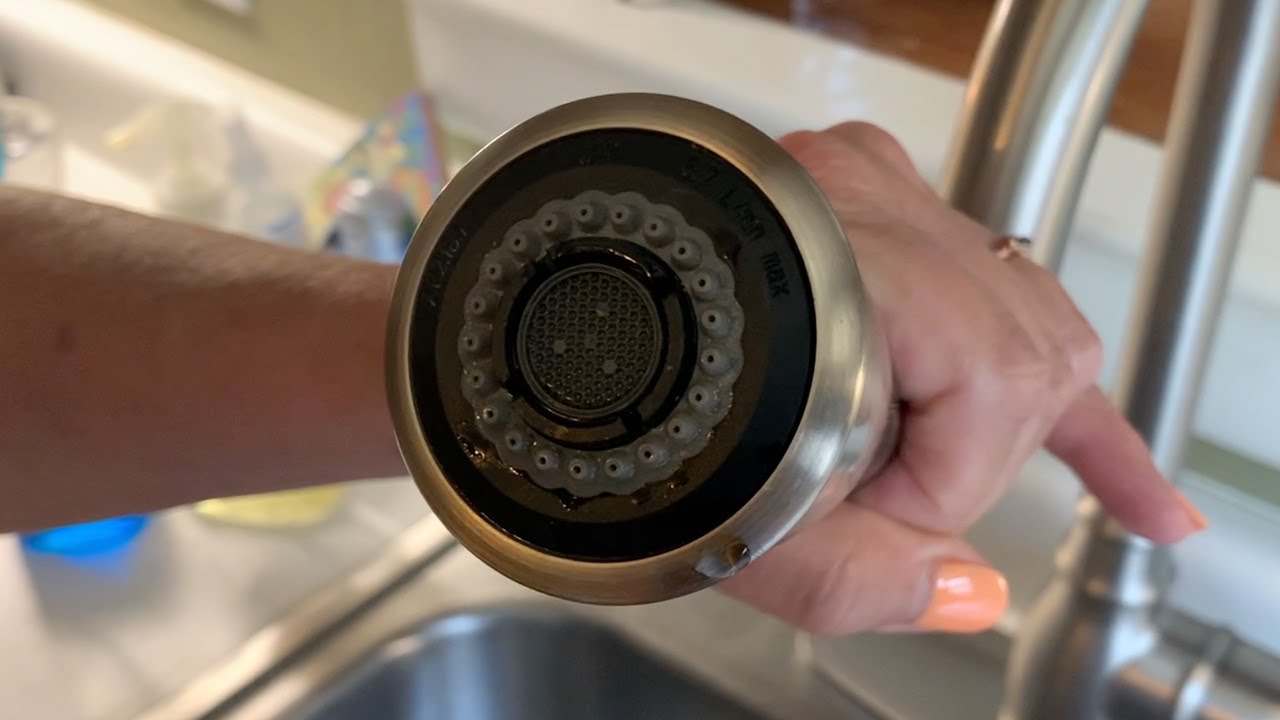
- If your sprayer has a removable face, unscrew it and rinse out grit.
- Soak the spray face in white vinegar for 30 to 60 minutes.
- Scrub gently with an old toothbrush.
- If you can access a little screen, check valve, or restrictor in the head connection, rinse it too.
- Rinse and reassemble, then test.
When to replace instead of clean
- Cracks in the sprayer body
- Trigger does not return smoothly
- Drips from the sprayer even when the sprayer is not being used
- Cleaning improves spray for a day or two, then it degrades again
If cleaning does not help: go to Fix 4 for diverter or switching issues, or Fix 5 if flow is weak everywhere.
Fix 3: Replace a leaking sprayer hose
If you see water beads forming along the hose, or the cabinet floor gets wet only when you use the sprayer, the hose is usually done.
Signs the hose is the culprit
- Leak appears mid-hose, not at the fittings
- Visible abrasion where it rubs on the cabinet or a pipe
- Bubbling or swelling in a braided hose
- Kinks that never relax back to a smooth curve
Replacement tips
- Match connections: take photos of both ends before buying parts. Side sprayers often use a specific coupling size and washer style.
- Measure length: too short binds and kinks. Too long tangles.
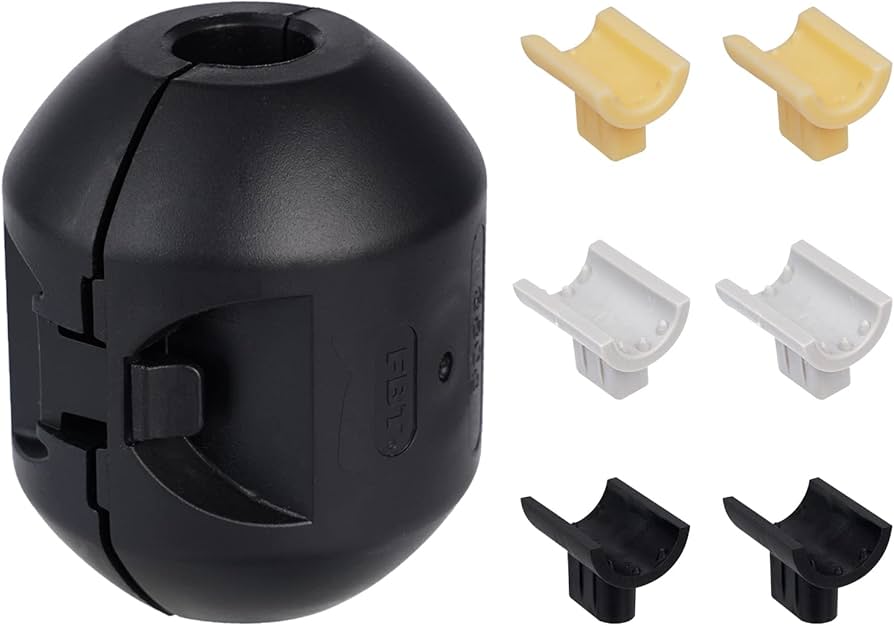
- Add chafe protection: if the old hose wore through from rubbing, add a sleeve or re-route so it does not scrape.
- Check for a weight (pull-down/pull-out): reinstall it in the same position so the head retracts properly.
- Check the wand quick-connect: a nicked O-ring at the wand connection can leak only when you pull the head out and flex the hose.
If the new hose still does not fix weak or no spray: move to Fix 4.
Fix 4: Fix a stuck diverter
The diverter is the internal switch that sends water to the spout or to the sprayer. On many faucets with a separate side sprayer, the diverter is a top suspect when a sprayer will not spray or only dribbles. On many pull-down/pull-out faucets, the switching is often in the spray head or a small valve assembly, but the troubleshooting logic is similar.
Symptoms of a diverter or switching problem
- Press sprayer trigger, but water still mostly comes out of the spout
- Sprayer works only if you partially block the faucet spout with your hand (not a long-term solution, just a clue)
- Sprayer works intermittently, especially after the faucet has not been used in a while
Two quick diverter tests
- Spout flow drop test: run water at a steady flow. Press the sprayer. If the spout barely changes, the diverter is not diverting.
- Sprayer line check (safe version): only do this if you are comfortable. Shut off both stops. Put the hose end into a bucket. Crack the connection loose, aim it safely, then turn a stop on briefly to see if you get strong flow to that line when the faucet is calling for spray. Turn the stop back off immediately. If that makes you nervous, skip it and go straight to cleaning or replacing the diverter or spray head assembly.
Cleaning vs replacing
Some diverters can be removed and cleaned, others are integrated and you replace a cartridge or the whole faucet assembly. It depends on brand and model.
- Removable diverter: shut off water, remove handle and spout if required, pull the diverter, soak in vinegar, rinse, and reinstall with the correct O-rings.
- Cartridge-based systems: the diverter function may live in the cartridge. Replacing the cartridge often restores spray performance.
- Pull-down/pull-out heads: the “diverter” may be inside the spray head or a small valve in the wand. Mineral buildup, a sticky button mechanism, or a clogged check valve can mimic a stuck diverter.
Thrifty move: before you order anything, look under the sink and on the faucet base for a brand name. Then search the brand plus “diverter” or “sprayer hose kit.” Many manufacturers sell kits that include O-rings and the correct fittings, which beats guessing in the plumbing aisle.
If it still will not switch correctly: move to Fix 5 to rule out a whole-faucet flow problem.
Fix 5: Check the faucet cartridge
Sometimes the sprayer is innocent. A worn or debris-filled faucet cartridge can reduce pressure, create weird temperature behavior, or send grit into the sprayer head that keeps re-clogging it.
Clues the cartridge is the real problem
- Both spout and sprayer have weak flow
- Flow is weak on hot but normal on cold (or the opposite), after you have confirmed the shutoff valves are fully open
- Water sputters or pulses even with the sprayer disconnected
- You recently had plumbing work done and now you have low flow (debris can lodge in the cartridge or inlet screen)
Simple confirmation test
Remove and clean the faucet aerator first. If the aerator is packed with debris, your cartridge (or an inlet screen) might be too. If the aerator is clean but the whole faucet still has low flow, the cartridge is a strong suspect.
Cartridge replacement basics
- Shut off hot and cold under the sink.
- Relieve pressure by turning the faucet on.
- Remove the handle (there is often a small set screw).
- Pull the cartridge and replace with the exact match for your faucet model.
- Turn water back on slowly and check for leaks.
If you cannot identify the faucet model, bring the old cartridge to the store. I have done the “close enough” cartridge swap once. It was not close enough. Save yourself the headache and match it exactly.
Common problems and likely fixes
- Leaks only when sprayer is used: hose crack, loose sprayer-hose connection, worn washer, or a wand quick-connect O-ring that leaks when flexed.
- Drips from sprayer head after shutoff: worn sprayer head or debris causing incomplete seal.
- Won’t switch to spray: stuck diverter (side sprayer) or sticky/clogged switching valve in the spray head (pull-down/pull-out).
- Spray is weak everywhere: clogged sprayer head, clogged aerator, kinked hose, partially closed stop, or faucet cartridge issue.
- Sprayer works but does not retract (pull-down): hose weight out of position, hose catching on something, or kink in the loop.
Buying parts without guessing
What to photograph
- Faucet brand logo and any model number tag under the sink
- Both ends of the sprayer hose and how they connect
- The sprayer head connection (threaded vs quick-connect)
- Any quick-connect clips and O-ring locations
Universal vs brand-specific
Some side sprayer heads and hoses are sold as “universal,” but universal often means “might fit.” If your faucet is a known brand, brand-specific kits usually fit better, leak less, and install faster.
When to call a plumber
I am all for DIY, but a few situations deserve a pro:
- Water is leaking behind the wall or you see cabinet swelling and ongoing moisture damage
- The shutoff valves under the sink will not close fully, or the stems leak when you turn them
- You cannot access the faucet mounting hardware without removing the sink or countertop components
- You replace multiple parts and still have inconsistent pressure, which can point to supply line issues or deeper valve problems
My troubleshooting order
If you want the quickest path with the fewest parts swapped, here is my usual order:
- Dry everything and find the exact leak location.
- Check that both shutoff valves are fully open and nothing is kinked.
- Tighten and reseat connections, check washers and O-rings.
- Clean the sprayer head and faucet aerator (and any little screens you can access).
- Check for rub points, then replace the hose if needed.
- Address the diverter or spray head switching valve.
- If pressure is still wrong at both spout and sprayer, look at the cartridge.
Do those steps and you will fix the vast majority of sprayer issues without turning your weekend into a full plumbing remodel.
About Marcus Vance
Content Creator @ Grit & Home
Marcus Vance is a lifelong DIY enthusiast and self-taught home renovator who has spent the last decade transforming a dilapidated 1970s ranch into his family's dream home. He specializes in budget-friendly carpentry, room-by-room renovations, and demystifying power tools for beginners. Through his writing, Marcus shares practical tutorials and hard-learned lessons to help homeowners tackle their own projects with confidence.