🚨 In a DIY emergency or rush?
Skip the details and jump straight to our 30-second cheat sheet for the most crucial info.
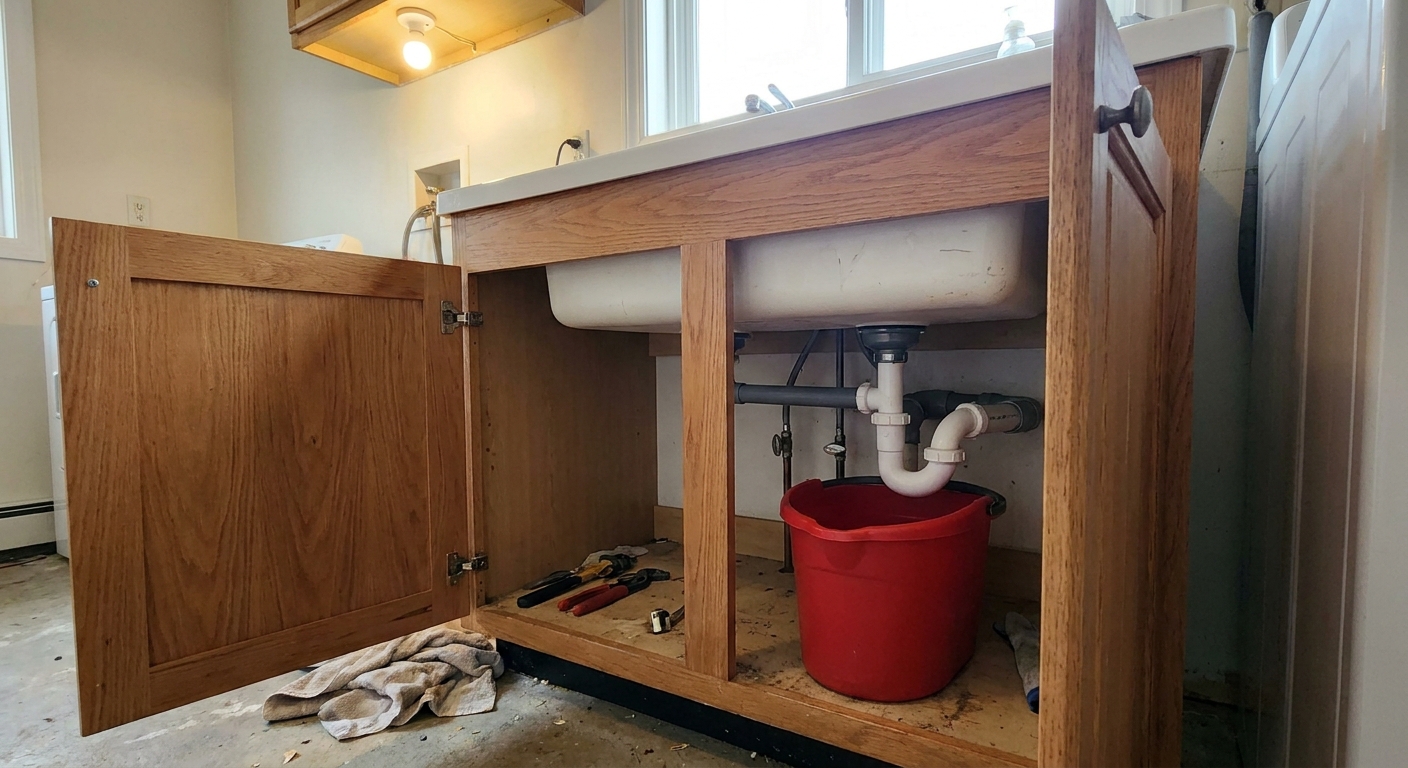
A laundry or utility sink is basically the “everything drain” of the house. Paint water, mop buckets, muddy shoes, washer overflow, you name it. So when it suddenly gurgles, drains slow, or just sits there like a sad pond, the fix is often straightforward, but not always. If you are seeing repeat clogs or anything that smells like “whole-house,” skip the heroics and jump to the main line warning signs below.
I have learned this one the hard way in my own 1970s ranch: if you start snaking first, you often miss the actual culprit, which is very commonly a packed P-trap full of lint sludge, or a vent issue that makes the trap act clogged even when it is not.
Jump to the likely cause
- Slow drain, no standing water: partial clog in the P-trap, trap arm, or the first stretch of branch line, or a venting problem
- Standing water that drains very slowly: a packed trap or a clog just past the trap bend
- Gurgling + sewer smell: trap siphoning from poor venting, a stuck AAV (Studor vent), or a dry trap from infrequent use
- Utility sink backs up when washer drains: laundry branch line restriction, standpipe tie-in issue, or a main line starting to choke
- Multiple fixtures backing up: main line clog or septic issue
Safety and setup first
What to grab
- Bucket and old towels
- Nitrile gloves and safety glasses
- Channel-lock pliers (for stubborn slip nuts)
- A small bottle brush or old toothbrush
- Flashlight or headlamp
- Hand snake (and a drill snake if you have one)
Two quick rules I follow every time
- Skip chemical drain openers. They struggle with lint and grease, can damage some plumbing, and make the trap removal messy and unsafe.
- Protect your floor. Utility sinks love to hide in laundry rooms with finished flooring. Lay towels down before you loosen anything.
Step 1: Check the easy choke points
1) Clean the strainer
Utility sinks often have a basket strainer that catches debris. Pull it out and clean it. If you see lint mats, string, or paint flakes, that is your clue that the clog might be soft buildup rather than a hard object.
2) Check the tailpiece
The tailpiece is the short vertical pipe directly under the sink drain. If the sink has been used for paint cleanup or grout tools, that tailpiece can narrow down fast. If you can see gunk right there, clean that first. It is the cheapest win you will get today.
3) Quick oddball check: side outlets
Some utility tubs have extra fittings or side inlets for a washer discharge or a pump. If yours does, take a quick look for a lint wad right at that opening.
Step 2: Clean the P-trap
If I had to bet on one culprit for a laundry sink that will not drain, it is the P-trap. Laundry sinks collect lint, pet hair, grease from rags, and even little chunks of drywall mud. All of it loves the trap because it is designed to hold water and slow things down.
How to remove and clean it
- Put a bucket under the trap.
- Loosen the two slip nuts (usually hand tight, sometimes need pliers).
- Lower the trap carefully. Expect dirty water.
- Pull out the clog and scrub the inside of the trap with a brush.
- Check the trap arm (the horizontal pipe heading into the wall) for buildup you can reach.
- Reinstall and hand tighten the nuts, then snug them just a bit more. Do not crush the washers.
What you are looking for
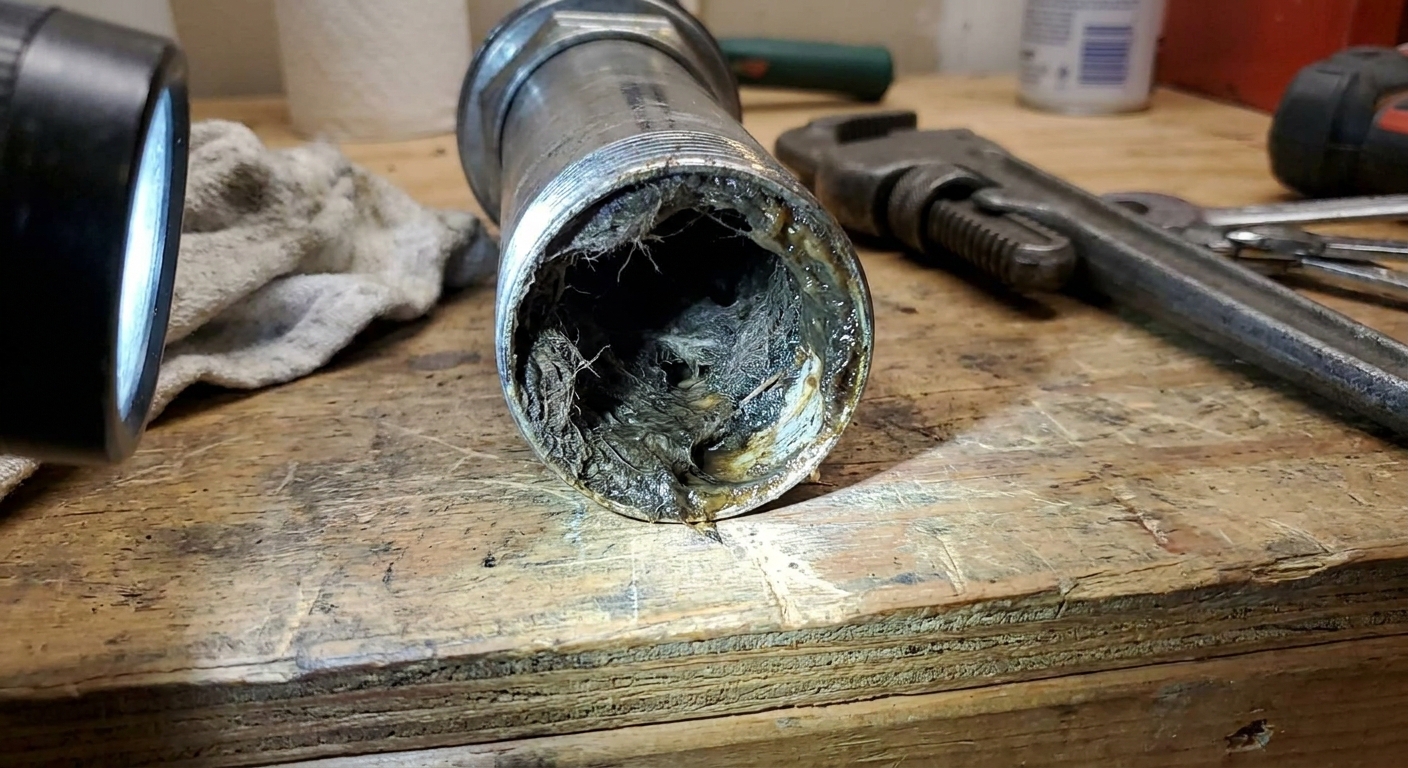
- Lint sludge: gray, stringy, wet felt texture
- Grease: tan or brown waxy coating that narrows the pipe
- Grit and sand: settles in the bottom of the trap and stacks up
- Hard obstruction: small toy, bottle cap, rag fragment
Personal lesson: I once “fixed” a slow utility sink by snaking it for 20 minutes. Two weeks later it clogged again because the trap was basically a lint terrarium. Cleaning the trap would have saved me the round trip.
Step 3: Clog or vent issue?
Here is the tricky part. A sink can behave clogged when the pipe is not fully blocked. Poor venting can slow the drain, cause gurgling, and even pull water out of the trap, which leads to sewer smell.
Two real-world examples
- Partial clog example: water drains, just slowly, and it stays slow even if you run the faucet gently. You might pull lint ropes on the snake.
- Venting example: the sink gurgles, the water level “surges,” and you may notice the trap smell after draining because the water seal gets disturbed.
Symptoms checklist
- Gurgling while draining: often venting, but can also happen with a partial clog
- Sewer smell after the sink drains: trap siphoning or a dry trap
- Slow all the time with no gurgle: usually a partial clog or heavy buildup
A note about “cracking a cleanout”
Yes, sometimes a drain will run better if air can get in, and a cleanout opening can hint at a venting or downstream restriction. It is not a definitive vent test, and it can also be messy or unsafe if the line is backed up. If you are not 100 percent comfortable with that risk, skip it and move on to snaking or call a plumber.
Step 4: Check the AAV
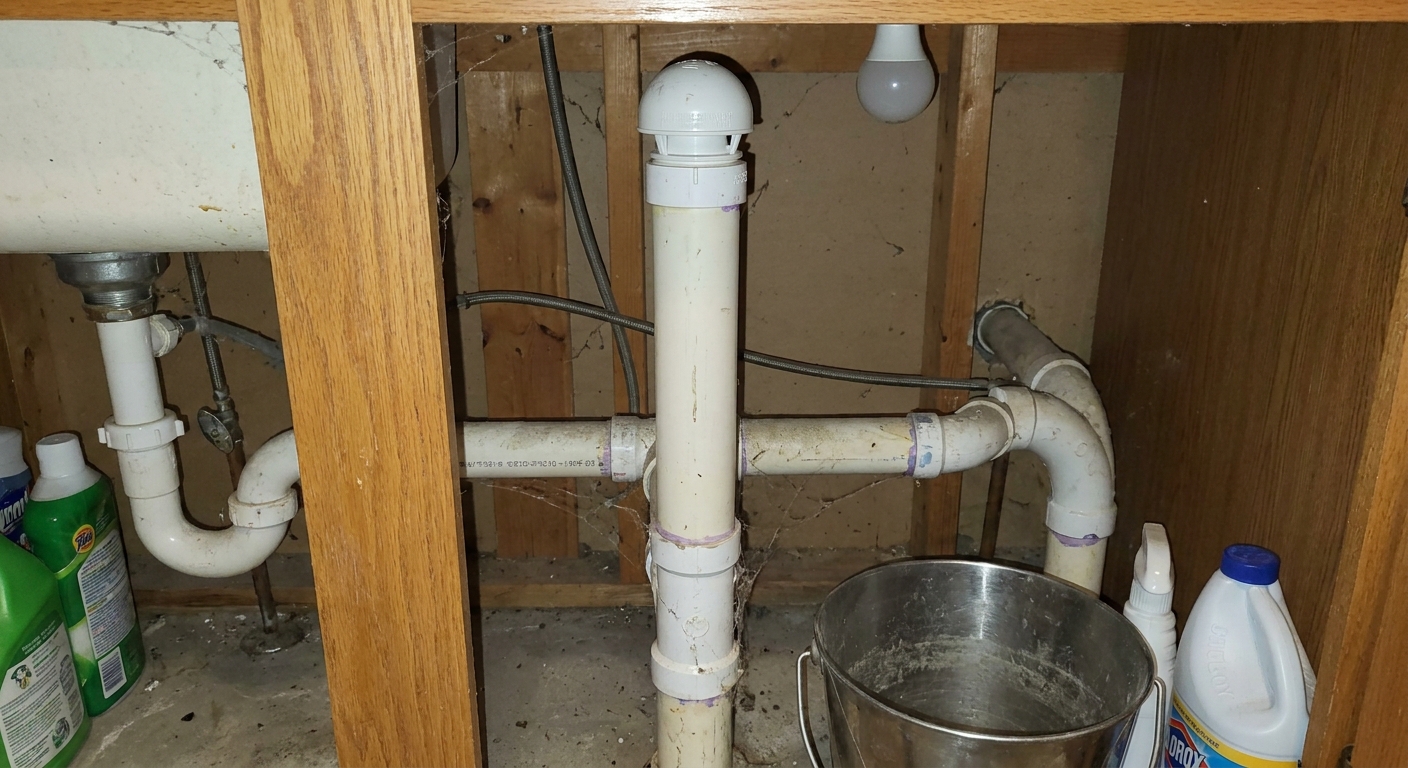
Many laundry room sinks are vented with an air admittance valve (AAV), commonly called a Studor vent. It is a one-way valve that lets air in so the drain can flow, but it is supposed to stay closed the rest of the time to block sewer gas.
What it looks like
Usually a small plastic cap-like valve mounted on a vertical pipe under the sink, or in a wall box with a grill cover.
Important AAV notes
- Not allowed everywhere: some areas do not permit AAVs, or only allow them in specific situations. Follow local code.
- Must stay accessible: do not seal it inside a wall or bury it where it cannot be serviced.
- What it can and cannot do: an AAV admits air to help with negative pressure. It does not relieve positive pressure. That means odors and gurgling can still be caused by bigger upstream or main line issues too.
How to tell if an AAV is causing trouble
- Sewer odor near the sink cabinet: AAV stuck open or failing seal
- Gurgling and slow draining: AAV stuck closed, not letting air in (or a clog that is making the line act “air locked”)
- Problem is isolated to this sink: points to a local vent or local clog, not automatically a main line
What you can do
- Make sure it is installed upright and higher than the trap arm.
- Confirm it is not buried behind boxes or insulation. It needs access to air.
- If it is old, cracked, or smelly, replacement is usually cheap and straightforward. Match the size and install per manufacturer directions and local code.
Note: If you do not have an AAV, your sink is likely vented through the wall and up through the roof. Roof vent clogs are possible, but they are not the first place I look unless multiple fixtures are acting weird. Also, if roof work is not in your comfort zone, that is a good place to stop and call a pro.
Step 5: Snake the line
If the P-trap is clean and the sink still drains slow, you likely have a clog in the branch line after the trap arm. This is where a snake shines, especially on lint mats that sit a few feet downstream.
Where to snake from
- Best: with the P-trap removed, snake into the wall through the trap arm connection
- Alternative: if there is a cleanout plug on the drain line, use that for a straighter shot
How far is “far enough”?
House layouts vary a lot, so consider these typical ranges, not hard rules. For a laundry sink, I usually plan to run a hand snake 10 to 15 feet minimum. If the sink ties into the same branch as the washer standpipe, you may need 15 to 25 feet to reach the common choke point where lint likes to hang up. If you have a longer snake and can run it safely, do it before you conclude the branch is clear.
Technique that works
- Feed slowly, rotate steadily, and do not force it hard through elbows.
- When you hit resistance, pause and think. It might be the trap arm elbow, a fitting, or the actual clog. Gentle back-and-forth usually beats brute force.
- Pull the cable out occasionally and wipe it. If you see lint ropes, you are on the right track.
- After snaking, run hot water gradually at first and watch the basin. If the level rises, stop and regroup.
- When it is flowing well, test with a full sink basin dump.
If your snake comes back clean
That can mean three things: the clog is farther than your snake length, the problem is heavy coating (not a plug), or you are dealing with a venting or main line issue instead.
Lint and grease buildup
Kitchen sinks get the grease blame, but laundry sinks can build up nasty coatings too. Think mop water with cleaner residue, oily rags, and lint that sticks to everything like wet paper mache.
Signs it is buildup
- Drain is consistently slow, not suddenly blocked.
- Snake pulls out smears and fuzz, not a big wad.
- Pipe walls look narrowed or rough inside when you inspect what you can.
What helps
- Manual cleaning of the trap and accessible pipes.
- Snaking plus a long hot water flush (once you are confident the line is flowing).
- If allowed in your area and safe for your piping, enzyme-based drain maintenance can help with organic gunk over time, but it will not fix a hard blockage today.
Washer clues
I am not going to turn this into a standpipe article, but your washer can give you valuable clues.
If the utility sink backs up when the washer drains
- Common cause: partial clog in the shared branch line where the sink and washer connect
- What you will notice: sink is “mostly fine” until the washer pumps out, then it burps and rises
- Next step: snake farther downstream, not just the trap arm
If the washer standpipe overflows too
Now you are looking at a bigger restriction, possibly farther down the line, or even the main drain if other fixtures are slow. Treat that as a red flag and keep reading.
Main line warning signs
A utility sink is often one of the lowest drains in the house, which makes it a “canary in the coal mine” for main line problems. If the main line is slowing down, the laundry sink is sometimes the first place you see it.
Signs it is not just the sink
- Toilet bubbles when the laundry sink drains
- Bathtub or shower drains slow at the same time
- Water comes up in the utility sink when you flush a toilet
- Gurgling across multiple fixtures
- Clogs that return quickly after you clear the trap
What to do if you suspect a main line issue
- Stop using water in the house to avoid overflow.
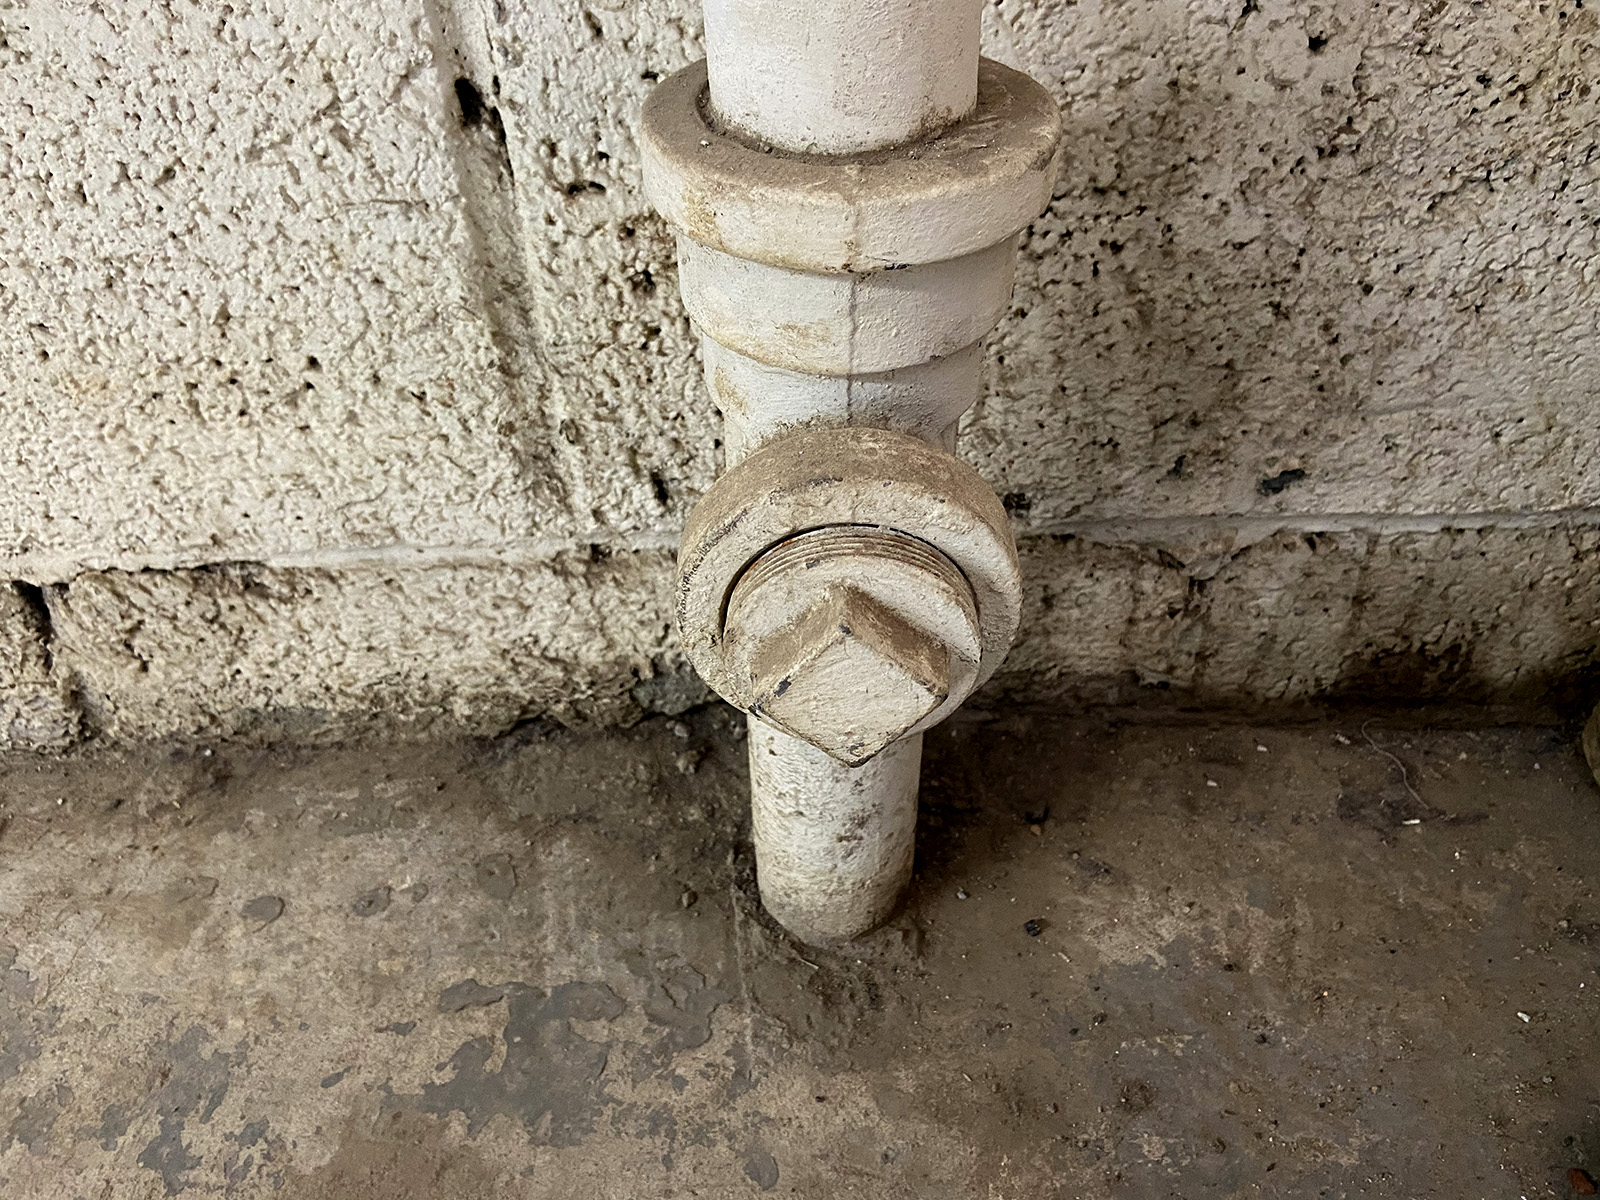
- Check for a main cleanout and look for standing water (only if you are comfortable doing so and have a plan for spills).
- If you are unsure, stop here and call a plumber. A main line snake or camera inspection is money well spent on repeat problems. Tree roots and collapsed pipes are real in older homes.
Pipe material matters
If your drain lines are PVC, most utility sink clogs are simple lint and gunk problems. If you have older galvanized pipe, slow drains can be heavy internal scaling that no small snake will magically fix. That is when pro cleaning or replacement starts to make more sense than fighting it every few months.
Common DIY mistakes
- Overtightening slip nuts: cracks plastic nuts or distorts washers, leading to leaks later.
- Skipping the trap cleanout and going straight to the snake: wastes time and often does not solve lint sludge.
- Using a plunger on a double-bowl laundry tub without blocking the other side: you just push water back and forth and call it exercise.
- Replacing an AAV without fixing a clog: you still have a slow drain, just with a new part.
- Assuming “no smell” means “no vent issue”: vent problems often show up as gurgling and slow drain first.
When to call a pro
I love DIY, but I also love not flooding my house on a Tuesday night.
- You have multiple fixtures backing up or gurgling.
- You suspect a main line clog or sewage is coming up.
- You have run a long snake with no improvement.
- Leaks, corrosion, or brittle old piping shows up when you open the cabinet.
- You need roof vent work and are not set up for safe ladder and roof access.
Quick troubleshooting summary
- Clean strainer and tailpiece.
- Remove and clean the P-trap.
- If it smells and the sink is rarely used, refill the trap with 10 seconds of water.
- Check AAV (if you have one) for access and failure symptoms.
- Snake the branch line and test slowly, then with a full dump.
- If other fixtures are involved, treat it as a main line problem.
Prevent it next time
- Use a strainer basket and clean it weekly if you do a lot of messy sink work.
- Do not dump paint, joint compound, grout haze water, or heavy sludge down the sink.
- For lint-heavy cleanup, dispose of bucketed water and debris per local guidelines instead of sending it all into the drain.
- Once a month, fill the sink halfway and do a fast flush to help move fine lint through.
- If you have an AAV, keep it accessible and do not pack the cabinet tight around it.
The 30-Second Cheat Sheet
Essential takeaways for: Laundry Sink Won’t Drain? Clogs and Vent Issues to Check
Fast diagnosis
- Standing water: a very common culprit is a packed P-trap, but it can also be a clog just past it in the trap arm or branch line.
- Slow + gurgling: often a venting issue (including a failing AAV/Studor vent) or a partial clog that is not letting the line breathe.
- Backs up when washer drains: restriction in the shared laundry branch or early main line trouble.
- Other fixtures affected: likely a main line backup.
Do this in order
- Clean the strainer and check the tailpiece.
- Remove and clean the P-trap (bucket underneath).
- Quick smell fix: if the sink is rarely used, run water for 10 seconds to refill the trap.
- If you have an AAV (Studor vent): make sure it is upright, unobstructed, and accessible (not sealed in a wall). Replace if failing.
- Snake from the wall with the trap removed. Run the longest practical distance. Typical is 10 to 15 ft, and 15 to 25 ft if the washer ties in nearby.
- Flush with hot water gradually and test by dumping a full basin.
Main line red flags
- Toilet bubbles when the sink drains
- Tub or shower also draining slow
- Water rises in the utility sink when you flush
Avoid
- Chemical drain openers (messy and risky when you remove the trap).
- Overtightening slip nuts (causes leaks and cracked fittings).
- Opening a cleanout without a plan: it can spill sewage. If you are not sure, stop and call a pro.
Call a pro if
- Multiple drains are backing up
- You ran a long snake with no change
- You suspect roots, a collapsed line, heavy galvanized scaling, or repeated backups
💡 Tip: Scroll up to read the full article for detailed, step-by-step instructions.
⬆️ Back to topAbout Marcus Vance
Content Creator @ Grit & Home
Marcus Vance is a lifelong DIY enthusiast and self-taught home renovator who has spent the last decade transforming a dilapidated 1970s ranch into his family's dream home. He specializes in budget-friendly carpentry, room-by-room renovations, and demystifying power tools for beginners. Through his writing, Marcus shares practical tutorials and hard-learned lessons to help homeowners tackle their own projects with confidence.