Your main water shutoff is one of those things you don't think about until you really, really need it. And then, of course, it's stuck, leaking, or it won't fully close. I've been there, hand on the valve, listening to a toilet run or a supply line spray, thinking: please turn.
This page walks you through the most common whole-house shutoff valve problems and the safest fixes to try first, without snapping a brittle handle or twisting a pipe in the wall. When it's time to stop troubleshooting and call a plumber, I'll tell you that too.
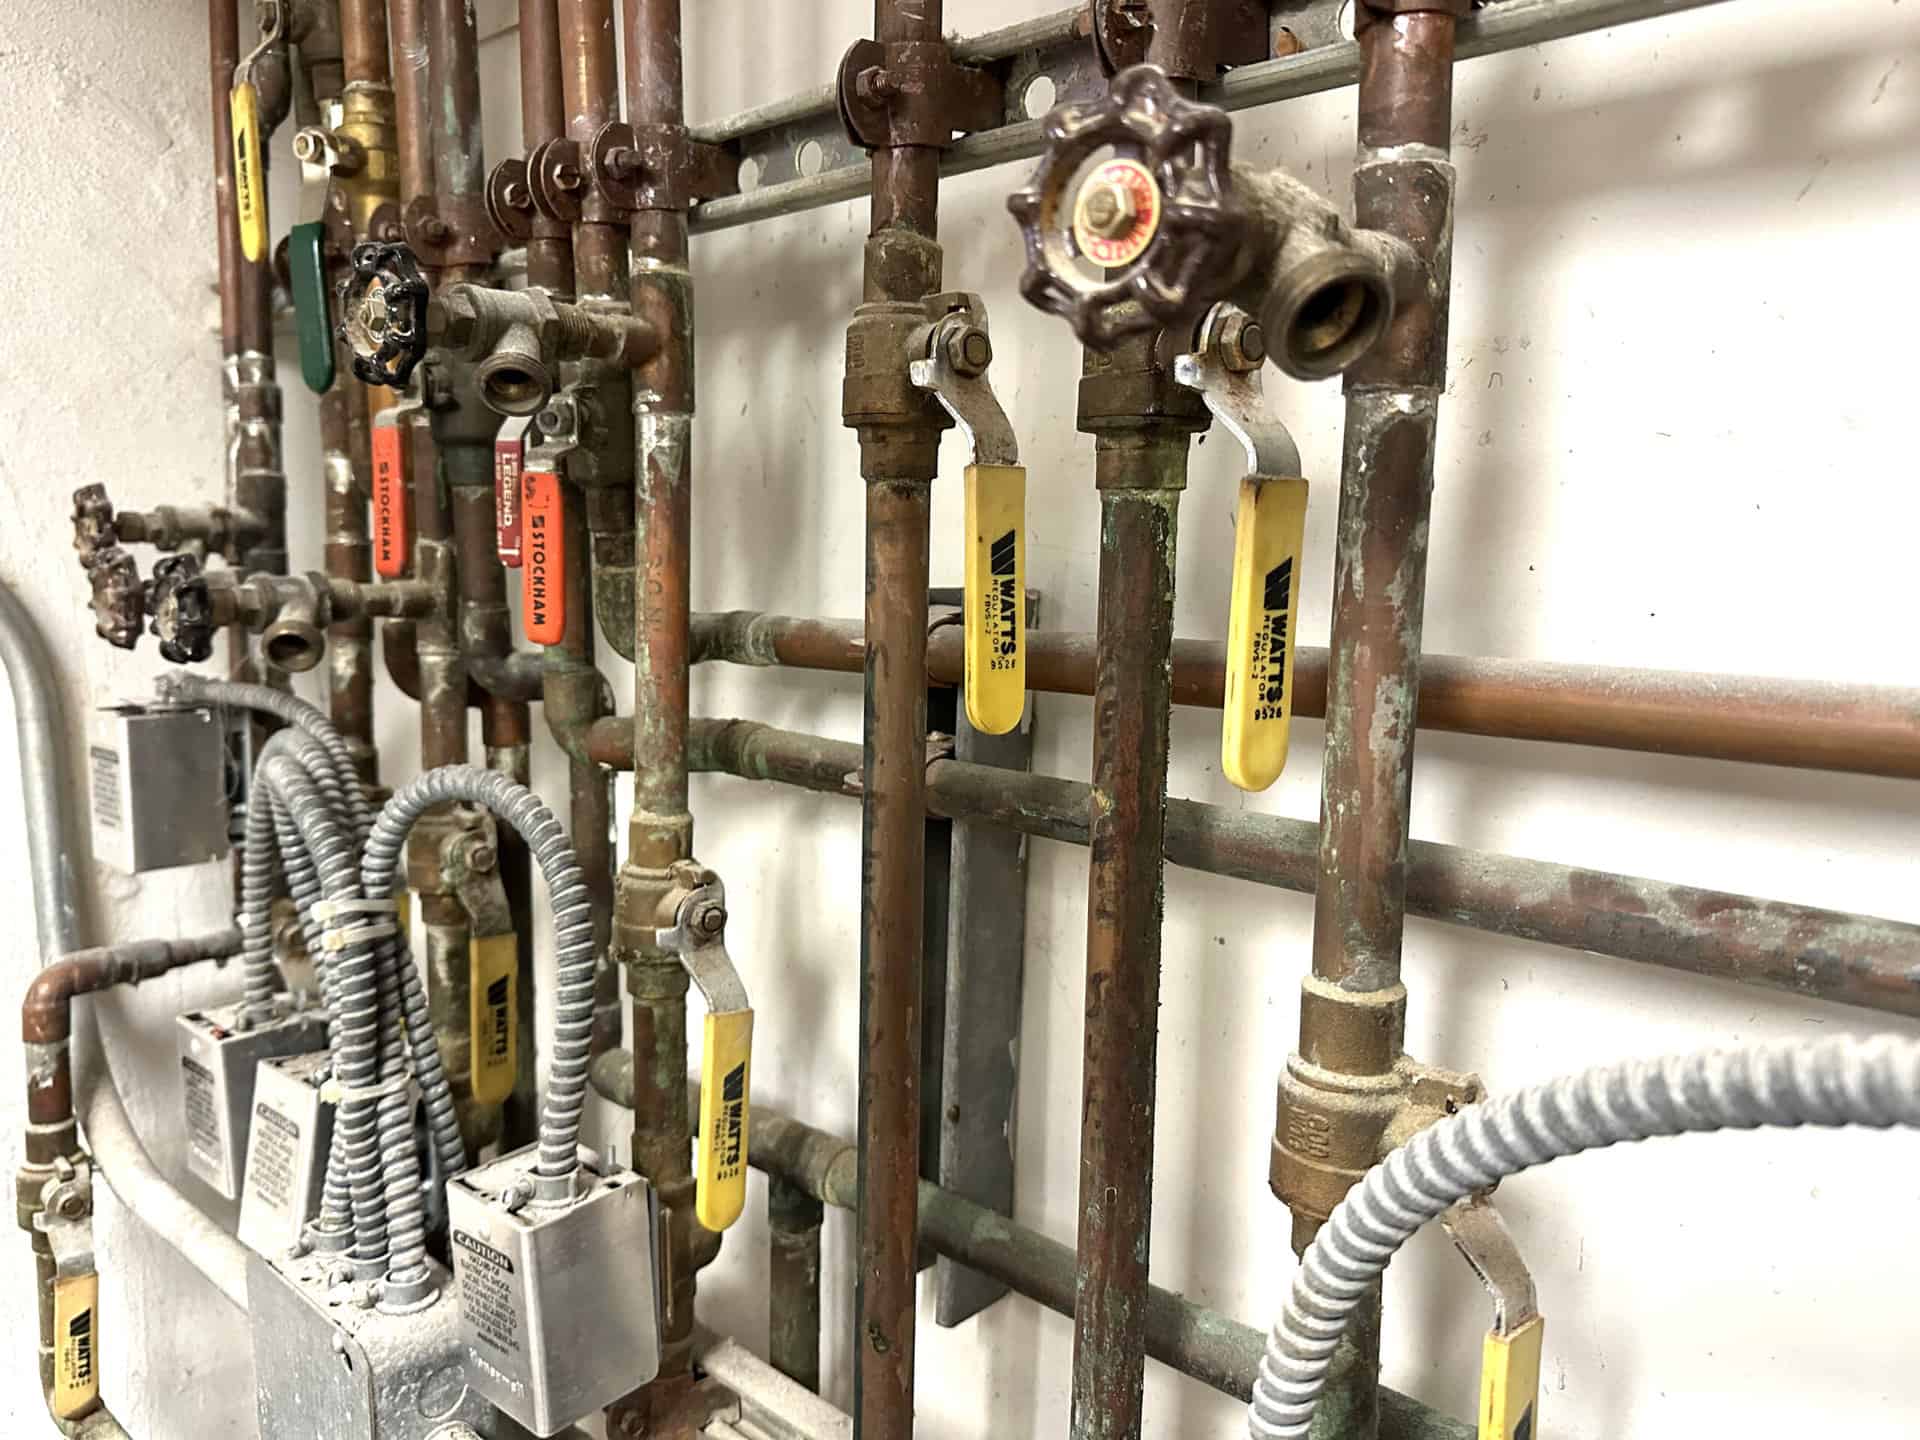
First: what kind of valve do you have?
The steps depend on whether you have a gate valve (older) or a ball valve (newer). The quick visual check is worth 10 seconds. (And yes, some homes have other setups like globe valves, stop-and-waste valves, or a shutoff built into a PRV, so if yours doesn't match either photo, skip ahead to the “call a pro” guidance.)
- Gate valve: Round wheel handle. Takes multiple turns to open or close. These are notorious for getting stuck and for failing to shut off completely as they age.
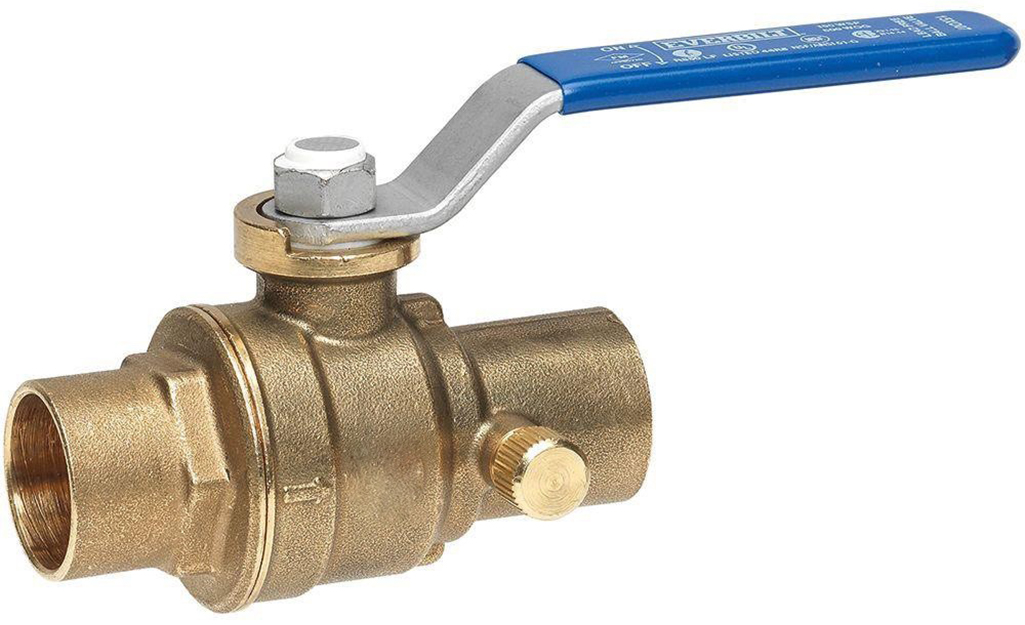
- Ball valve: Straight lever handle. A quarter turn is fully open or fully closed. These are typically more reliable and less finicky.
Handle position tip (ball valves): Lever parallel to the pipe usually means open. Lever perpendicular usually means closed. Quick caveat: if the handle was removed and reinstalled wrong, you can't trust the position 100 percent, so confirm by checking flow at a faucet.
Before you touch anything: reduce the risk
Main shutoffs live on pipes that may be old, corroded, or stressed where they enter the wall or floor. Your goal is to apply force to the valve without using the plumbing as a lever.
Do this prep (about 2 minutes)
- Find the closest place to relieve pressure, like a hose bib outside or a sink on the lowest level.
- Clear access so you can see the pipe on both sides of the valve. If it's buried behind storage, move it now.
- Have two tools ready: an adjustable wrench and a second wrench or pliers to hold the valve body or a nearby fitting steady if needed.
- Know your backup shutoff: the curb stop at the street or the meter shutoff. If you don't know where it is, jump to the section on locating and marking it.
Safety note: If your pipe looks like galvanized steel that's heavily rusted, or if the valve is green and crusty with corrosion on copper, go slow. If you feel the pipe flexing in the wall, stop and get help. A broken main line is an expensive way to learn this lesson.
If the valve is stuck: free it safely
1) Confirm it's not already closed
This sounds silly, but I've seen plenty of “stuck” valves that were simply already at the stop. For a ball valve, the lever at 90 degrees to the pipe is typically closed (with the caveat above about a misinstalled handle). For a gate valve, gently try turning counterclockwise a hair, then back toward closed. If it won't budge either way, move on.
2) Use controlled force, not brute force
Gate valve (wheel handle): Put one hand on the pipe or valve body to feel movement. With the other hand, apply steady pressure on the wheel. Don't jerk it. If it starts to move, work it back and forth in small increments rather than cranking hard in one direction.
Ball valve (lever handle): If the lever is hard to move, try a firm quarter-turn using your hand first. If you must use pliers, grip the handle near the base and apply slow, even pressure.
3) Support the valve and fittings if you use a tool
This is the difference between “the valve moved” and “the pipe cracked in the wall.” If you're applying tool force to the handle or stem, use your other tool to hold the valve body or a nearby hex fitting steady so torque isn't transferred into the plumbing.
4) Try a cautious lubrication approach (when appropriate)
On some older gate valves, a small amount of penetrating oil on the exposed stem and packing area can help. Let it sit for 10 to 15 minutes, then try again with gentle back-and-forth movement.
- Don't spray oil into any openings where it could contact drinking water.
- Also, be aware: if the stiffness is internal mineral buildup, oil may not help much anyway.
- Wipe excess oil so it doesn't attract dirt.
Stop and call a pro if you see any of these
- The valve body or pipe visibly twists when you turn the handle.
- You hear creaking or popping from a tight area in the wall.
- The handle feels like it's about to snap.
- Water starts leaking around the stem while you're forcing it.
If it closes but water still runs
“Won't fully close” means different things depending on the valve type. Also, gate valves can look closed and still pass water, so confirm by checking flow at a lowest-level faucet after you turn it off.
Gate valve: often the culprit
Gate valves shut off by lowering a metal “gate” down into the flow. Over decades, minerals and corrosion can keep that gate from sealing. Sometimes the stem spins but the internal gate is damaged and never seats.
What you can try: work the valve open and closed a few times, slowly. This can sometimes clear debris off the seat. Don't over-tighten at the end. Cranking harder rarely helps and can break the stem.
Ball valve: usually all-or-nothing
Ball valves seal with a drilled ball and internal seats. If a ball valve is fully turned to “off” and you still have flow, it may be damaged internally, it may not truly be at the full stop, or the handle may be misaligned.
What you can try: confirm the lever is fully perpendicular to the pipe. If it feels like it stops early, the handle could be loose on the stem. Tighten the handle screw (if present) and try again.
Quick test: is it actually the main valve?
In some homes, there's a whole-house shutoff at the meter and another inside. If you close the inside one and water still runs strong, you might be on a branch shutoff, a bypass line, or a PRV assembly with its own shutoff arrangement. Trace the incoming line from where it enters the house, and check near the meter.
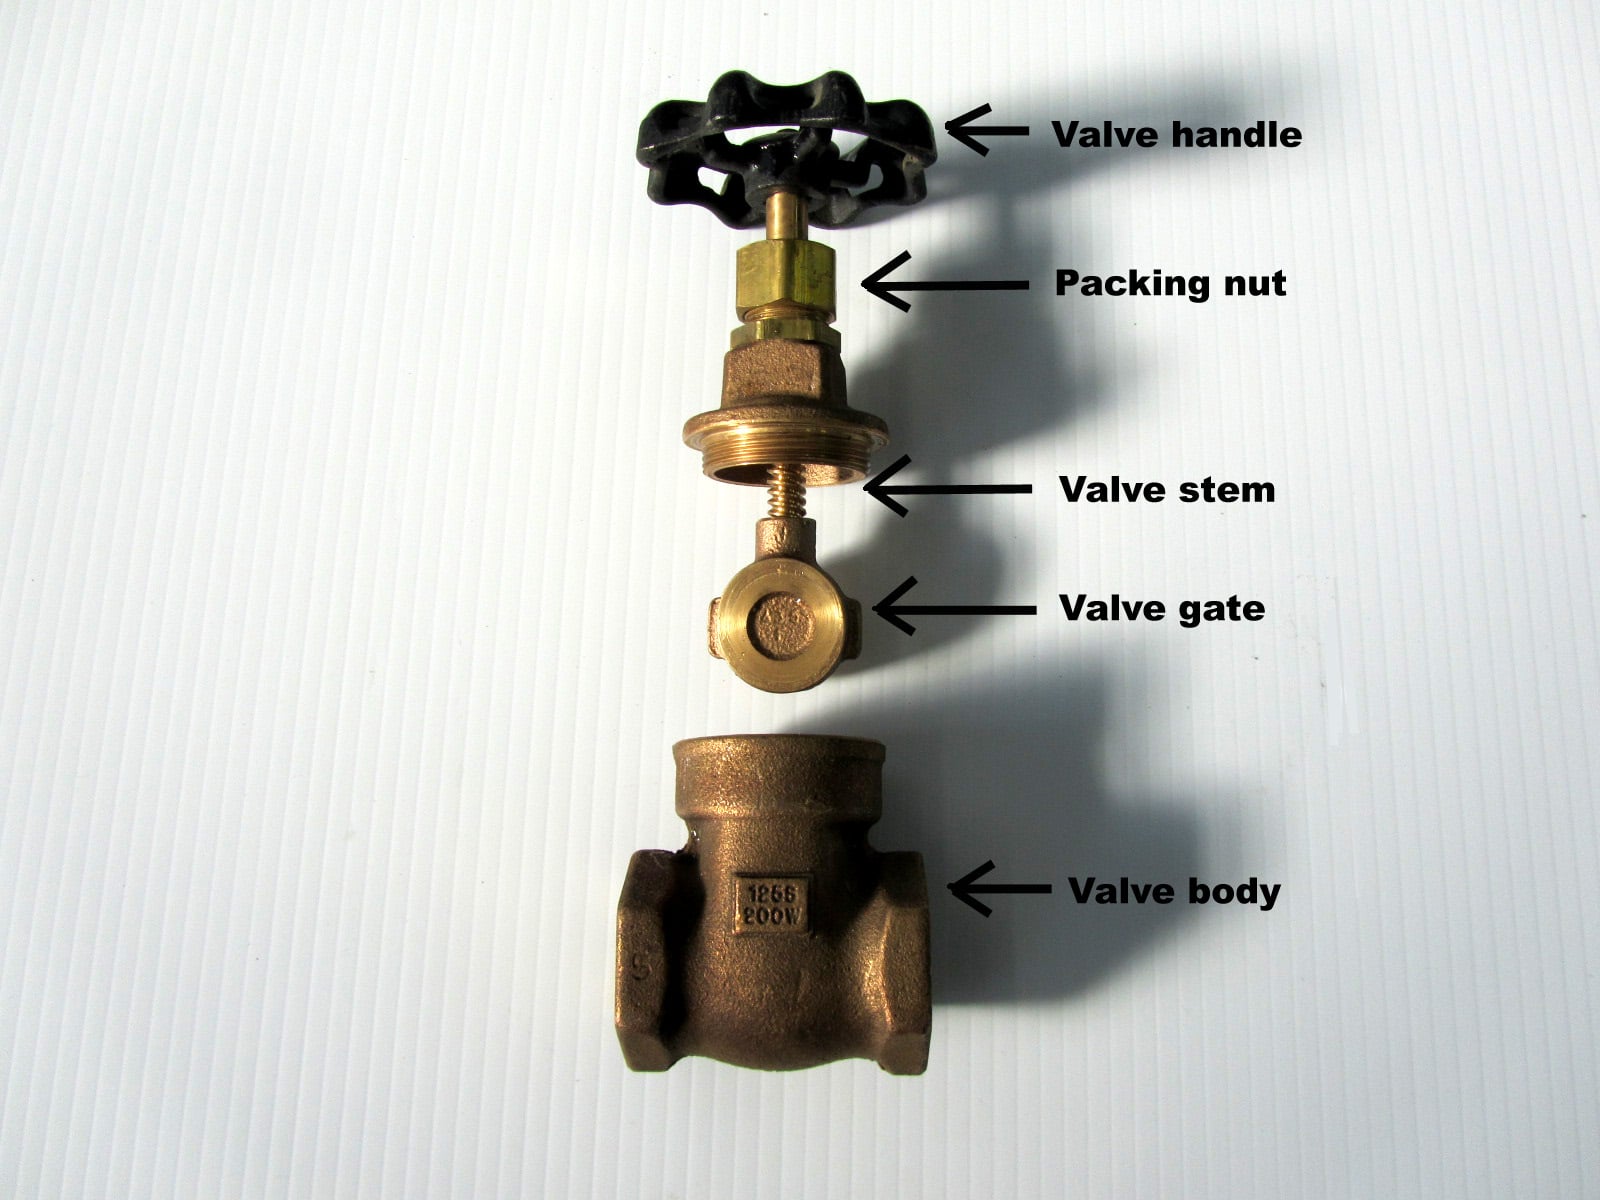
If the valve is leaking: packing nut
A small drip around the stem when the valve is turned is often a packing nut issue. This is especially common on gate valves and some older ball valves.
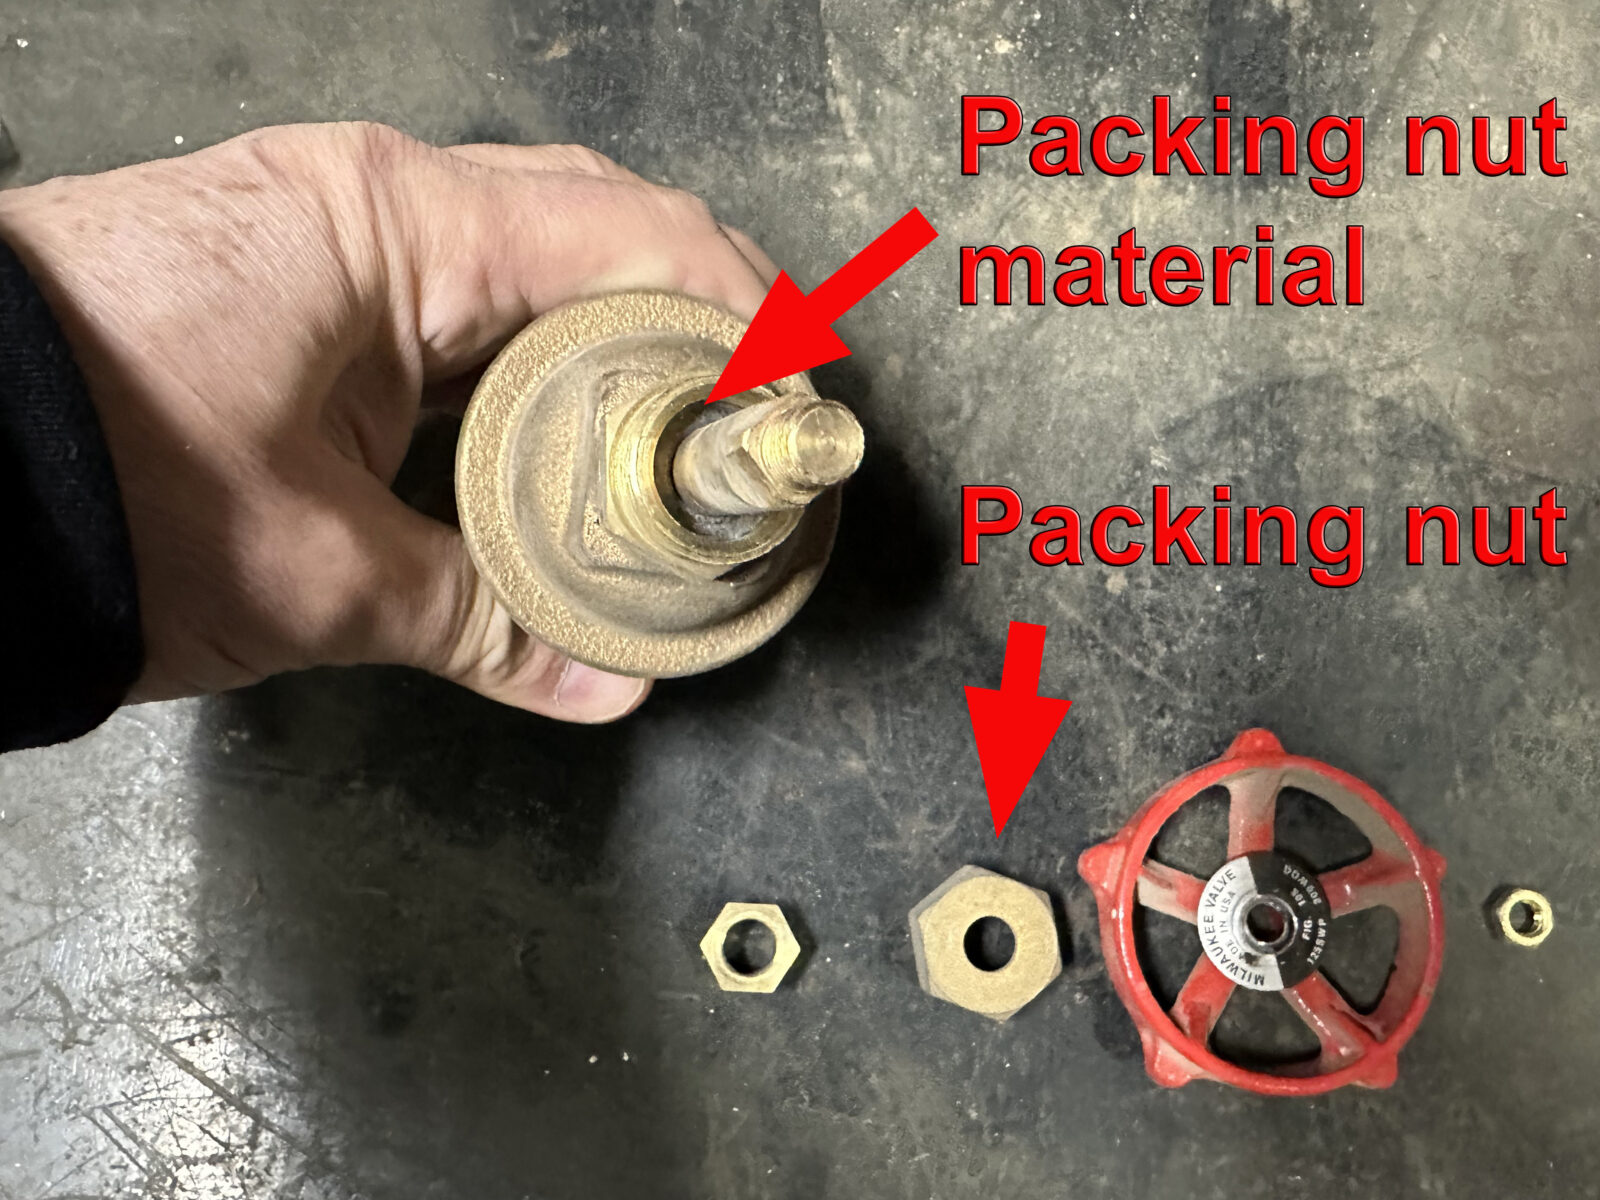
What the packing nut does
The packing nut compresses packing material around the valve stem to keep water from leaking out while the stem moves. Over time it can loosen slightly.
How to tighten a packing nut safely
- Put a wrench on the packing nut (the nut right behind the handle on many valves).
- Hold the valve body steady with a second wrench if you can.
- Tighten in tiny increments, usually 1/8 turn at a time.
- Recheck for dripping after each small turn.
My rule: If about 1/4 turn total doesn't improve the leak, I stop. That's not a hard technical limit, it's just a practical “don't get carried away” line, because over-tightening can make the valve hard to operate or damage the stem.
If tightening doesn't stop the drip
The packing may be worn out. Some valves let you repack the stem with packing material, but for a main shutoff, this is often the moment where replacement becomes the smarter long-term move, especially if the valve is already stiff or unreliable.
Replacing a bad main shutoff
If your main valve is a cranky gate valve that won't shut off fully, or it leaks no matter what you do, replacement is the real fix. I'm all for DIY, but I'm also realistic: replacing a main shutoff can go from calm to chaotic if you can't stop water upstream.
Best upgrade for most homes
- Full-port quarter-turn ball valve (brass), sized to match your main line
- Backflow note: backflow requirements are usually tied to specific risks (irrigation systems, boiler feed lines, certain hose bib setups, or other cross-connections), not automatically to a basic main shutoff swap. If you're adding new equipment or tying into an irrigation line, check local code or ask your plumber.
Decide: DIY or plumber?
DIY may be reasonable if:
- You can shut off at the street or meter reliably.
- You have accessible piping with room to work.
- You're comfortable soldering copper, pressing fittings, or using approved push-to-connect fittings where permitted.
Call a plumber if:
- You can't shut off water upstream.
- The piping is galvanized, very corroded, or cramped in a wall cavity.
- You see signs of previous leaks, patched sections, or questionable DIY splices near the main.
Replacement checklist (high level)
- Shut off water at the meter or curb stop.
- Open a hose bib or lowest faucet to drain pressure.
- Cut out or unthread the old valve.
- Install the new ball valve with correct fittings for your pipe type.
- If you use push-to-connect fittings, keep them accessible (not buried in a wall) unless your local code explicitly allows otherwise.
- Turn water back on slowly and check every joint for leaks.
Tip: If you're already doing this work, consider adding a second shutoff just after the main, or a drain valve, so future plumbing work is less stressful.
Finding and marking the shutoffs
In an emergency, you want two things: speed and certainty. Here's how I like to set a house up so anyone can shut water off fast.
Where the main shutoff is often located
- Basement or crawlspace near where the main line enters the home
- Utility room near the water heater or mechanical area
- Garage, often on an interior wall in warmer climates
Street or meter shutoff
Many homes have a shutoff at the water meter box near the curb or sidewalk. This is your backup if the indoor valve fails.

Important: Some municipalities prefer homeowners don't operate curb stops, or require a specific tool. Check your water provider's rules. When in doubt, call them, especially during a leak.
Mark it like you mean it
- Put a simple tag on the valve: “MAIN WATER SHUTOFF”.
- Keep the area clear. Don't bury it behind holiday bins.
- Write the shutoff location on a note inside your electrical panel door or on your family emergency sheet.
- If you have a ball valve, keep a small adjustable wrench nearby just in case the handle screw loosens or the handle is missing.
After you shut water off
Once the water's off, you can make your life a lot easier (and reduce mess) with a quick drain-down.
- Open a couple of faucets on the lowest level, both cold and hot, to relieve pressure and drain lines.
- Flush toilets once. Some water will remain in tanks and bowls, that's normal.
- If you have a whole-house filter, softener, or PRV near the main, your shutoff should typically be on the incoming side so it truly isolates the house. If you're not sure what's what, take a photo and ask a plumber.
Turning water back on
When you're done testing or repairs, turn things back on slowly. Fast re-pressurizing is a great way to get water hammer and surprise leaks.
- Turn the main shutoff back to fully open.
- Open a faucet slightly while refilling to let air escape.
- Bring water back on slowly, then check around the shutoff and any recent work for drips.
- If flow is suddenly weak at sinks or showers, debris may have clogged an aerator or showerhead. Unscrew and rinse the screen.
Emergency quick steps
If water is spraying or a pipe has burst, perfection isn't the goal. Fast is the goal.
- Turn off the main shutoff (or go straight to the meter or curb shutoff if the main valve is known to be bad).
- Open the lowest faucet or hose bib to relieve pressure and help drain the lines.
- Turn off the water heater if the tank could run dry (gas to “pilot” or “off” per manufacturer, electric breaker off). Don't run an electric water heater with an empty tank.
- Take photos for insurance if damage is occurring, then start water cleanup.
FAQ
Is it normal for the main shutoff to leak when I turn it?
A small drip at the stem can happen on older valves. Often a slight packing nut tighten fixes it. If the leak continues or worsens, plan for replacement.
Should I exercise my main shutoff?
Yes, gently. Turning it off and back on once or twice a year can keep it from freezing in place. If it's an old gate valve that already feels fragile, do this when you're home and able to deal with a problem, not five minutes before leaving for vacation.
My gate valve turns forever and never shuts off. What happened?
The internal gate or stem connection may be stripped or broken. At that point, replacement is the correct fix, and you may need to shut off at the street to do it.
My bottom line
A stuck or leaking main shutoff isn't just annoying, it's a risk. Try the gentle fixes first: controlled back-and-forth movement for stuck valves and small packing nut adjustments for stem leaks. But if the valve won't fully close, or it takes hero-level force to move, treat that as a warning sign and plan an upgrade to a quarter-turn ball valve.
The best time to replace a failing main shutoff is a calm Saturday morning, not when a supply line decides to impersonate a lawn sprinkler.
About Marcus Vance
Content Creator @ Grit & Home
Marcus Vance is a lifelong DIY enthusiast and self-taught home renovator who has spent the last decade transforming a dilapidated 1970s ranch into his family's dream home. He specializes in budget-friendly carpentry, room-by-room renovations, and demystifying power tools for beginners. Through his writing, Marcus shares practical tutorials and hard-learned lessons to help homeowners tackle their own projects with confidence.