🚨 In a DIY emergency or rush?
Skip the details and jump straight to our 30-second cheat sheet for the most crucial info.
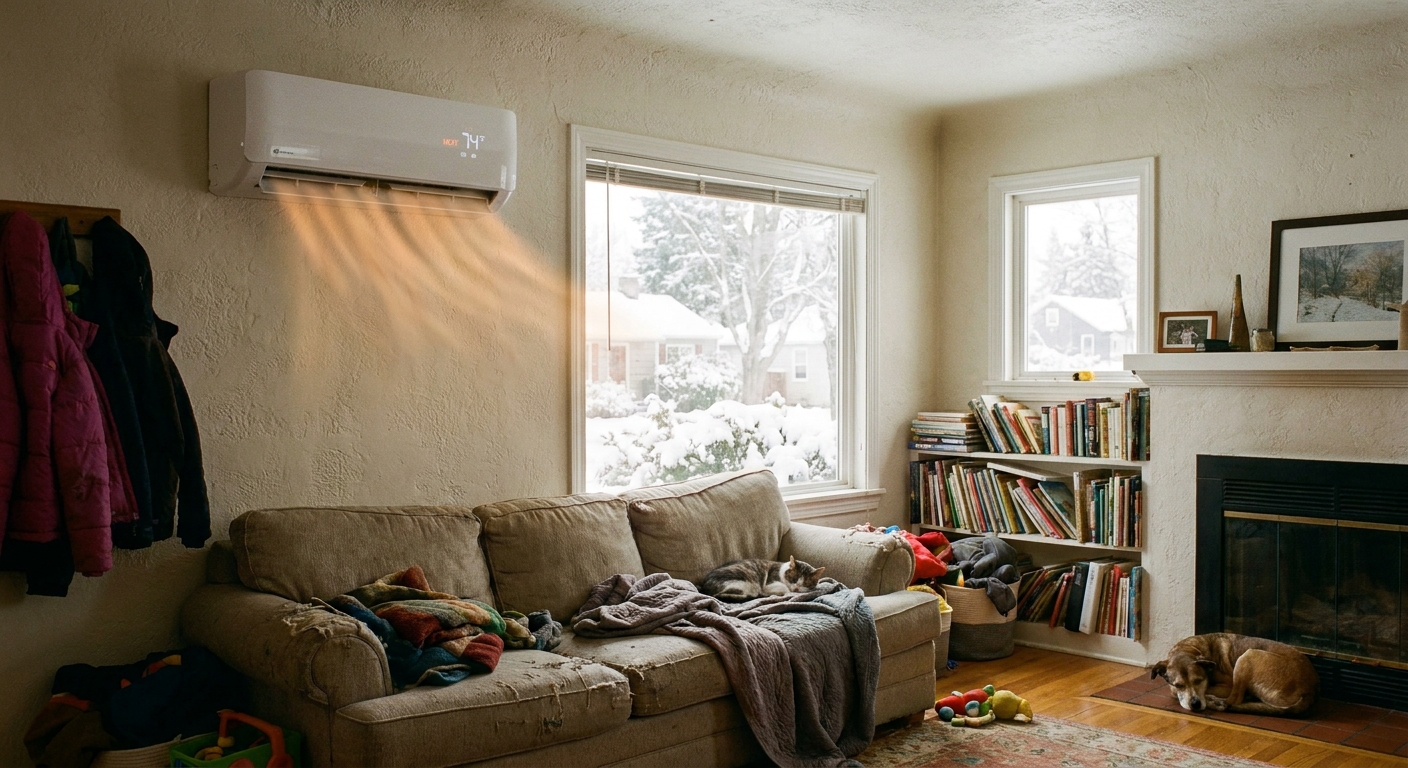
Nothing makes you question your DIY confidence like a mini-split that blows lukewarm air on the coldest morning of the year. I have been there. In my case, the “problem” was me accidentally hitting the remote and leaving it in a mode that looked like heat but was not actually calling for heat.
This guide is for those moments. These are owner-safe checks you can do in 10 to 20 minutes before you call for service. By owner-safe, I mean no removing panels, no messing with refrigerant, and no voltage testing. I will also be straight with you about the few signs that mean you should stop troubleshooting and bring in a licensed HVAC tech.
Safety first
- Do not remove covers on the indoor or outdoor unit.
- Do not chip ice off the coil or fan grille with tools.
- Keep clear footing around the outdoor unit. Defrost meltwater turns into a skating rink fast.
- If you use backup heat, use it safely. Avoid overloaded outlets and unsafe extension cords.
What “normal” heat looks like
Mini-splits are heat pumps. In heating mode, they steal heat from outdoor air and move it indoors. That comes with a few behaviors that surprise homeowners:
- It may not feel hot right away. Many systems ramp up slowly to protect the compressor and avoid cold drafts.
- The indoor fan may stop on its own. During defrost or when the unit is deciding what to do, the indoor fan can pause so you do not get a blast of cool air.
- Defrost cycles are normal. In humid or near-freezing weather, the outdoor coil frosts up and the system reverses briefly to melt it.
If your unit does some of these things but still cannot keep up, you may be dealing with sizing, airflow, outdoor icing, or low-ambient limits. If it does none of these things and never gets warm, start with the checks below.
Owner check #1: Controller settings
Most “mini-split not heating” calls I hear about start at the controller. Some homes use a handheld remote, some use a wall controller, and the icons are not always obvious.
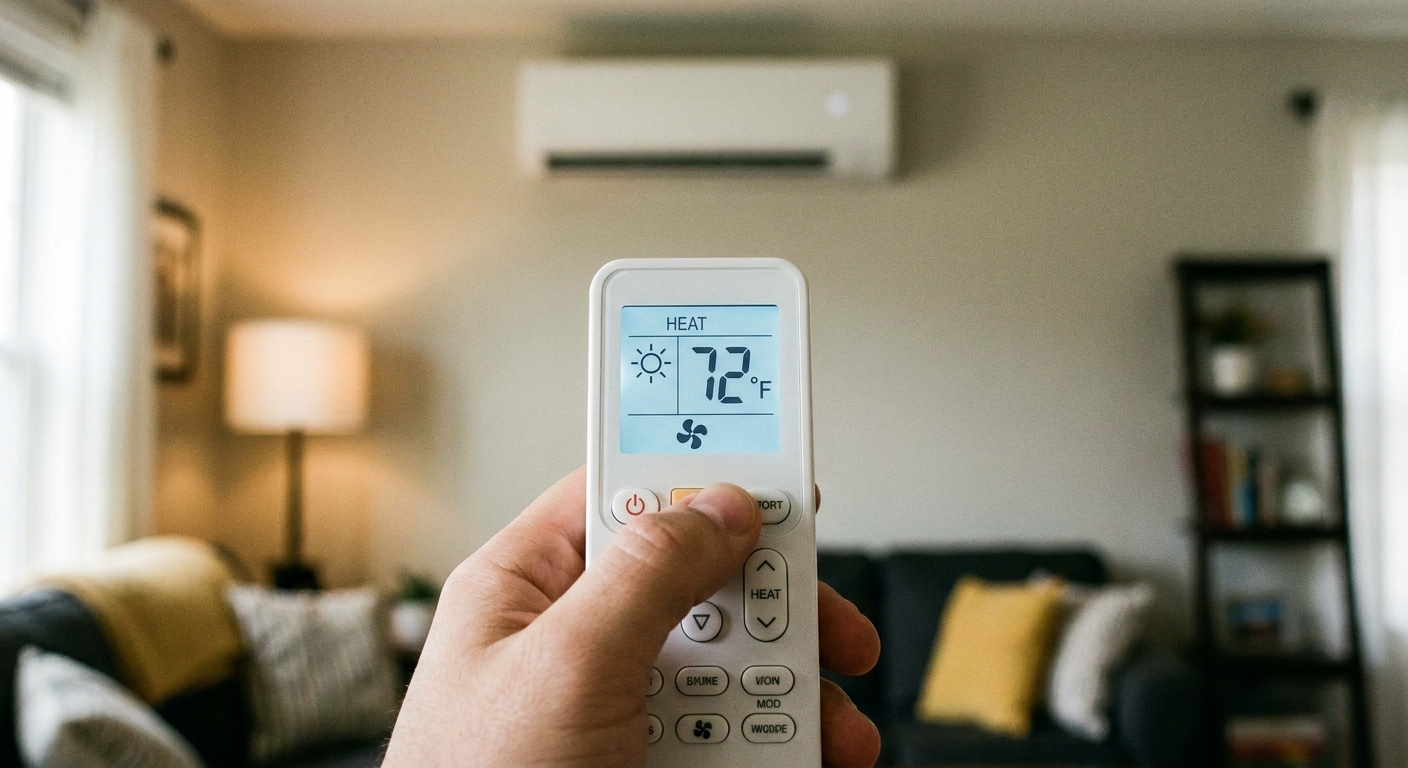
Confirm HEAT mode
- Cycle through modes until you see HEAT or the sun icon.
- AUTO mode can choose cooling or fan depending on room temperature and how the unit interprets the setpoint.
Set the temperature high enough
For troubleshooting, set the target temperature about 5 to 10°F above the current room temperature and wait 10 to 20 minutes. In very cold weather, or with inverter-driven systems that ramp gently, it can take longer than you expect.
Turn OFF Dry and Fan modes
- DRY is mainly for dehumidifying. It can run low and feel cool.
- FAN moves air only. No heat is being made.
Check fan speed and vane direction
- Set fan speed to Auto or High for the test.
- Aim vanes down and out. Heat rises, so blasting warm air straight at the ceiling wastes a lot of it.
Check ECO, Sleep, or Silent
These are comfort features, not miracles. In cold weather, they can keep the system from ramping up enough to feel warm.
Rule out schedules and lockouts
- If your system has a weekly schedule, temporarily disable it.
- If the controller has a lock feature, unlock it and retest.
- Replace remote batteries if the screen is dim or laggy.
Owner check #2: Start-up clues
After you correct settings, do a simple observation test:
- Set to HEAT and a higher setpoint.
- Wait 10 to 20 minutes.
- Put your hand in front of the indoor unit. The air should become warmer than room temperature once the system is fully running.
- Go outside. The outdoor unit typically runs in heat mode, and the large insulated copper line usually feels warmer than the outdoor air after it has been running a bit (except during or right after defrost).
If the indoor fan runs but the outdoor unit never starts, that often points to a power, control, or protection issue. You can check breakers and disconnects, but at that point a pro is usually the right move.
Owner check #3: Defrost or no heat
Defrost is the big one that confuses people because it feels like the unit quit right when you need it most.
What defrost looks like
- The indoor unit may stop blowing for a few minutes.
- You might see steam rising off the outdoor unit as frost melts. That steam is normal.
- Water may drip under the outdoor unit.
- The cycle often lasts 2 to 10 minutes, then heat resumes.
When defrost is a problem
If it seems like the unit is in defrost constantly, or it heats for 5 minutes then defrosts for 10 minutes on repeat, something is off. Common culprits are poor outdoor airflow, a dirty outdoor coil, low refrigerant, or a sensor/control issue.
Owner check #4: Outdoor icing
A light layer of frost on the outdoor coil can be normal in heat mode. What is not normal is a solid block of ice that does not clear with defrost.

Safe things to do
- Clear snow and leaves from all sides. Give it breathing room.
- Do not cover the unit while running. It needs airflow to make heat.
- Check the bottom for ice dams. If meltwater refreezes under the unit, it can build an ice platform that blocks airflow and can interfere with the fan.
- Confirm the unit is level and elevated enough. In snowy climates, mounting too low can bury the coil and force frequent defrost.
What not to do
- Do not attack the coil with a shovel or screwdriver.
- Do not pour hot water on a frozen coil. It can bend delicate fins, create electrical slip and splash hazards, and it often refreezes into a worse mess.
- Do not use salt. Corrosion is expensive.
If the coil is a solid block of ice and defrost is not clearing it, shut the system off and call a pro. That is often low refrigerant, a failed defrost sensor, or an airflow issue that needs proper diagnosis.
Owner check #5: Filters and airflow
In heat mode, restricted airflow can make a mini-split feel weak even if it is technically operating.
- Clean the indoor filters. Washable mesh filters clog faster than you think, especially with pets.
- Make sure the intake is not blocked. Curtains, tall furniture, and stacked storage right under the head unit can choke airflow.
- Open interior doors. A mini-split heats best when it can circulate air. Closed-off rooms can stay cold.
My rule of thumb: if the unit is blowing warm air but the room stays cold, think air movement and heat loss next. Drafty windows and a leaky attic hatch can make any heat source look bad.
Owner check #6: Drain and meltwater
Most people associate drains with cooling because the indoor unit makes lots of condensate in summer. But heating mode can still create water in ways that matter:
- Outdoor unit meltwater. Defrost produces water that must drain away. If it refreezes, it can create a growing ice mound that interferes with airflow and the fan.
- Indoor drain pan surprises. In certain conditions, or during mode changes, you can still get water in the indoor pan. A partially clogged drain can show up as drips even in winter.
What to look for
- Water dripping from the indoor head or staining on the wall.
- Gurgling sounds from the indoor unit.
- Ice buildup under the outdoor unit that keeps returning.
What you can do
- Make sure the outdoor unit has a clear path for water to drain away from the base.
- If you have a condensate pump, verify it has power and is not overflowing.
- For indoor drips, turn the unit off and call for service if you cannot easily confirm a simple blockage. Water inside walls is not a “wait and see” situation.
Owner check #7: Low refrigerant warning signs
Homeowners cannot legally handle refrigerant in most places, and even where rules vary, it is not a DIY task. But you can spot warning signs that suggest a leak or low charge. Just keep in mind these symptoms are not diagnostic on their own. Airflow problems, sensors, and weather conditions can look similar.
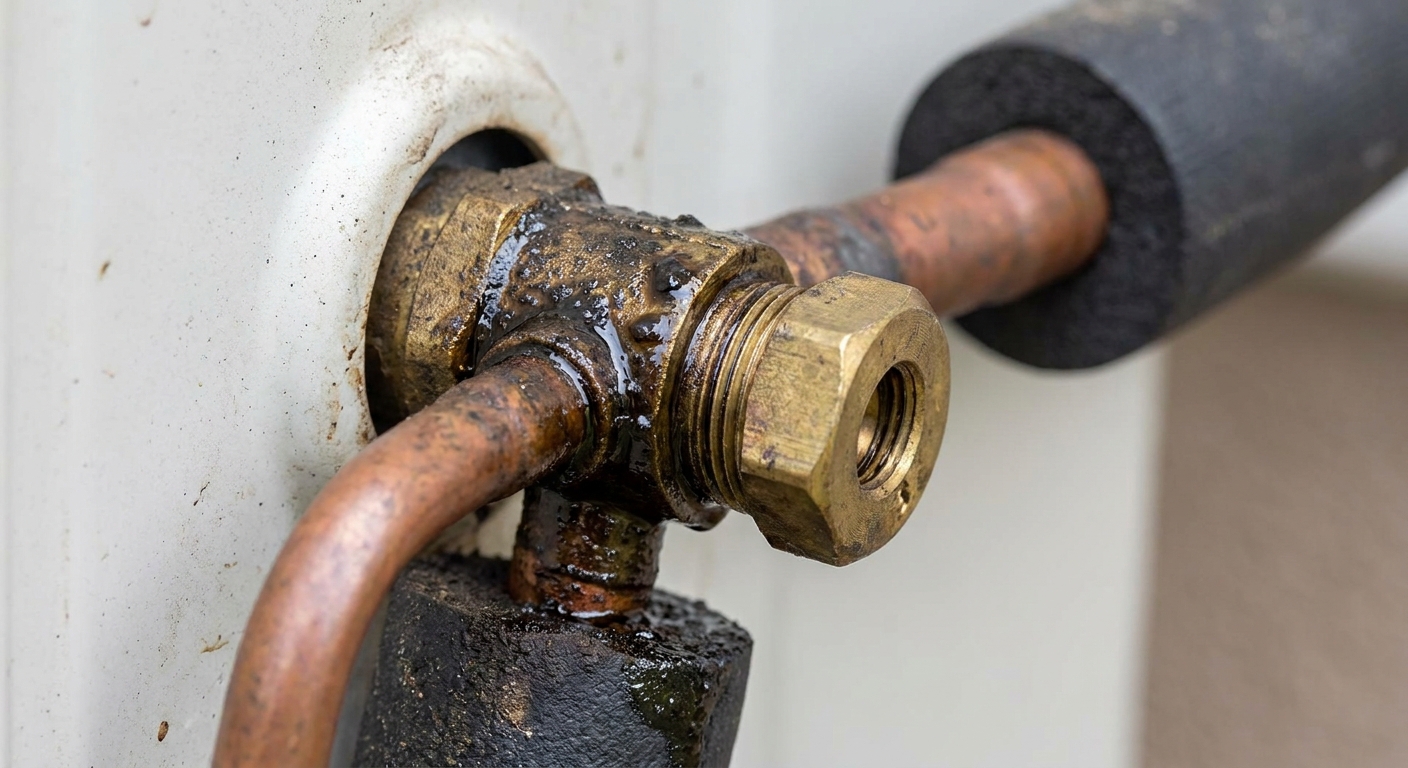
Signs that suggest a leak
- Oily residue on flare fittings or around the outdoor unit connections.
- Hissing near refrigerant lines.
- Persistent coil icing that defrost will not fix.
- System ran fine last season but slowly got weaker over weeks or months.
- Error codes related to pressure, sensors, or refrigerant (check your manual for your model).
If you suspect a leak, stop here and schedule service. Topping off refrigerant without fixing the leak is like adding air to a tire with a nail in it. It will fail again, and you risk compressor damage.
Owner check #8: Power basics
If the indoor unit is on but the outdoor unit is silent, do the safe basics:
- Check the breaker for the outdoor unit and the indoor air handler circuit if separate.
- If you have an outdoor disconnect box, confirm it is fully seated and switched on.
- If you see an error code, write it down along with your model number before you reset anything.
- Power cycle: turn the system off at the breaker for 2 to 3 minutes, then restore power and wait 5 minutes before testing heat.
Do not open panels, poke inside the disconnect, or test live voltage unless you know what you are doing. HVAC electrical compartments are not a beginner learning lab.
Cold weather limits
Even a perfectly working heat pump puts out less heat as outdoor temperatures drop. That does not always mean “broken.” It can mean “this is the edge of what it can do today.”
- Many systems are rated to heat well below freezing, but capacity still drops as it gets colder.
- If it is very cold and windy, you may need backup heat to stay comfortable, especially in drafty rooms.
- If you want a reality check, look up your model’s heating capacity at your current outdoor temperature in the submittal sheet.
Multi-zone quirks
If you have one outdoor unit feeding multiple indoor heads, the system has to make tradeoffs. It is normal for one head to feel weaker when another zone is doing most of the work, or for the system to behave oddly if some zones are off and one zone is calling hard. For troubleshooting, try turning on the main zones you actually want heated and set them to HEAT with similar setpoints.
Cooling guide differences
If you have already read our cooling-focused troubleshooting, here is what changes in heating season:
- Defrost is a feature, not a failure. In cooling, ice is almost always bad. In heating, some frost is expected and defrost cycles are normal.
- Outdoor icing matters more. In summer, outdoor coils run warm and shed water. In winter, they can freeze and choke the whole system.
- Air direction is a bigger deal. For cooling, you often aim vanes up for better mixing. For heating, aim down and out so warmth reaches people-level.
- Drain issues look different. Cooling makes indoor condensate constantly. Heating creates outdoor meltwater during defrost, plus occasional indoor drain surprises depending on setup.
- Capacity drops as outdoor temps drop. Your system might be functioning normally but struggling near its low-ambient limit or in a poorly insulated room.
Call a pro when
Some issues are not “more troubleshooting.” They are “protect the equipment and your home.” Call for service if you notice:
- The outdoor unit is loud, grinding, or rattling, or the fan is hitting ice.
- The coil is a solid block of ice and defrost never clears it.
- You see oily residue on refrigerant fittings or suspect a leak.
- The system trips the breaker repeatedly.
- You have indoor water leaking that could damage drywall, flooring, or wiring.
- An error code returns after a power cycle.
If you are without heat in freezing conditions, do not be shy about bringing in backup heat and calling early. Service schedules get slammed the moment the weather turns.
Quick decision guide
- No warm air at all: start with controller mode, setpoint, and a power cycle. If the outdoor unit never runs, call for service.
- Warm air but cold room: clean filters, open doors, check vane direction, and think heat loss and low outdoor temps.
- Stops heating in cycles: watch for defrost behavior and check outdoor icing and clearances.
- Ice that will not clear: shut it down and call a pro.
Quick warm-up checklist
- HEAT mode, not Auto, not Dry, not Fan
- Setpoint about 5 to 10°F above room temp, wait 10 to 20 minutes
- Fan Auto or High, vanes aimed down and out
- Clean filters and clear indoor airflow
- Outdoor unit clear of snow and leaves, no ice mound at the base
- Defrost behavior looks normal, not constant
- No oily residue, hissing, or persistent icing
- Write down error codes and model number before resetting
The 30-Second Cheat Sheet
Essential takeaways for: Mini-Split Not Heating? Owner Checks Before You Call
Do these first (most common fixes)
- Confirm HEAT mode (sun icon). Avoid AUTO while troubleshooting.
- Raise the setpoint about 5 to 10°F above room temp and wait 10 to 20 minutes.
- Fan speed to Auto or High. Vanes aimed down and out.
- Clean indoor filters and clear furniture or curtains blocking the intake.
Defrost: normal vs not normal
- Normal: indoor fan pauses, outdoor unit steams, water drips, then heat resumes in 2 to 10 minutes.
- Not normal: constant defrost cycles, or a coil that stays a solid block of ice.
Outdoor unit checks (winter specific)
- Clear snow, leaves, and ice buildup at the base so meltwater can drain away.
- Do not pour hot water on the coil and do not chip ice with tools.
Refrigerant leak red flags (call a pro)
- Oily residue on copper line fittings
- Hissing near the line set
- Persistent icing that defrost will not clear
Stop and call for service if
- Breaker trips repeatedly
- Indoor unit leaks water onto walls or floors
- Outdoor fan hits ice or makes grinding noises
- Error code returns after a breaker power cycle
💡 Tip: Scroll up to read the full article for detailed, step-by-step instructions.
⬆️ Back to topAbout Marcus Vance
Content Creator @ Grit & Home
Marcus Vance is a lifelong DIY enthusiast and self-taught home renovator who has spent the last decade transforming a dilapidated 1970s ranch into his family's dream home. He specializes in budget-friendly carpentry, room-by-room renovations, and demystifying power tools for beginners. Through his writing, Marcus shares practical tutorials and hard-learned lessons to help homeowners tackle their own projects with confidence.