Why nail pops happen (and why they come back)
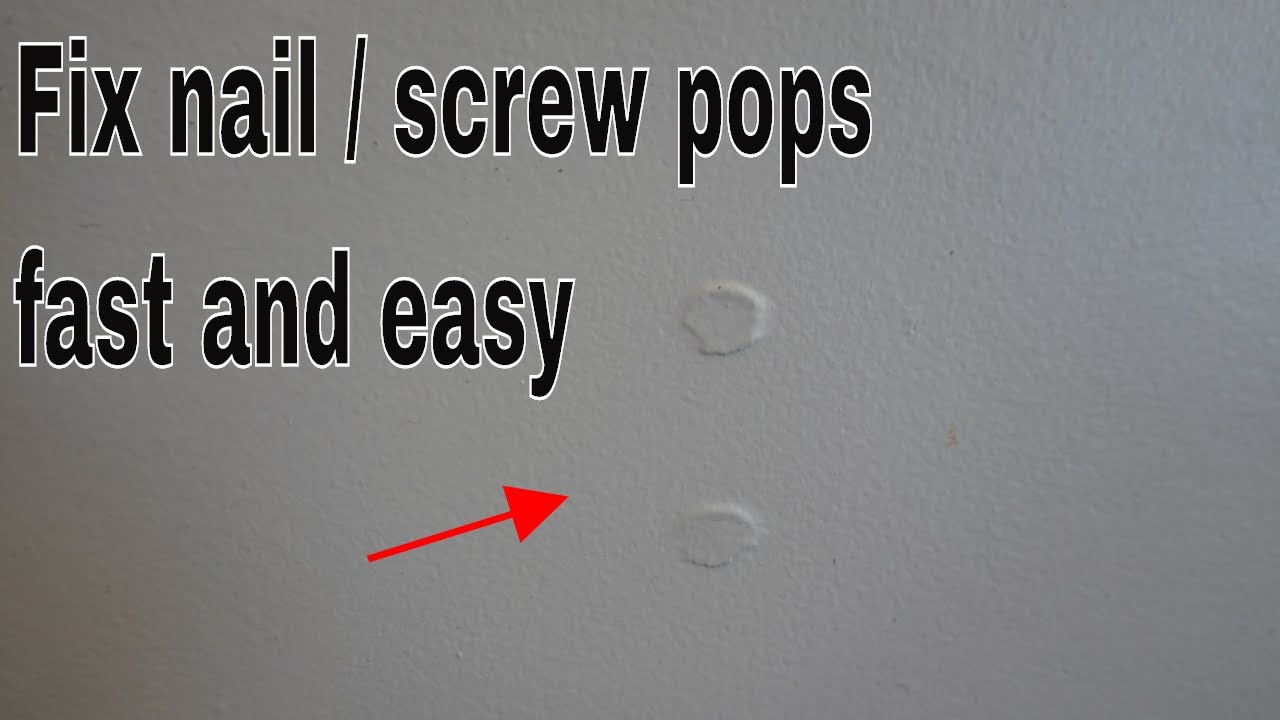
Nail pops are those little bumps or circles in painted drywall where a nail head pushes the paper outward, sometimes cracking the paint. They are common in ceilings and upper walls, and they love to show up as seasons change.
Most of the time, the drywall itself is fine. The fastener just is not holding anymore. Wood framing expands and contracts with humidity, houses settle a bit, and older smooth-shank nails can slowly wiggle. When the framing shifts even slightly, the nail head can lift, and the drywall paper becomes the weak link.
The good news is you can usually repair nail pops with basic tools. The key is fixing the cause first, then patching. If you only smear mud over the bump, it will often return and crack right through your pretty paint job.
Cosmetic nail pop or something bigger?
Before you start patching, take five minutes to figure out what you are dealing with. There is a big difference between a few cosmetic pops and movement that needs monitoring.
Usually cosmetic
- A handful of isolated pops scattered around a room.
- They show up gradually, often after winter heating or summer humidity.
- No obvious pattern at specific corners or along a long seam.
- Doors and windows still open and close normally.
Often truss uplift
Truss uplift happens when roof trusses move up slightly as the attic space dries or changes temperature, while interior walls stay put. This can create seasonal cracks or fastener pops near wall-to-ceiling intersections.
- Cracks or pops concentrated where interior walls meet the ceiling, especially near the middle of the house.
- Hairline cracks that open in winter and close in summer (or vice versa).
- More noticeable on upper floors or under large attic spaces.
If this sounds like your situation, you can still patch, but you may need a slightly different strategy to avoid locking things together too rigidly. I cover that below.
Potential structural movement
Drywall is basically your house’s “skin,” so it shows stress early. Nail pops alone are rarely a structural emergency, but watch for these red flags:
- Wide cracks (roughly thicker than a credit card) or cracks that grow quickly.
- Stair-step cracks in drywall or masonry, especially near windows and doors.
- Multiple doors that suddenly latch poorly or rub the jamb.
- Noticeable sloping floors, gaps at baseboards, or new gaps between trim and walls.
- Moisture stains, soft drywall, or recurring pops in a spot that feels damp.
If you see several of these together, it is smart to document what you are seeing and consider calling a qualified contractor, structural engineer, or foundation specialist depending on the symptom set.
Tools and materials
You do not need a full drywall kit, but the right basics make the repair disappear.
- Drywall screws: For wood studs/joists, #6 coarse thread is common. For steel studs, use fine-thread drywall screws.
- Screw length: Typically 1-1/4 inch for 1/2 inch drywall or 1-5/8 inch for 5/8 inch drywall in most single-layer applications. If you have double drywall or other layers, adjust length accordingly.
- Drill/driver with a Phillips bit.
- Drywall screw setter bit (dimpler bit): Optional, but very beginner-friendly for setting screws without tearing paper.
- Utility knife for cutting loose paper and making a clean edge.
- Putty knife: 4 to 6 inch for first coats, 10 to 12 inch for feathering (nice but optional).
- Joint compound: Lightweight all-purpose is beginner-friendly, or setting-type compound for faster recoat times.
- Sanding sponge (fine to medium), plus a dust mask and eye protection.
- Primer: Drywall primer (use stain-blocking primer only if you have stains).
- Paint to match, plus a small roller for the best blend.
- Optional for dusty rooms: Plastic sheeting and a shop vacuum for quick cleanup and dust control.

Step-by-step: a nail pop that stays fixed
1) Confirm it is a fastener pop
Run your hand over the bump. Most nail pops feel like a small hard circle. If the area feels soft, crumbly, or stained, stop and check for moisture first.
2) Find the stud or joist
The popped nail is usually in framing, but not always where you think. If you are not 100 percent sure where the stud or joist is, take an extra minute to find it:
- Use a stud finder, or a small magnet to locate drywall screws or nails along the line.
- Look for a straight line of other fasteners or faint dimples in raking light.
- As a last resort, probe carefully with a tiny finish nail in an area you will patch anyway.
3) Add screws to resecure the drywall
This is the part that prevents the comeback. Your goal is to pull the drywall tight to the framing near the pop.
- Drive a drywall screw about 1 inch above the pop and another about 1 inch below the pop (or left and right on a wall stud). Keep them about 3/4 inch to 1 inch away from the popped nail so you do not blow out the same spot.
- Set the screw head just below the drywall surface. A dimpler bit makes this much easier. If you tear the paper, back it out and try again nearby.
- If the screw spins and will not bite, you likely missed framing. Do not guess a fixed distance. Recheck the stud location, then try again where you know you are on solid wood or steel.
My rookie mistake: I used to drive one screw and call it good. Two screws bracketing the pop is what finally stopped my ceiling from re-cracking every heating season.
4) Deal with the original nail head
You have two common options, and both are fine as long as the drywall is now held tight with screws:
- Tap it in slightly with a hammer and nail set if it is proud of the surface.
- Remove it if it is loose and accessible, but do not tear the paper.
If the nail head is still tight and not sticking out, you can leave it. The screws are doing the real holding now.
5) Cut away loose paper and flatten the bump
Use a utility knife to slice any loose, bubbled paper around the pop. If there is a raised mound, press it gently and remove what is not bonded so the area sits flat. You want a stable surface, not a tent.
6) First coat of compound
Apply joint compound over the pop area and over your new screw heads. Keep it thin. Think “fill and flatten,” not “build a hill.” Let it dry fully.
7) Second coat
Apply a wider coat, extending 6 to 10 inches beyond the repair. This is where repairs disappear. Feather the edges by holding the knife at a slight angle and easing pressure as you pull away from the center.
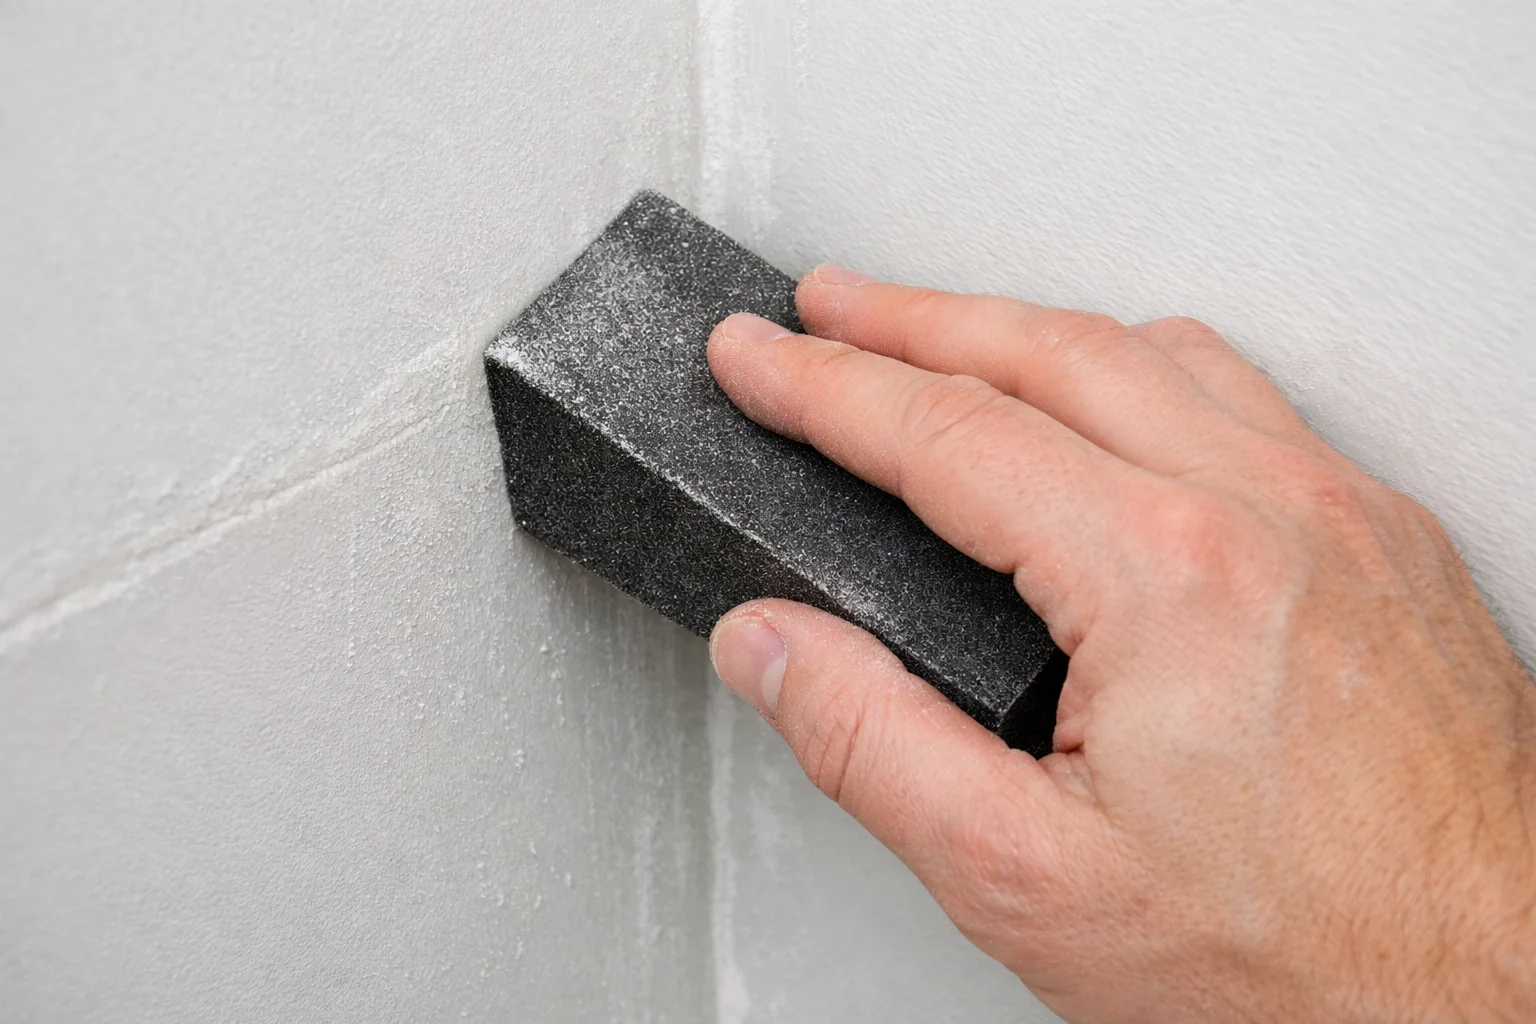
8) Light sand, then a final skim if needed
Sand lightly with a sanding sponge. If you still see a shadow or ridge, apply a thin skim coat and sand again when dry. Two to three coats is normal for invisible results.
Dust tip: If you can, close nearby doors, lay down plastic or a drop cloth, and vacuum dust as you go. It is a small step that makes cleanup way less annoying.
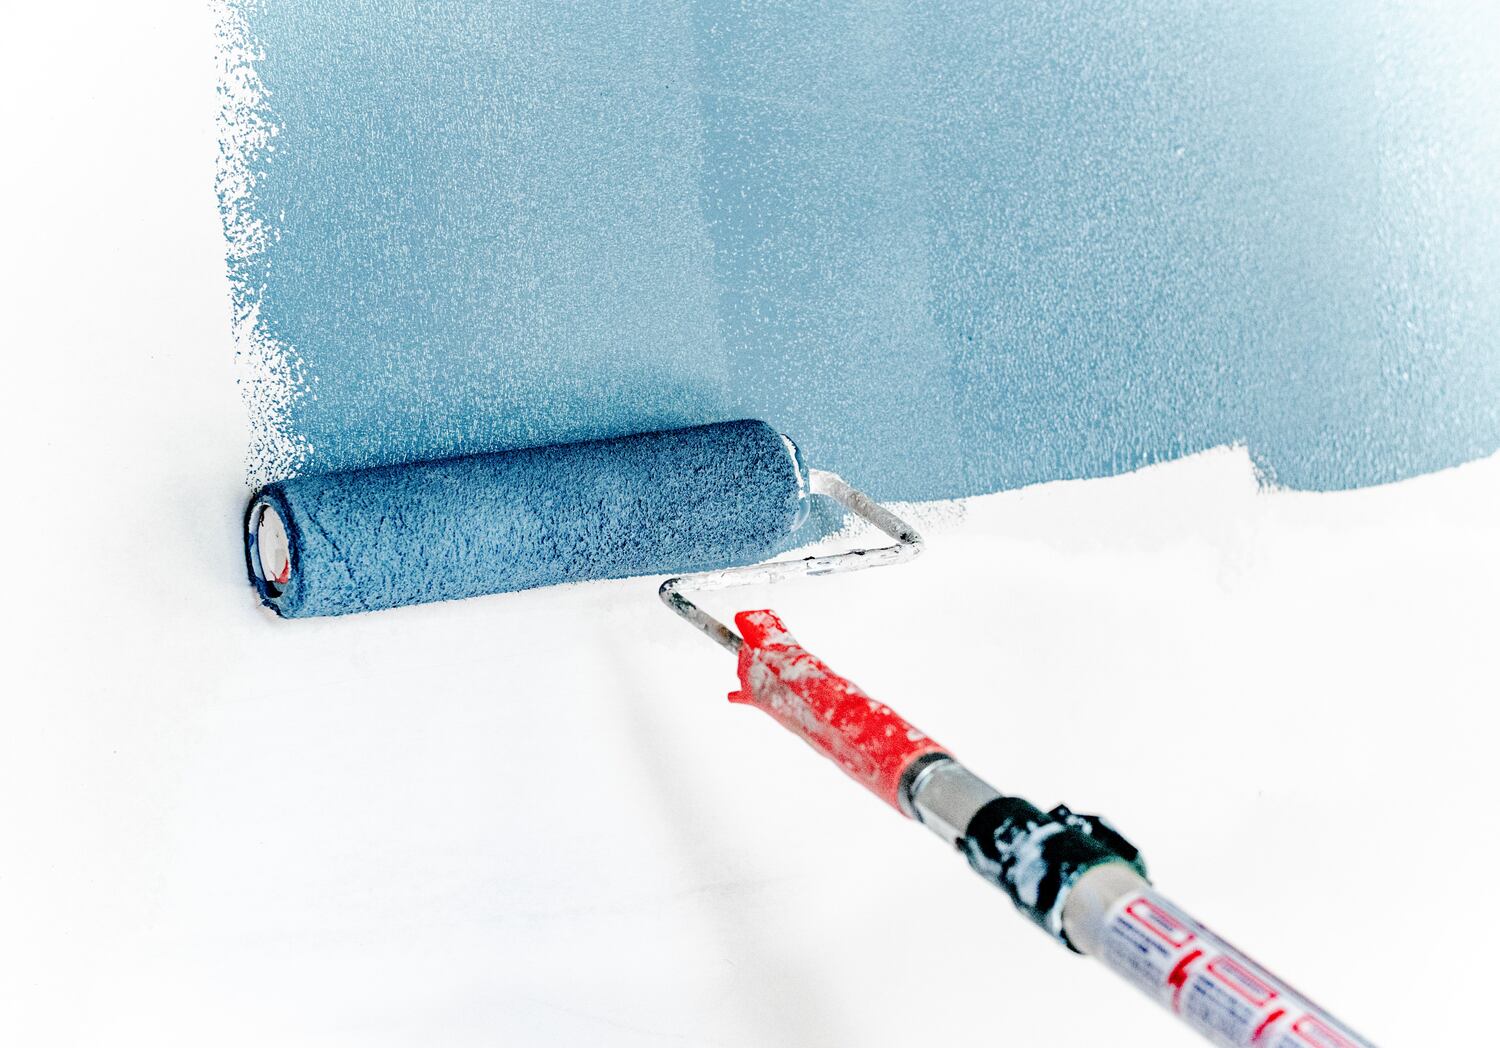
9) Prime, then paint
Do not skip primer. Drywall compound is thirsty and will “flash” through paint as a dull spot. Prime just the patched area, then paint. For ceilings especially, a small roller helps blend texture and sheen better than a brush.
If your surface is textured: Smooth mud on a textured ceiling can look like a spotlight. Match the texture (orange peel, knockdown, popcorn) before final paint if you want the patch to truly disappear.
Preventing repeat pops
Use screws, not more nails
If you replace a popped nail with another nail, you are often signing up to do the job twice. Drywall screws clamp better and resist backing out.
Hit framing and set the depth right
Missed studs and overdriven screws cause their own problems. If the paper tears, the screw head can pull through later. Aim for dimpled paper, not ripped paper. A dimpler bit helps a lot if you are new to this.
Control indoor humidity
Big seasonal humidity swings make framing move more. If your house runs very dry in winter or very humid in summer, consider:
- Keeping indoor humidity roughly in the 30 to 50 percent range.
- Using bath fans and kitchen ventilation consistently.
- Running a dehumidifier in damp basements or a humidifier in very dry climates.
Watch the pattern
If pops cluster along a single seam, at one corner, or across an entire ceiling line, document it. The pattern tells you more than one random bump ever will.
If you suspect truss uplift
When truss uplift is the culprit, the ceiling and the interior wall are moving differently. If you “glue” them together with a rigid patch right at the corner, cracks can come back seasonally.
- Focus repairs on the ceiling plane rather than packing mud deep into the wall-to-ceiling corner.
- Use paintable acrylic latex caulk at the corner if the gap is small and recurring, then paint. Caulk flexes more than joint compound.
- If cracks are persistent and long, consider a flexible corner approach such as specialty truss uplift clips or an adjustment to how the drywall is attached near the top of interior partitions. That is more advanced and may be worth a contractor consult if you are seeing it in many rooms.
Bottom line: with seasonal movement, you are aiming for a repair that can tolerate a tiny bit of shift without telegraphing it through the finish.
Monitor or call a pro?
Monitor (and repair as you go) if:
- You have a small number of pops over time.
- There are no moisture stains or soft spots.
- Cracks are hairline and not growing quickly.
- Doors and windows behave normally.
Investigate further if:
- Pops and cracks appear suddenly after a storm, plumbing leak, or roof issue.
- You see widespread cracking across multiple rooms in a short time.
- Cracks are widening, offset, or paired with sticking doors and sloping floors.
- You suspect the ceiling drywall is sagging between framing members.
If you are unsure, take a few photos now and again in 30 to 60 days. A simple “before and after” can tell you whether the house is stable or actively moving.
Quick FAQ
Can I just push the nail back in and mud over it?
You can, but it often comes back. Refasten with screws near the pop first, then patch.
Do I need to tape a nail pop?
Usually no. Nail pops are point repairs, not seam repairs. Tape is for cracks and joints. If you have a crack radiating from the pop, a small tape patch can help, but it is not the default.
Why does the patch show through my paint?
That is flashing from unprimed compound or uneven sheen. Prime the repair, then repaint with the same sheen. On ceilings, roll paint to match the surrounding texture.
How many times can I fix pops before I worry?
If you fix them correctly with screws and they still reappear in the same area repeatedly, start looking for an underlying issue like seasonal truss uplift, missed framing, steel studs with the wrong screws, or moisture.
My go-to routine
- Add two drywall screws near the pop, set just below the surface.
- Trim loose paper, keep the surface solid.
- Two thin coats of compound, feathered wide.
- Light sand, prime, then paint.
This is about 10 minutes of active time per pop, plus drying time between coats.
If you take nothing else from this page, take this: the screws are the fix, the mud is the finish. Do it in that order and your ceiling will stay smooth longer than one season.
About Marcus Vance
Content Creator @ Grit & Home
Marcus Vance is a lifelong DIY enthusiast and self-taught home renovator who has spent the last decade transforming a dilapidated 1970s ranch into his family's dream home. He specializes in budget-friendly carpentry, room-by-room renovations, and demystifying power tools for beginners. Through his writing, Marcus shares practical tutorials and hard-learned lessons to help homeowners tackle their own projects with confidence.