
If you have ever stood in the tool aisle staring at sanders thinking, Why are there so many shapes? you are not alone. I bought my first sander because a dresser top needed help fast, then learned the hard way that the wrong style can waste a whole Saturday and still leave swirl marks.
And yes, you are going to see those little triangle “mouse” sanders too. They are handy for tight corners and small detail work, but for most DIY jobs, the two workhorses worth understanding first are the random orbital sander and the sheet sander.
Here is the simple truth: a random orbital sander is usually the best first buy for most DIY woodworking and furniture projects. A sheet sander shines when you want control, flat sanding, and cheap sandpaper, especially on big, already-flat surfaces or paint prep.
The quick answer
- Get a random orbital sander if you refinish furniture, sand bare wood, remove old finish, or care most about a smooth, even surface.
- Get a sheet sander if you do lots of drywall or paint prep, want maximum control, or you are sanding large flat areas with lighter pressure.
- Own both if you renovate room by room. I reach for the random orbital in the shop and the sheet sander when I am doing trim, doors, spackle touch-ups, and “make it look good enough to paint” work.
What each tool does
Random orbital sander (often mistakenly called “orbital”)
A random orbital sander spins a round disc while also moving in a small orbit. That “random” motion helps it sand fast without leaving obvious straight scratch lines like a belt sander can. Most use hook-and-loop discs (commonly 5-inch or 6-inch), though a few models use stick-on (PSA) discs.
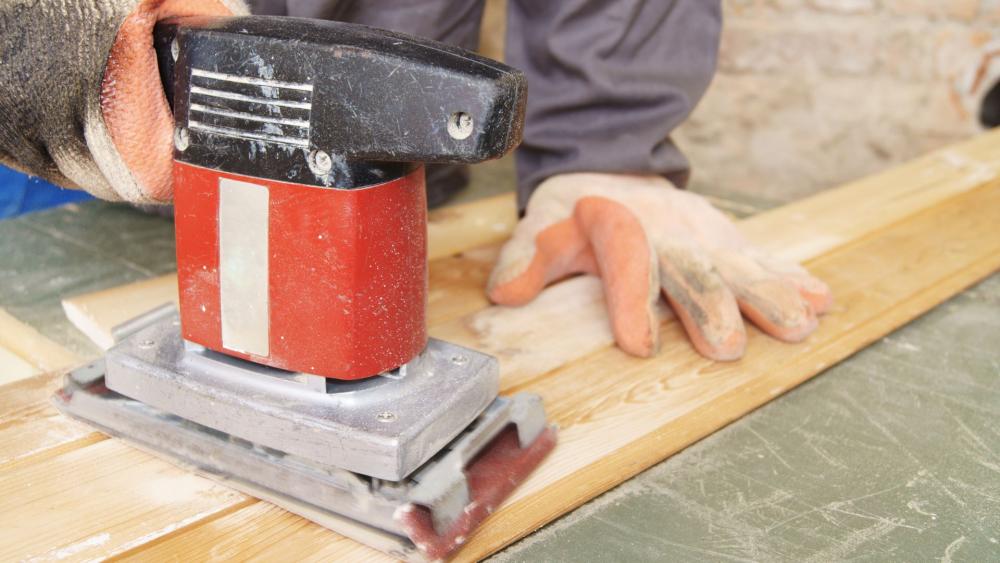
Sheet sander (finishing sander)
A sheet sander moves a rectangular pad in tiny back-and-forth vibrations. It uses a quarter-sheet or half-sheet of sandpaper, usually held by spring clips or hook-and-loop. It is slower, but very predictable and easy to keep flat.
Head-to-head comparison
1) Finish quality
- Random orbital: Best overall finish on wood. Less risk of obvious directional scratches. Can leave swirl marks (sometimes called pigtails) if you press too hard, skip grits, use clogged paper, or use cheap discs.
- Sheet sander: Leaves a consistent, directional scratch pattern and stays flatter on panels. On stained wood or glossy finishes, those scratches can telegraph if you do not step through grits carefully.
My real-world take: If you are staining or clear-coating furniture, the random orbital is more forgiving. The sheet sander is great for final passes or paint prep.
2) Speed and material removal
- Random orbital: Faster at removing old finish and leveling small ridges and uneven spots. Better for stripping a tabletop and smoothing rough lumber.
- Sheet sander: Slower. Great for “just scuff it” jobs, feathering patch edges, and light sanding where you do not want to gouge anything.
Quick reality check: If you truly need to flatten a badly cupped or twisted panel, neither of these is the magic tool. That is when a planer, drum sander, hand plane, or a belt sander with a sanding beam makes more sense.
3) Edges, corners, and tight spots
- Random orbital: Round pad cannot get into corners. You can get close to an edge, but it is easy to tip the tool and round it over if you are not paying attention (especially on veneer).
- Sheet sander: Rectangular pad gets closer to edges and corners and it is easier to keep it flat on a door, cabinet side, or stair tread. It still will not reach into inside corners. That is detail sander or hand-sanding territory.
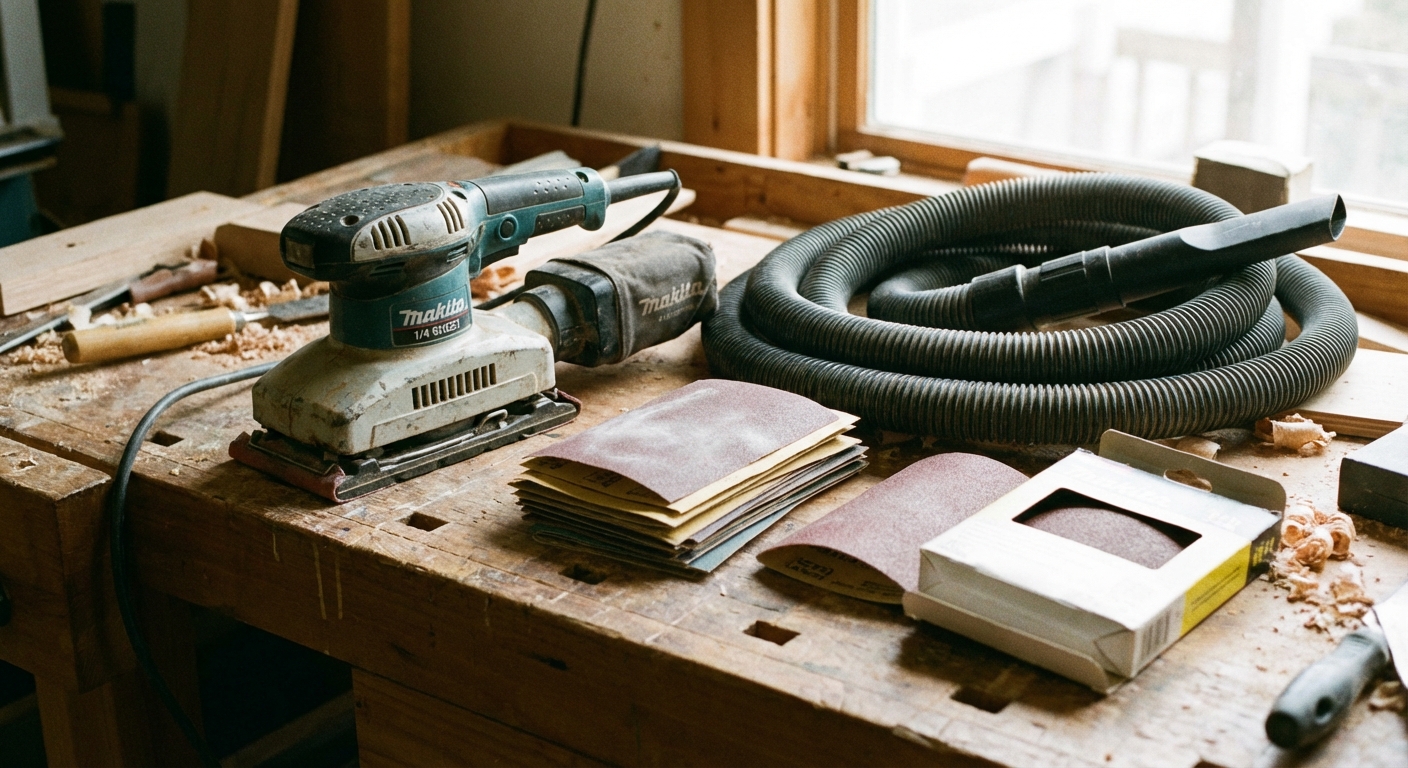
4) Dust collection
- Random orbital: Usually better. Most have multiple dust holes and a decent sealed path to a bag or vacuum. Hooking it to a shop vac makes a noticeable difference. Mesh discs can also help dust collection and keep paper cutting longer.
- Sheet sander: Mixed results. Many are decent, but the pad motion and paper fit can let more dust escape. Still worth using a vac or at least the dust bag.
Beginner note: Whichever you buy, choose one with a standard vacuum port or an adapter option. Dust is not just messy, it also clogs paper fast and makes sanding feel ten times harder.
5) Cost to buy and cost to run
- Random orbital: Tool cost is usually a bit higher. Discs cost more per square inch of sandpaper, and cheap discs wear out fast.
- Sheet sander: Often cheaper upfront. Sandpaper is very budget-friendly because you can buy full sheets and tear them down. Great when you are doing lots of prep work.
6) Learning curve
- Random orbital: Easy, but you need to learn “let the tool do the work.” Pushing down makes swirls and burns through finish unevenly. Be extra cautious on veneer.
- Sheet sander: Very beginner-friendly. It is forgiving, stable, and harder to mess up edges if you keep it flat.
Decision matrix
Use this as a quick “grab the right tool” cheat sheet.
| DIY scenario | Best choice | Why |
|---|---|---|
| Refinishing a dining table or dresser top | Random orbital | Faster finish removal and smoother results before stain or clear coat. |
| Scuff-sanding cabinets before painting | Sheet sander (random orbital for doors) | Controlled, flat sanding on broad faces. Random orbital helps on stubborn clear coats. |
| Prepping drywall patches and feathering spackle | Sheet sander (spot use) | Gentle and flat for small areas, but keep it moving, use fine grit, and consider hand sanding or a drywall sander for bigger patches to avoid waves. |
| Sanding between coats of polyurethane on a tabletop | Sheet sander or hand sand | Light pressure and even contact reduce the chance of cutting through. |
| Sanding a deck | Neither (use a floor/deck sander) | Decks are big. These tools are fine for rails and small areas, not the whole surface. |
| Deck rails, balusters, and small touch-ups | Random orbital | Faster on weathered wood and better at blending transitions. |
| Leveling small ridges on a glued-up panel or butcher block project | Random orbital | Good for flush-up and scratch blending. For serious flattening, use a planer, drum sander, or hand plane. |
| Prepping a door slab (already flat) for paint | Sheet sander | Stable pad keeps faces flat and gets close to edges. |
| Removing paint drips and rough spots on trim | Sheet sander | More control near profiles and edges. Finish with hand sanding. |
| General “first sander” for a DIY homeowner | Random orbital | Most versatile for wood projects and the best all-around finish quality. If your work is mostly paint prep and drywall, a sheet sander may make more sense. |
Best projects
Random orbital sander: best for
- Tabletops, countertops, butcher block, and large wood panels
- Refinishing furniture where you will stain or clear coat
- Removing old polyurethane, varnish, and light paint layers
- Smoothing rough lumber and easing tool marks after planing
- Blending repairs so they disappear under finish
Sheet sander: best for
- Paint prep on doors, walls (spot work), and trim
- Scuff-sanding glossy surfaces for primer adhesion
- Drywall patch feathering (small areas, light touch)
- Large flat surfaces where you want to avoid rounding edges
- Budget sanding sessions where paper cost matters
Sandpaper basics
Most sander frustration is actually sandpaper frustration. Here are the rules I wish I followed from day one.
- Do not skip grits. If you jump from 80 to 220, you will sand forever and still see scratches.
- Match grit to the job.
- 60 to 80: heavy removal and leveling (be careful on veneers)
- 100 to 120: general smoothing after rough work
- 150 to 180: pre-finish sanding for many hardwoods
- 220: between coats, final sanding for paint prep, and some softwoods
- Typical sweet spots: I usually do the early, dusty work with a random orbital (often 80 to 150), then switch to lighter passes (150 to 220) with a sheet sander or by hand if I am chasing a finish-ready surface.
- Replace paper early. Dull paper polishes instead of cutting, which makes you press harder, which makes mistakes.
- Choose the right abrasive. Aluminum oxide is a great all-around choice for wood. Silicon carbide is a common pick for sanding finishes and between coats because it cuts clean and leaves a nice scratch pattern.
Beginner mistakes
With a random orbital sander
- Pressing down to go faster. It usually goes slower and leaves swirls.
- Tilting near edges. That is how corners get rounded and veneers get burned through.
- Stopping in one spot. Keep it moving at a steady pace, like mowing a lawn.
- Not vacuuming the surface. A single grit of debris can carve a circle you will chase for 20 minutes.
With a sheet sander
- Ignoring the golden rule: sand with the grain. A sheet sander leaves directional scratches. Sanding across the grain can look fine until stain or clear coat makes every line pop.
- Using it like a scrub brush. Let it float. Too much force just vibrates your hands and tears paper.
- Not tightening paper evenly. Wrinkles cause chatter marks.
- Expecting it to remove thick finish quickly. That is not its strength. If the finish is tough, step back and choose the random orbital, a scraper, or chemical stripper.
Buying checklist
If you are buying a random orbital sander
- Size: 5-inch is the sweet spot for most DIY. 6-inch is great for big surfaces but costs more in discs.
- Variable speed: Helps on paint, soft wood, and between coats.
- Dust port that fits a vacuum: You will use it more if it is easy.
- Comfort: Try the grip. A sander you hate holding will sit on a shelf.
If you are buying a sheet sander
- Paper system: Clips are universal and cheap. Hook-and-loop is quicker but paper costs more.
- Pad flatness: A firm, flat pad sands flatter. Squishy pads can round edges.
- Low vibration feel: It is a small detail that matters after 30 minutes.
So, which do you need?
If you want one sander that can handle most wood projects with the least frustration, buy a random orbital sander and a small stack of quality discs in 80, 120, 150, and 220.
If your projects are more “house prep” than “woodworking” and you want something stable, affordable, and easy to control, a sheet sander is a smart pick.
And if you bounce between patching a wall on Saturday and refinishing a nightstand on Sunday, you will eventually appreciate having both. They are not duplicates. They are teammates.
Other tools worth knowing
- Detail (mouse) sander: inside corners, chair spindles, and small areas where the big sanders cannot fit.
- Sanding sponge or sanding block: profiles, trim details, and quick hand blending at edges.
- Scraper: fast, controlled finish removal with less dust than sanding when you learn the technique.
Safety and setup
- Wear a respirator when sanding finishes, paint, or drywall compound. A dust mask is better than nothing, but a respirator is the upgrade you never regret.
- Hearing protection helps. Sanders are loud, especially in a small room.
- Clamp your work when possible. Less chasing, more sanding.
- Check for lead paint in older homes before sanding. If you suspect it, stop and test.
About Marcus Vance
Content Creator @ Grit & Home
Marcus Vance is a lifelong DIY enthusiast and self-taught home renovator who has spent the last decade transforming a dilapidated 1970s ranch into his family's dream home. He specializes in budget-friendly carpentry, room-by-room renovations, and demystifying power tools for beginners. Through his writing, Marcus shares practical tutorials and hard-learned lessons to help homeowners tackle their own projects with confidence.