🚨 In a DIY emergency or rush?
Skip the details and jump straight to our 30-second cheat sheet for the most crucial info.
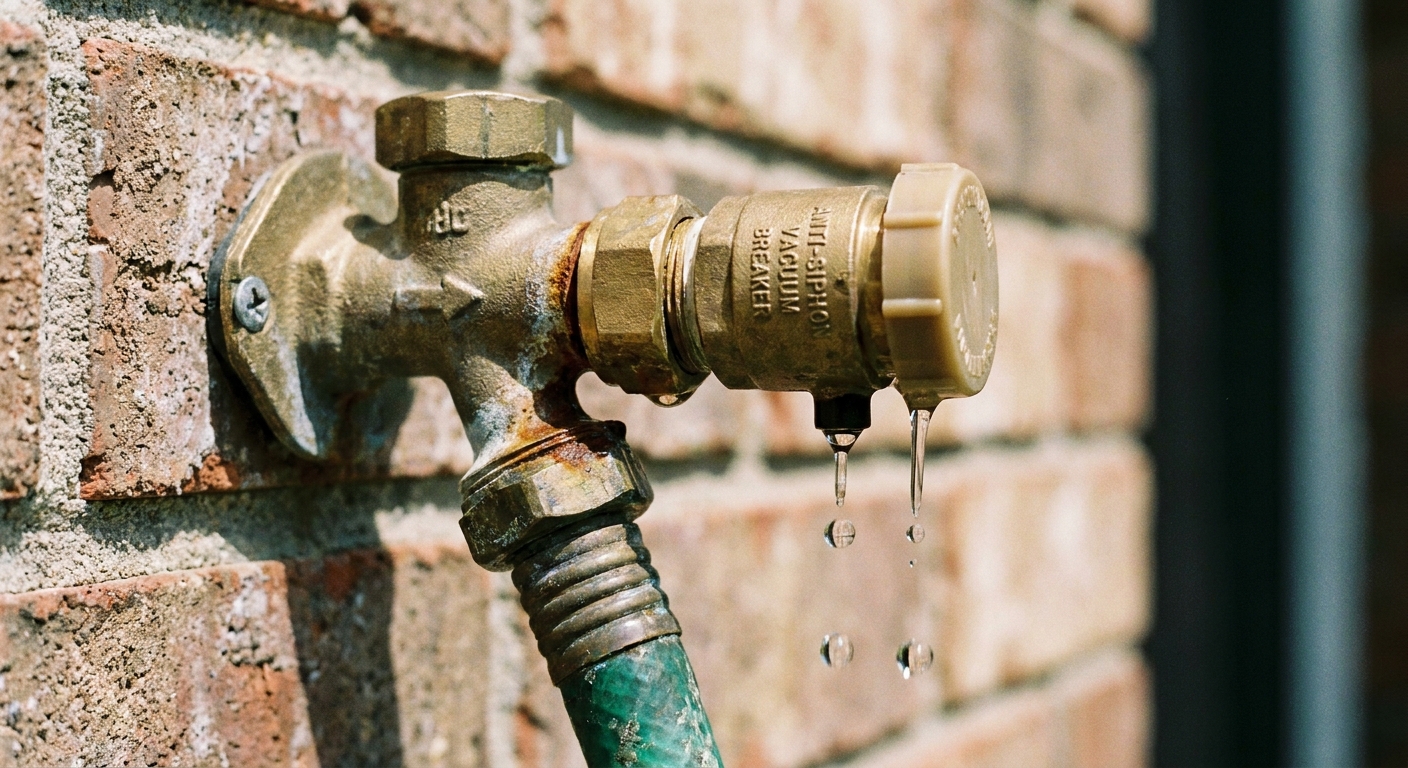
If your outdoor faucet (also called a hose bib or sillcock) is leaking from the little bell-shaped cap on or near the outlet, you are not alone. The anti-siphon cap (vacuum breaker) is a very common failure point, and the good news is you can often fix it with a simple cleaning or a small rebuild kit instead of replacing the whole faucet.
I have personally chased this leak after a “quick” winterization that was not as thorough as I thought. The breaker is a small, delicate assembly, and it does not take much grit or ice to make it misbehave. This article will help you pinpoint the cause and choose the cheapest safe fix.
What that cap does
The anti-siphon cap houses a vacuum breaker. Its job is to prevent dirty water from being siphoned back into your home’s plumbing if pressure drops suddenly (think: a hose in a bucket of soapy water, or a sprinkler head sitting in muddy soil).
Inside the breaker is a small moving check piece and usually one or two O-rings. When things are healthy, water only flows out the spout. When something is off, water escapes out the breaker’s vent or around the cap.
Important: Do not plug, caulk, tape, or “seal up” the little vent hole. That defeats the backflow protection and can create a bigger problem than a drip.
Two leaks that look similar
- Water spurts or dribbles from the tiny vent openings while the faucet is ON: often debris, mineral crust, worn seals, or a stuck check.
- Water drips from the breaker when the faucet is OFF: very often the main faucet valve is not sealing and the breaker is venting trapped pressure. It can also be a failed breaker seal or freeze damage.
Quick diagnosis
Before you take anything apart, do these fast checks. They can save you from rebuilding the wrong part.
1) Confirm it is not the hose
- Remove the hose entirely and test with the faucet running.
- If it only leaks when a hose is attached, the hose washer may be damaged or the hose end may be cracked.
2) Watch when it leaks
- Only while running: suspect grit, mineral buildup, worn O-ring, or a stuck check.
- Even when off: suspect the faucet is not fully closing (common), or a failed breaker seal.
- Only right after shutoff: a brief dribble can be normal pressure release, but it should stop quickly.
3) Identify your faucet type
- Standard hose bib: the shutoff point is close to the handle. These often use a washer, seat, or cartridge.
- Frost-free sillcock: the shutoff point is deeper inside the wall. These are great, but they can split inside the wall if a hose is left attached in freezing weather.
Also note: some vacuum breakers are a replaceable cap style, and some are integral to the faucet and not truly serviceable. If yours is integral or badly seized, full faucet replacement can be the smarter path.
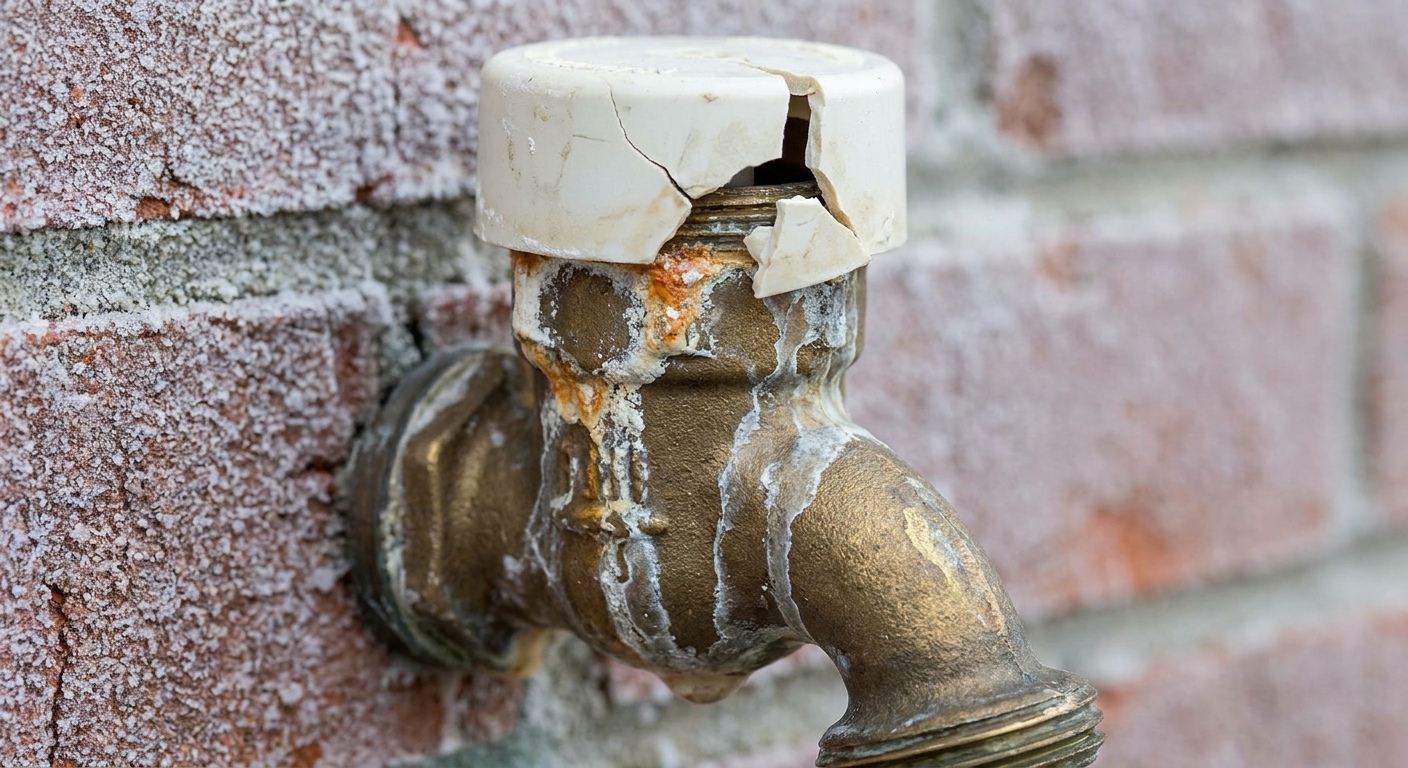
4) Check for freeze clues
If this started right after winter, look closely for:
- Hairline cracks in the breaker cap or body
- A distorted plastic cap that does not sit flat
- A hose bib that now weeps from the stem or wall area
Fast troubleshooting
| What you see | Likely cause | Next step |
|---|---|---|
| Leaks from vent while running | Debris, mineral buildup, worn O-ring | Clean, then rebuild or replace breaker |
| Leaks from vent when off | Main faucet valve not sealing, trapped pressure venting at breaker | Check for spout drip, rebuild valve, inspect for freeze damage |
| Leak at wall or indoors while running | Cracked sillcock body or supply connection | Shut down and repair or replace sillcock |
| Repeated weeping after repairs | High water pressure or hammering stressing seals | Check pressure, consider PRV, add hammer arrestor if needed |
Tools and parts
- Adjustable wrench or tongue-and-groove pliers
- Small flat screwdriver or pick (for O-rings)
- Rag and an old toothbrush
- White vinegar (for mineral buildup) and clean water
- Silicone plumber’s grease (not petroleum jelly)
- Replacement vacuum breaker or rebuild kit matched to your brand
Thrifty tip: Take the old breaker to the hardware store. There are a handful of common styles, but they are not universal.
Shut water off safely
Step 1: Turn off the supply
Shut off the indoor valve feeding the outdoor faucet. If you do not have a dedicated shutoff, you may need to shut off the main.
Step 2: Relieve pressure
Open the outdoor faucet to relieve pressure and drain water. Then close it.
Step 3: Protect the pipe
If your hose bib is threaded into a pipe, use a backup wrench on the body when needed. The goal is to avoid twisting copper or PEX inside the wall.
Fix 1: Clean the breaker
A tiny grain of sand can keep the internal check from sealing, and a little mineral crust can keep parts from moving freely.
Steps
- With water off, remove the breaker cap. Some unscrew, others have a small set screw.
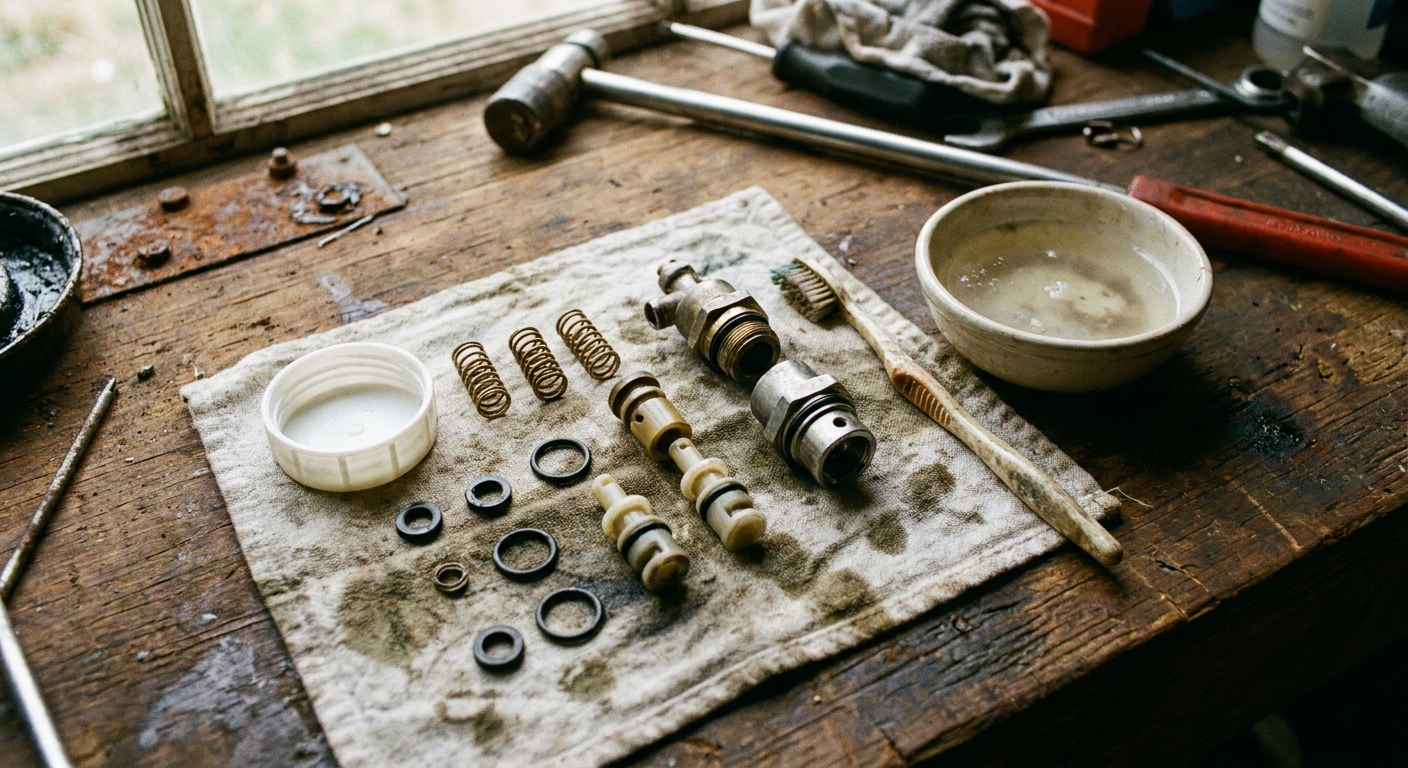
- Pull out the internal pieces carefully and lay them on a rag in order.
- Rinse parts and scrub gently with a toothbrush.
- Soak mineral-crusted pieces in vinegar for 15 to 30 minutes, then rinse.
- Reassemble and test.
If cleaning stops the leak, you just saved yourself a parts run. If it improves but does not fully stop, move to the O-ring rebuild.
Fix 2: Replace O-rings
Most anti-siphon leaks come down to tired rubber. Sun, heat, and hard water take their toll.
Steps
- Remove the cap and internal check assembly.
- Inspect O-rings for flat spots, cracks, or brittleness.
- Replace with the exact sizes from a rebuild kit or the manufacturer’s parts.
- Apply a thin film of silicone plumber’s grease to O-rings. Do not overdo it.
- Reassemble, restore water, and test with and without a hose attached.
My mistake to help you avoid it: The first time I rebuilt one, I grabbed a “close enough” O-ring from a mixed pack. It held for a week, then started weeping again. Exact fit matters here.
Fix 3: Replace the breaker
If the cap is cracked, the internal plastic is warped, or the rebuild parts are not available, swapping the whole vacuum breaker is typically cheap and quick.
How to replace it
- Turn off water and relieve pressure.
- Remove the old breaker. Many have a breakaway (shear) set screw designed to snap off after installation for tamper resistance.
- If the screw is already snapped, removal varies by design. Sometimes you can grab the remaining nub with locking pliers or carefully cut a slot. In other cases you may need to drill it out and use a screw extractor. If the breaker is integral or you cannot remove it without damaging the faucet body, replace the entire hose bib.
- Install the new breaker per instructions. Hand tighten, then snug with a wrench. Do not crush plastic parts.
- Turn water on and test for leaks around the cap and vent.
Important: In many areas, anti-siphon devices are required by code. If your hose bib had one, replace it with one, not a plain cap.
If the valve will not shut off
Sometimes the breaker is simply where the water shows up, but the real issue is that the hose bib valve is not sealing. A tiny trickle continues past the valve seat, builds pressure, and finds the easiest escape route, often the vacuum breaker vent.
Signs this is happening
- Leak continues long after the faucet is turned off
- You feel gritty resistance when turning the handle
- The faucet also drips from the spout
What to do
- Try opening the faucet fully, then closing it firmly (do not over-torque) to flush debris off the seat.
- If it still will not seal, you may need to rebuild the stem washer, cartridge, or seat depending on your faucet style.
If your hose bib is a frost-free sillcock, a persistent off-position leak can also be a clue the internal stem or seat has been damaged by freezing.
Freeze damage
Here is the blunt truth: if freezing cracked the sillcock body inside the wall, replacing the vacuum breaker will not save you. It might even hide the real leak until it rots framing.
Replace the whole sillcock if you notice
- Water inside the basement or crawlspace when the outdoor faucet runs
- Drips at the wall penetration or behind the siding
- A split tube on a frost-free faucet (often hidden until you remove it)
If you are not sure, remove the interior access panel (or peek from the basement) and run the faucet while watching the pipe. Any leakage inside the wall area is a “shut it down and fix it” situation.
Choosing the right breaker
Vacuum breakers are not all interchangeable. The safest approach is to match by:
- Faucet brand (often stamped on the handle or body)
- Thread type and size
- Breaker style (screw-on cap, integral assembly, set screw style)
If your existing breaker uses a set screw, buy the same style. Many are designed as “non-removable” after install for code compliance, but in the real world they still get replaced all the time with the correct part.
My repair order
- Remove the hose and retest.
- Clean the breaker and flush debris.
- Rebuild with new O-rings if parts are available.
- Replace the whole breaker if plastic is cracked, warped, or the screw is a lost cause.
- Investigate valve sealing or freeze damage if it leaks while off or you see moisture inside.
This order saves money and time, and it keeps you from over-repairing something that just needed a quick cleaning.
Prevent it next season
- Disconnect hoses before winter. A hose left on traps water and defeats frost-free designs.
- Shut off and drain the line if you have an interior shutoff and bleeder.
- Use a cover with realistic expectations. A foam cover helps during short cold snaps and wind, but it will not protect a hose bib that is holding water because a hose is attached.
- Open and close the faucet a couple times in spring to flush grit before you attach expensive timers or sprayers.
When to call a plumber
I am all for DIY, but outdoor plumbing can quietly damage a wall before you notice.
- You see any leaking inside the home when the faucet is on
- The faucet is soldered in tight quarters and you are not comfortable with torch work
- You suspect a cracked frost-free sillcock body
- Your local code requirements are strict and you need a compliant anti-siphon setup
- You suspect very high water pressure, or you keep killing vacuum breakers every season
The 30-Second Cheat Sheet
Essential takeaways for: Outdoor Faucet Leaking From the Anti-Siphon Cap? Fix It
Most common cause
If water leaks from the anti-siphon cap or vent while the faucet is running, it is usually debris, mineral buildup, or worn O-rings inside the vacuum breaker.
Fastest safe fix order
- Remove the hose and test again.
- Shut off supply, open faucet to relieve pressure.
- Remove vacuum breaker cap and clean parts (vinegar helps mineral buildup).
- Replace O-rings or install a brand-matched rebuild kit.
- If the plastic cap or body is cracked, replace the whole vacuum breaker.
If it leaks when the faucet is OFF
That often means the hose bib is not sealing (debris on the seat, worn washer or cartridge), and the vacuum breaker is simply the first place pressure can vent. Freeze damage is also possible. Check for any water inside the house when the faucet runs.
Do not ignore these red flags
- Moisture inside the basement or crawlspace near the hose bib
- Leak at the wall penetration
- Leak started right after a hard freeze and a hose was left attached
Parts to buy
Buy a brand-matched vacuum breaker or rebuild kit. Take the old one to the store. They are not universal, and some are integral and not serviceable.
Prevention
Disconnect hoses before winter, shut off and drain the line if you have an interior valve, and do a quick spring flush before attaching timers or sprayers. Covers help with short cold snaps, but they are not a substitute for proper draining.
💡 Tip: Scroll up to read the full article for detailed, step-by-step instructions.
⬆️ Back to topAbout Marcus Vance
Content Creator @ Grit & Home
Marcus Vance is a lifelong DIY enthusiast and self-taught home renovator who has spent the last decade transforming a dilapidated 1970s ranch into his family's dream home. He specializes in budget-friendly carpentry, room-by-room renovations, and demystifying power tools for beginners. Through his writing, Marcus shares practical tutorials and hard-learned lessons to help homeowners tackle their own projects with confidence.