🚨 In a DIY emergency or rush?
Skip the details and jump straight to our 30-second cheat sheet for the most crucial info.
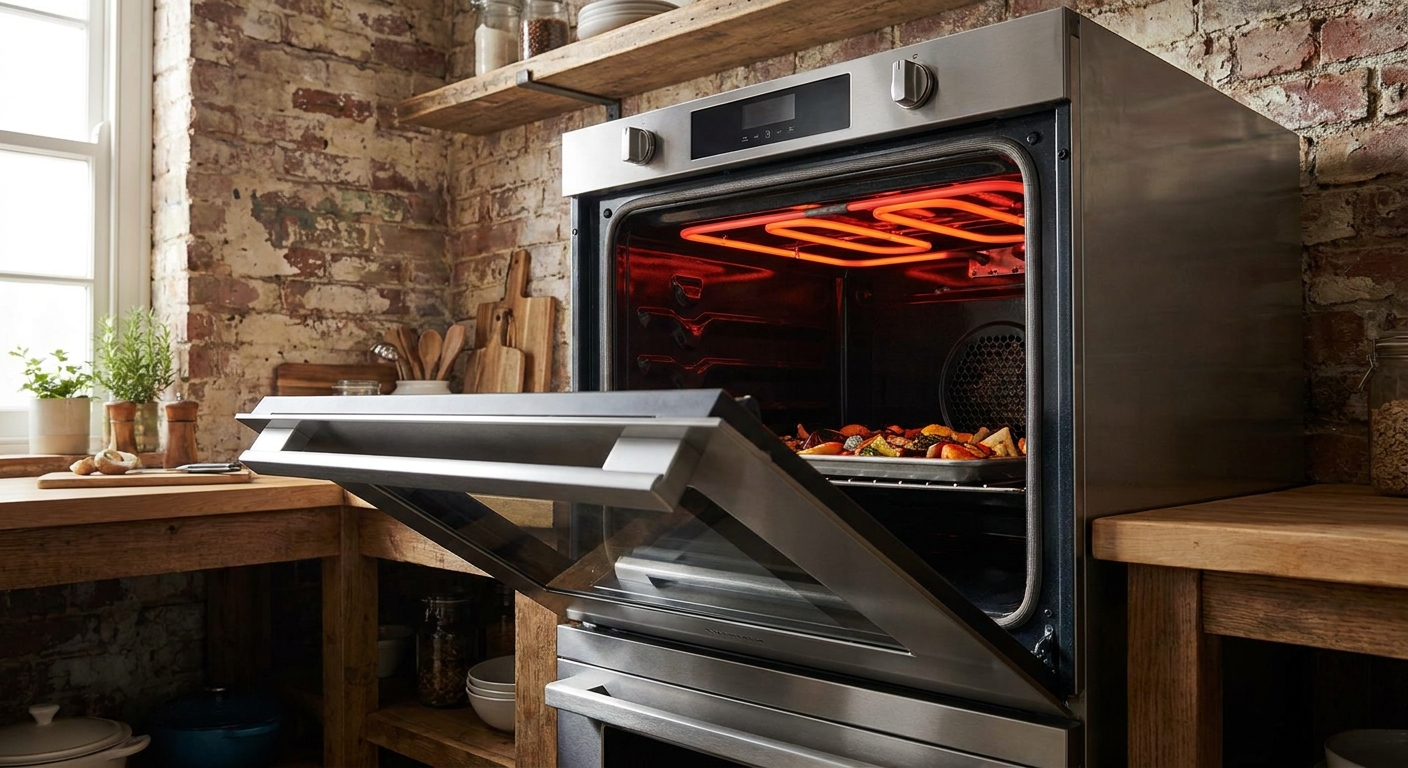
When the broiler stops working, it feels extra personal. You preheat, you wait for that top heat, and nothing happens. The good news is that broiler failures often have a short list of causes, and many are easy to confirm with a few careful checks.
This guide stays broiler-specific. If your bake is also not heating, you will want a different troubleshooting path because the likely culprits change.
Safety first (2 minutes that can save your weekend)
- Kill power at the breaker before removing panels, touching wiring, or testing parts. Electric ovens can be 240V.
- For gas ovens: if you smell gas, stop, ventilate, and contact your gas utility or a pro.
- Let the oven cool before inspecting the broil area. Broilers hide heat where you least expect it.
- Do not bypass fuses, thermostats, or door switches. Those are safety devices.
Quick triage: what is it doing?
Before you grab tools, get specific. The symptom points you toward the right component.
- Electric broil: Element never glows, only a few sections glow, or it glows weakly and never seems to stay on.
- Gas broil: You hear clicking and no flame, you see a glowing igniter and no flame, or the flame lights then shuts off.
- Control behavior: Display says “BROIL” but nothing else happens, it runs forever, or it throws an error code.
- Door factor: Works only with the door cracked, or never works unless the door is fully shut.
Now let’s walk the most common broiler-only causes in the order I check them at my own house.
1) Confirm broil mode
This sounds too simple until you have watched a tired parent try to broil on “Bake” at 500°F. Broil uses a different heat source and sometimes different control logic.
What to check
- Setting: Select Broil, not Bake, Convection Bake, or Warm.
- High vs Low Broil: Some ovens default to Low Broil. That can look like “not working” if you expect a quick sear.
- Rack position: Most broiling is done near the top. If your food is far down, it will feel like a dead broiler.
- What “preheat” looks like: On some models, broil heat cycles on and off by design or behaves differently with the door closed versus ajar. A steady glow or a constant flame is not guaranteed.
My quick test: Set broil to High, use the door position your manual recommends, and wait 60 to 90 seconds. For electric, you may see the element begin to glow (sometimes in sections) and then cycle. For gas, you should see the igniter action (glowing and or clicking depending on design), then flame shortly after. If opening the door makes the heat stop immediately, that is a useful clue for the door sensing section below.
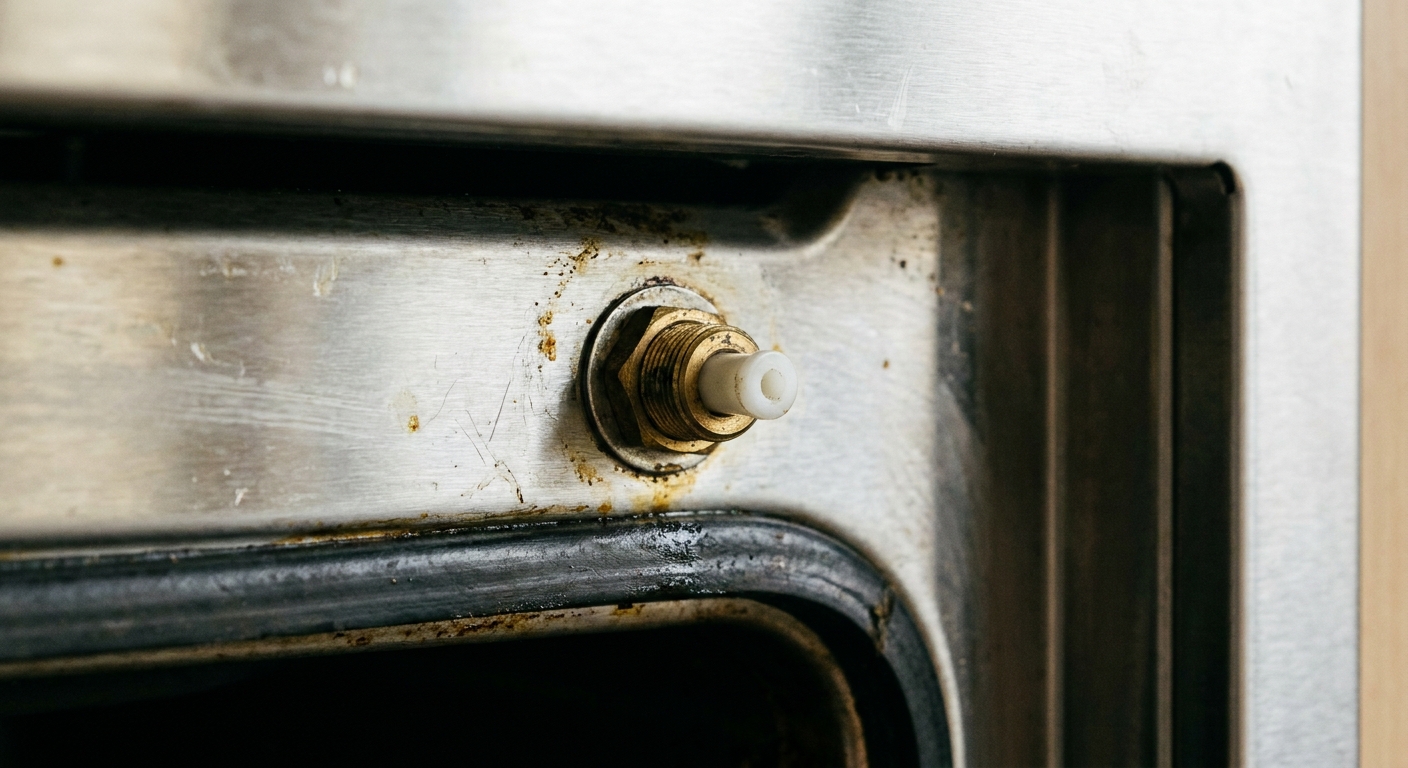
2) Door position and door sensing
Manufacturers treat the broiler like the power tool of the oven. It gets extra safety rules. Depending on the model and era, the broiler may require the door to be fully closed, slightly ajar, or it may shut down if the control thinks the door is open.
What to check
- Your manual’s rule: If the manual says broil with the door cracked, follow that. Some older units need it for temperature control.
- Door closes fully: Grease buildup on the gasket area or a warped hinge can keep the door from closing enough to satisfy the sensor.
- What kind of “switch” you have: Some models use a plunger-style switch on the frame. Others use latch or lock sensing, or a magnetic or reed-style sensor. If it is sticky, loose, or broken, the oven may think the door is open and disable broil.
DIY-friendly fix: With power off, gently clean around the door sensing area and door frame with degreaser. If the switch or sensor is physically damaged or loose, it usually needs replacement.
3) Electric oven: broil element
In an electric oven, the broil element is the top heating element. When it fails, bake can still work because bake uses the bottom element. That is why broiler-only problems often point right here.
Signs the broil element is bad
- No glow at all on broil after a couple minutes (with the door in the correct position for your model).
- Dead sections that never glow or an intermittent glow pattern that does not change even after a few minutes.
- Visible damage: blisters, cracks, burned-through spots, or heavy pitting.
What to do
- Visual inspection: With power off and the oven cool, look closely at the element surface.
- Continuity test: If you own a multimeter, remove the element mounting screws, gently pull it forward, and test for continuity across the terminals. No continuity usually means a failed element.
- Replacement: Broil elements are often one of the more DIY-friendly oven parts. Take a photo of the wire connections before removing anything.
Thrifty note: If your element is visibly burned through, do not spend time on deeper diagnostics first. Replace the element, then retest.
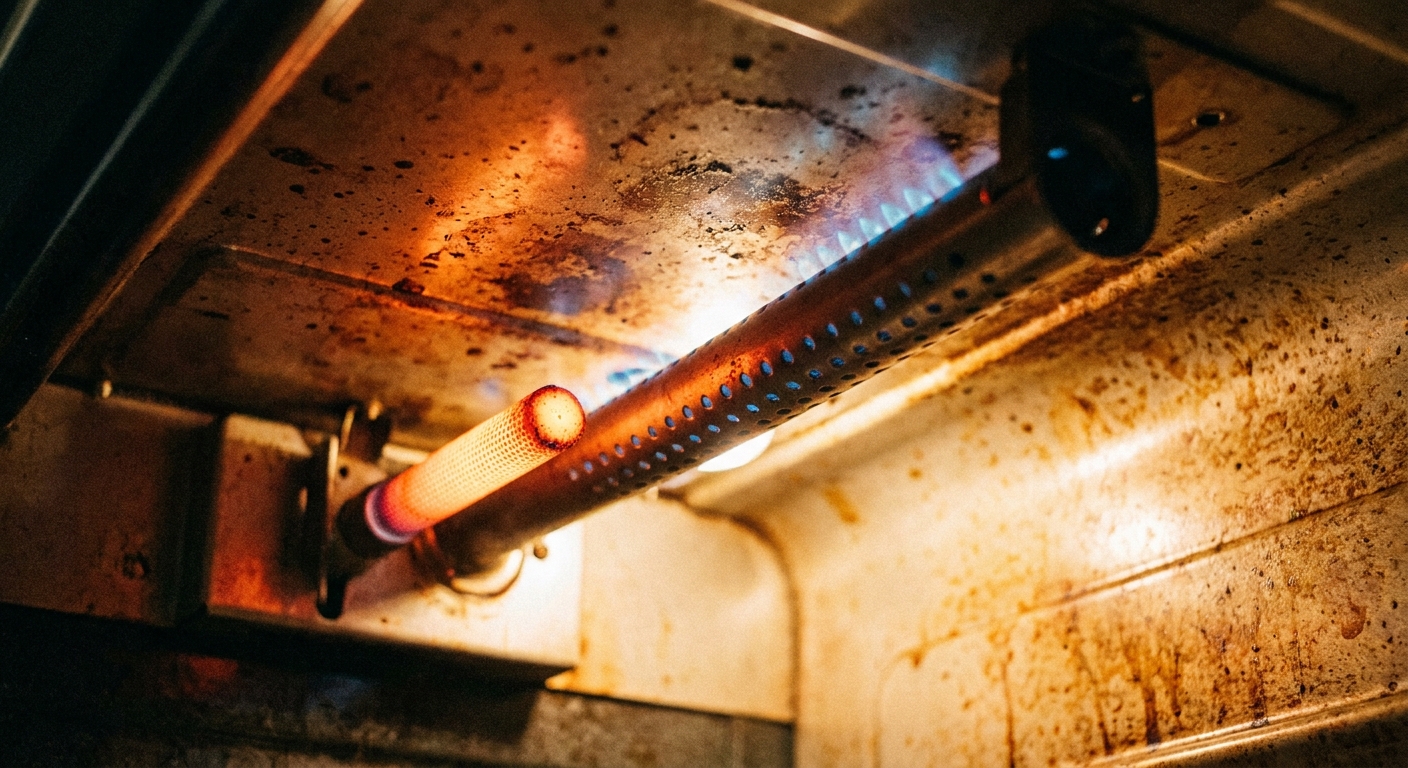
4) Gas oven: igniter and valve logic
Gas broilers need ignition, and ignition components wear out. The tricky part is that an igniter can look like it is working when it is not working enough.
Hot surface igniter (glow bar) symptoms
- Igniter glows weakly but burner never lights. In many designs, the igniter has to draw enough current to open the gas valve.
- Igniter glows for a long time, burner lights late, then shuts off.
- Broil works sometimes, then not, especially when the oven is hot.
Spark ignition symptoms (model-dependent)
- You hear clicking but no flame.
- No clicking at all when broil is selected.
Flame sensing (where applicable)
- Lights then shuts off: Some systems use flame sensing or proof-of-flame logic. If the oven cannot confirm flame, it will shut the gas off. A weak igniter is still a top suspect, but this is also where a tech may check the gas valve circuit and related safety controls.
What to do
- Watch the sequence: On broil, you should see the igniter glow bright (hot surface) and then get flame shortly after. On spark systems you may hear clicking before ignition.
- Inspect for debris: Grease and crumbs can clog burner ports or block flame spread.
- Do not “help it” with a lighter: If the oven is not igniting as designed, the safe fix is part replacement or service, not improvisation.
5) Weak broil or short cycling
Here is a frustrating one. The broiler turns on, then seems to give up, or it cycles so quickly your food never browns. Some cycling is normal, and it can be more noticeable in newer ovens with tighter temperature control.
Start with the basics
- Rack distance: Move food closer to the broil element or burner (within your manual’s guidance). Broil intensity drops fast with distance.
- Door position: Use the door position your model requires. The wrong position can change airflow and trip safety logic.
- Electric glow expectations: Some elements glow in sections and cycle. Glow intensity varies by model and does not always correlate perfectly with heat output.
- Gas reality check: A weak igniter is a very common cause of “sometimes broils” or “takes forever to light,” and it often gets worse as the igniter ages.
One more possibility: temperature sensor
- Oven temperature sensor (RTD probe): If it reads wrong, the control board may think the oven is hotter than it is and reduce broil time.
- Sensor placement: If the sensor is bent or touching the oven wall, it can read oddly.
What to do
- Locate the sensor: Usually a thin metal probe on the back wall inside the oven.
- Check for contact: It should not be pressed against metal surfaces.
- Test resistance (advanced DIY): Many RTD sensors are around 1080 to 1100 ohms at about room temperature, but specs vary by brand and model. Check your service manual or the tech sheet for the correct numbers before you condemn a sensor.
6) Thermal fuse or high-limit
If your oven overheated recently, had poor ventilation, or a cooling fan issue, a safety device may have opened the circuit. Depending on the design, this can disable one or more heating functions and sometimes makes it look like broil is the only casualty.
Clues
- Broil suddenly stopped after a self-clean cycle.
- Cooling fan is loud, failing, or not running when it should.
- Oven acts “dead” in certain modes, but the display still works.
What to do
- Let it cool completely and try again later. Some limits reset, some do not.
- Check for blocked airflow: Do not store pans or foil where they block vents.
- If a fuse is blown: Replace the fuse, but also look for the reason it blew. Otherwise you are buying the same part twice.
7) Error codes: do not ignore them
If the display shows an error code, treat it like a shortcut. It often points directly to a door latch issue, a sensor problem, or a control fault.
- Look it up in your owner’s manual, service manual, or the tech sheet stored on the appliance (commonly behind the control panel or lower drawer on ranges).
- Write it down before you reset power. Intermittent codes love to vanish when a tech arrives.
8) Control board or relay
If the broil element or igniter is good, wiring looks intact, and the door sensing is fine, you can be left with a control problem. Broil is typically switched by a relay on the control board. When that relay fails, bake may still work because it uses a different relay.
Clues
- No power is being sent to the broil element or igniter even though the oven says it is broiling.
- Intermittent broil, especially after the control panel warms up.
- Burnt smell or visible scorching on the control board area (if inspected by a pro).
My honest take: This is where I stop and decide whether the oven is worth a board. Boards can be pricey, and misdiagnosis is common. If you are not comfortable testing live voltage, hire it out.
9) Wiring and connectors
Heat, vibration from doors, and years of cooking grime can loosen or burn a connector. A broil element can be perfectly good, but a fried spade connector can prevent it from heating.
What to look for (power off)
- Loose push-on connectors at the broil element terminals.
- Discolored insulation or melted connector housings.
- Damaged wiring near the top of the oven cavity.
If you see melted wiring, treat it as a serious safety issue. Replace damaged connectors with high-temperature rated parts, or call service if you are unsure.
Avoid these common broil mistakes
- Foil on the top rack: It can reflect heat toward sensors, disrupt airflow, and trip limits.
- Leaving the door in the wrong position: Follow your model’s broil instructions.
- Assuming “no preheat” means “no heat”: Give it 60 to 120 seconds, then check for element glow or burner ignition. Remember that cycling is normal on many ovens.
- Overloading the broiler pan: Too much cold mass can make broil seem weak, especially on Low.
When to call a pro
- You smell gas or suspect a gas supply issue.
- You need to test live voltage and are not experienced.
- The fix points toward a control board, high-limit system, or complex wiring repair.
- Your oven is under warranty. DIY may void coverage.
If you do call service, tell them: “Bake works, broil does not,” plus whether you have an electric or gas oven, and any error codes you saw. That one sentence prevents a lot of wasted time.
The 30-Second Cheat Sheet
Essential takeaways for: Oven Broiler Not Working? Causes and Fixes to Try
Fast checks (broiler-only)
- Confirm Broil mode (High vs Low) and give it 60 to 120 seconds with the door in the position your model requires. Some ovens cycle broil heat by design.
- Door sensing: If the oven thinks the door is open, broil may be disabled. Depending on the model, this could be a plunger switch, latch/lock sensing, or a magnetic/reed-style sensor.
- Electric oven: Inspect the top broil element. If it is cracked, blistered, or has dead sections that never glow, replace it. If you have a multimeter, check continuity.
- Gas oven: Watch the broil ignition sequence. A weak hot surface igniter can glow but still fail to open the gas valve and light the burner.
- Check the power supply (electric): Make sure the double-pole breaker is fully reset. A partial power loss can cause strange heating behavior.
If broil is weak or cycles oddly
- Normal cycling: Many ovens cycle the broil heat to control temperature. Rack distance and door position can make normal cycling look like weak broil.
- Temperature sensor: One possibility after the basics. A bad sensor can make the control think the oven is hotter than it is, so broil cuts out early.
- Airflow: Clear vents and remove foil that might reflect heat toward sensors or trap heat.
Safety devices to consider
- Thermal fuse or high-limit: Often triggered after overheating or self-clean. Depending on design, it can disable one or more heating circuits. Some reset, some require replacement.
Last likely culprits
- Loose or burned connectors at the broil element or igniter.
- Control board/relay failure if the element or igniter tests good but never gets power.
Stop and call a pro if
- You smell gas, see melted wiring, or need to test live voltage.
- The diagnosis points to the control board and you are not 100% confident.
💡 Tip: Scroll up to read the full article for detailed, step-by-step instructions.
⬆️ Back to topAbout Marcus Vance
Content Creator @ Grit & Home
Marcus Vance is a lifelong DIY enthusiast and self-taught home renovator who has spent the last decade transforming a dilapidated 1970s ranch into his family's dream home. He specializes in budget-friendly carpentry, room-by-room renovations, and demystifying power tools for beginners. Through his writing, Marcus shares practical tutorials and hard-learned lessons to help homeowners tackle their own projects with confidence.