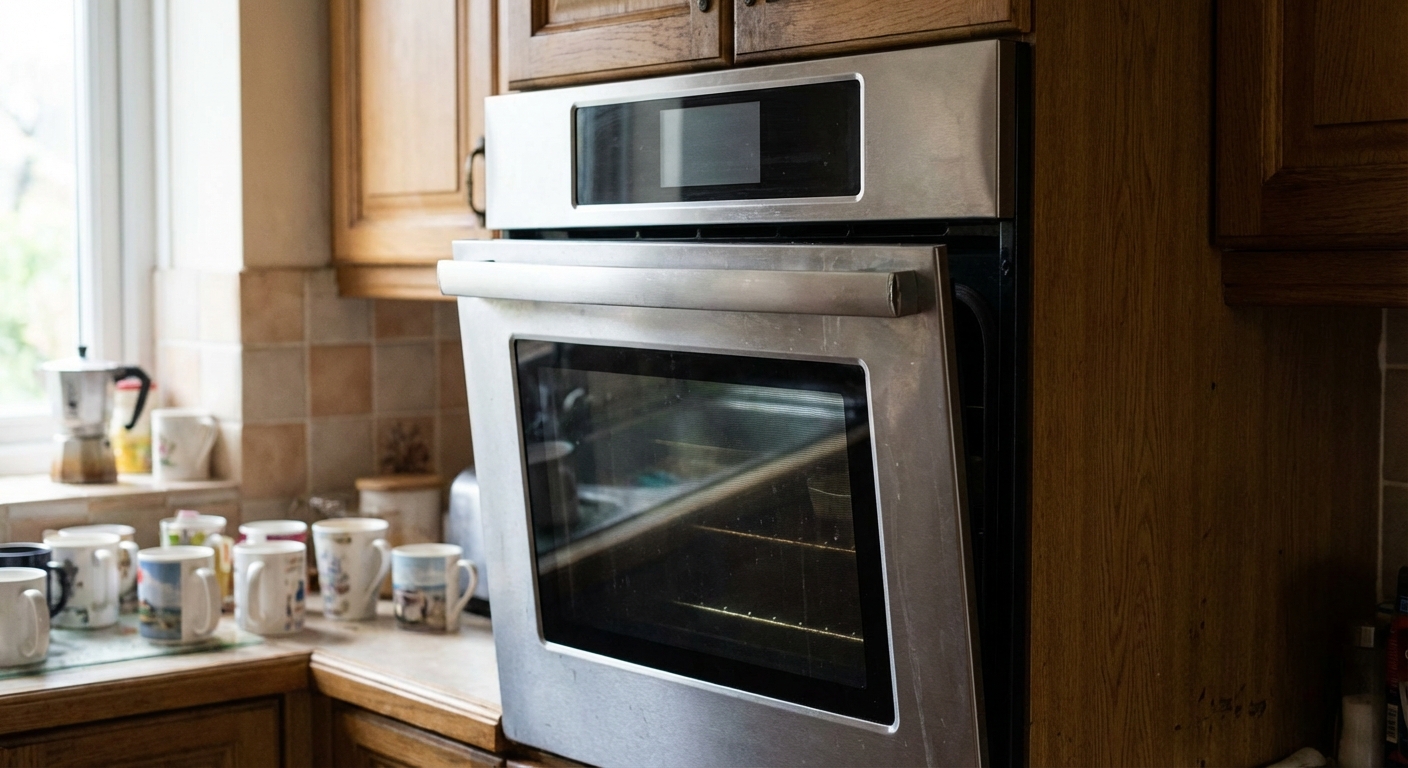
An oven door that will not close is more than an annoyance. It wastes energy, cooks unevenly, and in the worst cases can create a real safety problem. The good news is most door issues are mechanical and fixable with basic tools, a little patience, and the right replacement part.
I have been there. On our old range, the door started sagging just enough that the light stayed on and the preheat never felt right. I kept “nudging” it shut until one day the hinge finally gave up. Learn from my mistake and tackle it early.
Do not cook with the door partly open
If your oven door will not fully close, hit pause on baking and broiling until you diagnose the issue. Here is why it matters:
- Burn risk: Escaping heat can make the front of the range and nearby cabinets dangerously hot.
- Fire risk: Heat spilling out can overheat knobs, melt nearby plastics, or scorch towels hanging on the handle.
- Gas oven safety: Gas ovens are designed to vent heat and combustion byproducts in specific ways, often near the door area. A door that is not closing correctly usually causes performance problems first, but any situation that may affect normal venting or combustion is a safety concern. Make sure you have working CO alarms in your home.
- Temperature swings: Your oven cycles harder to maintain heat, which can increase wear over time and ruin bakes.
If you smell gas, feel dizzy, or suspect carbon monoxide: turn the oven off, ventilate the area, and contact your gas utility or a qualified technician right away.
Quick diagnosis: what is the door doing?
Before you buy parts, match the symptom to the likely cause:
- Door hangs crooked or sagging: hinge wear, bent hinge arm, hinge receiver issue, or the range is not sitting level.
- Door will not shut all the way: hinge not seated, debris in the hinge slot, warped door, gasket bunching, or a rack not fully seated.
- Door shuts but will not latch: misaligned latch, broken latch spring, latch stuck after self-clean, or the door is not closing far enough due to hinges or gasket.
- Door bounces back open: hinge spring fatigue, hinge binding, or a hinge installed incorrectly.
- Big gap at the top or side: damaged gasket, hinge issue, door warp, or the range is slightly out of position.
Safety and tools
Before you start
- Turn the oven off and let it cool completely.
- Turn off the circuit breaker for the range, or unplug it if you can safely access the plug.
- If you need to pull the range out, do it carefully and confirm the anti-tip bracket is engaged when you put it back.
- Put down a towel or cardboard to protect the floor and the door glass.
Common tools
- Phillips and flathead screwdrivers
- Nut driver set or small socket set
- Pliers
- Work gloves
- Flashlight
- Smartphone camera (take photos before removing anything)
Part lookup tip: Use your oven model number, usually found on a label inside the door frame, on the drawer frame, or behind the lower drawer. Order hinges, springs, and gaskets by model, not by “looks similar.” If you are choosing between OEM and aftermarket, check reviews and the seller return policy before you click buy.
Cause #1: Worn or bent hinges
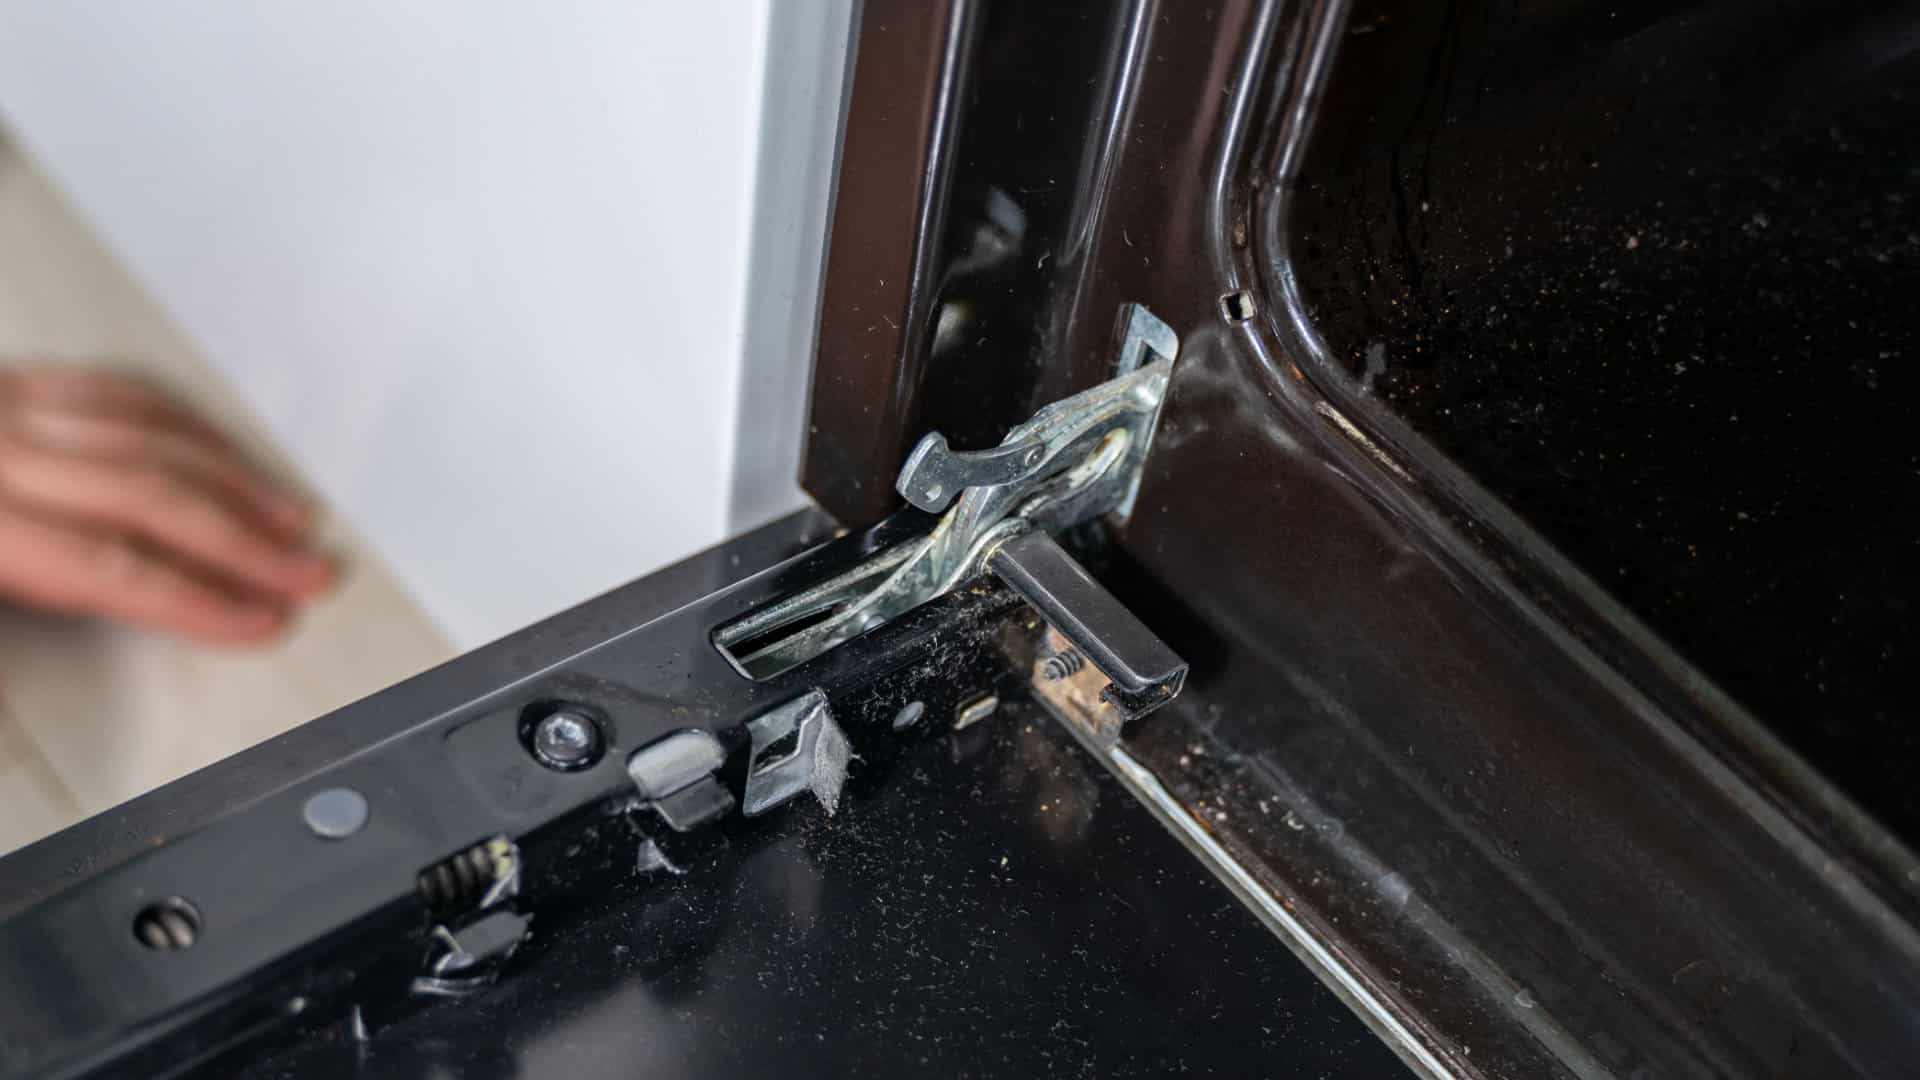
If the door sags, rubs, or sits unevenly, the hinges are the first place I look. Hinges wear over time, and once they start to deform, the door may never line up correctly again.
How to confirm
- Open the door a few inches and watch the hinge motion. If one side moves differently, you likely have a failing hinge.
- Look for a door that closes “farther” on one side than the other.
- If the door feels loose or drops slightly when you let go, that is classic hinge fatigue.
Fix: Reseat the hinges
Door removal varies by brand and hinge style. The steps below are typical for many drop-down doors with hinge locks, but check your manual if anything looks different.
- Open the door fully.
- Flip the small hinge locks forward (if your model has them).
- Close the door partway, often around 10 to 20 degrees, then lift up and out to remove the door.
- Caution: The door is heavier than it looks. Keep your fingers clear of hinge pinch points and get help if you need it.
- Inspect the hinge receivers (the slots in the oven frame). Remove crumbs, foil bits, or baked-on gunk.
- Reinstall the door by sliding both hinges fully into their slots. You should feel them seat evenly.
- Open fully, flip hinge locks back, then test the close.
Fix: Replace the hinges
If reseating does not help, replace hinges in pairs. One new hinge and one tired hinge usually means the door will still close unevenly.
- Remove the door (steps above).
- On many ovens, hinges are held by screws on the door itself. Lay the door on a padded surface and remove the fasteners.
- Install the new hinges, tightening firmly but not stripping the screws.
- Reinstall the door and test. The door should close smoothly without lifting or slamming.
My thrifty note: If a hinge is bent, do not try to “bend it back.” Metal fatigue is real, and an oven door is not where you want a surprise failure.
Cause #2: Broken or weak door springs
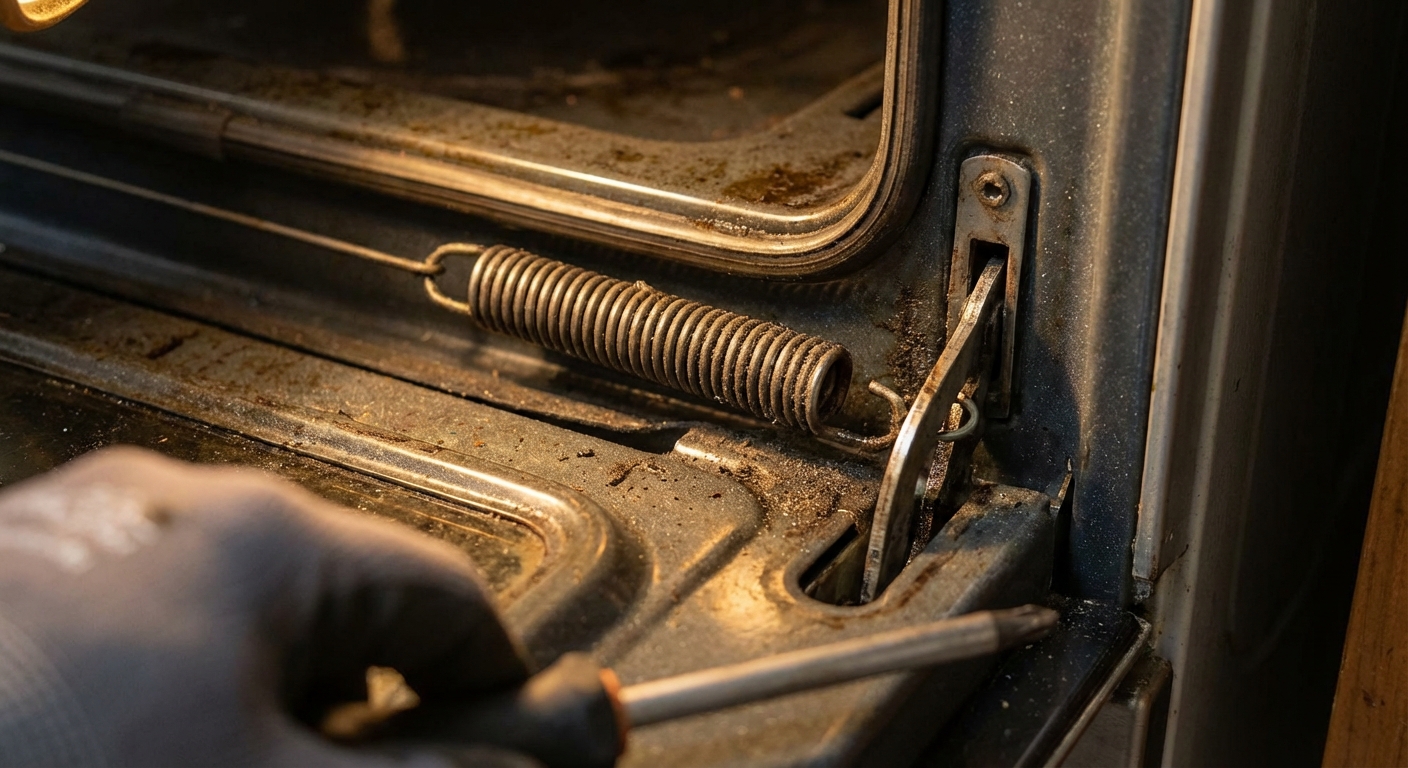
Some ovens use springs or spring-assisted hinges to counterbalance the door. When a spring breaks or loses tension, the door can drop, bounce, or refuse to stay in the right position for closing.
Signs you have a spring issue
- The door feels suddenly heavier than it used to.
- You hear a metallic snap or rattle, then the door stops behaving normally.
- The door will not stay partially open and slams down.
Fix
Spring replacement varies a lot by design. On some units you can access springs behind a lower drawer or a rear panel. On others, the spring is integrated with the hinge assembly.
- Disconnect power first (unplug or turn off the circuit breaker).
- Take photos before removing the spring so you can match hook locations.
- Replace springs in pairs to keep tension even left to right.
When to call a pro: If spring access requires removing large panels near wiring, sharp metal edges, or gas connections and you are not comfortable, it is worth paying for a service call.
Cause #3: Misaligned or damaged door latch
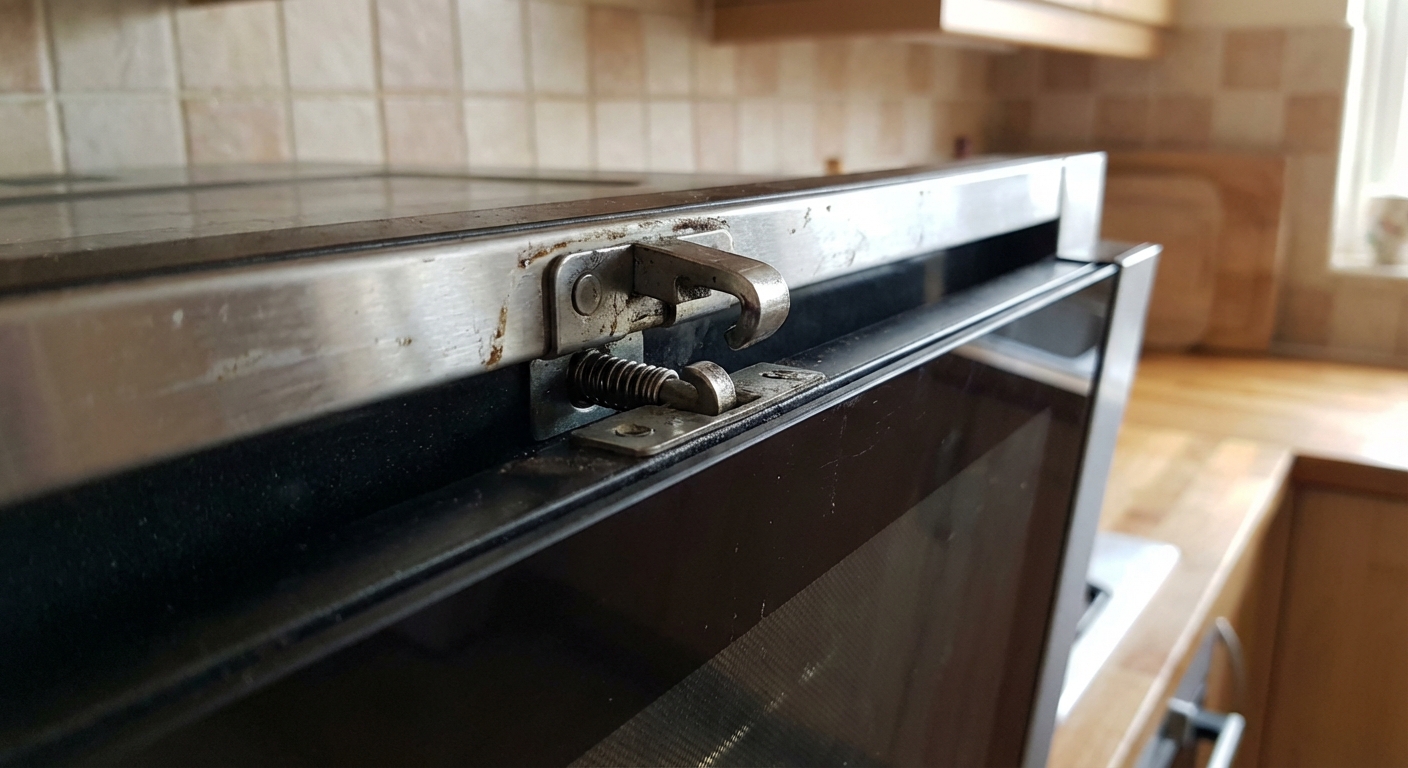
If the door closes but will not latch, or you have to slam it, the latch or strike plate may be out of alignment. This is especially common on ovens with a self-clean lock mechanism.
What to check
- Look for grease buildup or baked-on residue around the latch hook and strike plate.
- Confirm the latch is not stuck in the “locked” position after a self-clean cycle.
- Check whether the door is actually closing far enough. A hinge or gasket problem can mimic a latch issue.
Fix: Clean and align
- With the oven cool, wipe the latch area with a damp cloth and mild degreaser. Do not soak electrical latch assemblies.
- Tighten any loose screws on the strike plate.
- Test close gently. If you still need to slam, stop and look for what is physically blocking closure.
If the self-clean lock is stuck
Many ranges will release a stubborn lock after a power reset, but procedures vary. With the oven cool, turn off the circuit breaker for a few minutes, then restore power and try again. If the latch is motorized, the oven is throwing an error code, or anything sounds strained, stop and call for service.
Fix: Replace the latch assembly
If the latch is bent, cracked, or the spring is broken, replacement is usually straightforward but can involve removing a top trim panel and unplugging a connector. Label wires or photograph connectors so you can put everything back exactly as found.
Cause #4: Damaged or loose door gasket
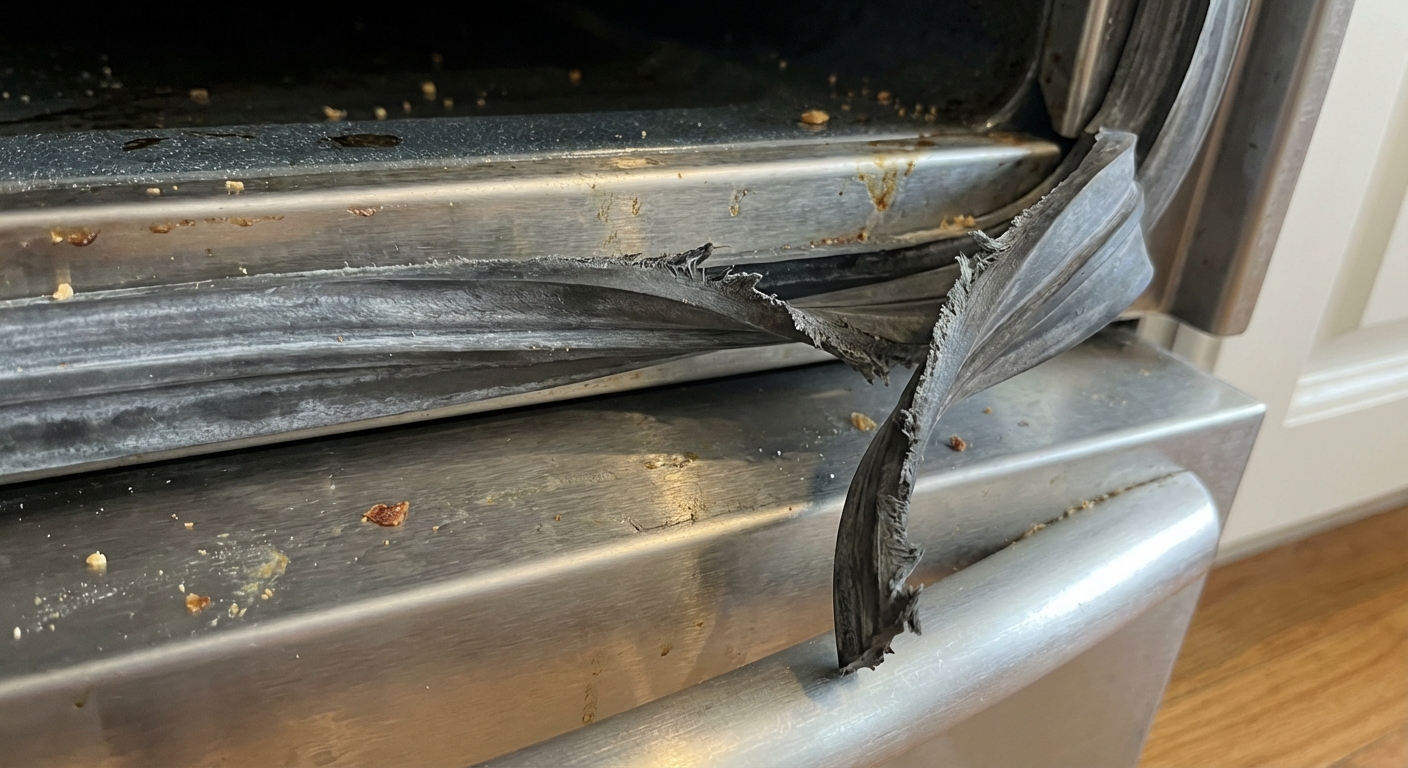
The gasket is the heat-resistant seal around the oven cavity. If it is torn, flattened, or popped out of its clips, you can get heat leaks, long preheat times, and a door that feels like it never quite “nests” into place.
How to confirm
- Look for fraying, gaps, or a section that is hanging loose.
- Close the door on a strip of paper and gently pull. If it slides out easily in one spot, the seal may be compromised there.
Fix: Reseat the gasket
- With the oven cool, press the gasket back into its channel or reattach it to its clips.
- Work your way around evenly. Do not stretch it.
- Close the door and recheck alignment.
Fix: Replace the gasket
Most gaskets either clip in or use small hooks. Buy the correct gasket for your model and match the attachment style. After installation, expect the door to feel slightly tighter for a few uses as the gasket settles.
Cause #5: Warped door or frame
If you have replaced hinges and the gasket looks good, but there is still a consistent gap, the door itself may be warped. It is not common, but I have seen it after someone used the open door as a step, or after repeated slamming when a hinge was failing.
How to check
- Look along the edge of the door from the side. If it bows, that is a clue.
- Check for cracked glass, loose screws, or a twisted handle pulling the door frame out of square.
- Confirm the range is level and sitting correctly. A range that is tilted or pulled forward can change alignment enough to create a gap.
Fix options
- Tighten hardware: With the door removed and supported, snug any loose perimeter screws and handle bolts.
- Replace the door: If the metal frame is warped, replacement is usually the reliable fix.
- Replace internal supports: Some doors warp “functionally” because internal brackets crack or shift.
Budget reality: Door assemblies can be pricey. If the oven is older and multiple major parts are failing, it may be time to compare repair cost vs. replacement.
Also check for obstructions
Before you order parts, do a quick sweep for the simple stuff:
- Foil or a baking sheet edge sticking out and contacting the door.
- A rack not seated in its grooves, sitting proud by a quarter inch.
- Crumbs or hardened grease in the hinge pockets.
- A loose thermometer clip or pizza stone shifted forward.
When to call a technician
- You smell gas or suspect carbon monoxide.
- The latch is motorized and you are not comfortable working around electrical connectors.
- The door glass is cracked or the door feels unstable on its hinges.
- You replaced parts and the door still will not close, which can point to a bent frame or deeper alignment issue.
Test after the repair
Before you trust it with dinner, do a quick check:
- The door sits even left to right and does not sag when you let go.
- The gasket contacts evenly all the way around (repeat the paper test in a few spots).
- The oven light turns off when the door closes.
- There is no obvious heat leak at the front during preheat.
- No new error codes appear after a self-clean lock or latch repair.
Prevent it next time
- Do not use the oven door as a step or a resting spot for heavy pans.
- Close the door gently. Slamming accelerates hinge wear.
- Keep the hinge pockets clean. A few crumbs can turn into a door that never seats.
- After a self-clean cycle, let the oven cool fully before forcing the latch.
- Make sure your range stays level and fully seated, especially after cleaning behind it.
If you are shopping for parts, use your model number to match the exact hinge, spring, latch, or gasket, then confirm the return policy in case it is not the right fit. That small step can save you a lot of back and forth.
About Marcus Vance
Content Creator @ Grit & Home
Marcus Vance is a lifelong DIY enthusiast and self-taught home renovator who has spent the last decade transforming a dilapidated 1970s ranch into his family's dream home. He specializes in budget-friendly carpentry, room-by-room renovations, and demystifying power tools for beginners. Through his writing, Marcus shares practical tutorials and hard-learned lessons to help homeowners tackle their own projects with confidence.