If your cookies burn on the bottom while the tops stay pale, or a recipe that always worked suddenly comes out underdone, odds are your oven temperature is lying to you. The good news: most “my oven is off” problems fall into a handful of fixable buckets, and you can narrow it down with one cheap tool and a little patience.
I have fought this battle in my own 1970s kitchen more than once. My first mistake was assuming the number on the dial was gospel. It is not. Let’s walk through a simple, repeatable way to test your oven, calibrate it if you can, and fix the common mechanical causes of hot spots and uneven baking.
Safety first (quick but important)
- Shut off power at the breaker before removing panels, swapping parts, or touching wiring.
- Shut off gas (and ventilate) if you suspect a gas smell or ignition issue. If you smell gas, stop and call your gas company or a pro.
- Expect sharp edges inside access panels. Gloves help.
- Do not block vents or line the oven bottom with foil. That can create serious heat problems.
Tools and supplies
- Standalone oven thermometer (analog or digital, but rated for oven temps)
- Optional but smart: a second thermometer or a digital probe to cross-check accuracy
- Notepad or phone notes (for recording readings)
- Screwdriver set
- Multimeter (helpful for elements and sensors)
- Flashlight
- High-temp gloves or oven mitts
- Optional: replacement door gasket, temperature sensor, bake element, or igniter depending on diagnosis
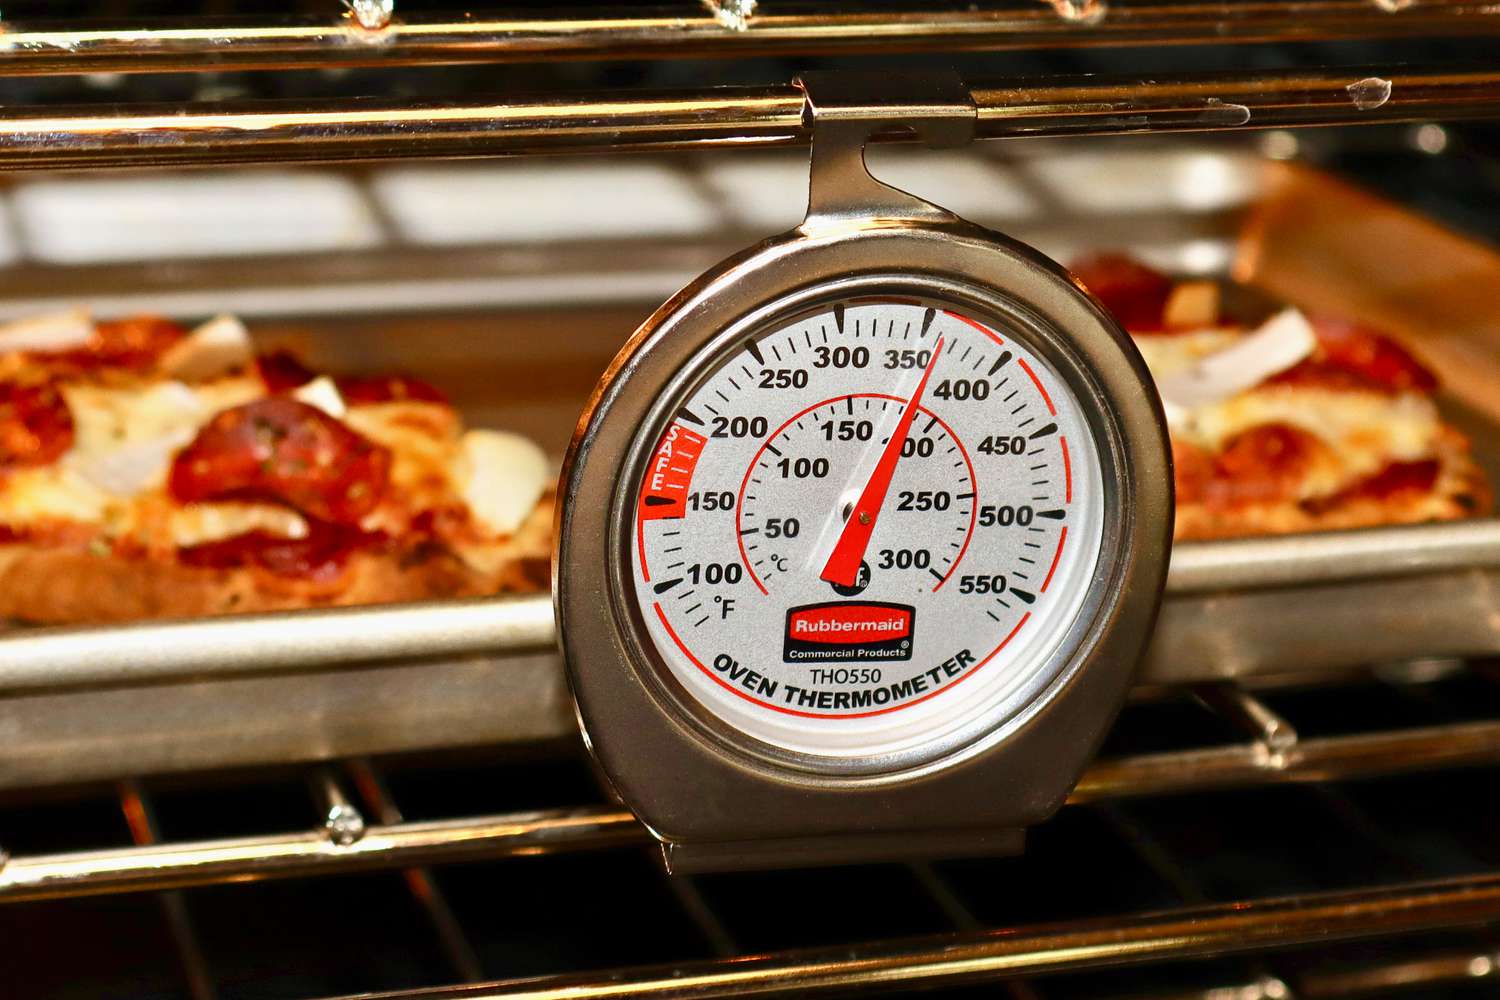
Step 1: Test with a real oven thermometer
The display or knob setting is an instruction, not a measurement. Your first job is to measure what the oven is actually doing.
How to test temperature accuracy
- Place the oven thermometer on the center rack, centered front-to-back.
- Preheat to 350°F.
- Once the oven says it is preheated, wait 10 more minutes. (This is where I used to rush and get bad data.) This extra time matters even more if you bake with a stone, cast iron, or a heavy pan that needs to heat soak.
- Keep the door closed as much as you can. Every peek dumps heat and skews the numbers. If you have a probe-style thermometer you can route safely (without pinching wires or blocking vents), use it so you can read temps without opening the door.
- Record the thermometer reading.
- Now watch for 20 minutes and record the highest and lowest readings you see.
What you are looking for: Most ovens cycle. It is normal to swing above and below the target temperature as the thermostat tells the heat source to kick on and off.
- Typical swing: often around 10°F to 40°F, depending on the model, the sensor location, and how well the oven is sealed. Some ovens swing more.
- Often worth addressing: if your oven’s average temperature is consistently off by roughly 20°F to 25°F or more, or if swings are unusually wide (for example, 275°F to 400°F).
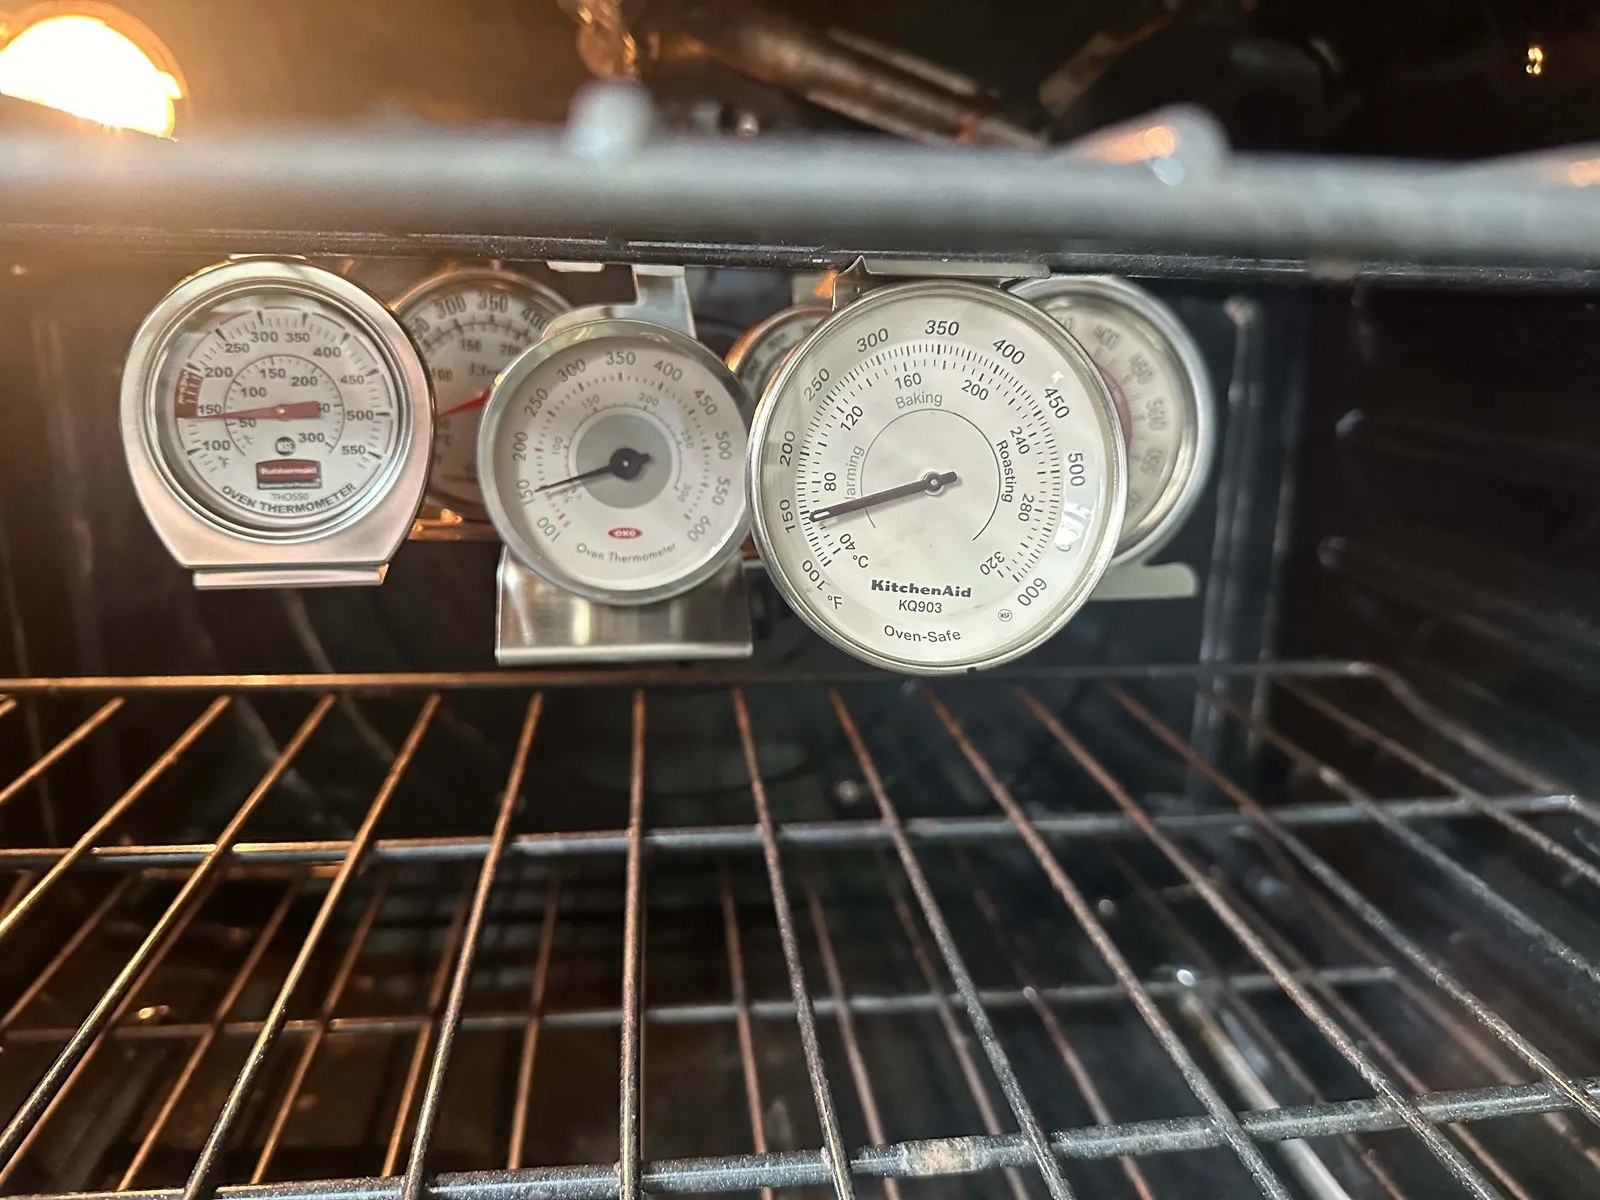
How to test for hot spots
If your complaint is “one side burns,” do a simple hot spot check. The key is giving the thermometer time to settle.
- Keep the oven set to 350°F.
- Move the thermometer to the front left of the rack, close the door, wait 10 minutes, then record.
- Repeat at front right, back left, and back right. Close the door and wait the full 10 minutes each time.
If one area is consistently 25°F to 50°F hotter, you likely have an airflow issue, a failing element, a convection fan problem, or a door seal leak.
Step 2: Fix the easy stuff
Rack position and overcrowding
Before we blame parts, make sure you are not accidentally creating your own hot spots.
- For most baking, start with the rack in the middle.
- Leave a little space around pans so heat can circulate.
- Use lighter-colored baking sheets for cookies if bottoms are over-browning.
Foil and liners
Foil on the bottom of the oven can reflect heat and block airflow, which often leads to scorched bottoms and uneven temps. If you have foil down there, remove it and clean the oven bottom properly.
Convection mode
If you accidentally use convection for a recipe written for conventional bake, it can cook faster and drier. Some ovens automatically reduce the set temperature by 25°F in convection mode, some require you to do the reduction, and some do neither. Confirm which mode you are using and what your oven does.
Step 3: Calibrate (if possible)
If your thermometer test shows the oven is consistently hot or cold, calibration can bring the average temperature back in line. Some ovens make this easy. Others do not allow user calibration, and you will move to sensor or control troubleshooting instead.
When calibration makes sense
- The oven heats reliably, but it is consistently off by a similar amount (for example, always about 20°F hot).
- Your temperature swing is normal, but the average is wrong.
How calibration usually works
Digital ovens: Many models have an “Oven Temp” or “Calibration” setting in the control menu that lets you adjust an offset (often in 5°F increments, commonly up to +/- 35°F). Check your manual by model number if you can.
Dial ovens: Some have a small adjustment screw, ring, or calibration plate behind the temperature knob. You pull the knob off and make a small adjustment. Not every knob is adjustable, so do not force it.
What to do with your data
Use the average of your readings, not the highest or lowest. For example, if you set 350°F and your oven spends most of its time cycling between 315°F and 335°F, your average is about 325°F. That is roughly 25°F low. If your oven allows offsets, apply about a +25°F calibration and re-test.
My thrifty tip: Adjust in small steps, then re-test at 350°F. It is tempting to crank a big correction, but you will overshoot and chase it.
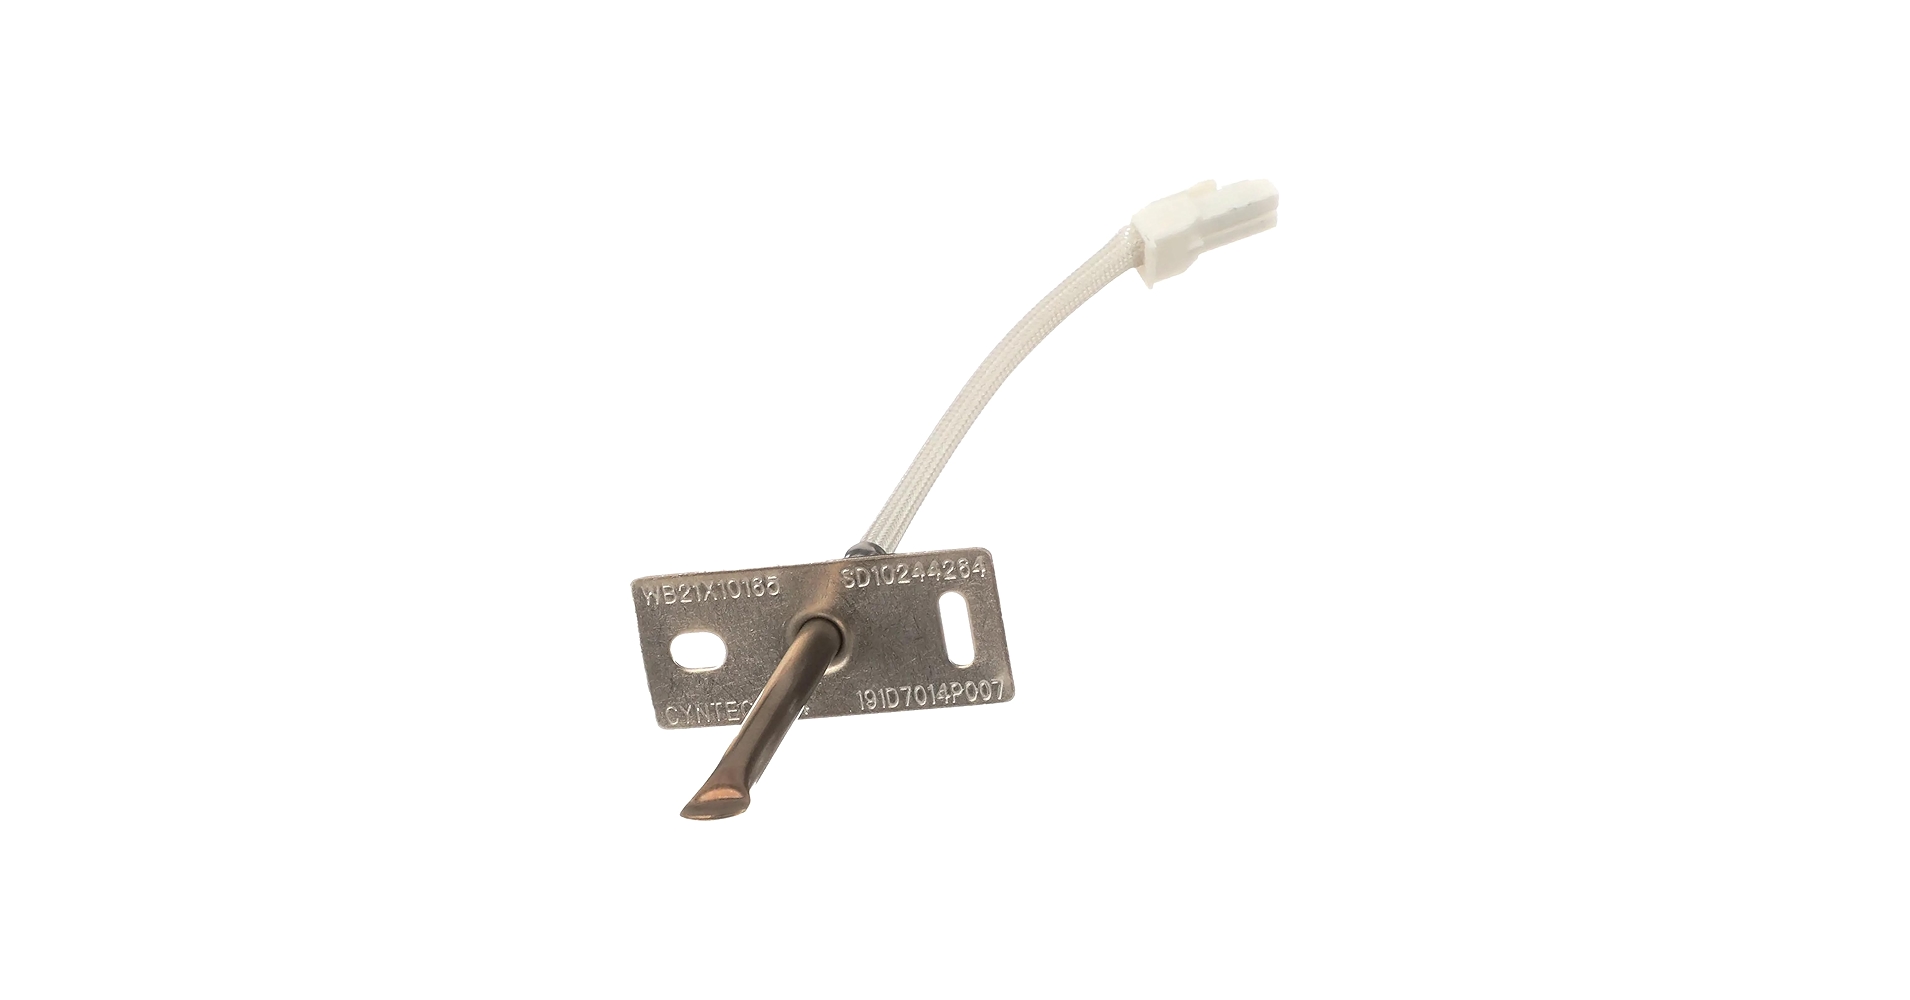
Step 4: Check the temp sensor
In many electric ovens, a thin metal probe inside the oven cavity measures temperature. If that sensor drifts out of spec, the oven may run hot, cold, or swing wildly.
Quick visual check
- Locate the sensor probe on the back wall (usually upper area).
- Make sure it is not touching the oven wall, a rack, or a pan.
- Look for obvious damage or heavy corrosion.
Basic resistance check (common RTD style)
With power off, you can often test the sensor with a multimeter. Many ovens use an RTD sensor that reads around 1,080 ohms at room temperature (about 70°F). Others use different specs, so confirm your model’s expected range if possible.
- Turn off the breaker.
- Remove screws holding the sensor inside the oven.
- Gently pull it forward to access the connector.
- Unplug the sensor from the harness, then measure resistance across the sensor leads. (Measuring in-circuit can mislead you.)
What the results mean:
- If the reading is far from the expected range, the sensor is a strong suspect.
- If it is open (infinite resistance) or shorted (near zero), replace it.
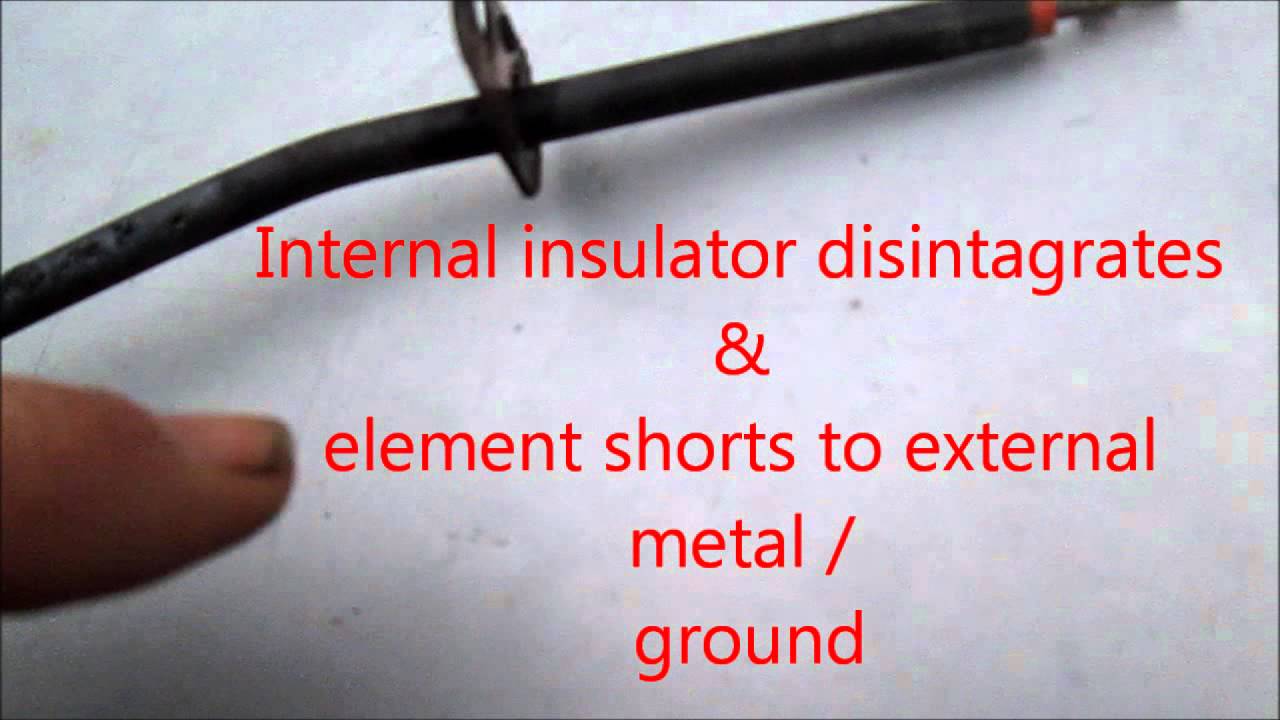
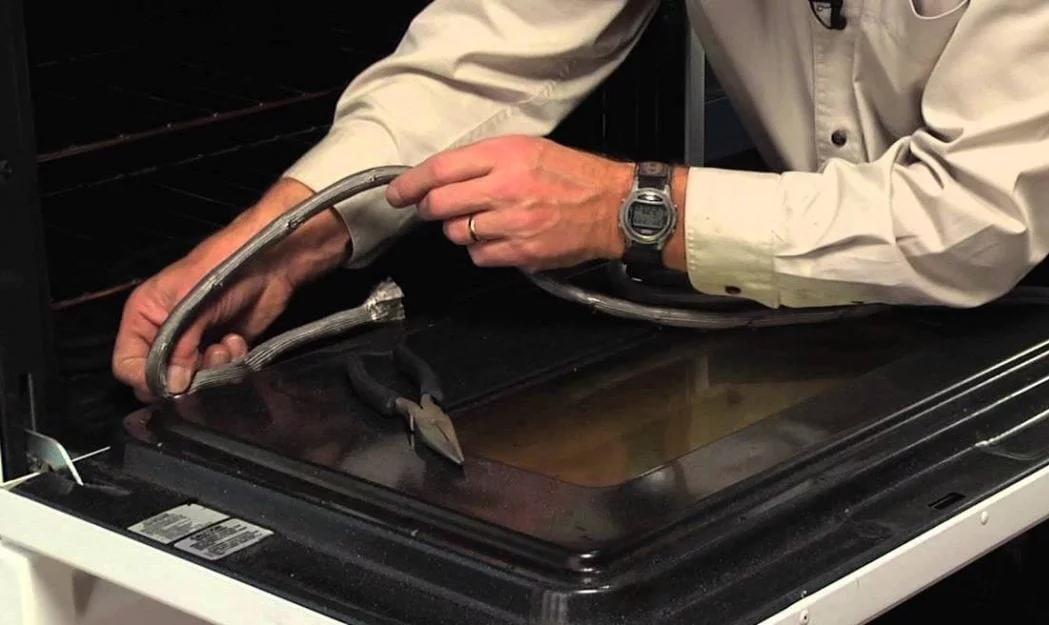
Step 5: Inspect heating elements
Uneven baking, long preheat times, and temperature that droops during cooking can happen when an element is weak even if it is not completely dead.
Bake element symptoms
- Food browns strangely on the bottom or takes much longer than expected.
- Oven preheats, but struggles to maintain temperature once you load food.
- Visible damage like bubbling, blisters, cracks, or burn marks.
Broil element symptoms
- Top browning is weak or spotty.
- Some ovens use broil to help preheat. If it is weak, preheat can be slow.
What to check
- Visual inspection: With the oven off and cool, look closely for damage.
- Continuity test: With power off and element leads disconnected, check for continuity with a multimeter. No continuity usually means the element is failed.
Step 6: Gas ovens that run cold
Gas ovens are a little different. If the burner is not lighting correctly or the flame is weak, the oven may struggle to reach temp or may heat unevenly.
Common culprits
- Weak igniter (very common): it glows but does not pull enough current to open the gas valve consistently on hot-surface igniter systems.
- Dirty burner ports: debris can cause uneven flame patterns.
- Calibration or sensor issues: similar to electric, depending on model.
What I recommend: The definitive test for many hot-surface igniters is measuring igniter amperage. That usually means working in tight spaces around gas components, so it is a good “call a tech” moment for a lot of households. If you do DIY, shut off gas, shut off power, and follow your model’s service instructions closely.
Step 7: Fix door seal issues
If heat leaks out around the door, your oven can run cold, take forever to preheat, and create hot spots near the leak because the burner or element runs longer trying to compensate.
Quick door seal test
- With the oven off, close the door on a strip of paper or a dollar bill.
- Gently tug it out.
- Repeat around the perimeter.
If it slips out easily in one area, you may have a worn gasket or a door alignment issue.
What to look for
- Flattened, torn, or brittle gasket material
- Gasket pulling out of its channel
- Door hinges that feel loose, sagging door, or a door that does not close evenly
Fix: Door gaskets are usually a straightforward replacement. Order by model number. Take a quick photo of how the old one routes before you pull it out so you can copy the path.
Step 8: Check the convection fan
If you have a convection oven and it bakes unevenly, the fan and its airflow path matter. A convection fan that is not running, is noisy, or is obstructed can create dramatic hot and cool zones.
- Listen for the fan during convection mode.
- Check for a buildup of grease or foil fragments near the fan cover.
- If the fan is dead or squealing, it may need service or replacement.
Step 9: Control and relay problems
If your sensor tests fine, but your oven overshoots hard, keeps heating past the set point, or behaves erratically, you may be looking at a thermostat (older models) or an electronic control issue. A stuck relay on a control board can keep an element powered longer than it should.
This is usually not the most satisfying DIY rabbit hole unless you are comfortable diagnosing electronics. If your readings suggest this, skip the guessing and call a pro.
Quick guide by symptom
- Consistently about 15°F to 35°F hot or cold: calibrate if your model allows it, then consider sensor drift.
- Big swings or overshooting: temperature sensor, thermostat, or control/relay issues (model dependent).
- One side cooks faster: door seal leak, convection fan problem, airflow blockage, rack placement, or warped element.
- Long preheat plus poor temp recovery: weak bake element (electric) or weak igniter (gas).
When to call a pro
I am all for DIY, but I am also a big fan of knowing when you are about to burn an entire Saturday for a problem that needs a specialized tool or a trained eye.
- You smell gas or suspect a gas valve issue.
- Your oven trips the breaker or shows signs of burned wiring.
- You replaced a sensor or element and the oven still wildly overshoots.
- The fix appears to involve the control board and you are not comfortable diagnosing electronics.
- You want to test igniter amperage on a gas oven.
My “do this next” checklist
If you want the shortest path to a real answer, do this in order:
- Test at 350°F with a standalone oven thermometer and record highs and lows (door closed as much as possible).
- If you can, cross-check with a second thermometer or a digital probe so you trust your data.
- Check for hot spots by moving the thermometer to each corner of the rack, closing the door, and waiting 10 minutes per position.
- Remove oven-bottom foil, reset racks, and avoid overcrowding.
- Calibrate the oven if your model supports it, then re-test.
- Inspect and test the temperature sensor (unplugged).
- Inspect and test heating elements (electric) or suspect igniter (gas).
- Check the door gasket with the paper test and replace if needed.
Once you have those results, the fix usually becomes obvious. And when it does, you will feel that satisfying little moment I still get every time: “Okay, I know what’s wrong. I can handle this.”
About Marcus Vance
Content Creator @ Grit & Home
Marcus Vance is a lifelong DIY enthusiast and self-taught home renovator who has spent the last decade transforming a dilapidated 1970s ranch into his family's dream home. He specializes in budget-friendly carpentry, room-by-room renovations, and demystifying power tools for beginners. Through his writing, Marcus shares practical tutorials and hard-learned lessons to help homeowners tackle their own projects with confidence.