Peeling paint looks like a cosmetic problem, but it is usually your house telling you something. Most of the time, it comes down to one of four culprits: moisture, poor prep, incompatible layers, or painting at the wrong temperature.
I have chased peeling paint more times than I care to admit in our 1970s ranch. The lesson I learned the hard way is this: if you only patch the peeling spot without fixing the reason it let go, the new paint will peel again, sometimes within a season.
What peeling paint is really telling you
Paint is a film. For that film to stay stuck, it needs a clean, stable surface and the right conditions while it dries. When something breaks that bond, the paint fails in one of a few recognizable ways.
- Peeling in sheets often points to moisture or poor adhesion from bad prep.
- Small flakes and chips can be age, sun exposure, or impact, but can still be moisture related.
- Bubbling or blistering usually means moisture vapor pushing from behind, or paint drying too fast in heat and sun.
- Peeling at edges and seams is common on trim, caulk lines, and patched drywall that was not primed.
Main causes of peeling paint
1) Moisture: the number one cause
Moisture breaks the bond between paint and the surface. That moisture can come from a leak, condensation, or water working its way in from outdoors.
- Interior sources: bathroom steam, kitchen humidity, plumbing leaks, roof leaks, unsealed drywall repairs, damp basements.
- Exterior sources: failed caulk, missing flashing, end-grain wood soaking up rain, sprinklers hitting siding, gutters overflowing.
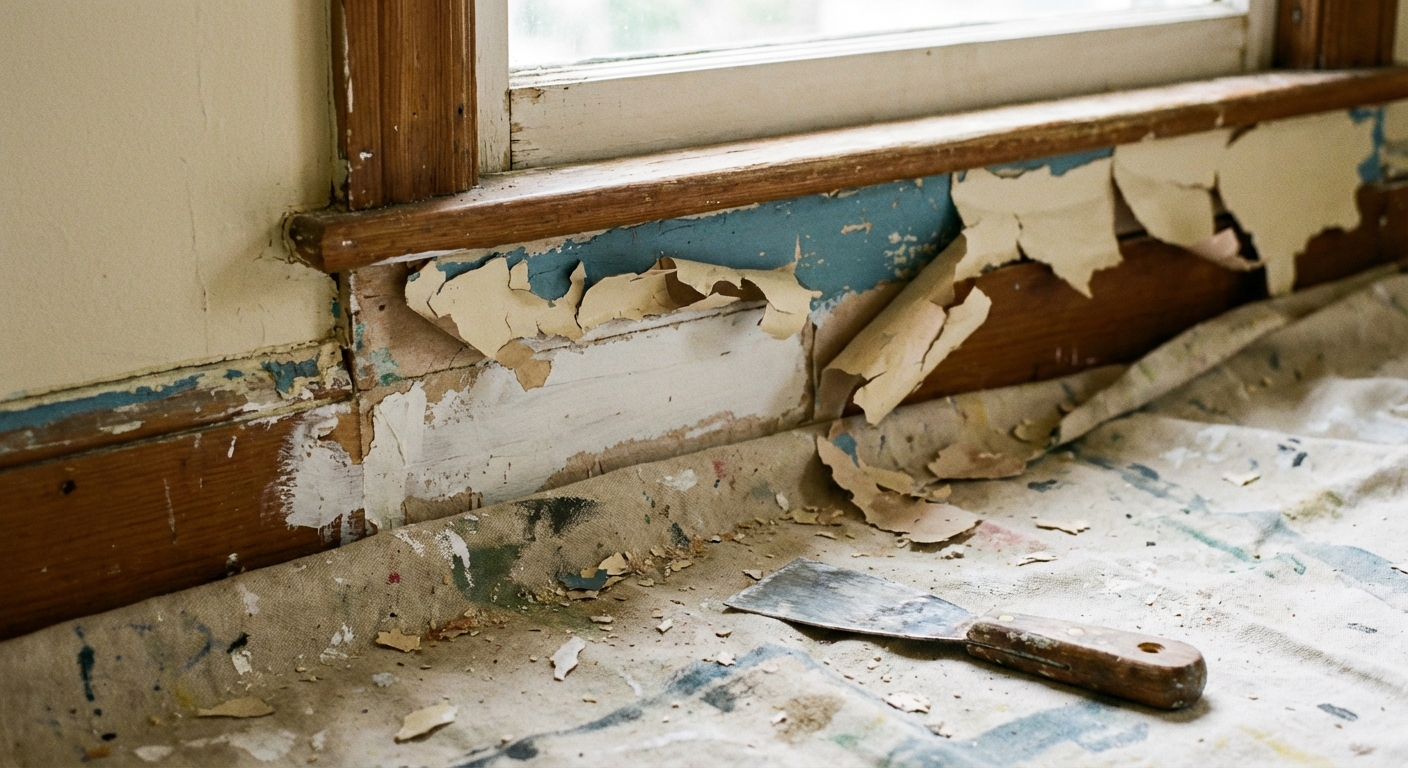
2) Poor surface prep
Paint will not stick well to dust, grease, glossy finishes, or chalky old paint. The most common prep mistakes I see are skipping cleaning, skipping sanding on glossy surfaces, and painting raw patch compound without primer.
- Painting over soap scum or hair spray in bathrooms
- Painting trim without deglossing or scuff sanding
- Painting drywall repairs without primer
- Painting over loose, flaking paint instead of removing it
3) Incompatible paint layers
Not all paints play nicely together. A classic example is putting latex paint over old oil-based paint without proper bonding primer and scuff sanding. It can look great for a bit, then start peeling like a sticker.
4) Temperature and drying conditions
Paint needs a temperature window to cure. Too cold and it does not bond well. Too hot or in direct sun and it can skin over too fast, trapping solvents or moisture.
- Exterior painting: avoid hot afternoon sun on the surface you are painting, and watch overnight lows.
- Interior painting: keep air moving, manage humidity, and do not rush recoats.
Quick diagnosis by location
Use the location to narrow down the cause. Here is how I troubleshoot peeling paint when I walk into a room and see it.
Bathroom: peeling near the ceiling, above the shower, or around the fan
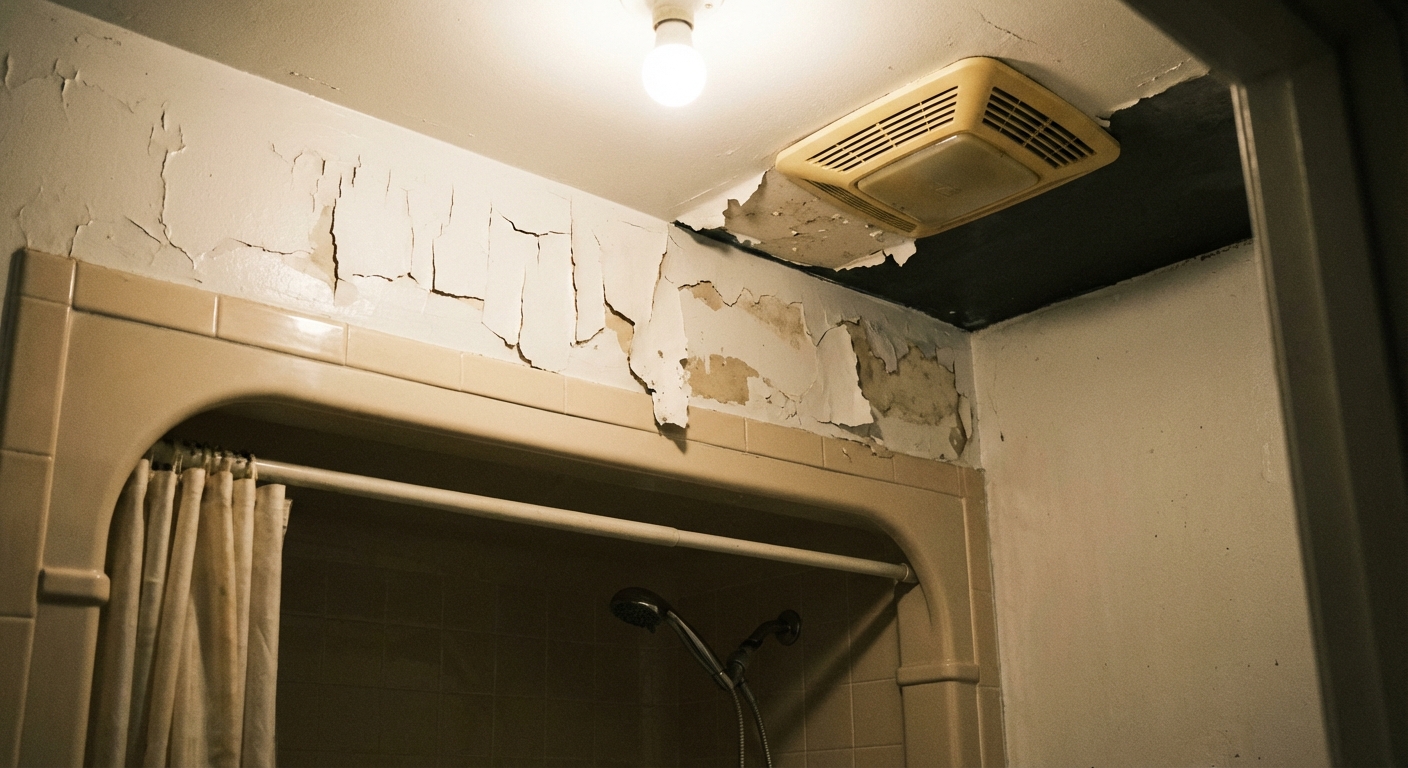
- Most likely cause: condensation and poor ventilation.
- Clues: peeling that gets worse in winter, water droplets on walls, musty smell, or a fan that is loud but weak.
- What to check: confirm the bath fan vents outdoors, clean the fan grille, and test airflow with a piece of toilet paper held to the fan. It should stick.
- Best fix: stop the moisture first, then repair with a stain-blocking primer and a quality kitchen and bath paint.
Exterior trim: peeling at joints, bottom edges, and near gutters
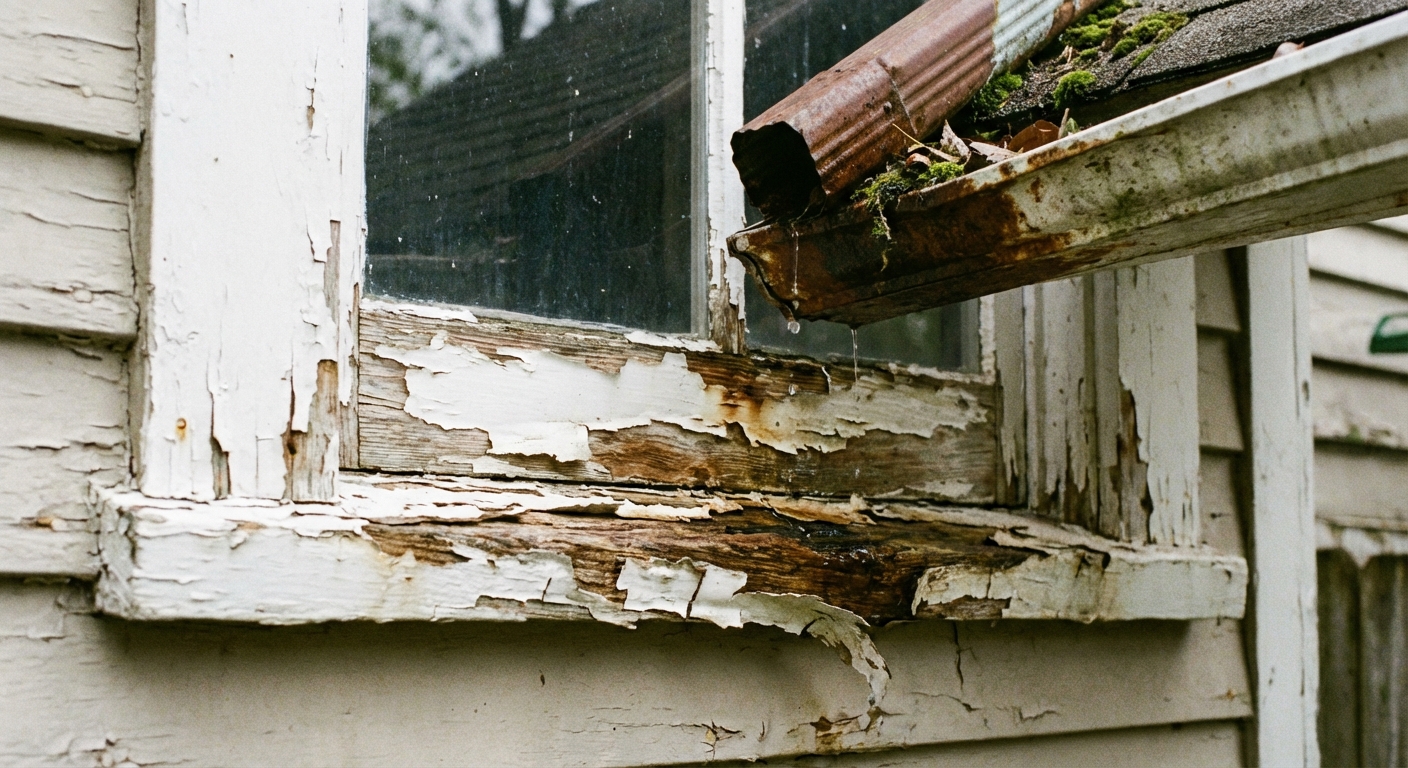
- Most likely cause: water getting behind paint from failed caulk, end-grain exposure, or constant wetting.
- Clues: peeling right under a gutter seam, near a downspout, or where trim meets siding.
- What to check: gutter overflow, missing drip edge, cracked caulk, soft wood, and sprinkler spray patterns.
- Best fix: repair water management, replace any rotted wood, prime bare wood, then repaint.
Ceiling: peeling in the middle of the room or near an outside wall
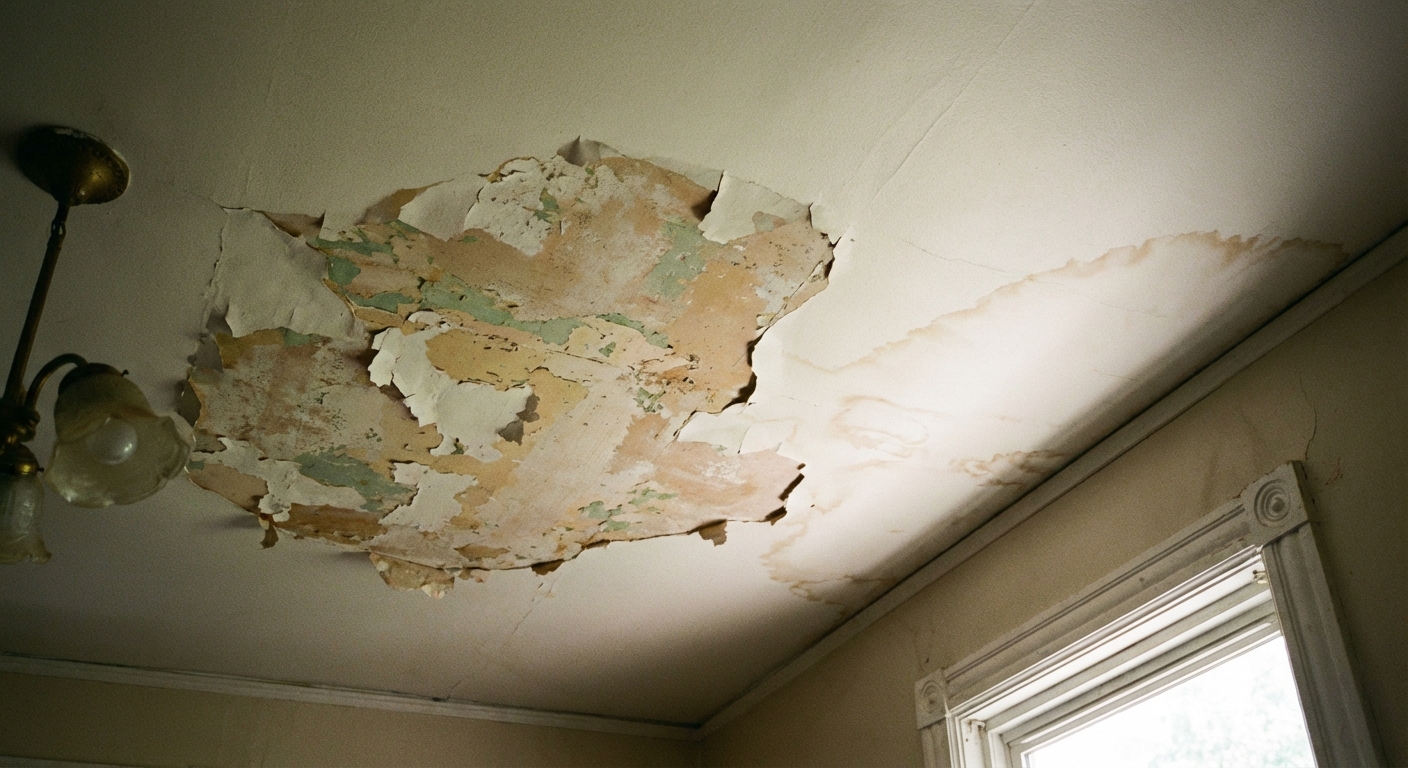
- Most likely cause: an old roof leak, plumbing leak from above, or condensation in an under-insulated ceiling.
- Clues: yellow or brown staining, soft drywall, or peeling that expands after heavy rain.
- What to check: attic for wet insulation, roof penetrations, bathroom exhaust dumping into attic, and plumbing lines.
- Best fix: fix the leak, fully dry the area, prime stains, then repaint.
Kitchen: peeling above the stove or near the sink
- Most likely cause: grease or repeated wiping with cleaners, sometimes combined with steam.
- Clues: peeling in a hand-height band where scrubbing happens, or right behind the range.
- What to check: greasy film on the wall, weak range hood, and whether a flat paint was used.
- Best fix: degrease thoroughly, prime if needed, then repaint with a washable eggshell or satin.
When peeling paint signals a bigger problem
Moisture that will not quit
If paint keeps peeling in the same area after a repair, assume there is still moisture. That can mean a slow plumbing leak, missing flashing, or chronic condensation from ventilation and insulation issues.
- Red flags: soft drywall or wood, visible mold, repeated staining, damp smell, or peeling that worsens after rain or showers.
- Next step: trace the water path and fix it before you paint again. Sometimes that means a roofer, plumber, or an insulation and ventilation upgrade.
Lead paint concerns (homes built before 1978)
If your home was built before 1978, treat peeling paint as potential lead paint until proven otherwise. Lead dust is the danger, especially when you scrape or sand.
- Do not dry scrape aggressively, power sand, or use a heat gun on suspected lead paint.
- Do use an EPA-recognized lead test kit for a quick screen, and consider a certified lead professional for larger areas or if kids are in the home.
- Containment basics: plastic sheeting, disposable gloves, wet methods, HEPA vacuum, and careful cleanup.
If you see peeling paint in a child’s bedroom, around windows, or on friction surfaces like doors, take the lead question seriously. Those areas create more dust.
How to fix peeling paint for good
This is the process I use when I want the repair to last, not just look good for a month. The keys are removing what is loose, feathering edges, and priming the right way.
Tools and materials
- Drop cloths and painter’s tape
- Scraper or putty knife
- Sanding sponge or sandpaper (80 to 120 grit for shaping, 150 to 220 for smoothing)
- Spackle or patching compound for drywall, exterior wood filler or epoxy for trim
- Primer matched to the situation (more on that below)
- Quality paint in the right sheen for the room
- Dust mask or respirator, and eye protection
Step 1: Fix the cause first
If moisture is involved, do not skip this step. Repair the leak, improve ventilation, redirect sprinklers, reseal exterior gaps, or address gutter issues. Let the area dry fully.
Step 2: Scrape until it stops peeling
Scrape all loose paint. Keep going until your scraper stops finding edges that lift easily. If you leave a loose edge, the new paint will fail right there.
Step 3: Sand and feather the edges
Sand the perimeter so the transition from bare surface to intact paint feels smooth to your fingertips. This is what prevents that obvious patched ridge after repainting.
- Start with 80 to 120 grit to knock down the edge.
- Finish with 150 to 220 grit for a smoother blend.
- Vacuum dust and wipe with a damp cloth. Let it dry.
Step 4: Patch if needed
If the peeling pulled paper off drywall or left divots, skim with a patching compound. For exterior trim, fill checks and small voids with an exterior-rated filler. Let it cure, sand smooth, then remove dust again.
Step 5: Prime like you mean it
Primer is not optional on repaired areas. It is what bonds to the surface and gives your paint a consistent base.
- Drywall patches: use a quality drywall primer or a stain-blocking primer if there was water staining.
- Water stains: use a stain-blocking primer (oil-based or shellac-based are the heavy hitters) to prevent bleed-through.
- Glossy trim or oil paint: scuff sand and use a bonding primer.
- Exterior bare wood: prime bare wood promptly, especially end grain.
Let primer dry per the can. Rushing this step is a sneaky way to invite peeling back.
Step 6: Repaint with the right paint and conditions
Use a paint that fits the space and apply it under the conditions the manufacturer recommends.
- Bathrooms: a kitchen and bath paint in satin or semi-gloss is usually the most forgiving.
- Living areas: eggshell or satin for washability, flat for low-traffic ceilings.
- Exterior: exterior-rated 100% acrylic is the go-to for flexibility and durability.
Apply two coats for most repairs, especially if you primed bare spots. Keep humidity reasonable indoors and avoid painting exteriors in direct baking sun.
Common mistakes that make peeling come back
- Painting over chalky or dusty surfaces without cleaning
- Skipping primer on patches, bare wood, or stained areas
- Assuming paint plus caulk fixes water problems on exterior trim
- Using flat paint in steamy rooms where it gets wiped and damp
- Not feather-sanding edges, which leaves a ridge that cracks and telegraphs through
A simple “why is it peeling?” checklist
If you only remember one thing, remember this order: water, prep, compatibility, conditions.
- Water: Is there a leak, condensation, staining, or damp smell?
- Prep: Was the surface cleaned and scuffed? Is there grease, soap film, or dust?
- Compatibility: Is this latex over old oil paint without bonding primer?
- Conditions: Was it too cold, too hot, too humid, or recoated too soon?
Work through that list and your fix has a much better shot at being permanent.
When to call in help
I am all for DIY, but there are a few situations where calling a pro is the smart, safe move.
- Repeated moisture issues you cannot trace, especially around roofs, chimneys, and second-floor plumbing
- Suspected lead paint with large areas of peeling or any work that would create dust
- Rotten exterior trim where the underlying wood is soft and needs replacement, not filler
About Marcus Vance
Content Creator @ Grit & Home
Marcus Vance is a lifelong DIY enthusiast and self-taught home renovator who has spent the last decade transforming a dilapidated 1970s ranch into his family's dream home. He specializes in budget-friendly carpentry, room-by-room renovations, and demystifying power tools for beginners. Through his writing, Marcus shares practical tutorials and hard-learned lessons to help homeowners tackle their own projects with confidence.