🚨 In a DIY emergency or rush?
Skip the details and jump straight to our 30-second cheat sheet for the most crucial info.
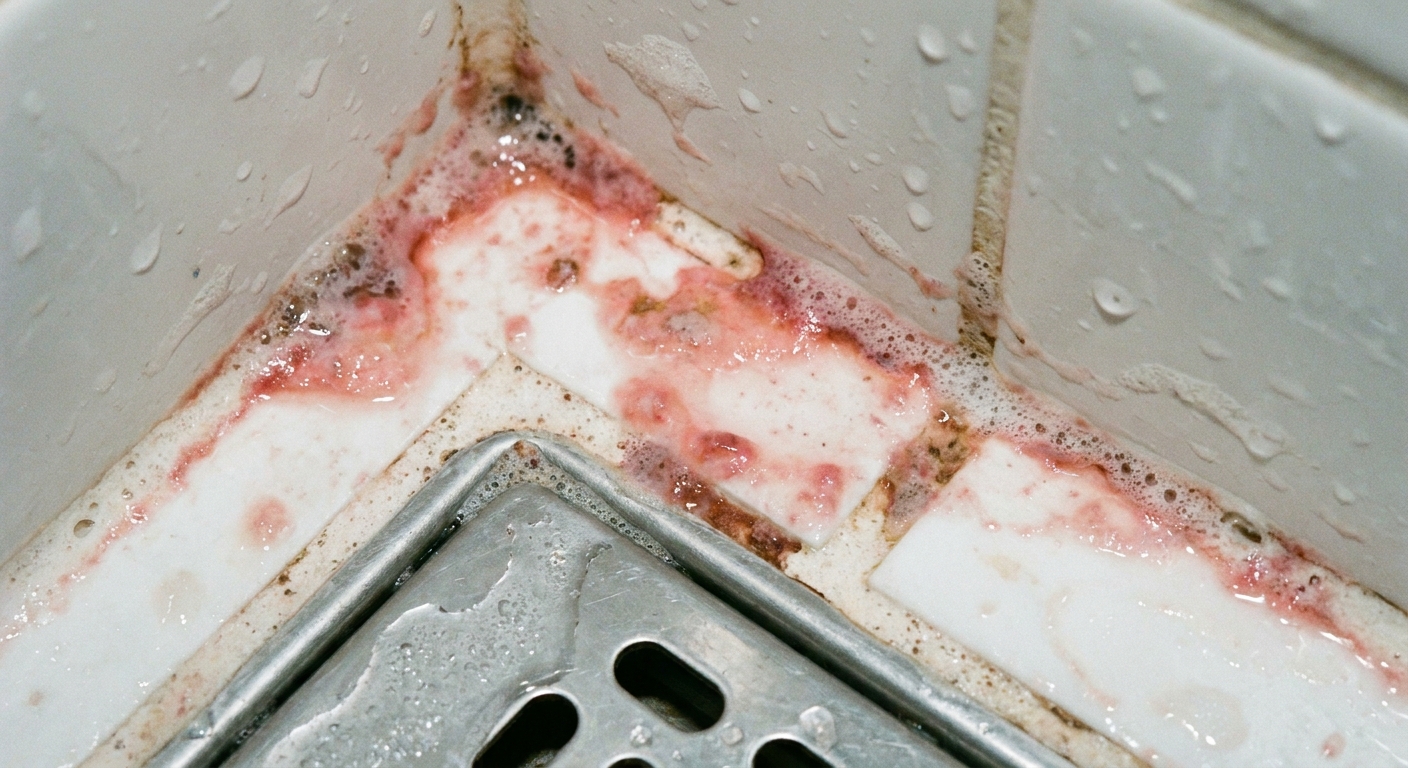
What “pink mold” really is
That light pink or salmon-colored film on your shower curtain, grout, or caulk is often linked to Serratia marcescens, a bacterium that can form a slick biofilm. People call it pink mold because it looks moldy and keeps coming back, but it’s usually microbial growth living on damp residue like soap film, body oils, shampoo, and the stuff that builds up where water sits.
Quick reality check: you can’t confirm the exact organism by sight. The good news is, the cleaning strategy is basically the same either way: remove the film it clings to, then disinfect, then dry.
In my house, this shows up fastest where water sits, like the bottom corners of the shower, the sliding door track, and the bead of caulk at the tub line. If you clean it but don’t change the moisture routine, it comes back like clockwork.
Why it keeps coming back
Serratia and other bathroom biofilm culprits thrive on two things most showers have in abundance: moisture and build-up. “Build-up” is my not-so-technical term for the mix of soap residue, body oils, shampoo, and hard-water minerals that likes to park itself on grout, caulk, and textured surfaces.
Common causes
- Constant damp surfaces: caulk lines, grout pores, textured tile, shower curtains, and door tracks never fully dry.
- Soap film and oils: the thicker the residue, the easier it sticks and spreads.
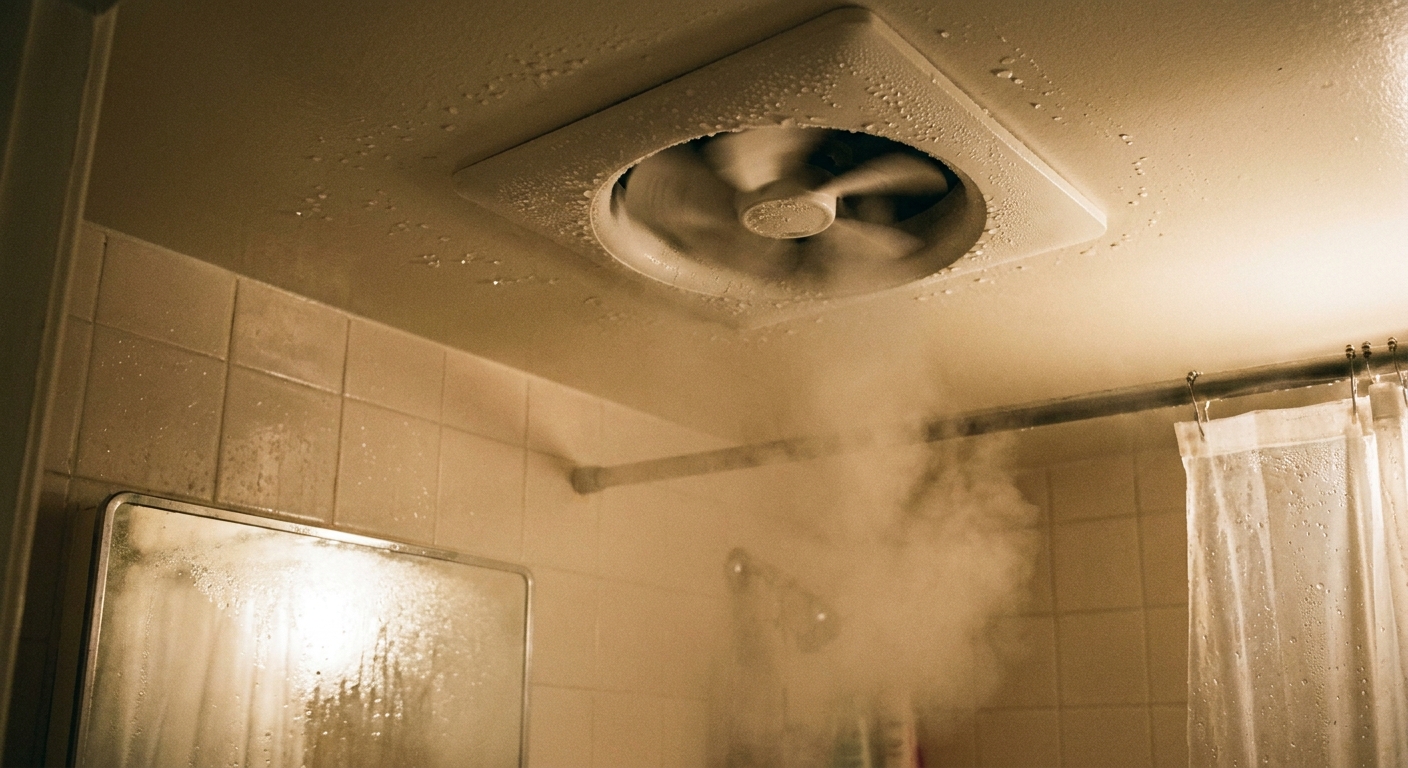
- Low airflow: no fan, weak fan, fan not run long enough, or a bathroom door kept shut.
- Warm temperatures: steamy showers turn your bathroom into a cozy incubator.
Pink vs “black mold”
Both are “things you don’t want growing in your shower,” but they’re not the same thing. Also, a small but important note: color alone isn’t an ID. Lots of different microbes can look dark or pink, and lab testing is the only way to confirm a species.
- Pink growth (often Serratia or other biofilm): usually a slimy, pink to orange film. It loves wet residue and often shows up on caulk, corners, and shower curtains.
- Dark growth (mold or mildew): can look black, dark green, or brown. It often shows up where moisture sticks around for the long haul, including ceilings, drywall, and areas affected by leaks.
Important: If it’s limited to shower surfaces, you usually don’t need to treat this like a whole-house remediation project. But you do want to clean it promptly. Serratia can cause infections in certain situations, especially for people with weakened immune systems.
Before you clean
I’m a big believer in simple, repeatable routines. The safest cleaning is the one you can actually do without gassing yourself out.
Quick checklist
- Ventilation: run the fan. Crack a window if you have one.
- Gloves: yes. Eye protection is smart when scrubbing overhead or using sprays.
- Tools: nylon brush, microfiber cloths, and a non-scratch sponge.
- Cleaners: dish soap or a soap-scum cleaner, plus hydrogen peroxide (3%) or oxygen bleach. Bleach only if needed.
Safety and surface notes
- Never mix chemicals: especially bleach with ammonia or vinegar. Mixing can create toxic gas.
- Spot-test first: especially on older grout, colored caulk, or unknown finishes.
- Avoid abrasives on delicate surfaces: acrylic, fiberglass, and natural stone can scratch or etch. Use non-scratch tools and cleaners intended for that surface.
If you’re sensitive to fumes or you’re cleaning a small bathroom with poor airflow, peroxide or oxygen bleach tends to be a lot easier to live with than heavy chlorine bleach.
The cleaning plan
Pink biofilm is slippery. If you only hit it with a quick wipe, you often smear it around. The trick is: remove residue first, then disinfect.
Step 1: Remove soap film and build-up
Pick one:
- Dish soap + warm water: great for greasy residue. Put a few drops in a spray bottle with warm water.
- Bathroom cleaner labeled for soap scum: follow label directions.
Spray, let it sit 5 to 10 minutes, then scrub with a nylon brush or non-scratch pad. Rinse well.
Step 2: Disinfect
Now choose a disinfecting approach based on what you’re cleaning. For any disinfectant, follow the product label for surface compatibility and contact time.
Option A: Hydrogen peroxide (3%) for most showers
- Spray 3% hydrogen peroxide on grout and caulk.
- Let it sit for the label contact time (often about 10 minutes).
- Scrub, rinse, and dry.
This is my go-to because it’s effective and the smell is mild compared to bleach.
Option B: Bleach for stubborn staining (use carefully)
- Use regular unscented household bleach diluted with water (follow the product label for disinfecting dilution and contact time).
- Apply to hard, non-porous surfaces and grout. Avoid soaking fabrics.
- Do not leave it to dry on surfaces.
- Rinse thoroughly and ventilate until the smell is gone.
Heads-up: bleach can discolor some caulks and damage some finishes. Also, when caulk is failing, the problem is often under or behind the bead , where surface disinfecting won’t fully solve it.
Option C: Oxygen bleach paste for grout lines
Oxygen bleach (often sold as a laundry booster) can be mixed into a paste for grout. It’s slower than chlorine bleach but gentler and very DIY-friendly.
- Mix powder with a little warm water to make a spreadable paste.
- Work it into grout lines with an old toothbrush.
- Let it sit 15 to 30 minutes, keep it damp, then scrub and rinse.
Cleaning grout
Grout is porous, which means it holds moisture and residue. If you want less repeat growth, your goal is to get it clean enough that it dries fast.
Grout steps
- Do the soap film pre-clean first.
- Use hydrogen peroxide or oxygen bleach paste for deeper cleaning.
- Scrub with a stiff nylon grout brush, not a wire brush.
- Rinse thoroughly, then dry the area with a towel.
If your grout stays dark even after cleaning, that may be staining, worn grout, or moisture trapped behind tile. At that point you’re outside “pink mold quick fix” territory and into repair territory.
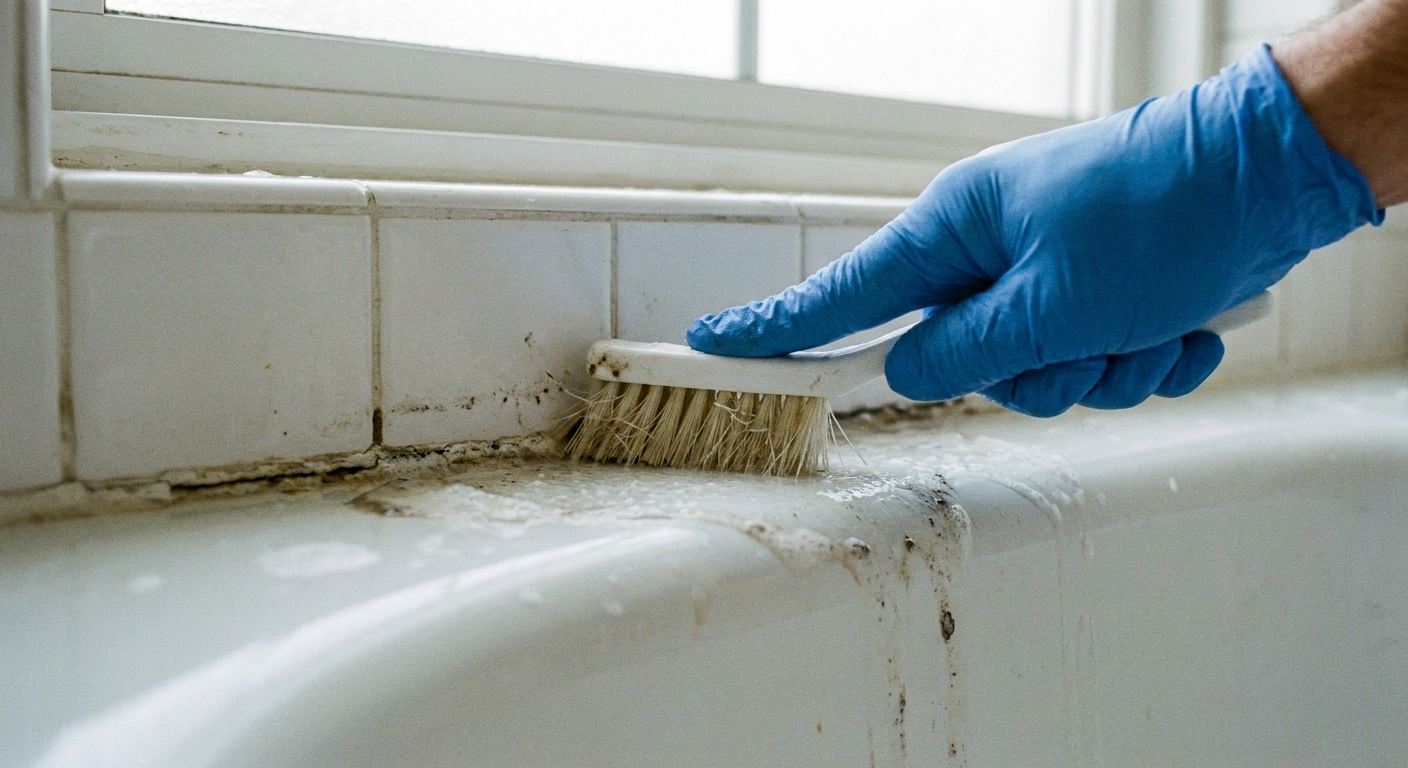
Cleaning caulk
Caulk is where this stuff loves to set up shop, especially at the tub line where water pools. The frustrating part is that once silicone caulk is compromised, microbes can hang on in tiny pits, edges, or underneath the bead.
Caulk cleaning steps
- Wash first to remove soap film.
- Apply hydrogen peroxide, or a bleach solution on a rag, and press it along the caulk line for 10 to 15 minutes (or per label contact time).
- Scrub gently, rinse, and dry.
Replace caulk if you see any of these
- Cracks, gaps, or peeling: water is getting behind it.
- Pink returns within days: you’re likely dealing with biofilm living in damaged caulk or behind the bead.
- Dark staining under clear or white caulk: growth or grime trapped underneath.
- Soft or spongy sections: caulk failure or moisture behind the joint.
My rule: if the caulk line looks like a bad zipper and cleaning only buys you a week, stop fighting it and re-caulk. It’s cheaper than repairing water damage later.
Quick re-caulk notes
This isn’t a full caulking tutorial, but there are two make-or-break points that prevent pink growth from showing up right away.
- Remove all old caulk: new silicone doesn’t bond well to old silicone. If you leave strips behind, you create little moisture tunnels.
- Let the joint dry out: if you caulk over moisture, you’re sealing in the conditions biofilm loves.
Use a bathroom-rated, mildew-resistant 100% silicone and let it cure fully before regular showers. Cure times vary by product, so follow the tube.
Stop it from coming back
I can scrub a shower spotless on Saturday. If we go right back to shutting the door and leaving wet surfaces all day, the pink film will be back by next weekend. Prevention is mostly drying and airflow.
My simple anti-pink routine
- Run the fan: during the shower and for 20 to 30 minutes after. If your fan is weak, leave the door open too.
- Squeegee in 60 seconds: hit the tile and glass. Less standing water equals less biofilm.
- Dry the trouble spots: a quick towel pass along the tub-to-tile caulk line is shockingly effective.
- Wash the shower curtain liner: monthly, or replace it if it stays slimy. Liners are cheap; your time isn’t.
- Reduce heavy residue: if bar soap leaves thick scum in your shower, try switching to a body wash or different soap for a few weeks and see if buildup slows.
Once-a-week reset
- Spray a gentle bathroom cleaner on tile, grout, and caulk.
- Wait 5 minutes.
- Rinse and dry the caulk line.
When it’s a bigger issue
Sometimes pink slime is just a cleaning and ventilation issue. Sometimes it’s telling you moisture isn’t leaving the room.
Investigate if any of these are true
- Paint is peeling or bubbling outside the shower.
- You smell mustiness that never goes away.
- Grout stays dark and damp for hours after showering.
- Your exhaust fan is loud but seems to move no air, or it’s venting into an attic.
A quick rule of thumb: if your mirror stays fogged for more than 20 to 30 minutes after a shower, you may need better ventilation. A fan upgrade or proper ducting is often the best long-term fix you can make for the whole bathroom.
FAQ
Is pink mold dangerous?
For healthy people, it’s generally a low-risk annoyance, but it’s still not something you want growing where you bathe. If someone in your home is immunocompromised, has open wounds, or keeps getting skin or eye irritation, it’s worth being extra cautious and checking in with a clinician.
Will vinegar kill pink mold?
Vinegar can help with mineral buildup and some microbes, but pink biofilm often comes right back if residue remains. Also, never use vinegar at the same time as bleach.
Why does it show up on my shower curtain liner first?
Because the liner stays wet, gets coated in residue, and doesn’t dry quickly. Washing or replacing the liner and improving drying habits usually makes a noticeable difference.
The 30-Second Cheat Sheet
Essential takeaways for: Pink Mold in Your Shower: Clean It and Stop It
What it is
- “Pink mold” in showers is often a pink or salmon biofilm caused by microbes like Serratia marcescens (a bacterium), but you cannot confirm the exact species by sight.
Fast cleaning steps
- Step 1: Remove soap residue and oils first (dish soap and warm water, or a soap-scum bathroom cleaner). Rinse.
- Step 2: Disinfect: spray 3% hydrogen peroxide, follow product directions for contact time (often about 10 minutes), scrub, rinse, and dry.
- Stubborn areas: use a bleach solution per label directions, ventilate well, and never mix bleach with vinegar or ammonia.
Grout vs caulk
- Grout: use peroxide or oxygen bleach paste, scrub with a nylon grout brush, rinse, then towel-dry.
- Caulk: if pink comes back in days or the bead is cracked, peeling, or stained underneath, replace the caulk instead of endlessly bleaching.
Stop it from coming back
- Run the bathroom fan during showers and 20 to 30 minutes after.
- Squeegee tile and glass after each shower.
- Towel-dry the tub-to-tile caulk line, where pink film loves to start.
- Wash or replace the shower curtain liner regularly.
Pink vs black mold
- Pink: often a bacterial or yeast biofilm living on wet residue.
- Dark spots: can be mildew or mold, but color alone does not identify the species. Testing is the only way to confirm what it is.
💡 Tip: Scroll up to read the full article for detailed, step-by-step instructions.
⬆️ Back to topAbout Marcus Vance
Content Creator @ Grit & Home
Marcus Vance is a lifelong DIY enthusiast and self-taught home renovator who has spent the last decade transforming a dilapidated 1970s ranch into his family's dream home. He specializes in budget-friendly carpentry, room-by-room renovations, and demystifying power tools for beginners. Through his writing, Marcus shares practical tutorials and hard-learned lessons to help homeowners tackle their own projects with confidence.