When a range hood light goes out, it is tempting to blame the bulb and move on. Sometimes that is exactly right. Other times, the bulb is just the messenger and the real problem is a crusty socket, a tired switch, or an LED driver that finally called it quits.
I have chased this exact issue in my own 1970s ranch more than once. The good news is you can usually diagnose it in 15 to 30 minutes with a screwdriver and a little patience. The key is to separate cosmetic, low-risk fixes from anything that smells like wiring trouble.
What you will need
- Flat and Phillips screwdriver
- Flashlight or headlamp
- Rubber gloves (grip) and a clean paper towel (halogens)
- Dry nylon brush or a small fine abrasive pad (for light corrosion)
If a step has you opening covers or getting near wiring, add a non-contact voltage tester to that list, or hand it off to a pro.
Safety first (quick but important)
- Turn off power at the breaker before opening any covers or touching wiring.
- Let bulbs cool before handling. Halogens get extremely hot.
- Do not spray cleaner into the light housing. Moisture plus electricity is a bad mix.
- If you see melted plastic, scorched wires, or a burning smell, stop and skip to the electrician section.
If your hood is hardwired and you are not 100 percent comfortable working around electrical connections, keep your troubleshooting to bulb and lens removal only. Anything past that is a fair handoff to a pro.
Testing habit: After each step, restore power and test the light. It keeps you from changing three things at once and guessing what fixed it.
Triage: what is the symptom?
One light is out
This is usually a bulb issue or a socket issue on that one side.
Both lights are out (fan still works)
More likely a switch, a loose connection feeding the light circuit, or an LED driver (common on newer LED-module hoods).
Lights flicker, then die
Often a failing bulb, poor socket contact, or an LED driver going bad.
Lights work sometimes when you tap the lens
Classic sign of a loose bulb, weak socket tension, or corrosion on the contacts.
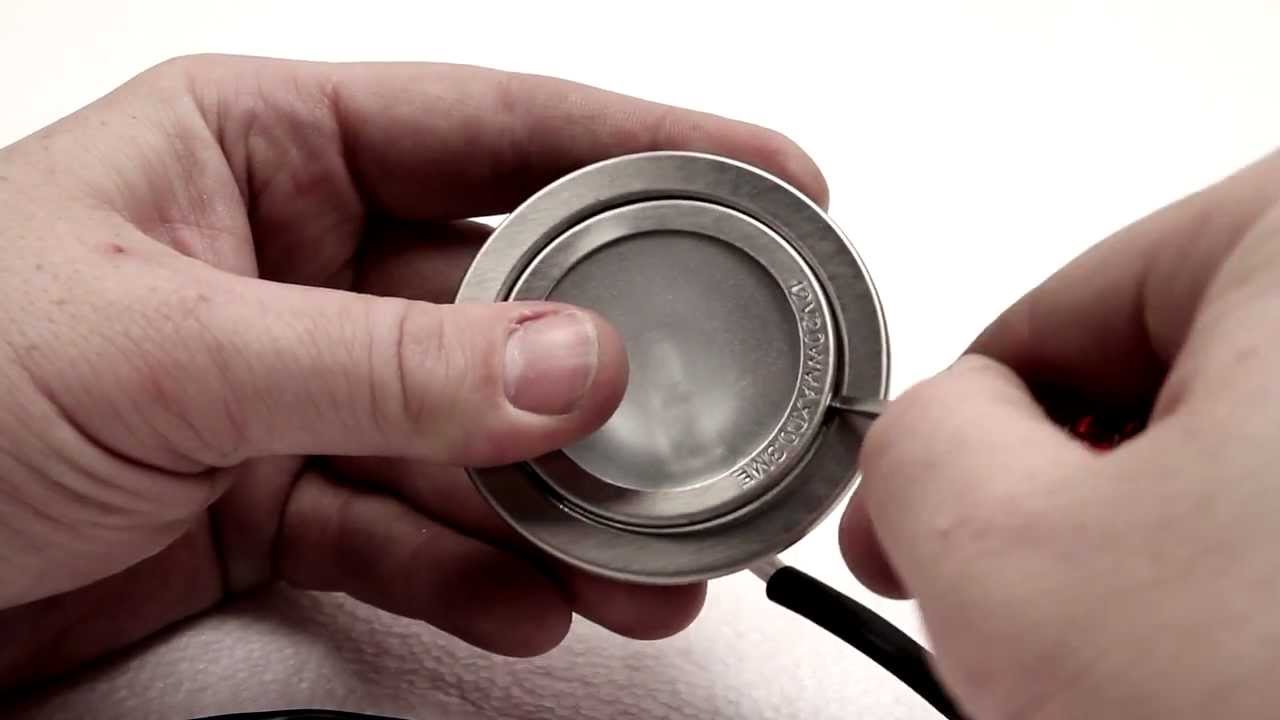
Step 1: Identify the bulb type
Range hood lights are small, hot, greasy, and brand-specific more often than you would expect. Pull the old bulb and read the markings on the base. If it is too grimy, wipe it with a dry paper towel first.
Common range hood bulb types
- E26 or E27: standard screw base (less common on modern hoods).
- E17: intermediate screw base, common on some older hoods.
- GU10: twist-lock base with two short posts, commonly found on 120V spotlight-style lamps (often PAR16-shaped).
- GU5.3 (MR16 style): 2-pin base typically used with 12V MR16 halogens. Not the same as GU10.
- G4: tiny bi-pin halogen capsule (many under-cabinet style hoods).
- G9: looped bi-pin style, often in compact glass housings.
- Integrated LED module: no replaceable bulb, usually a small LED board or puck tied to a driver.
Match voltage too. Some systems use 120V bulbs, others use 12V halogens with a transformer or LED driver. The old bulb will usually list voltage and wattage. If it says 12V, do not substitute a 120V version and vice versa.
Respect the hood's wattage limit. Many hoods specify a maximum wattage per socket (often printed near the socket or in the manual). Exceeding it can overheat the lens, cook the socket, and shorten bulb life.
My thrifty tip
If your hood uses halogen and you cook a lot, consider switching to an LED equivalent that is rated for enclosed fixtures and the correct voltage. It runs cooler, lasts longer, and helps reduce the heat baking grease onto the lens.
Step 2: Replace the bulb
For screw-in bulbs (E26, E17)
- Turn power off.
- Remove the lens or cover.
- Unscrew the bulb. If it is stuck, wear rubber gloves for grip and wiggle gently.
- Install the new bulb snugly, not over-tight.
For twist-lock bulbs (GU10)
- Press in slightly and rotate counterclockwise about a quarter turn.
- When installing, line up pins, push in, then rotate clockwise to lock.
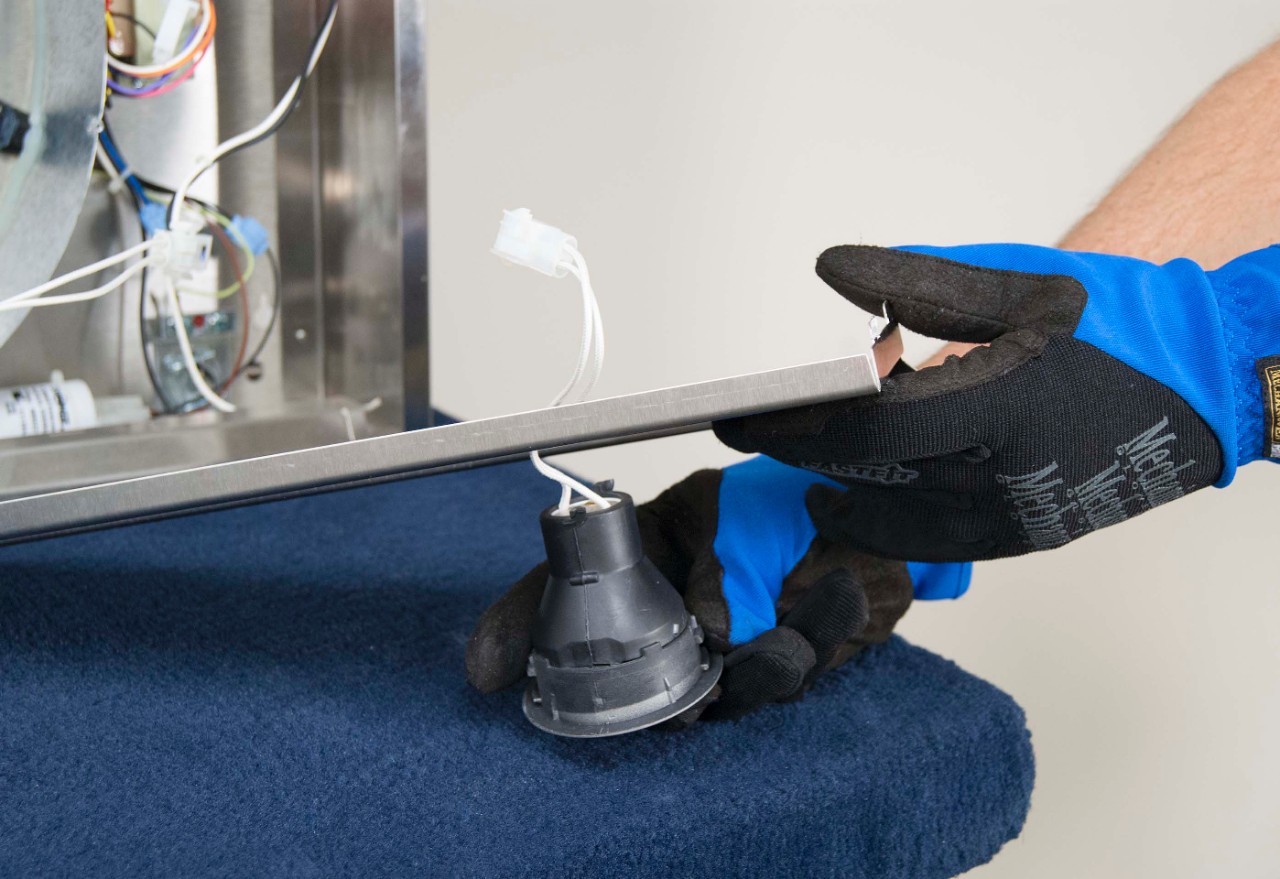
For bi-pin halogens (G4, G9, GU5.3)
- Pull straight out, do not twist unless the fixture design calls for it.
- Do not touch halogen glass with bare fingers. Skin oils can shorten life. Use gloves or a clean paper towel.
If the bulb breaks or the base is stuck
This happens more than anyone wants to admit. If the glass separates and the base stays in the socket:
- Turn power off at the breaker and confirm the switch is off.
- Let everything cool completely.
- Use needle-nose pliers to gently rotate the metal base out. Go slow and do not crush the socket.
- If the socket cracks, spins freely, or looks scorched, stop and plan on replacing the socket (or call a pro).
If the new bulb still does not light, leave it installed and move to socket and power checks.
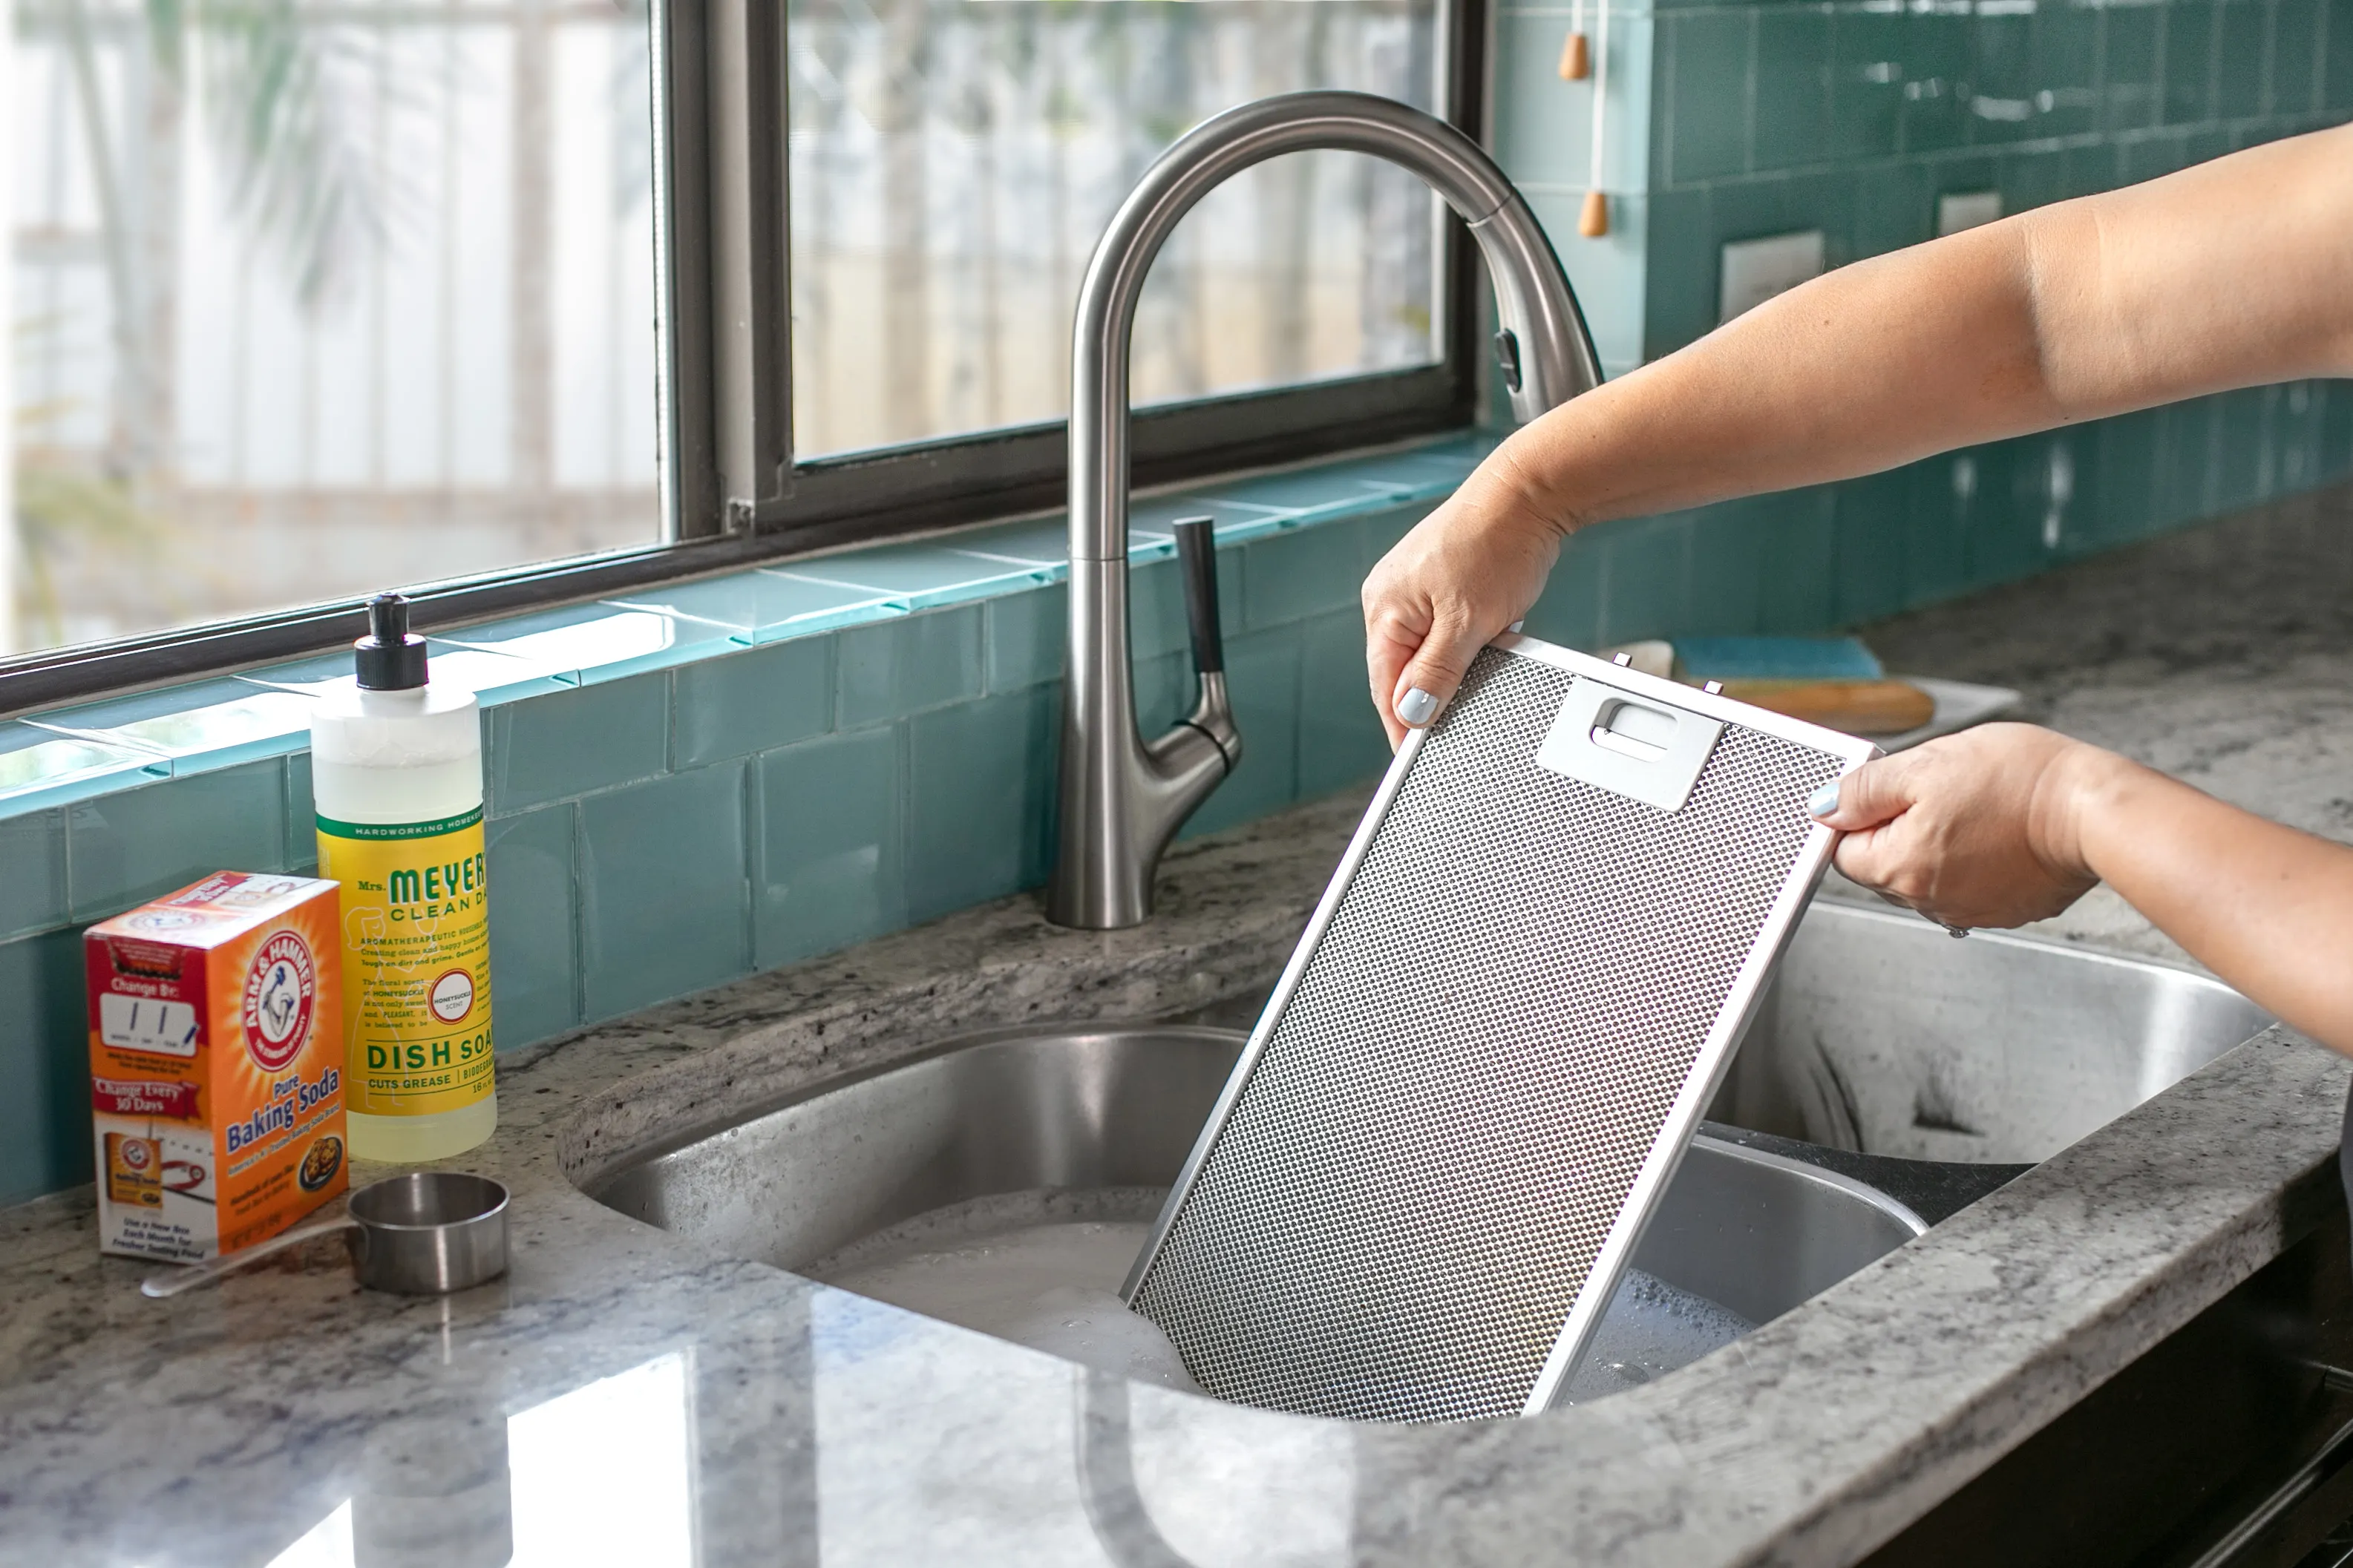
Step 3: Clean the lens and reflector
Sometimes the light is working, but the lens and reflector are so coated that it looks dim or dead.
- Remove the lens and wash it with hot water and degreasing dish soap.
- Wipe the reflector and housing with a damp rag and a mild degreaser, then dry completely.
- Make sure the lens is seated correctly. On some models, an incorrectly installed lens can trap heat or block light. If it seems finicky, check the manual or the parts diagram.
Step 4: Socket problems
Range hood light sockets live in a rough neighborhood. Heat cycles, cooking vapor, and grease can corrode the contacts or weaken the socket tension.
Signs the socket is the issue
- Bulb works in another fixture but not in the hood.
- Light works only if you push the bulb in a certain direction.
- You see greenish corrosion, black soot, or pitting on contacts.
What you can do safely
- Turn power off at the breaker.
- Inspect the socket with a flashlight.
- If it is a screw-in socket and the center tab looks flattened, you can sometimes restore contact by gently lifting it a tiny bit with a small flat screwdriver. Only do this with power off.
- Clean light corrosion with a dry nylon brush or a small piece of fine abrasive pad. Keep debris out of the motor area.
If the socket is brittle, cracked, or scorched, replacement is the right move. Many hoods use a prewired socket assembly with a plug, which is a beginner-friendly swap. If yours is hardwired with wire nuts inside the hood, that is still doable for a confident DIYer, but it is also an easy point to bring in an electrician.
Step 5: Switch and controls
If both lights are out, do not skip the switch. Range hoods often use a separate light switch that can fail while the fan switch keeps working.
Quick tests
- Try every light setting (low, high, night light) if your hood has them.
- Toggle the switch 10 to 20 times. If it flickers back to life, the switch contacts may be worn or dirty.
- If the hood has electronic buttons, power-cycle the hood by turning the breaker off for 60 seconds, then back on.
Mechanical rocker or slider switches can often be replaced as a part. Electronic control boards are pricier, but still commonly available by model number.
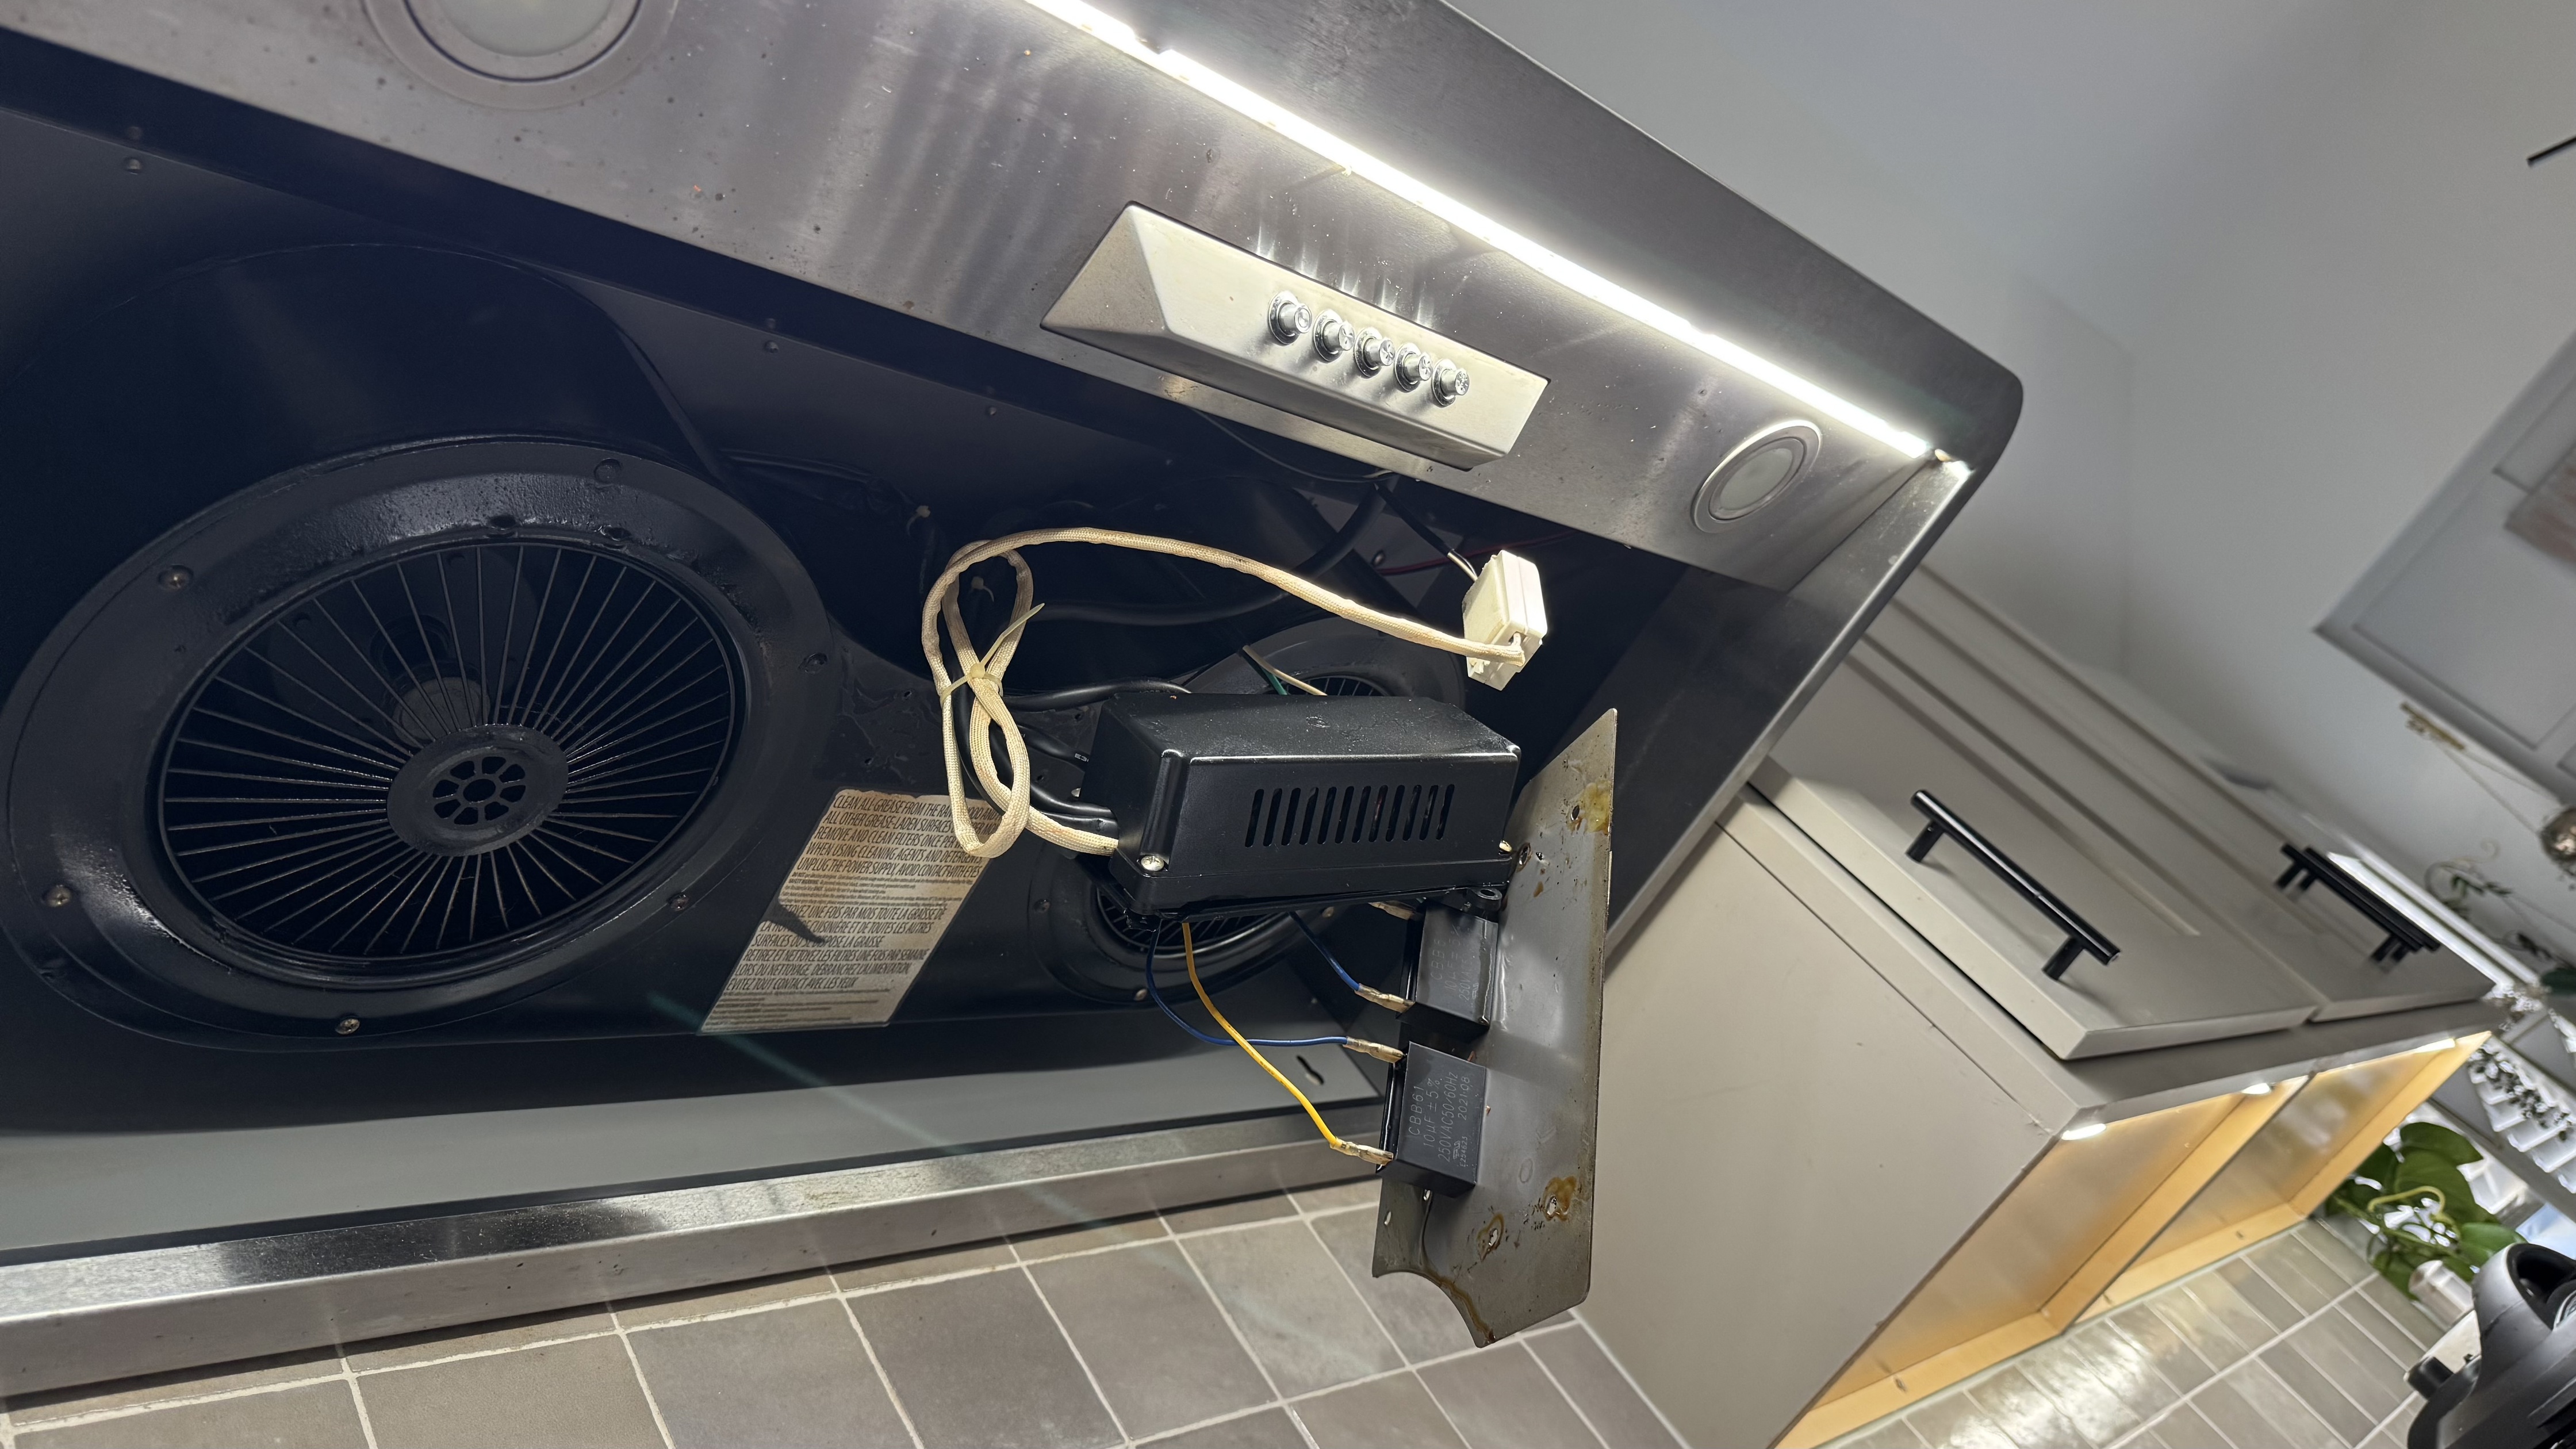
Step 6: LED modules and drivers
Newer hoods may not have replaceable bulbs at all. They use an LED light module powered by a driver, sometimes called a transformer. When these fail, the symptom is often both lights out at once, flickering, or lights that are dim or intermittent. In some cases you may also notice a color shift, but that alone is not a slam-dunk diagnosis.
How to spot an LED driver
- You do not see a standard bulb base.
- You see a small LED board or puck with wires leading to a small box labeled with output voltage like 12V or 24V DC.
- The hood manual mentions LED module, driver, or transformer.
Drivers are typically replaced, not repaired. The safe homeowner approach is to identify the hood model number (usually on a label inside the hood or behind the filter) and order the exact driver or LED assembly.
One caution from the school of hard knocks: LED drivers are not one-size-fits-all. Constant voltage vs constant current, connector style, and mounting all matter. When in doubt, match the exact part number.
Step 7: Wiring checks
If new bulbs and a decent-looking socket do not solve it, you are likely into wiring or component failure. Here is how I separate reasonable DIY checks from electrician territory.
DIY-friendly checks (power off)
- Confirm the plug is fully seated if your hood plugs into an outlet inside an upper cabinet.
- Look for a tripped GFCI upstream. Some kitchens have the hood outlet protected by a GFCI in a nearby receptacle.
- Inspect for obviously loose spade connectors on the light circuit. If one slipped off, re-seat it firmly.
Call an electrician if you see any of these
- Burn marks, melted insulation, or brittle wire jackets.
- Repeatedly blown bulbs, especially instantly on power-up (and you have confirmed the correct bulb type, voltage, and wattage).
- Tripping breaker or GFCI when the light switch is used.
- Aluminum branch wiring connections, or a crowded junction box that you are not comfortable reworking.
There is no shame in calling for help here. Hoods sit over heat and grease, and a small wiring issue can become a real hazard if ignored.
Parts and model number
If you take only one practical tip from this page, make it this: get the model number before you start ordering parts. Look for a sticker:
- Behind the grease filter
- On the inside wall of the hood body
- Inside the upper cabinet if it is an insert
With the model number, you can usually find the exact bulb spec, lens, socket harness, switch, LED module, or driver. It saves money and avoids the classic return-pile on your workbench.
Quick checklist
- Confirm the correct bulb type, voltage, and wattage (and the hood's max wattage rating).
- Test the bulb in another socket if possible.
- Clean the lens and reflector.
- Inspect and clean the socket contacts, restore tension if needed.
- Test the light switch behavior and settings.
- If LED module: suspect the driver when both lights fail or flicker, and buy the exact match.
- Stop and call an electrician if you find heat damage or tripping breakers.
When replacement makes sense
If your hood is older, parts can be surprisingly expensive. If you are staring at a control board plus LED assembly plus switch, it may be time to price a new hood. As a thrifty renovator, I like repair first, but I also like not throwing good money after bad.
A reasonable rule: if the repair parts total more than about half the cost of a quality replacement hood, strongly consider replacing. You will usually get quieter operation and better lighting along with it.
About Marcus Vance
Content Creator @ Grit & Home
Marcus Vance is a lifelong DIY enthusiast and self-taught home renovator who has spent the last decade transforming a dilapidated 1970s ranch into his family's dream home. He specializes in budget-friendly carpentry, room-by-room renovations, and demystifying power tools for beginners. Through his writing, Marcus shares practical tutorials and hard-learned lessons to help homeowners tackle their own projects with confidence.