If your refrigerator door gasket is not sealing, your fridge can end up running longer to keep up. That often means higher electric bills, more frost problems, and food that spoils sooner. The good news is you can diagnose most seal issues in under 10 minutes, and many are fixable without buying parts.
I learned this the hard way after wondering why our milk kept turning early. The fridge was cold, but the compressor seemed to run all day. One corner of the door was leaking just enough warm air to cause a constant battle inside the box.
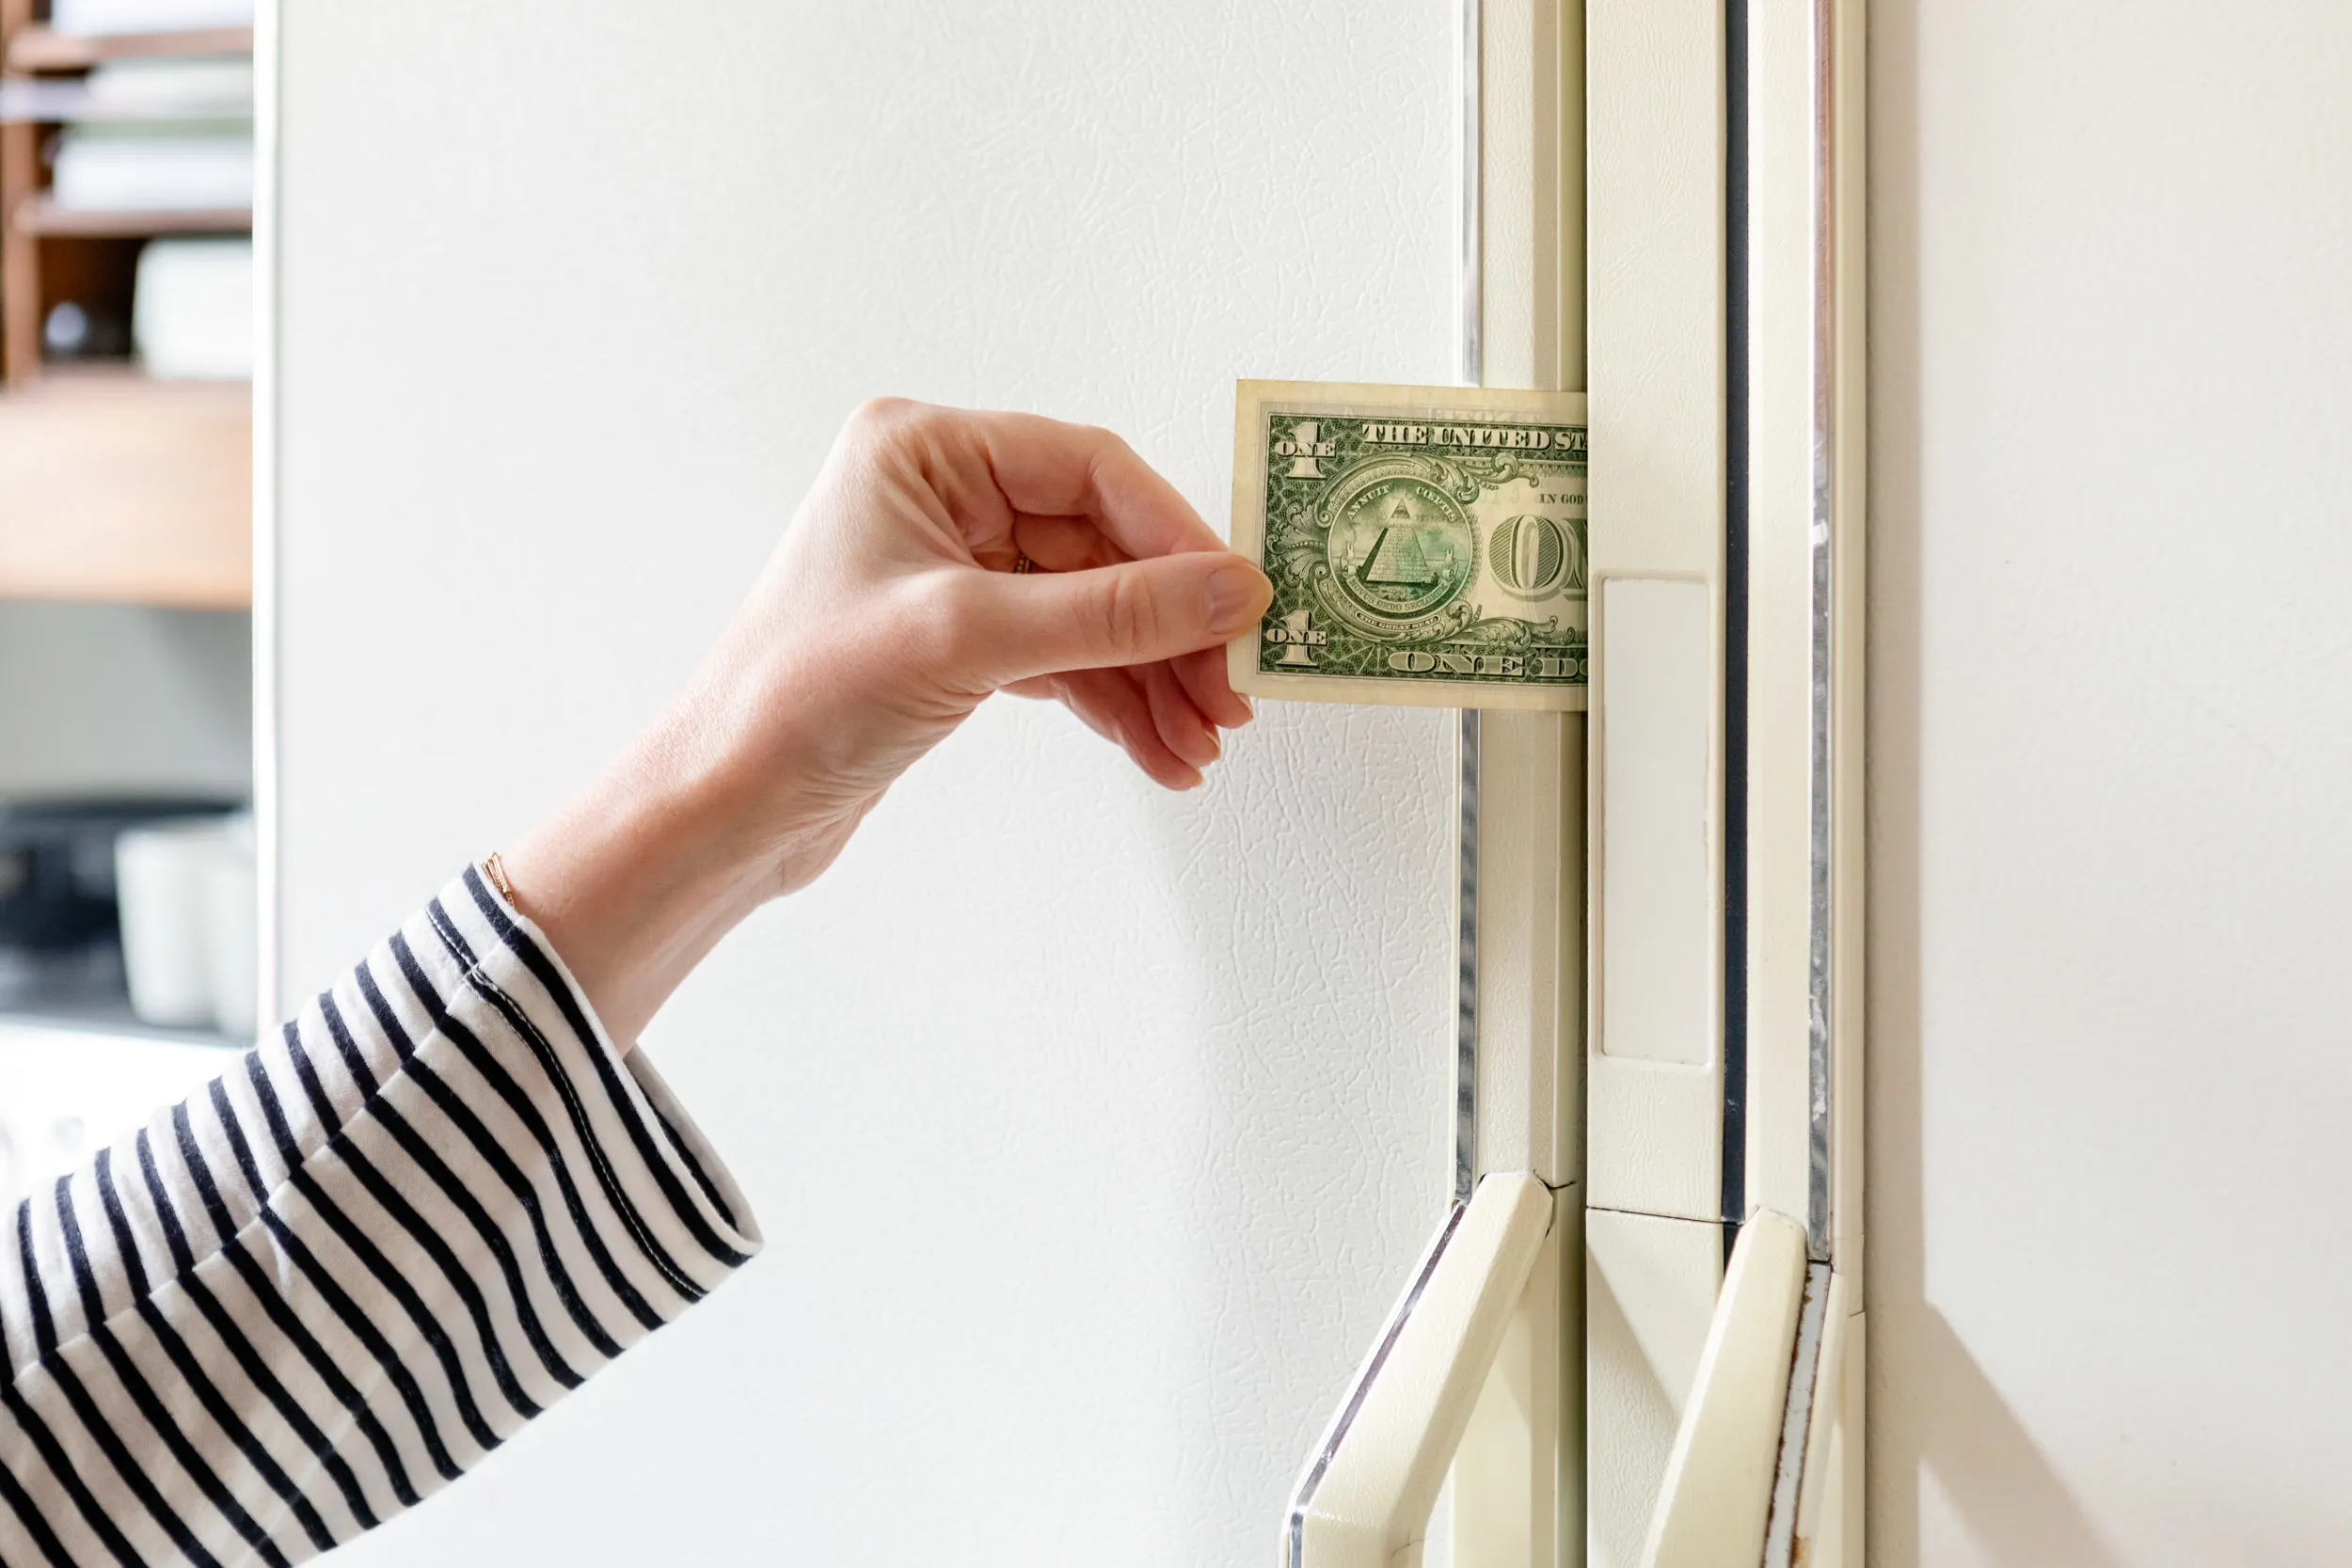
Fast diagnosis: the dollar-bill test
This is the quickest way to find where the seal is weak.
Quick note: This is a screening test, not a lab-grade measurement. Some magnetic gaskets can feel “light” and still seal, and results vary by door design. If you are on the fence, use the flashlight test below as a second check.
How to do it
- Close the fridge door on a dollar bill (or a strip of paper) so half is inside, half is outside.
- Gently pull the bill straight out.
- Repeat every 6 to 8 inches around the entire perimeter of the door, including corners.
How to read the results
- Good seal: noticeable resistance, the bill slides out with a tug.
- Weak seal: little to no resistance, the bill slips out easily.
- Inconsistent seal: tight in some spots, loose in others. This usually points to dirt buildup, door alignment issues, or a warped gasket.
Backup check: the flashlight test
- In a dim room, put a flashlight inside the fridge pointing toward the door seam.
- Close the door and look around the gasket edge from the outside.
- If you see a clear line of light, that spot is likely leaking.
Tip: Do the same test on the freezer door too. A leaky freezer gasket often shows up as frost buildup, ice clumps, or a freezer that seems to “never settle down.”
Before you replace anything: 5 fixes
Most gaskets fail in boring ways first: crumbs, sticky spills, or a door that is slightly sagging. Work through these in order.
1) Clean the gasket and the frame
Even a thin film of syrup, grease, or pet hair can hold the gasket open.
- Mix warm water with a drop of dish soap.
- Wipe the gasket folds (especially the bottom and hinge side) using a soft cloth.
- Wipe the fridge frame where the gasket lands.
- Dry everything. Water left in the folds can freeze on freezer doors.
Cleaner note: Skip harsh abrasives and strong chemicals that can dry out or damage vinyl and rubber. If you are dealing with mildew, start with mild soap and thorough drying, or follow your manufacturer’s cleaning guidance.
2) Remove “seal blockers”
Door shelves and bins love to push tall items into the gasket line.
- Check for food boxes, pizza cartons, bags, or gallon jugs protruding past shelves.
- Look for a loose crisper drawer or shelf that is preventing the door from fully closing.
- Make sure the door bins are seated correctly.
3) Check leveling and door swing
Many models are designed to close gently when you let go, but not all. Door swing depends on hinge design, cam condition, and leveling. The goal is simple: the door should close cleanly and stay closed.
- Place a small level on top of the fridge (front to back).
- If needed, raise the front leveling legs slightly so the cabinet leans back just a touch.
- Confirm the door closes without drifting open.
4) Tighten hinges and check for sag
A sagging door often causes a leak at the top or bottom corner opposite the hinges.
- With the door open, lift gently on the handle side. If you feel play, check hinge screws.
- Support the door while tightening if needed, especially on heavy doors.
- Tighten hinge bolts with the proper socket or driver. Do not over-torque into thin sheet metal.
- Inspect the hinge area for cracked plastic bushings or worn cam risers (common on older units).
If parts are worn, you can often replace hinge cams and bushings for less than a full gasket. Search using your model number.
5) Re-shape a warped gasket with gentle heat
If a gasket looks wavy, twisted, or flattened, you can sometimes bring it back.
- Clean and dry the gasket first.
- Warm the problem area with a hair dryer on low, moving constantly to avoid overheating.
- Massage the gasket outward so it sticks out slightly and contacts the frame evenly.
- Close the door for 10 to 15 minutes to “train” the shape.
My caution: Do not use a heat gun. It is too easy to melt vinyl and turn a small warp into a ruined gasket.
How to tell if the gasket is bad
Sometimes a gasket is past the point of cleaning and adjusting. Here is what I look for.
Signs you can usually fix
- Minor flattening where the door rests most often
- Light grime, sticky spots, or mildew on the folds
- A single loose corner that improves after warming and pressing
Signs you should replace it
- Tears or splits anywhere on the sealing edge
- Hardened or brittle gasket that no longer flexes
- Permanent deformation that returns immediately after heat reshaping
- Mold that will not clean out from deep cracks or porous areas
- Loose magnetic strip (the gasket will not “grab” the frame)
Common symptoms of a leak
- Condensation or water beads on the door edge or near the gasket
- Frost buildup in the freezer, especially near the door
- Compressor running longer or more often than usual
- Temperature swings and faster food spoilage
Replacement overview
Gasket replacement is one of those jobs that sounds intimidating but is usually straightforward. The biggest trick is ordering the correct part and giving the new gasket time to relax into shape.
Step 1: Find your model number
Look for a sticker inside the fridge compartment (often on a side wall), sometimes inside the crisper area, or on the door frame. Write down the full model number and serial number.
Step 2: Buy the correct gasket
- Use the model number to order the exact gasket. “Close enough” often is not.
- Choose OEM when you can. Aftermarket can work, but fit is everything with gaskets.
- Expect a typical price range of about $40 to $150, and more for premium or built-in units.
Step 3: Know how it attaches
Most refrigerators use one of these:
- Push-in (barbed/dart) gasket: presses into a channel in the door.
- Retainer under an inner panel: the gasket is captured by an inner liner, sometimes with screws around the perimeter.
- Snap-on retainer: a trim strip or retainer holds the gasket in place.
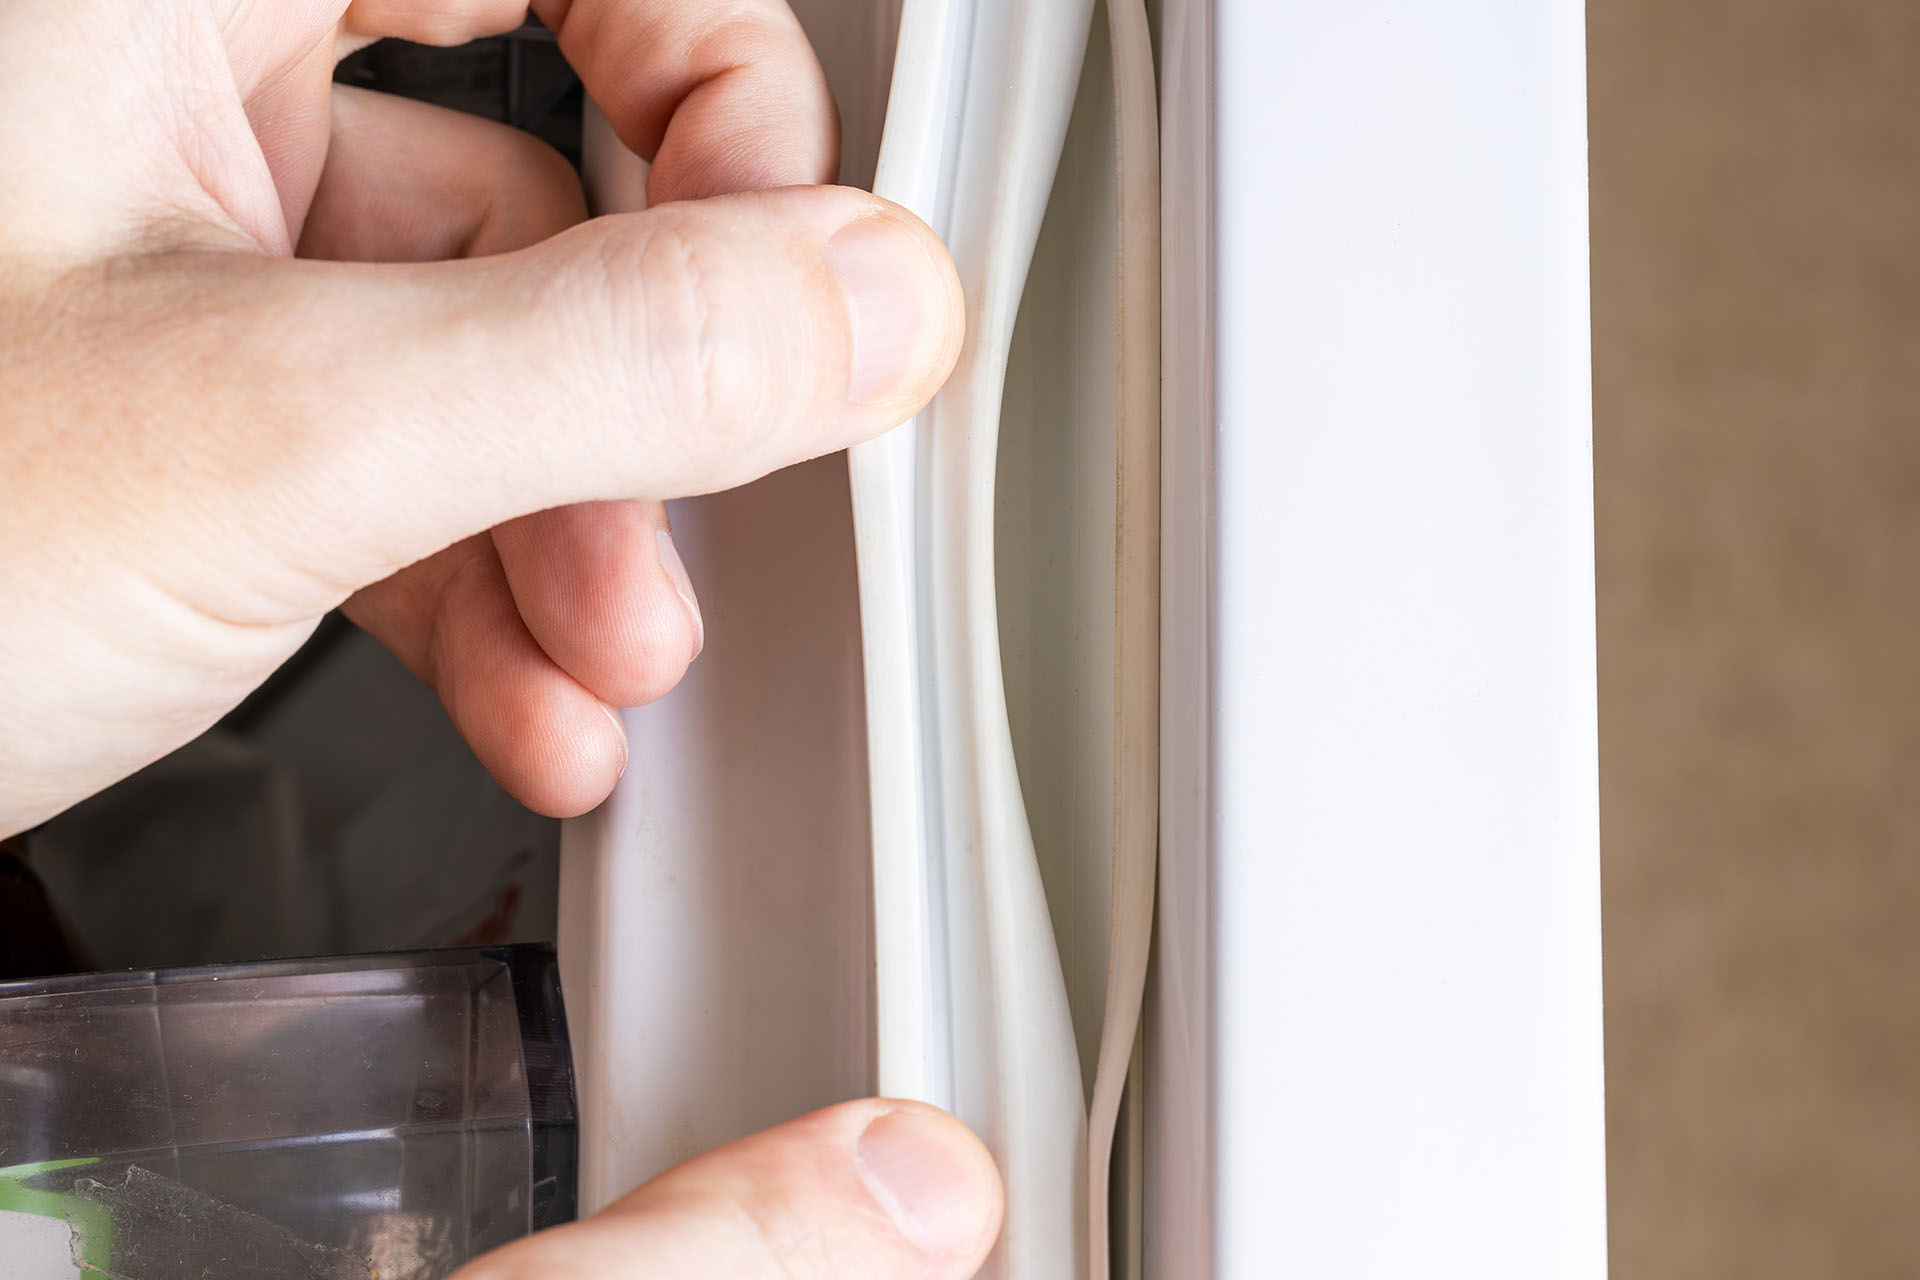
If you are unsure, pull gently on a corner. If it pops out of a groove, it is likely a push-in style. If it feels trapped under the inner panel, look for screws along the inside edge of the door.
Step 4: Remove the old gasket
- Unplug the fridge if your hands will be near wiring or fans, or if you will be working slowly with the door open.
- Start at a corner. Peel it back carefully.
- If screws are involved, loosen them just enough to free the gasket. You usually do not need to remove every screw fully.
Step 5: Prep the new gasket
- Let it sit at room temperature so wrinkles relax.
- If it arrived folded, warm it gently with a hair dryer and lay it flat for a few minutes.
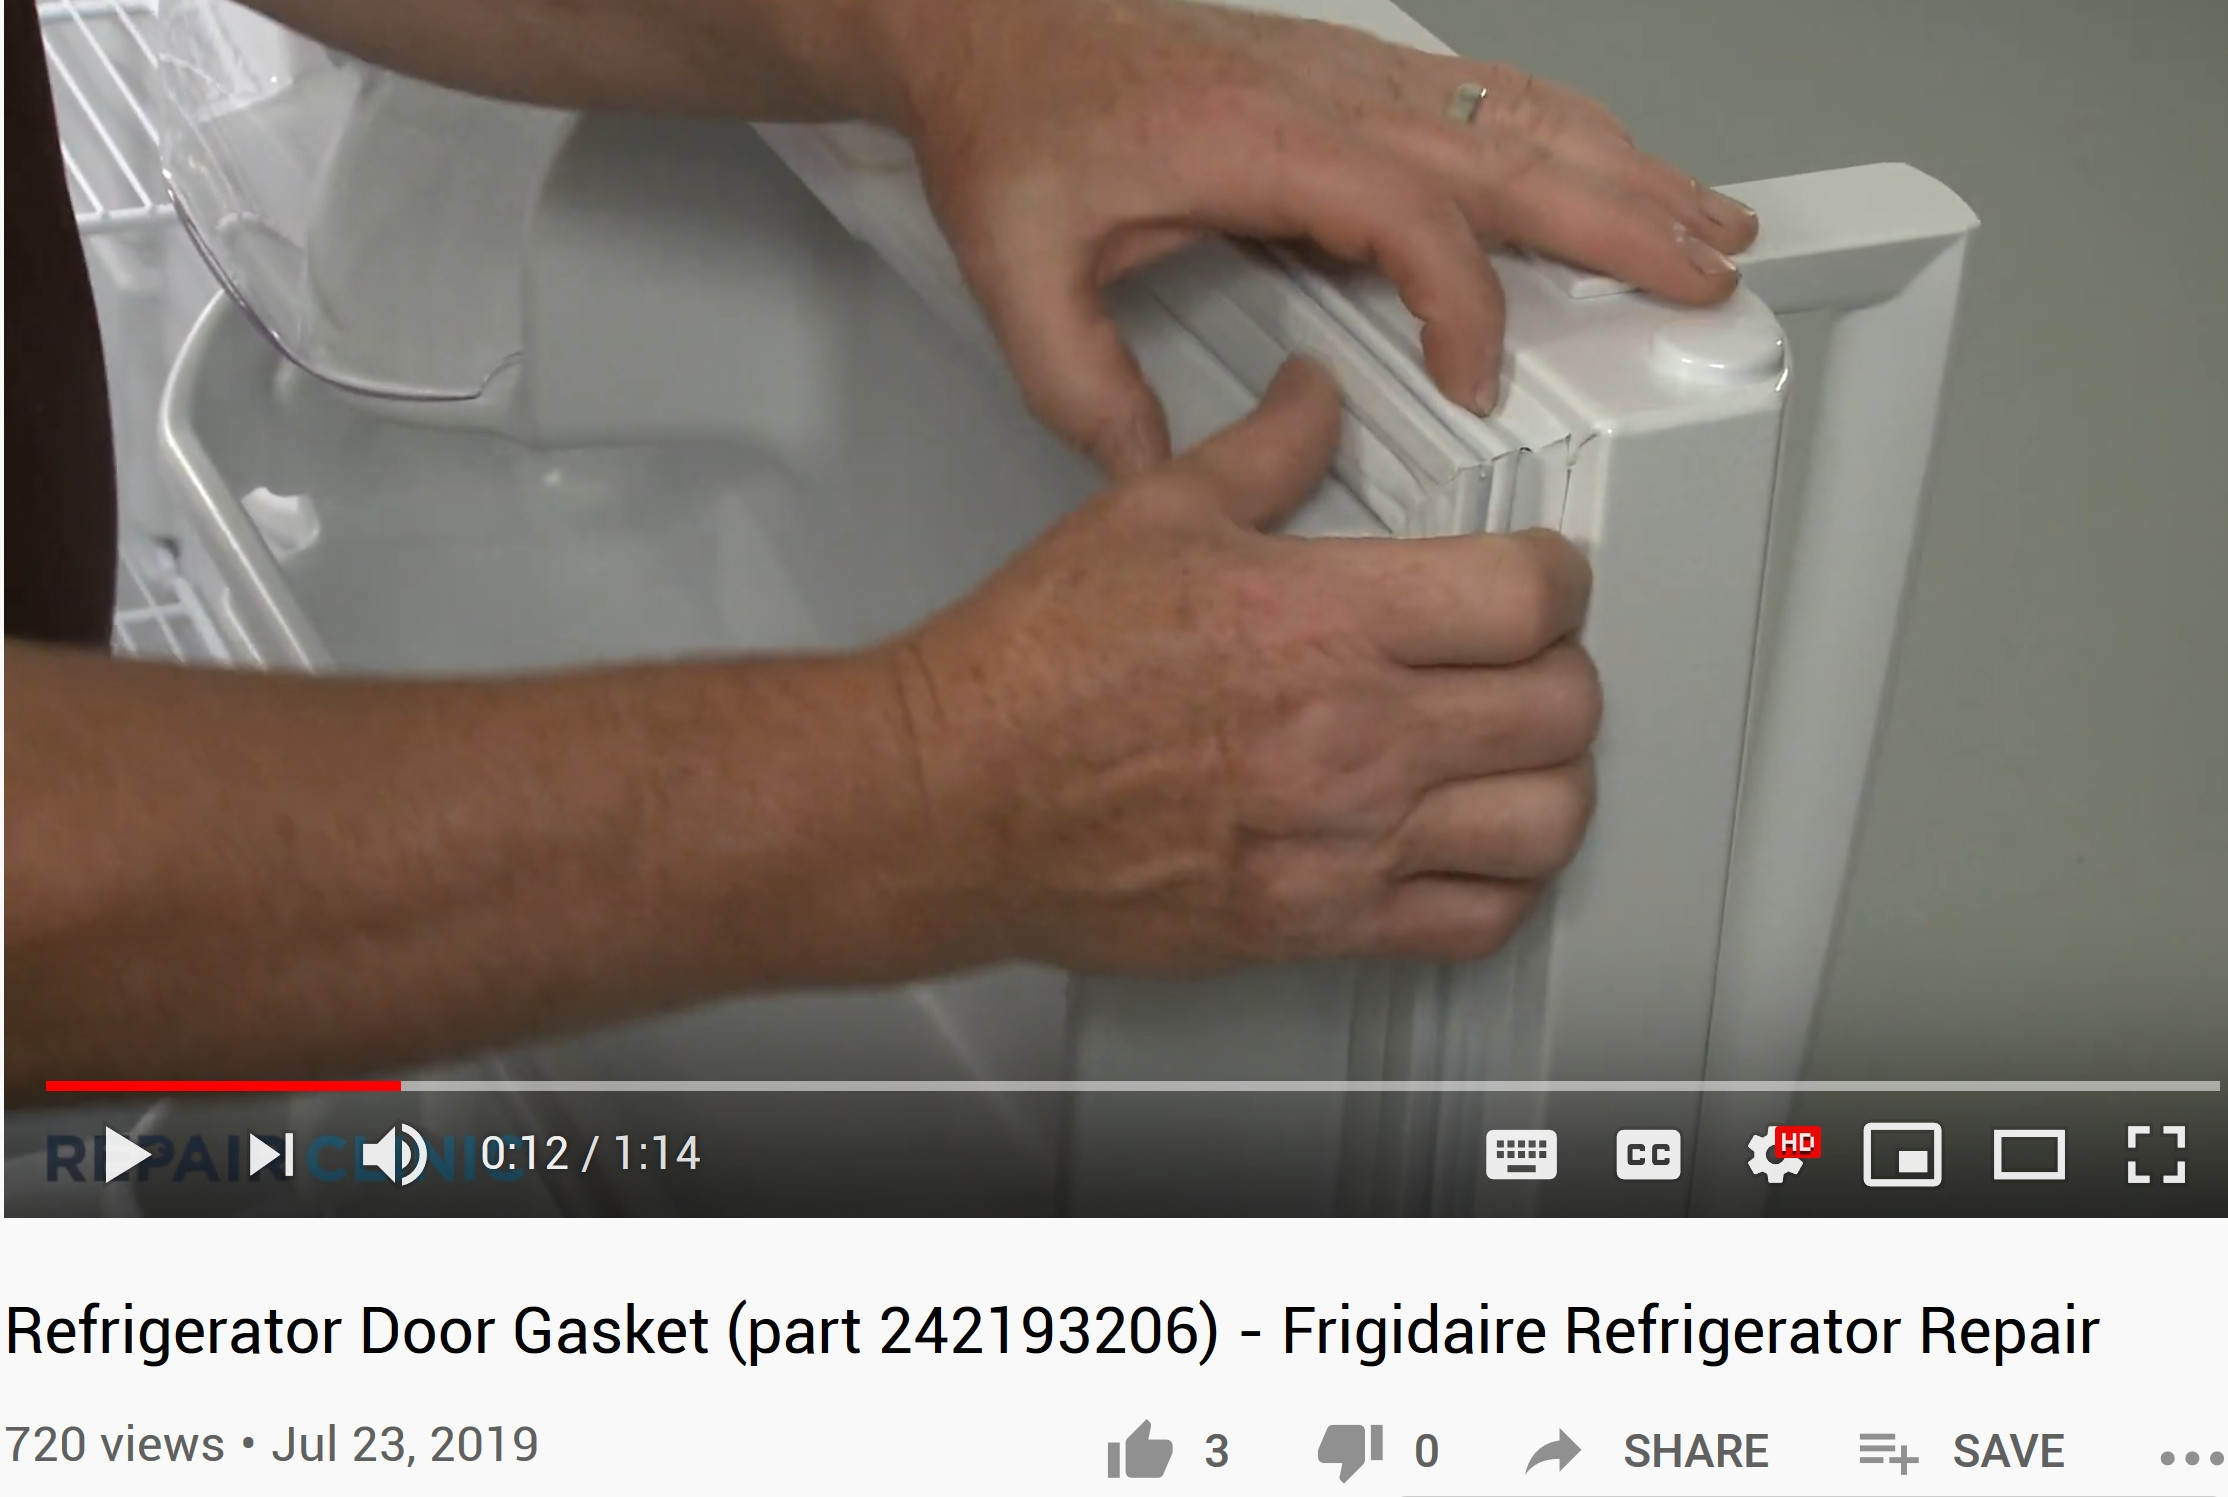
Step 6: Install and seat corners
- Confirm orientation before you start. If your gasket has a magnetic strip, it should face the fridge frame.
- Start with the top corners, then work down the sides, then finish the bottom.
- Press evenly and make sure corners are fully seated. Avoid stretching the gasket. Stretching creates gaps later.
- If there are screws, snug them gradually all around so the gasket clamps evenly.
Step 7: Train the seal and re-test
- Close the door for 15 to 30 minutes.
- Repeat the dollar-bill test all around.
- If a spot is still loose, use gentle heat and hand pressure to improve contact.
Quick reality check: A brand-new gasket can take a day to fully settle. As long as you are close and the door is closing cleanly, you are on the right track.
Why a bad seal matters
A leaky gasket is not just annoying. It can cost real money and can shorten the life of your refrigerator over time.
- Higher energy use: warm air infiltration can force longer compressor run times.
- Food waste: temperature swings can cause faster spoilage and can contribute to freezer burn.
- Ice and frost issues: extra moisture can turn into frost that can restrict airflow in freezers.
- More wear: extra run time and moisture load can add stress to cooling components.
If you want to go deeper on why run time spikes and what it can do to your utility bill, see our guide on refrigerator energy use and common causes of high run time.
Food safety quick check
If you suspect spoilage or wide temperature swings, do not guess. Use a fridge thermometer for a day.
- A common target for the fridge is about 37 to 40°F (3 to 4°C).
- A common target for the freezer is about 0°F (-18°C).
If your temps are consistently out of range, fix the sealing issue first, then reassess. If temps still do not hold, you may have a different problem going on.
Troubleshooting: not always the gasket
If the gasket passes the dollar-bill test but you still have cooling issues, look at these common culprits:
- Overstuffed fridge: blocks vents and prevents proper airflow.
- Dirty condenser coils: makes heat rejection inefficient and can mimic “weak cooling.”
- Freezer door left cracked: often happens with a stuck drawer or ice bin.
- Door switch problems: some models run fans or lights incorrectly when the switch is failing.
Condensation note: Door “sweating” is not always a gasket leak. High humidity, frequent opening, and, on some models, a door heater circuit that is not working can also cause moisture on the exterior edges.
If you are seeing heavy frost behind a freezer panel or the fridge section is warm while the freezer is cold, you may be dealing with a defrost issue rather than a seal problem.
Quick FAQ
Can I glue a torn gasket?
You can sometimes patch a tiny tear as a temporary fix, but it rarely lasts. Once the sealing lip is compromised, replacement is the reliable solution.
Should I use petroleum jelly on the gasket?
I do not recommend it. It can attract dirt and may not play nicely with some gasket materials over time. Stick to cleaning, alignment, and reshaping. If you need lubrication for sticking, a very light wipe of food-grade silicone can be safer, but only after confirming the gasket material and manufacturer guidance.
How long does gasket replacement take?
Most DIYers can do it in 30 to 90 minutes, depending on door style and how stubborn the old gasket is.
My checklist
- Run the dollar-bill test all around the door (and confirm with the flashlight test if needed)
- Clean gasket folds and the fridge frame
- Confirm the door closes cleanly (leveling and hinge design both matter)
- Tighten hinges and check for sag
- Try gentle heat reshaping on loose corners
- If you find tears, brittle rubber, or persistent warping, replace using your model number
If you get stuck, take a clear photo of the gasket corner and the hinge area and compare it to your model’s parts diagram. That one step can save you from ordering the wrong seal and doing the job twice.
About Marcus Vance
Content Creator @ Grit & Home
Marcus Vance is a lifelong DIY enthusiast and self-taught home renovator who has spent the last decade transforming a dilapidated 1970s ranch into his family's dream home. He specializes in budget-friendly carpentry, room-by-room renovations, and demystifying power tools for beginners. Through his writing, Marcus shares practical tutorials and hard-learned lessons to help homeowners tackle their own projects with confidence.