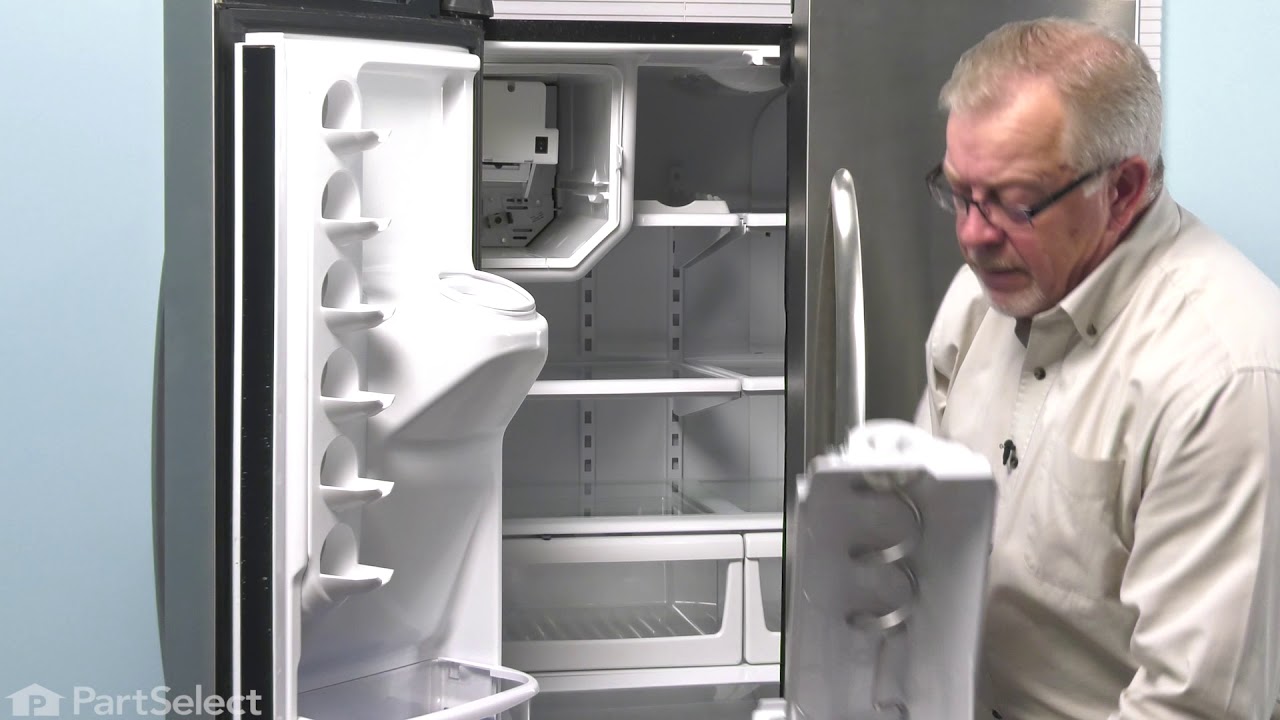
If your refrigerator’s ice bin is frozen solid or glued into the freezer like it grew there, you’re not alone. I’ve been there, tugging on a plastic bucket like it’s a stubborn paint can, wondering how much force is too much.
The good news: most stuck ice bins come down to a few predictable problems like ice bridging, auger jams, a bin that isn’t seated correctly, or frost buildup from warm air sneaking in. The goal is to thaw and free it without cracking the bin, warping the liner, or damaging the dispenser parts.
Before you pull hard: 60-second safety checks
- Stop forcing it. Ice bins and freezer liners crack more easily than you’d think, especially when cold.
- Turn off the ice maker. Use the switch or the control panel setting so it doesn’t keep trying to harvest ice while you work.
- Move perishable food if you’ll be in there a while. If you expect this to take more than 10 to 15 minutes, put ice cream, seafood, and other highly perishable items in a cooler (or the fridge section) so they don’t start thawing.
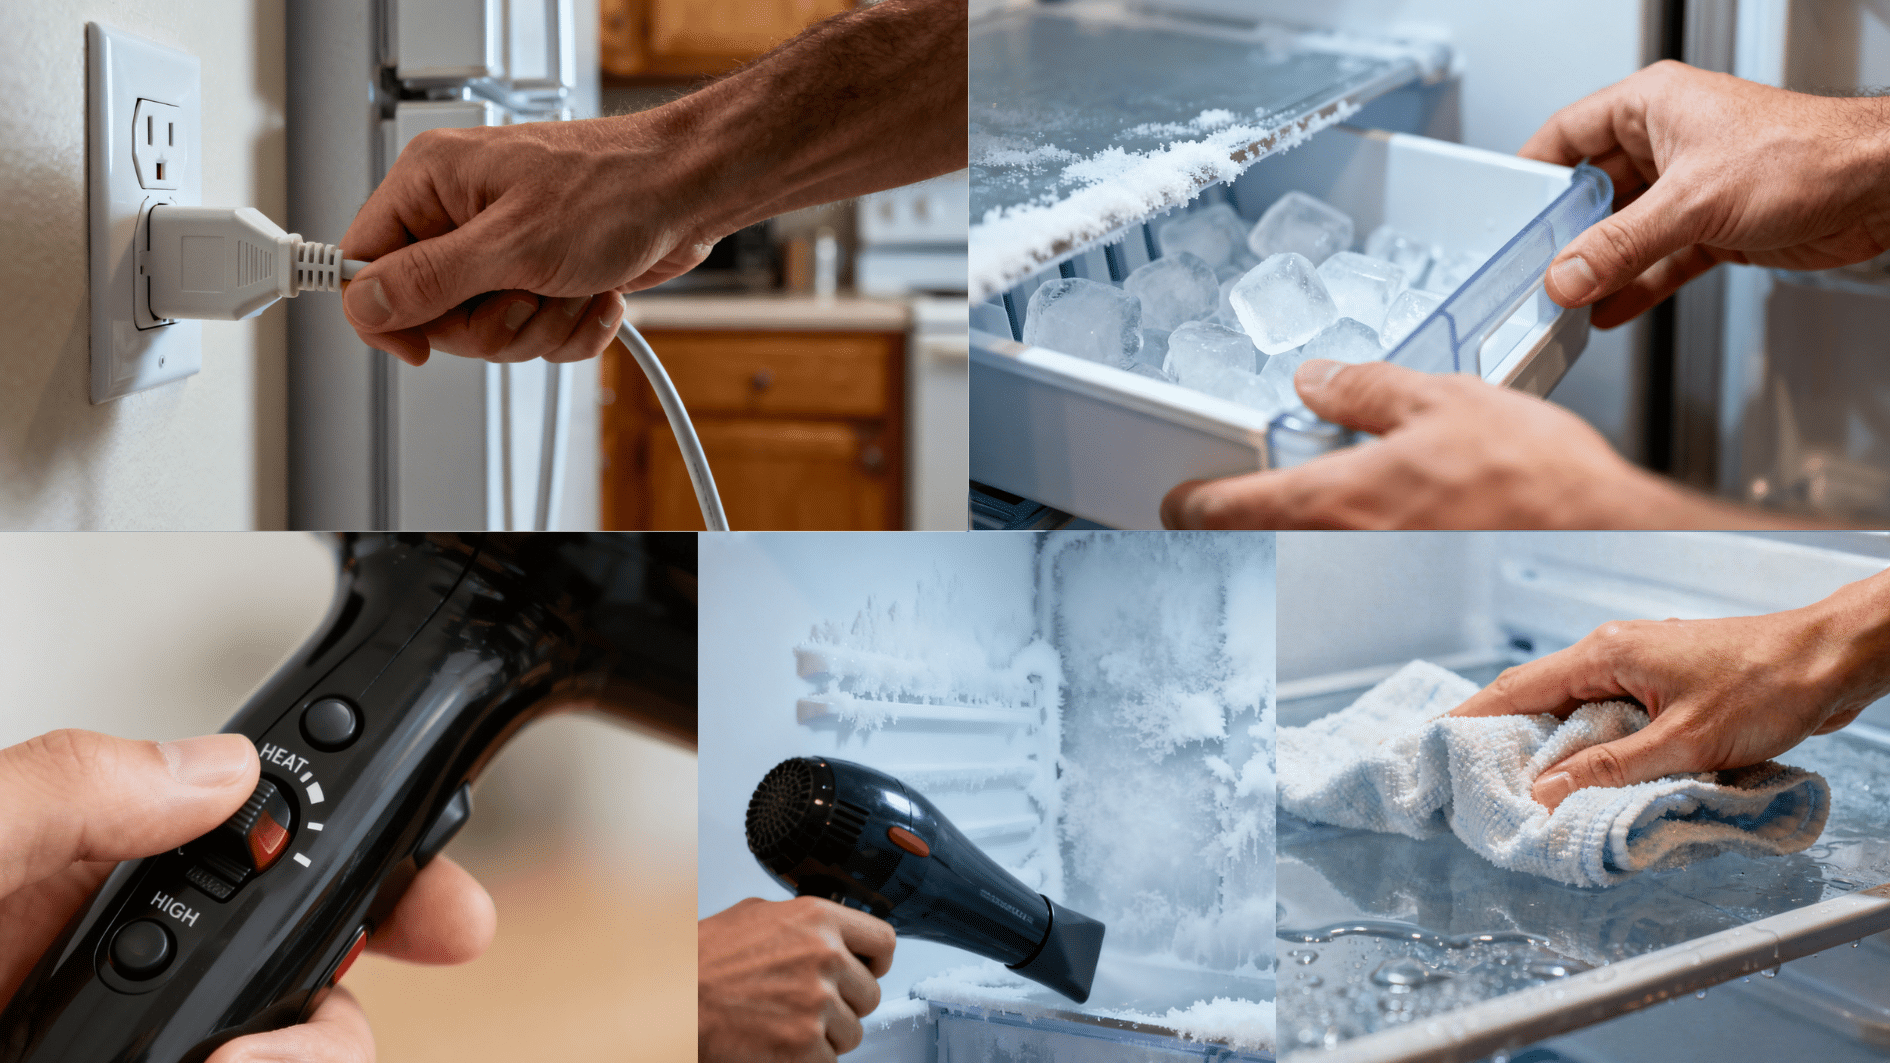
- If you’ll use any heat tool, unplug the fridge. A hair dryer and a wet freezer are not a time to gamble.
- Protect your floor. Lay down a towel and a shallow pan. Thawing makes a surprising amount of water.
- No sharp tools. No screwdrivers, ice picks, or knives. They crack plastic and puncture liners.
- Check for a latch or lock. Some bins have a release button, a tab, or a lift-then-pull motion. If something feels like it’s catching, look for a small lever or locking clip before you try again.
Quick reality check: If you still have the manual, look up “ice bucket removal” for your model number. If you don’t, search your model number plus “ice bin removal.”
What’s happening (and why it won’t budge)
Ice bridging
Loose cubes partially melt and refreeze into a single ice brick. This can lock the bin to the auger, the chute area, or the bin rails.
Auger jam
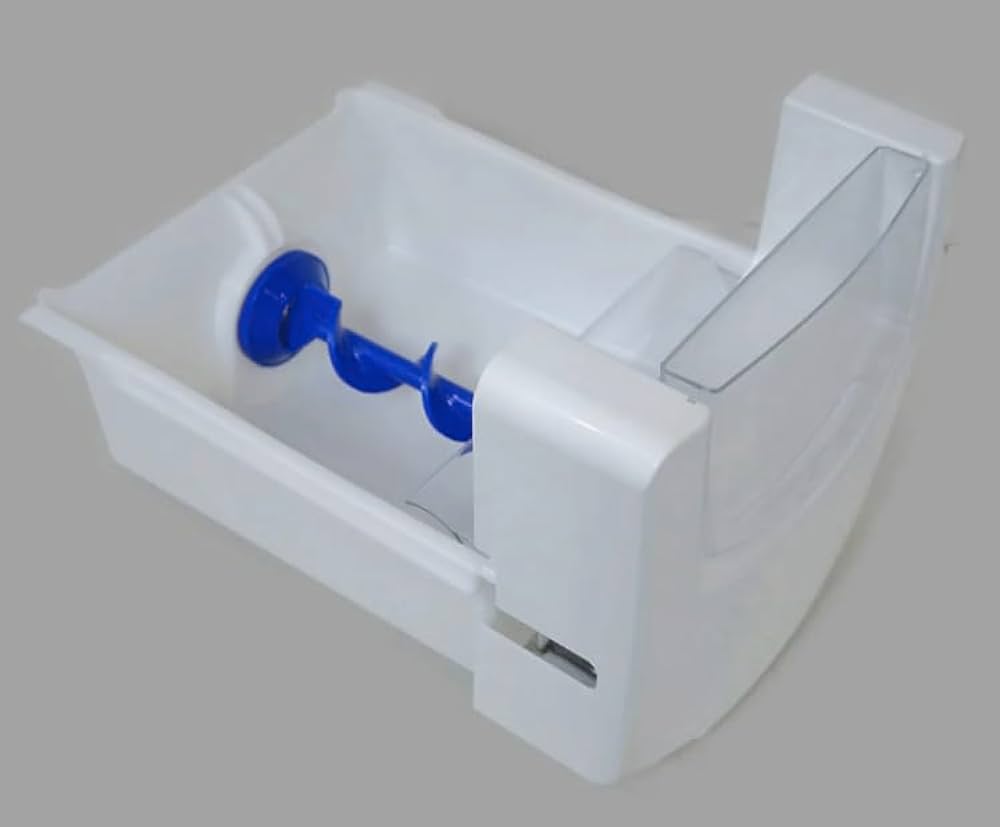
The auger is the corkscrew or paddle inside the bin that pushes ice toward the dispenser. A chunk of ice or frost can wedge it, making the bin feel “stuck” even if it isn’t frozen to the freezer wall.
Misaligned bin
If the bin isn’t seated on its rails or coupler correctly, it can bind. Sometimes it only takes a slightly crooked install after refilling.
Iced-over drive yoke or coupler
Many dispensers use a drive coupler (often a square or D-shaped socket) that mates the bin to the auger motor. If that drive area frosts up, it can “lock” the bin in place even when the rails look clear.
Stuck dispenser door
The little flap inside the dispenser chute can freeze open or closed. When it sticks open, warm air gets in and creates frost and refreeze issues that snowball.
Frost from a warm-air leak
A door that isn’t sealing, a door left ajar, or a leaky gasket lets humid kitchen air rush in. That moisture becomes frost, which becomes “glue” around bins and rails. For gasket-specific troubleshooting, see our refrigerator door gasket guide (linked in the related section below).
Safest way to free a frozen ice bin
This is my go-to sequence because it uses gentle heat and patience, not brute force. Plan on 15 to 45 minutes depending on how bad the freeze is.
Step 1: Open briefly and make space
- Open the freezer and give it 1 to 3 minutes so you can see what’s going on and work comfortably.
- Remove nearby items so you don’t soak food packaging and you can reach the bin from both sides.
Tip: Try not to leave the freezer wide open for long stretches. The longer it’s open, the more warm, humid air gets in, and that humidity can refreeze later.
Step 2: Warm towel on the contact points
- Soak a towel in warm (not boiling) water and wring it so it’s not dripping.
- Press it against the bin’s edges where it meets the rails, floor, or side walls.
- Refresh with warm water as it cools.
Why this works: You’re melting the thin ice layer bonding plastic to plastic, not trying to melt the entire ice load inside the bin.
Step 3: Gentle wiggle, not a yank
- Grip both sides of the bin.
- Try a small left-right wiggle, then a slight lift and pull. Keep the movement short and controlled.
- If it doesn’t move, go back to the warm towel for a couple minutes and try again.
Step 4: Thaw the drive area if it’s binding
If the bin moves a little but feels “hooked” at the back or side, the drive coupler may be iced over. Look for the drive point where the bin connects to the motor, often a square or D-shaped socket or post near the back. Hold a warm towel against that area for a minute or two, then try the gentle wiggle again.
Step 5: Hair dryer (only if allowed)
If towels aren’t enough, a hair dryer can help, but some manufacturers warn against it. If your manual prohibits it, skip this and stick with warm towels and time.
- Unplug the refrigerator first.
- Set dryer to low heat, low fan.
- Hold it 8 to 12 inches away and keep it moving.
- Focus on the bin’s contact points, rails, and the drive coupler area. Avoid blasting one spot on the liner.
- Dry up meltwater with a towel as you go.
Do not use: heat guns, torches, boiling water poured into the freezer, or chiseling tools. That’s how liners warp and bins crack.
Once it’s out: clear the ice and auger
Thaw the bin in the sink
- Carry the bin to the sink or tub.
- Let it sit 10 to 20 minutes, or rinse the outside with warm water.
- Dump the ice. If it’s bridged into a solid block, let it soften and break apart with your hands.
Check the auger and coupler
- Look for a chunk of ice lodged around the auger or at the front where it meets the dispenser opening.
- If your model allows, spin the auger by hand. It should turn with steady resistance, not feel locked solid.
- Check the coupler where the bin mates to the motor. It’s often a square or D-shaped drive that can get frosty and bind.
- Wipe everything dry. Water left in the bin becomes next week’s jam.
Fix the cause so it doesn’t refreeze
1) Reseat the bin
- Slide it in slowly on both rails.
- Make sure it sits flat and fully back so the coupler engages.
- If it sits crooked, pull it out and try again. Forcing it often causes binding.
2) Clear the chute and check the flap
- Open the little flap in the ice chute and check for frost or a cube wedged in the doorway.
- Wipe away frost with a warm cloth.
- If the flap feels sticky or slow, it may be letting warm air into the freezer section.
3) Check for warm-air leaks
- Run your fingers along the door seal. If you feel gaps, that’s a red flag.
- Try the paper test: close the door on a dollar bill. If it slides out easily, the seal may not be tight in that spot.
If you suspect the seal is the root problem, jump to our refrigerator door gasket troubleshooting article for cleaning, reshaping, and replacement pointers.
4) Confirm freezer temp is in range
Many manufacturers recommend around 0°F (about -18°C), and some guidance allows a small range (often a few degrees above that). If the freezer runs too warm, cubes partially melt and refreeze into clumps. If humid air is leaking in, colder surfaces can also make that moisture freeze faster around entry points, which means more frost buildup where you least want it.
5) If you have a warm-air leak, pause ice for a bit
If the flap or gasket is clearly leaking, it can help to turn off the ice maker and empty the bin for several hours (or overnight) until the leak is fixed and the area dries out. Otherwise you’re fighting the same melt and refreeze cycle on repeat.
Fast troubleshooting
- Bin won’t pull out at all: Frozen to rails or floor, or a rear coupler is bound. Warm towel at contact points first, then the drive area.
- Bin pulls out slightly, then stops hard: Often an ice bridge at the front near the chute, a latch you missed, or a misaligned rail.
- Dispenser hums but no ice comes out: Auger jam or an ice brick inside the bin.
- Crushed ice works, cubes don’t (or vice versa): Ice type gate stuck or ice packed in one side of the bin.
- Lots of frost around the bin area: Warm-air leak through the door seal, chute flap not closing, or the freezer was left ajar.
What not to do
- Do not pry with a screwdriver. One slip can crack the bin, gouge the liner, or puncture a hidden evaporator cover.
- Do not pour boiling water into the freezer. Thermal shock can warp plastic and create new cracks that collect frost later.
- Do not chip ice off the liner. The liner is thin. Once it’s damaged, it’s a permanent problem.
- Do not run a heat gun. It’s too hot, too fast for freezer plastics.
When to call for service
If you free the bin, clear the ice, and it refreezes within a day or two, something upstream is usually causing repeated melting and refreezing or excessive frost.
- Ice clumps keep returning even with a clean, dry bin
- Freezer temp swings widely or food is soft
- Dispenser door doesn’t close reliably
- You see heavy frost buildup that returns quickly after defrosting
That’s the point where a deeper ice maker diagnosis makes sense. We have a separate ice maker troubleshooting guide that walks through water fill issues, harvest cycles, and common sensor problems without guessing.
Quick prevention checklist
- Empty and rinse the bin occasionally, then dry it fully before reinstalling.
- Do not overpack ice. Let cubes tumble freely so they don’t fuse.
- Make sure the bin is seated squarely every time.
- Keep the dispenser chute area free of frost and crumbs.
- Address door seal issues early before they turn into constant frost.
About Marcus Vance
Content Creator @ Grit & Home
Marcus Vance is a lifelong DIY enthusiast and self-taught home renovator who has spent the last decade transforming a dilapidated 1970s ranch into his family's dream home. He specializes in budget-friendly carpentry, room-by-room renovations, and demystifying power tools for beginners. Through his writing, Marcus shares practical tutorials and hard-learned lessons to help homeowners tackle their own projects with confidence.