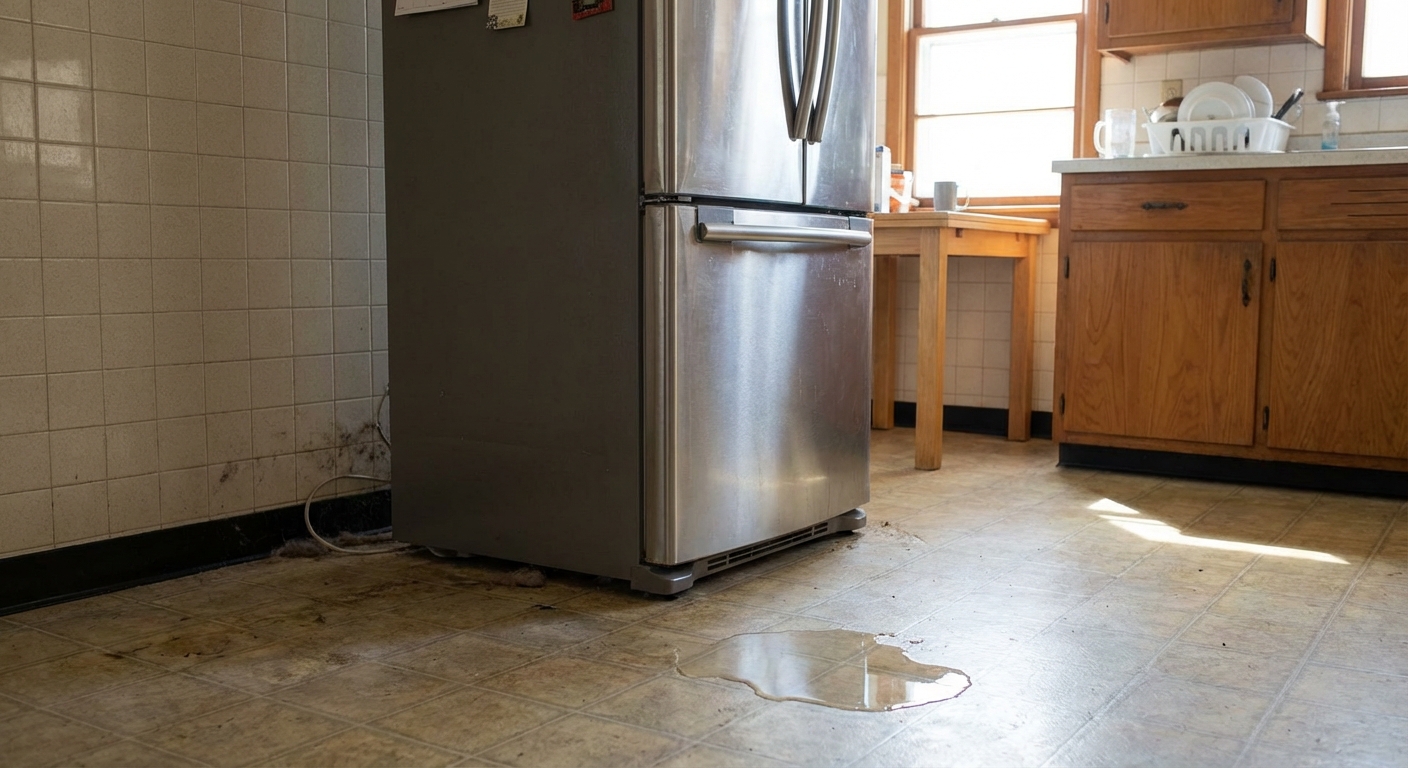
Finding water around the fridge feels like one of those problems that could be anything. The good news is that most refrigerator leaks come from a short list of usual suspects, and you can diagnose them with a flashlight, a couple towels, and a little patience.
I've chased this exact issue more than once in my 1970s ranch. The first time, I replaced a part I didn't need because I skipped the simple checks. Let's save you that money and the hassle.
Safety first and a quick check
Before you start
- Unplug the fridge before removing panels or working near wiring.
- Turn off the water supply if your fridge has an ice maker or water dispenser. Usually it's a small shutoff valve under the sink, in the basement, or behind the fridge.
- Put down old towels and keep a shallow pan nearby.
Step 0: Confirm it's actually from the fridge
This takes two minutes and can save you a lot of chasing your tail.
- Dry the floor completely and wipe the fridge underside and nearby baseboards.
- Place a paper towel or a sheet of cardboard under the front and another under the back. Check which one gets wet first.
- Check the obvious: spilled drinks, wet produce drawers, a pet bowl nearby, or a sink/dishwasher drip that runs toward the fridge.
Locate the leak zone
Use this quick check to narrow things down:
- Water inside the fridge (under crisper drawers): often a clogged defrost drain.
- Water under the front: often an internal overflow that runs forward, or a filter/dispenser leak. A door seal issue is usually indirect (extra condensation and frost that later melts).
- Water under the back: often a supply line, inlet valve, ice maker fill issue, or drain pan problem.
Quick leveling check
If the fridge isn't level, water can pool and run where it shouldn't. Many manufacturers want the front slightly higher than the back so doors self-close and drainage behaves.
- Put a small level on a shelf or check that the doors gently swing shut from halfway open.
- Adjust the front leveling legs if needed (a little goes a long way).
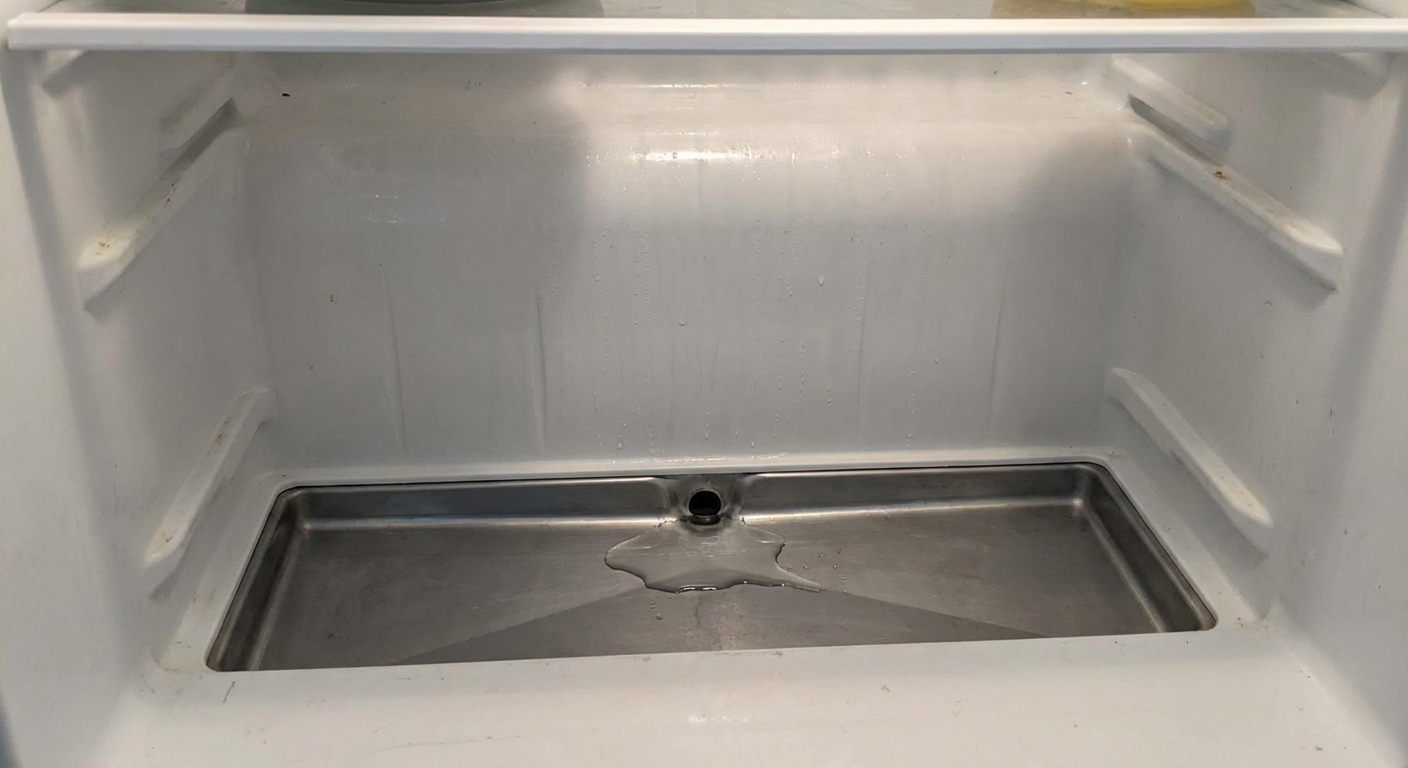
Cause #1: Clogged defrost drain
If you've ever found a sheet of ice under the bottom drawer or a little pond under the crisper, this is the first thing I check. During the defrost cycle, melted frost is supposed to run down a small drain hole, through a tube, and into the drain pan below. When that drain clogs with food bits, slime, or ice, water backs up into the fridge and eventually spills out.
How to confirm it
- Remove the crisper drawers.
- Look for standing water on the floor of the fridge compartment or an icy buildup near the back wall.
- Find the drain hole or trough (location varies by model, often centered at the back near the bottom).
Fix: Clear the drain safely
- Thaw ice first: Leave the fridge unplugged with the doors open for 30 to 60 minutes, or use a hair dryer on low, moving constantly and keeping it away from plastic.
- Flush the drain: Use a turkey baster or squeeze bottle with hot water to force water down the drain hole. Repeat until it drains freely.
- Clear the tube: If it still won't drain, the clog may be in the tube behind the fridge. Some models let you access the drain tube from the rear service panel. You can gently run a flexible plastic tube or pipe cleaner through it.
Pro tip: A mix of hot water with a small amount of baking soda can help break down gunk, but skip harsh chemicals. You don't want fumes or residue where food lives.
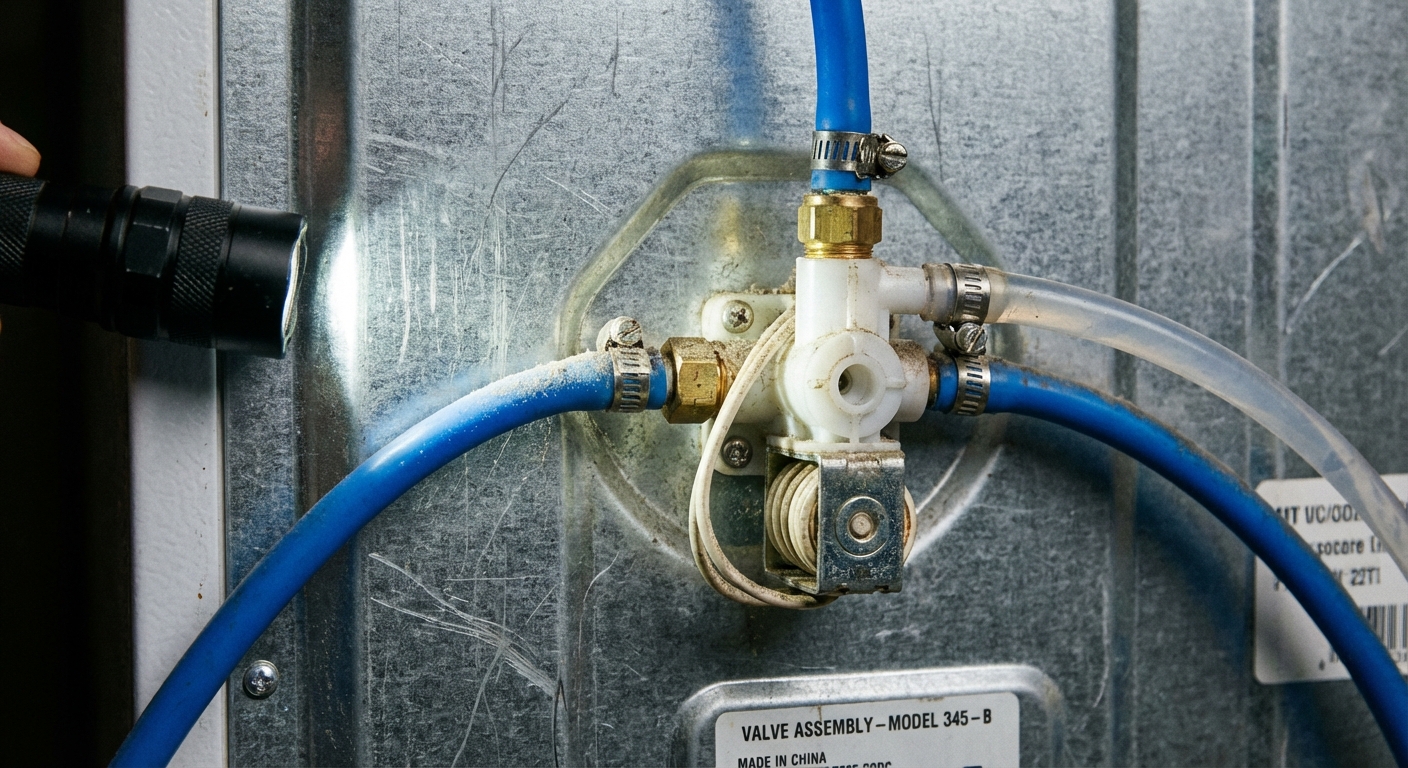
Cause #2: Cracked or loose water supply line
If your fridge has a water dispenser or ice maker, it has a supply line. A slow seep from a cracked plastic line or a loose compression fitting can make a surprisingly big puddle over a day or two.
How to confirm it
- Pull the fridge out and look for water tracks on the floor starting near the back. (They often look like a faint shiny trail or a dusty “clean” path through floor grime.)
- Check the tubing connection at the wall valve and at the back of the refrigerator.
- Dry everything, then watch for a fresh bead of water forming.
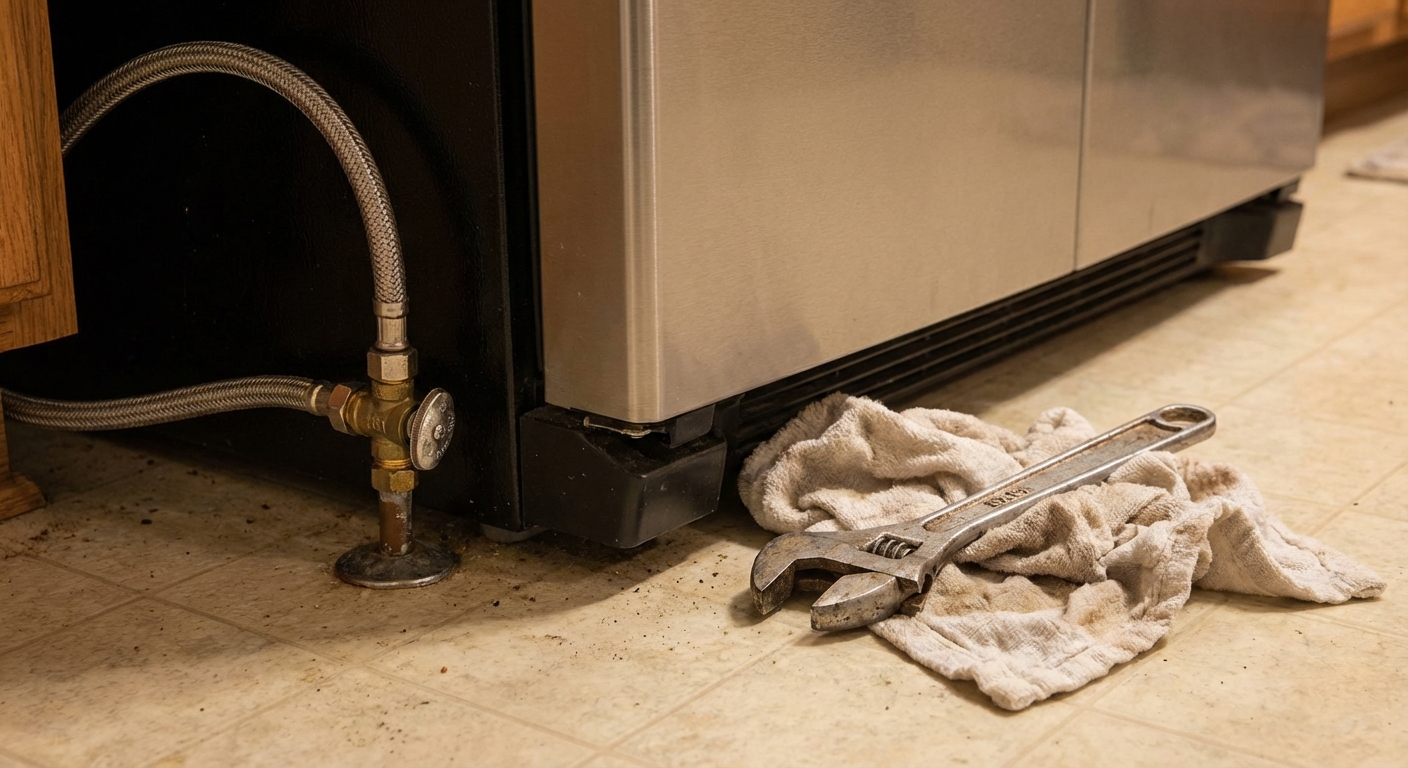
Fix: Tighten or replace the line
- Shut off the water at the valve.
- Inspect the line type: copper, braided stainless, or plastic.
- Tighten gently if the fitting is loose. Don't crank down hard, especially on plastic fittings.
- Replace damaged tubing. If you have plastic, consider upgrading to braided stainless for durability.
- If you have push-to-connect fittings: make sure the tubing end is cut square (not angled) and fully seated. If the fitting looks worn or won't seal after reseating, replace the fitting.
What I use: A braided stainless fridge line plus a new quarter-turn shutoff valve if the old valve is crusty or hard to turn. It costs more than plastic, but it's cheaper than a wet floor.
Cause #3: Faulty water inlet valve
The water inlet valve is an electrically controlled valve at the back of the fridge that feeds water to the dispenser and ice maker. When it cracks, sticks, or a connection loosens at the valve body, you can get leaks that show up under the back of the fridge, sometimes only during ice maker fill cycles.
How to confirm it
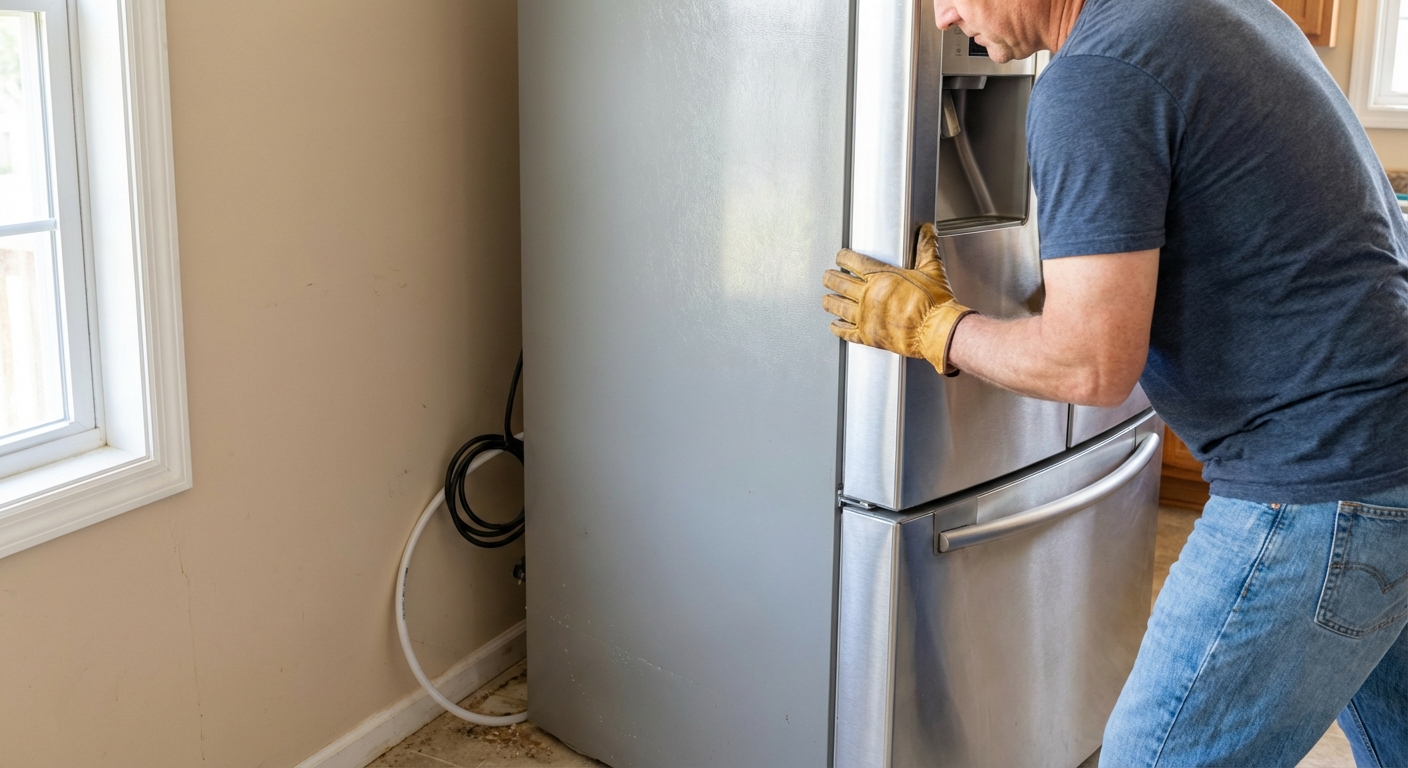
- Unplug the fridge and pull it out.
- Find the inlet valve where the supply line connects to the fridge (usually low on the back).
- Look for mineral deposits, moisture, or cracks on the valve housing. (Mineral deposits often look like white, chalky crust or greenish buildup around fittings.)
- Turn the water back on briefly and watch the valve area for seepage.
Fix: Replace the inlet valve
- Unplug the fridge and shut off the water.
- Remove the rear access panel (typically a few screws).
- Take a photo of tubing and wire connections so you can put everything back correctly.
- Disconnect the water lines (have a towel ready) and the wiring harness.
- Swap in the exact matching part number for your model, then reconnect everything firmly.
- Turn water on and check carefully for leaks before pushing the fridge back.
When to call a pro: If you see damaged wiring, burnt connectors, or you're not sure you can identify the right valve for your exact model.
Cause #4: Drain pan issues
Most refrigerators have a drain pan underneath that catches defrost water. The warm air under the fridge helps it evaporate. If the pan is cracked or knocked out of place, it can spill onto the floor. In some homes, evaporation can also fall behind (high humidity, poor airflow, or a dusty condenser area), making the pan look “too full” for longer than you'd expect.
Model note: Some modern fridges use non-removable pans or internal evaporation setups. Access and removal vary by model, so your manual or a model-specific diagram helps here.
How to confirm it
- With the fridge pulled out, look underneath from the back with a flashlight.
- Check if the pan is centered and seated correctly on its rails or supports.
- Look for cracks, heavy grime, or water that seems to be sloshing over an edge.
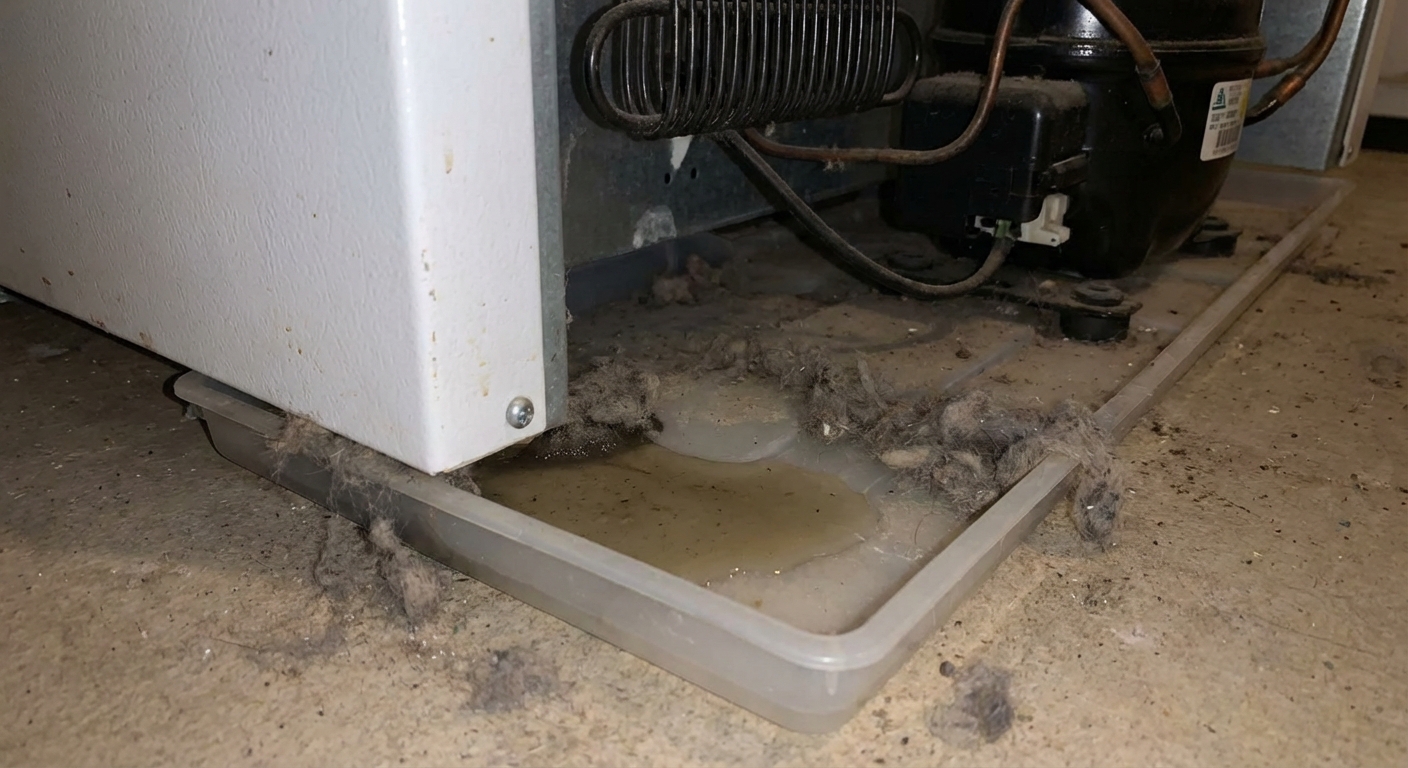
Fix: Clean, reposition, or replace
- Slide the pan out if your model allows it. Some pans aren't removable without extra disassembly.
- Wash with warm soapy water, dry it, and reinstall it level.
- If the pan is cracked or warped, replace it.
- If the pan area is packed with dust, vacuum the condenser area (gently). Better airflow helps evaporation.
Thrifty note: Don't try to “patch” a cracked pan with random glue. It rarely holds long-term with heat cycles and vibration.
Cause #5: Door seal (gasket) problems
A bad gasket can cause leaking in a sneaky way. When warm, humid air leaks in, it can create excess condensation and frost. That extra moisture can overwhelm the normal defrost drainage and show up as water inside the fridge or on the floor near the front.
How to confirm it
- Inspect the gasket for tears, gaps, or hardened sections.
- Do the paper test: close the door on a strip of paper and tug. If it slides out easily, the seal is weak in that spot.
- Look for condensation on shelves or frequent frost buildup.
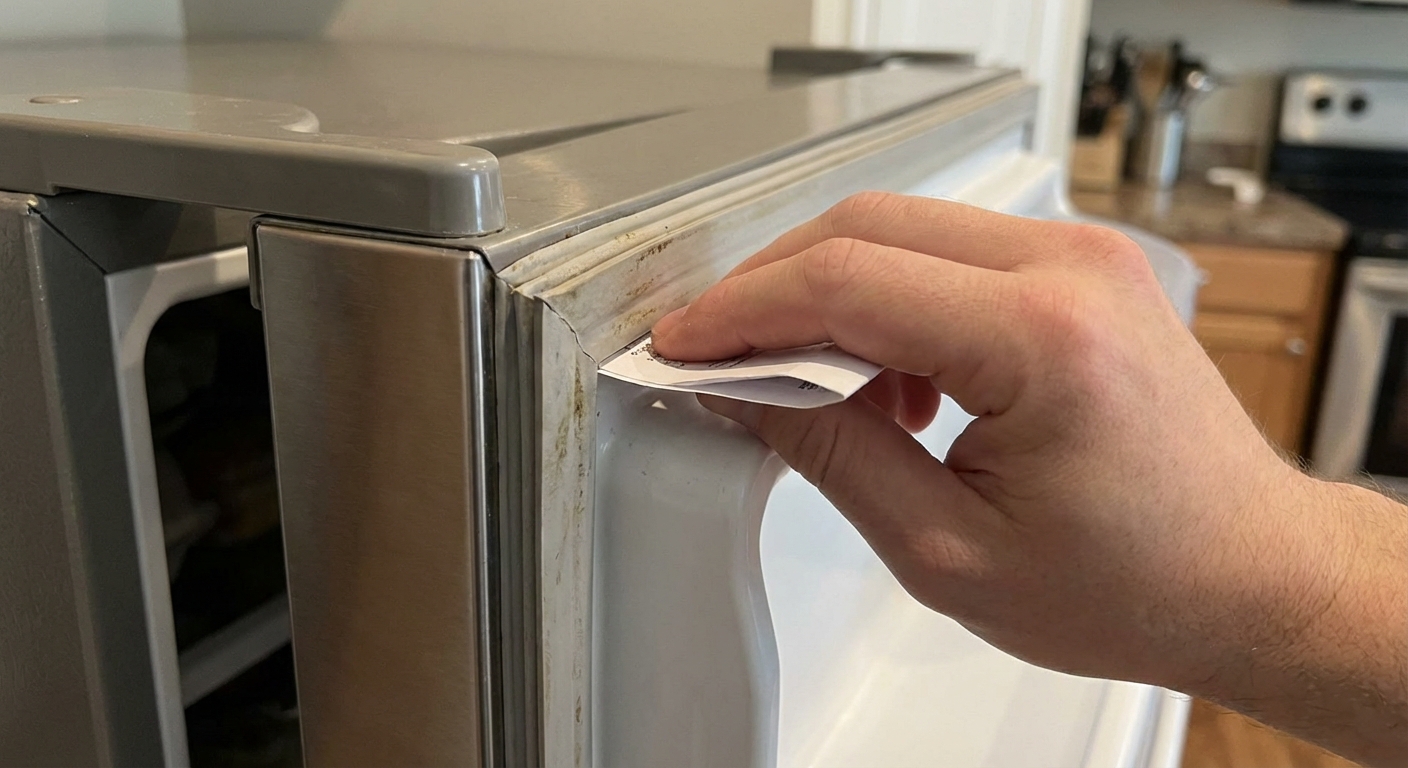
Fix: Clean, soften, or replace the gasket
- Clean first: warm water and a drop of dish soap, then dry thoroughly.
- Soften and reshape: gently warm the gasket with a hair dryer on low and massage it back into shape.
- Replace if it's torn or permanently deformed. Order by model number for the correct fit.
My mistake to avoid: I once tried to “live with” a curled corner seal. It cost me more in food spoilage and ice buildup than the gasket would've.
Cause #6: Ice maker fill tube issues
If the leak seems random or only shows up around ice making, don't skip the fill tube. A frozen, cracked, or misaligned fill tube can cause water to spray or drip outside the ice maker mold. That water can freeze, then melt later and look like a mystery leak.
How to confirm it
- Look at the ice maker area for a lump of ice near the fill tube or behind the ice maker.
- Check for ice cubes fused together or an ice slab in the bin, which can hint at splashing.
- If you can safely see it during a fill cycle, look for water missing the mold.
Fix: Thaw and correct the cause
- Thaw the tube: unplug the fridge and let it thaw, or carefully use a hair dryer on low.
- Check alignment: make sure the fill tube points into the ice maker cup/mold.
- If it refreezes: the inlet valve may be seeping and slowly icing the tube shut, which points you back to Cause #3.
Cause #7: Water filter or dispenser leaks
On some models, a poorly seated filter or a cracked filter head can drip and run down inside the cabinet, then show up as a front puddle that doesn't seem connected to anything.
How to confirm it
- Check the filter area for moisture, drips, or a small trail of dried mineral crust.
- Remove and reinstall the filter firmly (follow the arrows and stop points). Then dispense a few cups of water and watch for leaks.
Fix: Reseat or replace parts
- Reseat the filter and make sure it's fully locked in.
- Replace the filter if the O-rings look damaged or the filter housing won't seal.
- If the filter head is cracked or the housing leaks, replace the housing assembly for your model.
Fast troubleshooting: match the symptom
- Water under crisper drawers: clogged defrost drain (most common).
- Puddle behind fridge: supply line, inlet valve, ice maker fill tube, sometimes drain pan.
- Puddle in front of fridge: internal overflow running forward, filter/dispenser leak, or condensation from a weak gasket.
- Only leaks when ice maker runs: inlet valve, supply fittings, or fill tube splash/freeze.
- Leak worse on humid days or with lots of door opening: condensation load plus gasket or leveling issues.
When to call for service
DIY is great, but I'm also a big believer in knowing when to tap out and hand it to a pro.
- You have a built-in refrigerator that's hard to pull out safely.
- You see water near electrical components and can't safely access them.
- The leak continues after you've verified the drain, line, valve, and filter area.
- There are signs of a cooling problem along with heavy frosting (not common for simple leaks, but it can point to bigger issues).
If you do call a tech, tell them exactly where the water appears and when it happens. That detail saves diagnostic time and often saves you money.
Tools and supplies I keep on hand
- Flashlight or headlamp
- Old towels and a shallow pan
- Phillips screwdriver or nut driver (varies by model)
- Turkey baster or squeeze bottle for flushing the drain
- Pipe cleaner or flexible plastic tubing
- Adjustable wrench
- Braided stainless water line (if yours is old plastic)
- Small level (optional, but helpful)
About Marcus Vance
Content Creator @ Grit & Home
Marcus Vance is a lifelong DIY enthusiast and self-taught home renovator who has spent the last decade transforming a dilapidated 1970s ranch into his family's dream home. He specializes in budget-friendly carpentry, room-by-room renovations, and demystifying power tools for beginners. Through his writing, Marcus shares practical tutorials and hard-learned lessons to help homeowners tackle their own projects with confidence.