
First, a quick reality check
I love a good DIY win, but refrigerators can fool you. A fridge that feels warm might just be between cooling cycles, or the freezer is working while the fridge section is starving for airflow. This page walks you from the easiest, cheapest checks to the more hands-on part swaps.
- Food-safe targets: aim for 37°F in the fridge, and keep it at or below 40°F. Freezer target is 0°F.
- Give it time: after changing settings or cleaning, allow up to 24 hours for temps to stabilize.
- Grab a thermometer: a $5 fridge thermometer beats guessing by feel.
Food safety note: If your fridge has been above 40°F for 2+ hours, follow your local food safety guidance and consider tossing high-risk perishables (milk, meat, leftovers). No DIY fix is worth food poisoning.
Safety and what to listen for
Any time you remove panels or touch wiring, unplug the fridge. If you smell burning plastic, see arcing, or the cord is damaged, stop and call a pro.
- Unplug first before pulling access covers.
- Wear gloves around sharp sheet metal edges.
- Listen: a running compressor sounds like a low hum. Fans sound like a light whir.
Fix 1: Check temperature controls
This is the easiest fix and also the most common. Controls get bumped during cleaning, kids spin them, or someone cranks the freezer colder thinking it will cool the fridge faster (it usually does not).
Difficulty
Easy
Tools needed
- Fridge thermometer (recommended)
- Flashlight
Steps
- Find the controls. They are usually inside the fridge section, sometimes in the freezer or on a top panel.
- Set fridge to 37°F (or the middle setting on a 1 to 5 dial).
- Check for a Vacation, Demo, or Showroom mode and turn it off.
- Put a thermometer in a glass of water on the middle shelf and recheck after 12 hours, then again at 24 hours if needed.
What success looks like: you hear the fridge kick on within a few minutes, and temps trend down over the next several hours.
Fix 2: Stop overstuffing and reset airflow
This one sounds too simple, but it matters. Refrigerators are basically controlled airflow boxes. If shelves are jammed tight, cold air cannot circulate and sensors read the wrong temps. The fridge runs longer, items freeze in the back, and milk still spoils on the door.
Difficulty
Easy
Tools needed
- None
Steps
- Pull items away from the back wall and any vent openings.
- Leave some open space on each shelf for air to move.
- Keep liquids and dairy toward the middle shelves, not the warm door.
- Verify temps again after 12 to 24 hours.
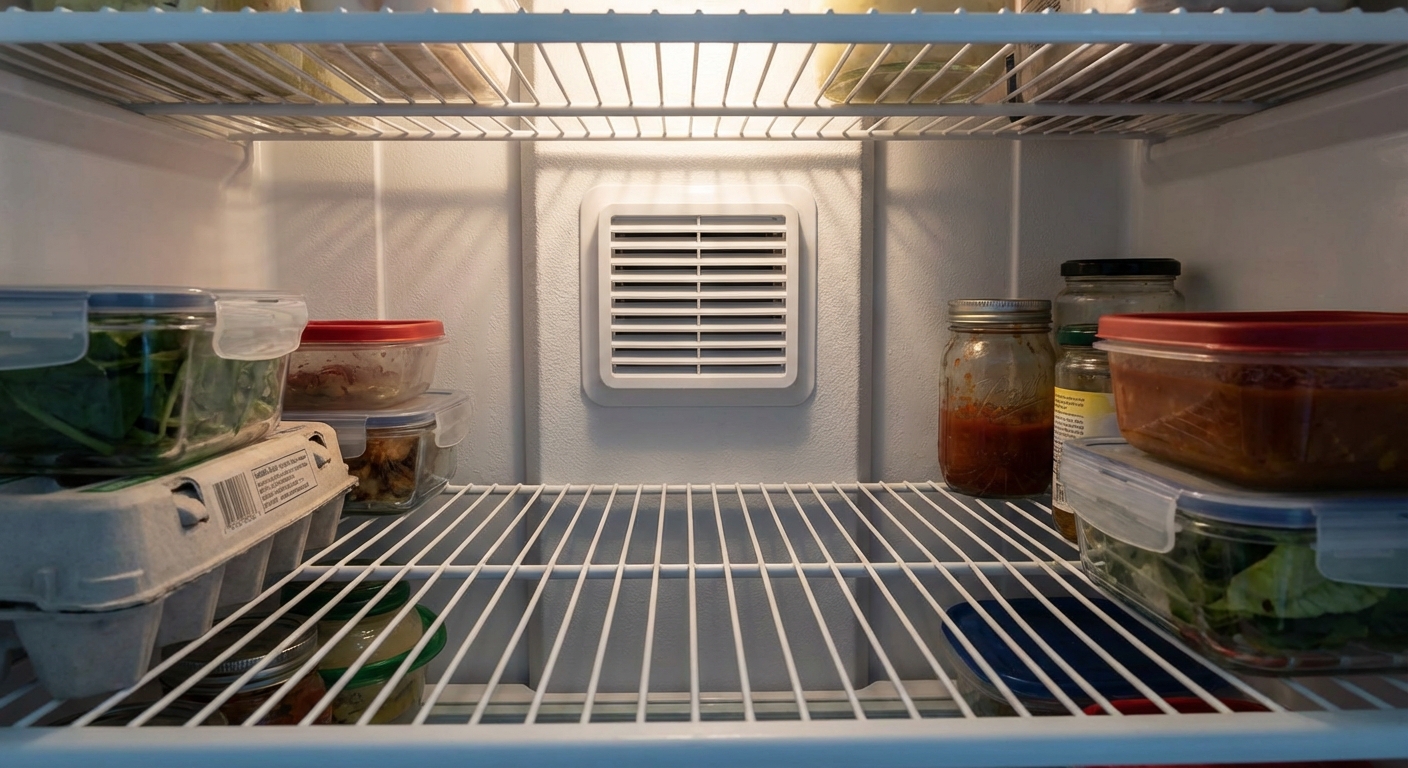
Fix 3: Unblock air vents
Most refrigerators cool the fridge section by blowing cold air from the freezer through vents. If those vents get blocked by a pizza box or an overstuffed shelf, the freezer can be rock solid while the fridge turns into a sad lukewarm closet.
Difficulty
Easy
Tools needed
- Flashlight
- Small mirror (optional)
Steps
- Locate the vents. Common spots are the back wall of the fridge and the back or side wall of the freezer.
- Do not block either opening. Some are supply vents (cold air comes in) and some are return vents (air goes back). Both matter.
- Move food containers away from vents by at least 2 to 3 inches.
- Look for frost or ice covering the vent openings.
- If the vent is iced over, skip ahead to Fix 7 (defrost problems).
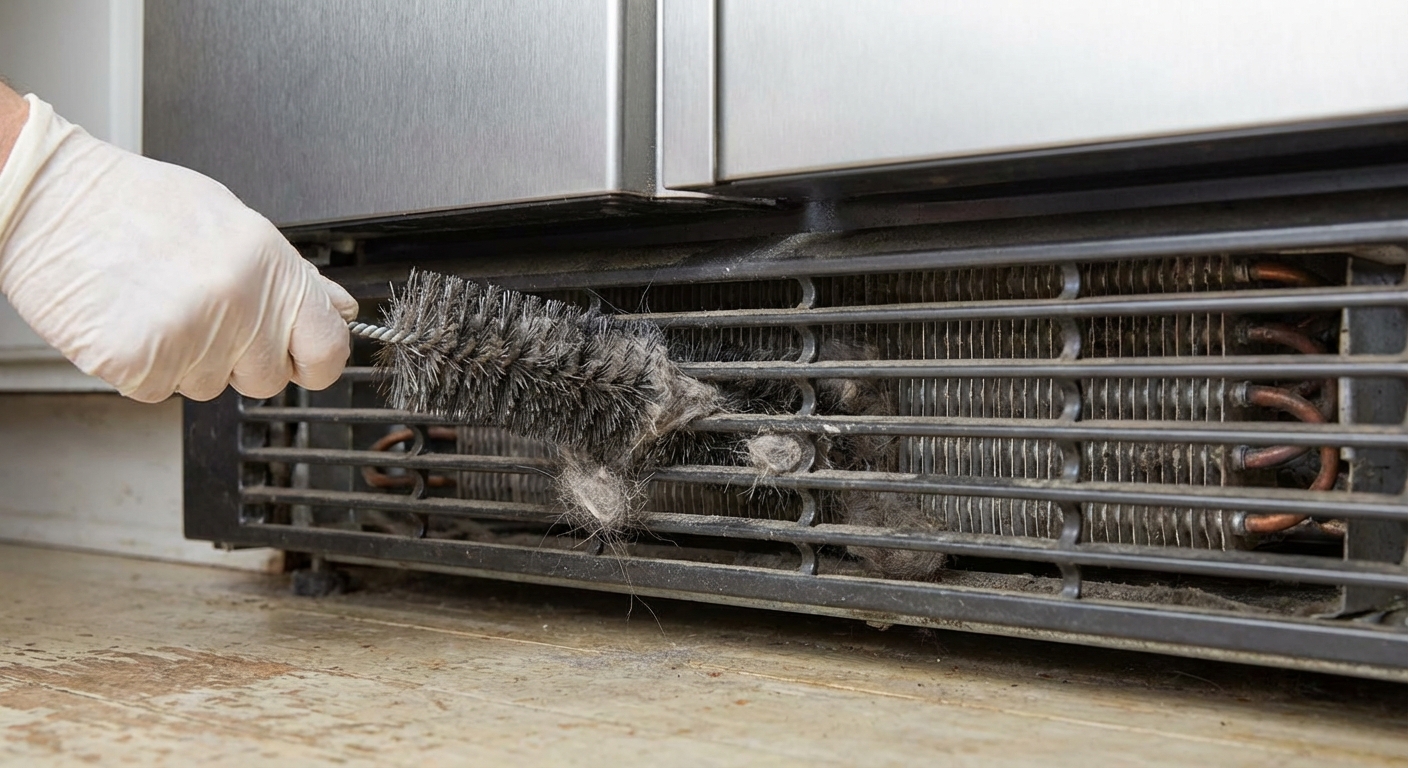
Fix 4: Clean condenser coils
If I could pick one maintenance chore that prevents the most fridge breakdowns, it is this. Dirty coils make your fridge work harder, run hotter, and cool worse. In a home with pets, coils can look like a felt blanket after a year.
Difficulty
Easy to Moderate
Tools needed
- Vacuum with hose
- Coil brush (or a long, soft brush)
- Flashlight
- Work gloves
Steps
- Unplug the refrigerator.
- Find the coils: either behind a lower front toe grille or on the back of the unit.
- Model note: some newer fridges have a sealed or "skin" condenser that is not accessible like traditional coils. If you do not see coils behind the grille or rear panel, check your manual and focus on cleaning air intake areas and fan vents instead.
- Remove the grille or rear cover if needed.
- Vacuum loose dust first.
- Use the coil brush to loosen packed lint, then vacuum again.
- Plug the fridge back in and listen for normal operation.
My hard-learned lesson: do not jam the brush too aggressively. Those fins bend easily (on models that have them), and bent fins reduce airflow.
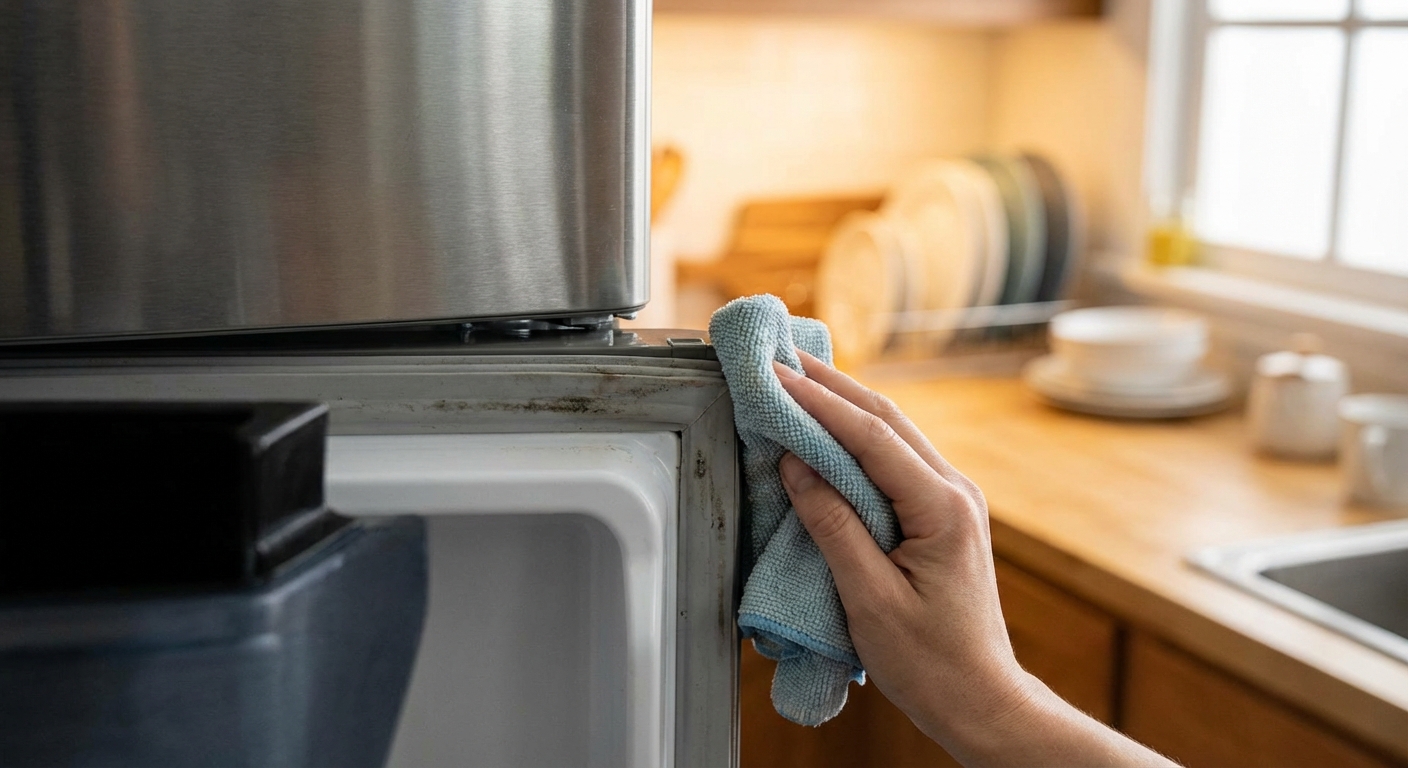
Fix 5: Check the door seal
If the door gasket is torn, loose, or grimy, warm room air leaks in constantly. That creates condensation, frost, and poor cooling. This is one of those fixes that feels boring until you see how much difference a good seal makes.
Difficulty
Easy (cleaning) to Moderate (replacement)
Tools needed
- Warm soapy water and a rag
- Old toothbrush
- Paper bill (for the seal test)
- Hair dryer (optional for reshaping)
- Screwdriver or nut driver (if replacing)
Steps
- Visually inspect the gasket for tears, gaps, or hardened sections.
- Clean the gasket folds with warm soapy water. Dry thoroughly.
- Do the paper test: close the door on a paper bill and pull. You should feel steady resistance. Test several spots.
- If a section is warped, gently warm it with a hair dryer and massage it back into shape.
- If it is torn or will not seal, order the exact gasket by model number and replace it following the manufacturer’s method.
- Quick bonus check: make sure the fridge is level enough that the door self-closes. If the door wants to drift open, a small front tilt up can help (follow your manual).
Fix 6: Check the evaporator fan
If your freezer is cold but the fridge section is warm, the evaporator fan is a prime suspect. That fan circulates cold air over the evaporator coil and pushes it through the vents. When it fails, cooling becomes weak or uneven.
Difficulty
Moderate
Tools needed
- Phillips screwdriver or nut driver
- Flashlight
- Multimeter (optional)
- Work gloves
Steps
- Open the freezer and listen. You should usually hear a fan when the compressor is running.
- Press the door switch (the little button that turns the light off) and listen again. Some fans stop when the door is open.
- If you hear scraping, the fan blades may be hitting ice. That points to a defrost problem. See Fix 7.
- Unplug the fridge. Remove the freezer’s rear interior panel to access the fan area.
- Check if the fan spins freely by hand. If it is stuck, wobbly, or noisy, the motor is likely failing.
- If you are comfortable, use a multimeter to check the motor for continuity. Note: continuity can confirm an open motor on some models, but it is not a guarantee the motor is good under load. Some units use DC or ECM motors controlled by a board, so consult your model’s service info if available.
- Replace the evaporator fan motor with the correct part for your model.
Tip: Take a photo before disconnecting wires. Future-you will be grateful.
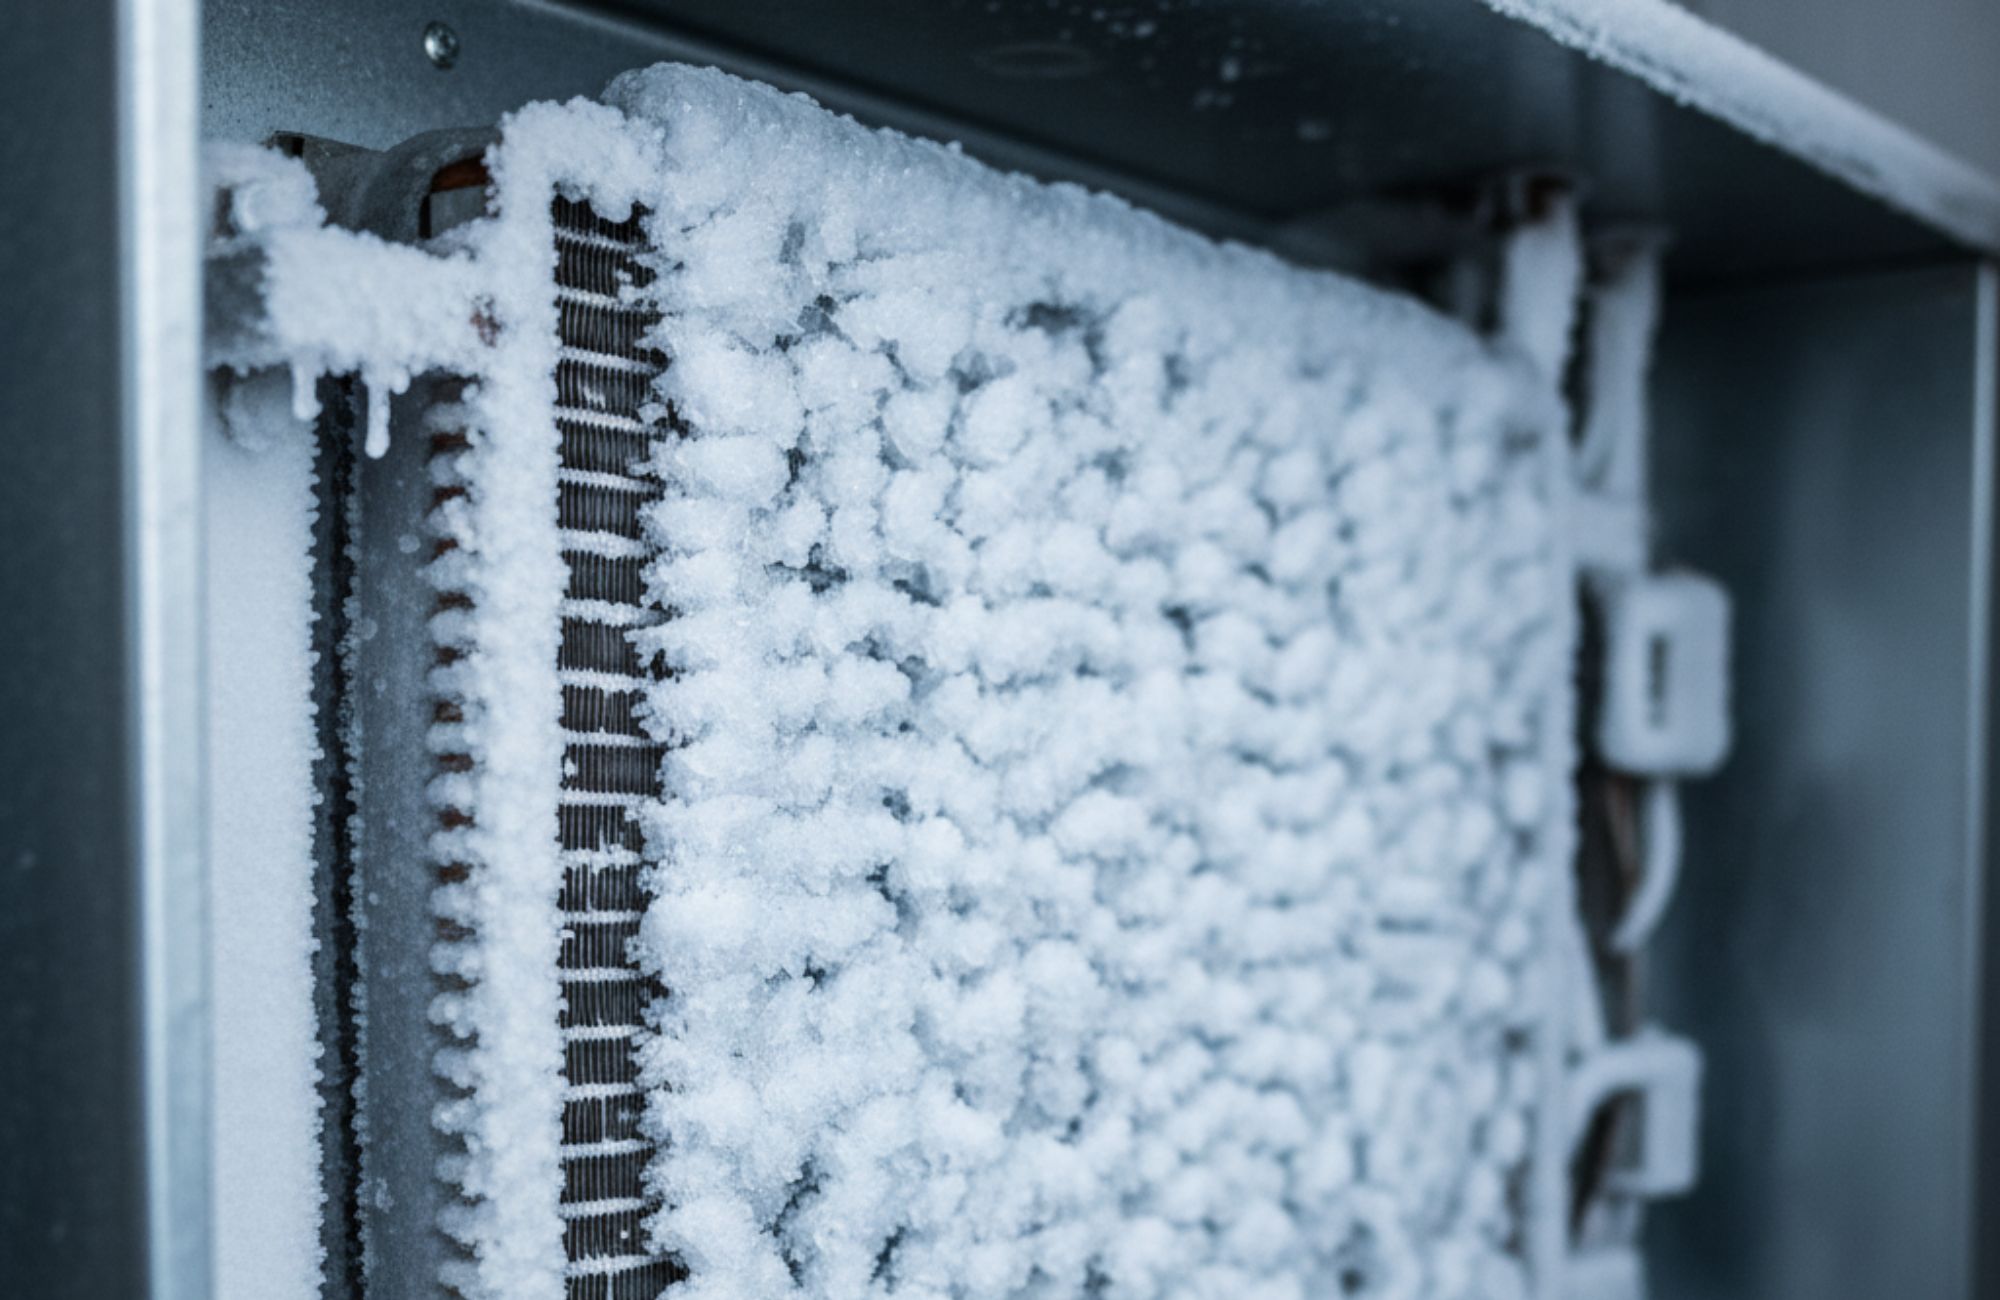
Fix 7: Check for defrost failure
When the defrost system fails, the evaporator coil can become a solid block of ice. Air cannot pass through, so the fridge warms up even though the freezer might still seem cold at first.
Difficulty
Moderate to Hard
Tools needed
- Phillips screwdriver or nut driver
- Towels
- Hair dryer (use carefully) or time for a full manual defrost
- Multimeter (for diagnosing heater, thermostat, or control)
Steps
- Unplug the fridge and remove food from the freezer.
- Remove the rear inside freezer panel (this is where the evaporator coil lives).
- If you see heavy frost or a solid ice mass on the coil behind that panel, you have an airflow problem caused by icing.
- Quick test: fully defrost the unit (unplug 12 to 24 hours with doors open and towels down). If it cools normally for a few days and then fails again, the defrost system is the culprit.
- Hair dryer safety: keep water away from electrical parts, keep the dryer moving, and do not overheat plastic liners. If anything looks sketchy, stop and let it thaw naturally.
- Diagnose components with a multimeter:
- Defrost heater: should show continuity.
- Defrost thermostat or bi-metal: often only shows continuity when cold.
- Defrost timer or control board: harder to test, often diagnosed after other parts check good.
- Replace the failed component with the correct model-specific part.
Avoid this mistake: do not chip ice with a screwdriver. It is very easy to puncture a coil, and that usually means the refrigerator is done.
Fix 8: Check the condenser fan
Not every fridge has an obvious condenser fan, but many do, especially models with coils and a compressor area behind a lower rear panel. If that fan is dead, the compressor can run hot and cooling performance drops fast even if the coils are clean.
Difficulty
Moderate
Tools needed
- Nut driver or screwdriver
- Flashlight
- Work gloves
- Multimeter (optional)
Steps
- Unplug the fridge.
- Remove the lower rear access panel.
- Locate the fan near the compressor area (if equipped). Make sure it is not jammed with dust, a stray zip tie, or debris.
- Spin the blades by hand. It should move freely.
- Plug in briefly and observe from a safe distance. On many models the fan should run when the compressor runs. If the compressor is running and the fan is not, the fan motor, wiring, or control could be the issue.
- Unplug again and replace the fan motor if it is clearly failed, using the correct part for your model.
Fix 9: Check the start relay
If the fridge is warm and you hear a repeated clicking every few minutes, the compressor may be trying and failing to start. A common cause is a failed start relay. These are inexpensive compared to a compressor, and worth checking before you panic.
Difficulty
Hard (but doable if you work carefully)
Tools needed
- Nut driver or screwdriver (rear access panel)
- Multimeter
- Needle-nose pliers (optional)
- Work gloves
Steps
- Unplug the fridge.
- Remove the lower rear access panel.
- Locate the compressor (the black can) and the small relay assembly plugged into its side.
- Pull the relay off. If it smells burnt or shows heat damage, it is often bad.
- Relay note: the "rattle test" (shaking a relay to hear broken pieces) is a useful clue on some PTC relay styles, but it is not universal. When in doubt, verify by part number and follow a model-appropriate testing procedure.
- If your fridge has a start capacitor, treat it like it is charged.
- Unplug the fridge and wait 5 to 10 minutes.
- Use an insulated screwdriver with a 10k to 20k ohm, 2W resistor across the tip (or use a dedicated capacitor discharge tool).
- Hold the resistor across the capacitor terminals for 10 to 20 seconds. Do not touch metal parts.
- If you are not comfortable doing this, skip capacitor testing and call a pro. Shock risk is real.
- Test the capacitor with a meter that has capacitance mode, or replace if out of spec.
- Reassemble and plug in. The compressor should start smoothly without repeated clicking.
When to stop: If a new relay does not solve a hard-start compressor, you may be looking at compressor or sealed-system work. That is usually a pro-only call.
If freezer is cold but fridge is warm
This is the most common split symptom. Work this shortlist in order:
- Airflow habits (Fix 2)
- Blocked vents (Fix 3)
- Damper control (see below)
- Evaporator fan not running (Fix 6)
- Defrost ice blockage (Fix 7)
Quick damper check
Some models use a damper door to meter freezer air into the fridge. If it is stuck closed, iced up, or has a dead actuator, the freezer can be fine while the fridge warms up.
Difficulty
Easy to Moderate
Tools needed
- Flashlight
- Screwdriver (sometimes)
Steps
- Find the damper area (often upper back wall of the fridge section).
- Check for visible ice blocking the opening. If iced, you likely have a defrost or door seal issue upstream.
- Adjust the fridge temp setting slightly colder and listen near the damper area for movement on models with a motorized damper.
- If the damper is broken or clearly not moving when it should, look up your model number and the correct damper assembly.
When to call a pro
DIY can take you far, but sealed-system refrigeration is its own world. Call a technician if:
- The compressor runs but neither section cools and coils and vents are clean.
- You suspect a refrigerant leak (sometimes you may see oily residue near lines or a gradual loss of cooling).
- The compressor is extremely hot and keeps clicking off even after replacing the relay.
- You find damaged wiring or a burnt smell that returns.
Quick troubleshooting cheat sheet
- Warm fridge, freezer OK: airflow habits, vents, damper, evaporator fan, defrost ice.
- Both warm: condenser coils, condenser fan (if equipped), start relay, compressor issues, control problems.
- Frost wall in freezer: defrost system.
- Condensation, sweaty doors: gasket seal, door left ajar, door alignment or leveling.
If you want to go one step further, look up your refrigerator’s model number (usually inside the fridge) and match parts exactly. With appliances, "close enough" is how you end up returning parts twice.
About Marcus Vance
Content Creator @ Grit & Home
Marcus Vance is a lifelong DIY enthusiast and self-taught home renovator who has spent the last decade transforming a dilapidated 1970s ranch into his family's dream home. He specializes in budget-friendly carpentry, room-by-room renovations, and demystifying power tools for beginners. Through his writing, Marcus shares practical tutorials and hard-learned lessons to help homeowners tackle their own projects with confidence.