Why your siding turns green
That green film is often algae, although in some areas it can overlap with mildew, light mold, pollen, and general biofilm grime. It loves shade, lingering moisture, and surfaces that stay damp from sprinklers, leaky gutters, or heavy tree cover. Vinyl and aluminum do not “feed” algae, but they are great platforms for it to cling to.
Here’s the curb appeal kicker: even a clean yard can look neglected if the siding has green streaks on the north side or under the eaves. The good news is this is usually a surface problem. You can often remove it without sanding, repainting, or blasting your house with a pressure washer.
Algae, mildew, or something else?
Before you mix anything, do a quick ID check. This helps you pick the right cleaner and avoid chasing stains that are not biological.
- Green film or streaks: usually algae. Common on shaded walls and areas hit by sprinkler mist.
- Black, gray, or brown spotting: often mildew, mold, or grime. It may be heavier under soffits where airflow is poor.
- Rusty orange runs: usually metal oxidation from fasteners, nails, or flashing. Cleaning helps, but the source may keep bleeding.
- Chalky white residue when you rub vinyl: oxidation. Cleaning will improve it, but you might still see a dull “tired” finish afterward.
If you are unsure, spot test an inconspicuous area first. Algae and mildew usually lighten after proper dwell time with an oxygen bleach solution. Rust stains do not.
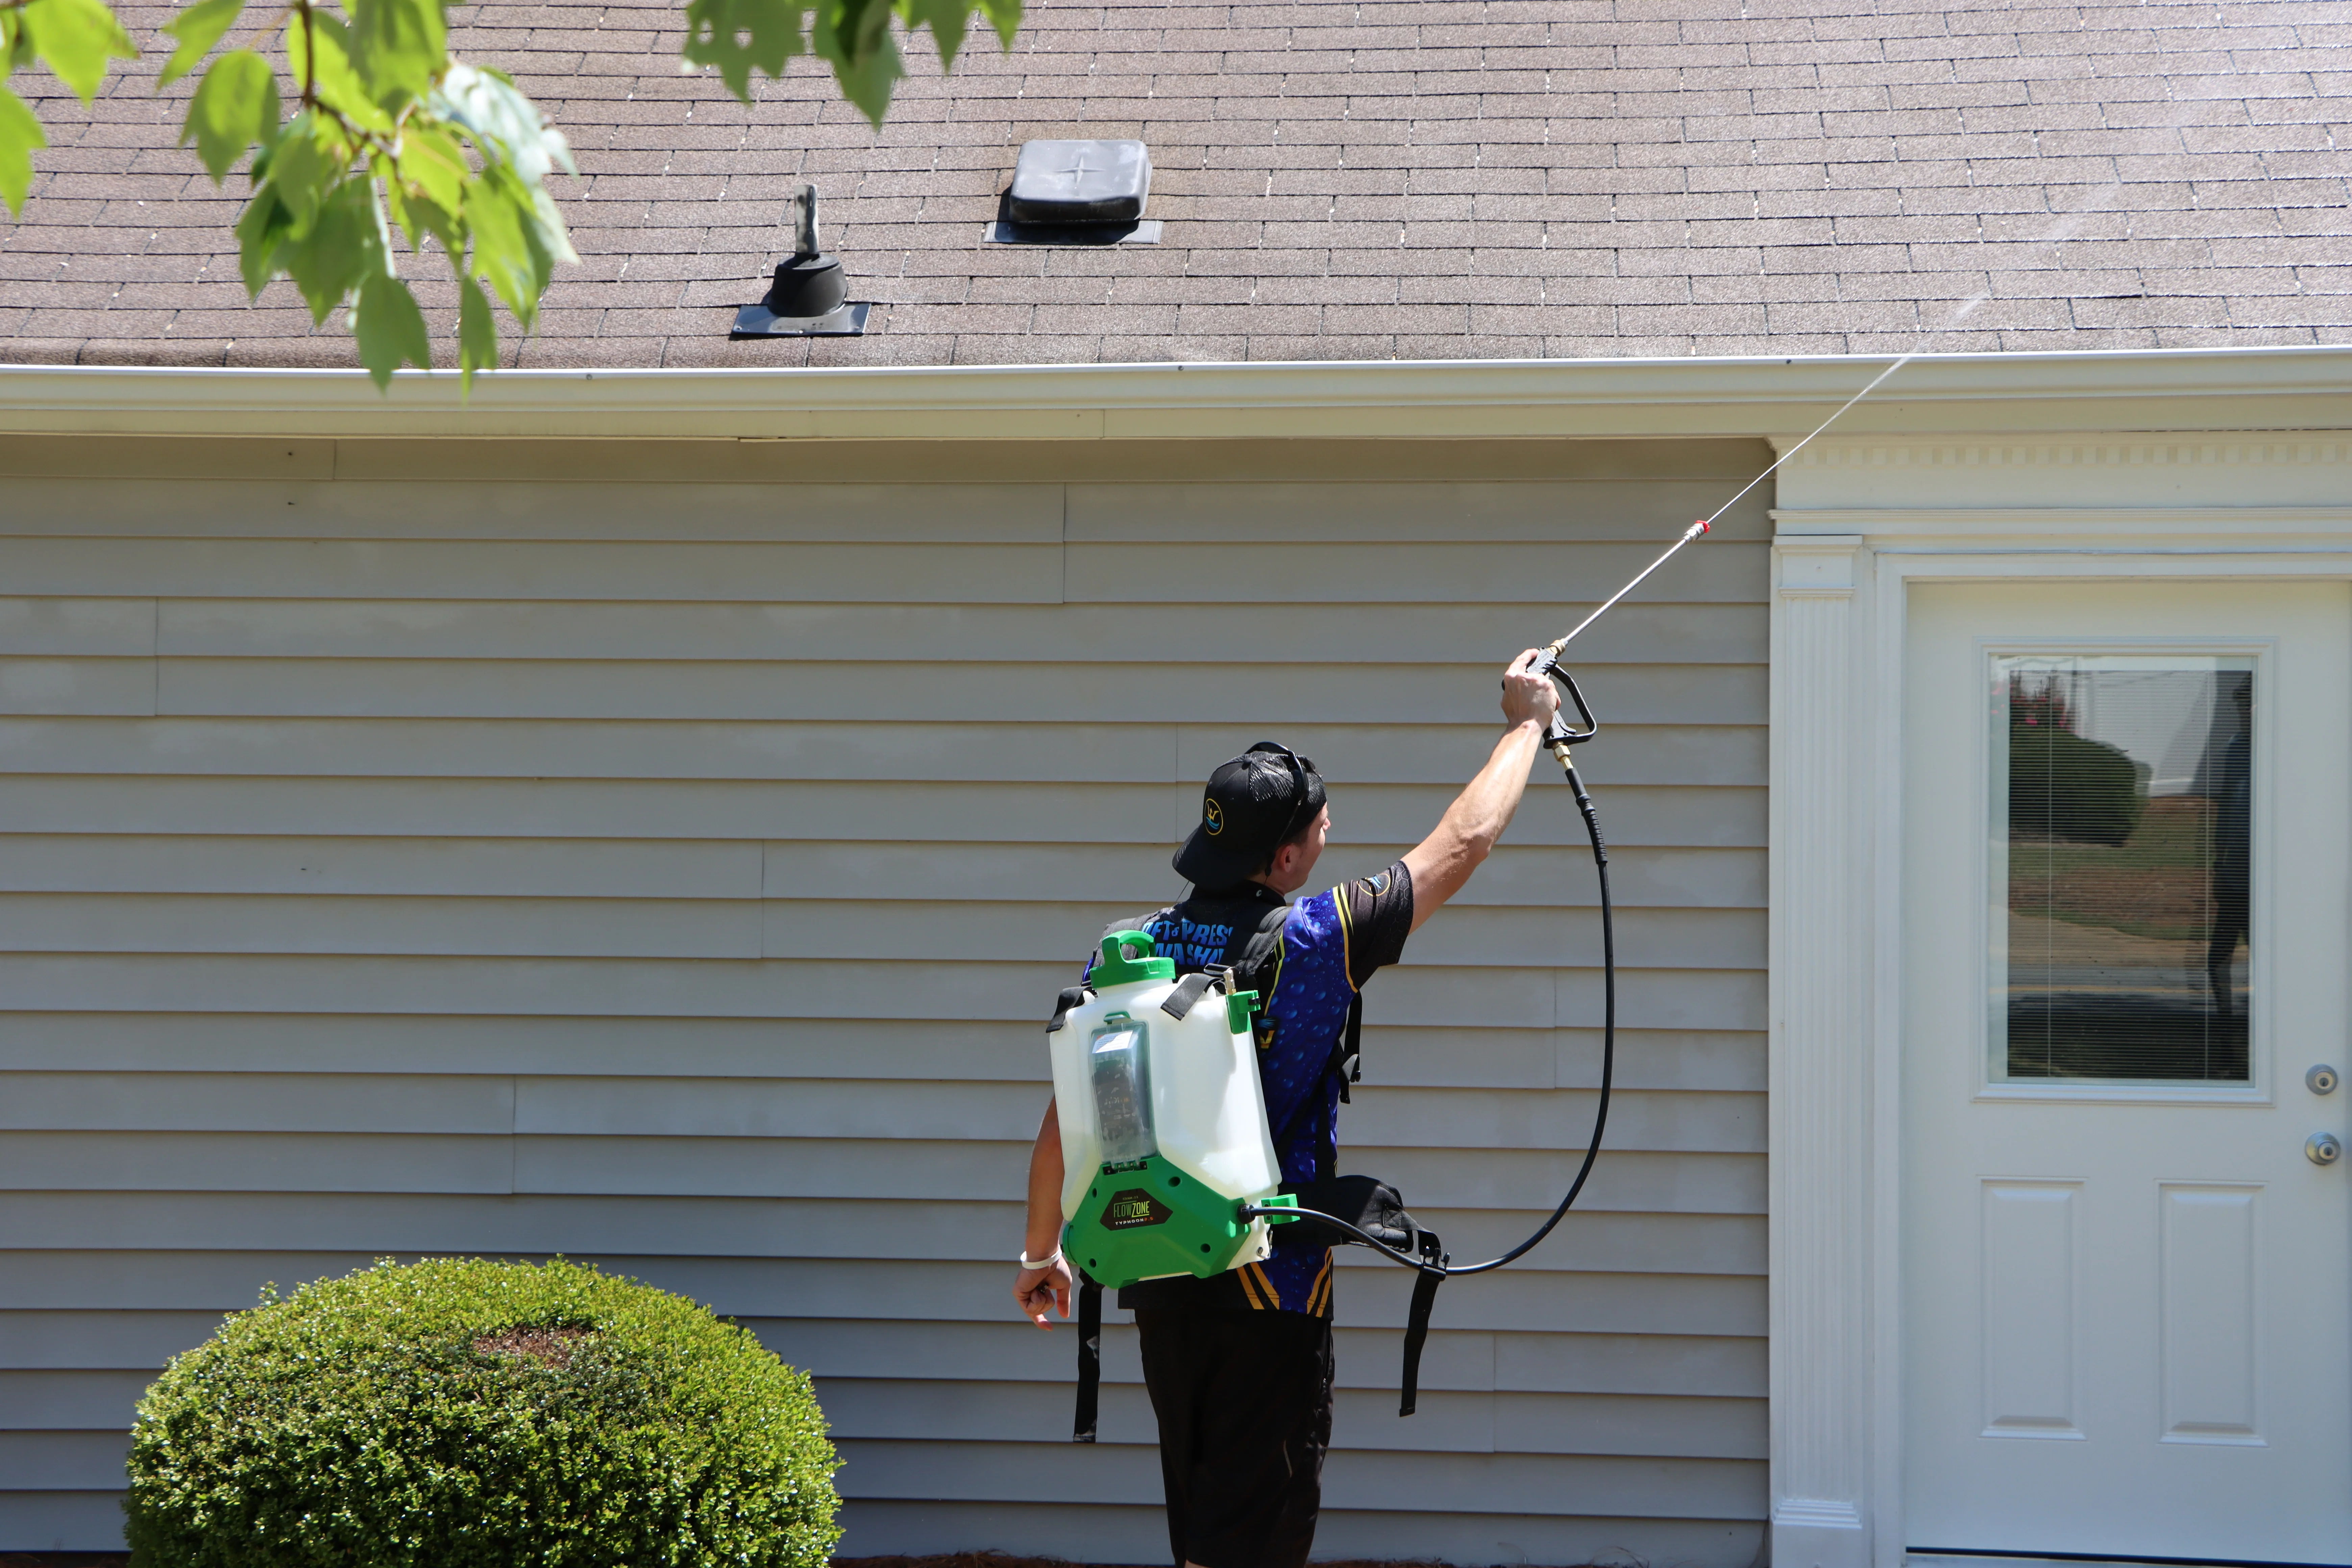
Soft washing vs pressure washing
I own a pressure washer and I still reach for a soft wash first on siding. Most algae comes off because the cleaner kills and releases it, not because you blasted it off.
Soft washing (recommended)
- Uses a pump sprayer or hose-end sprayer and a gentle rinse.
- Much lower risk of forcing water behind siding panels.
- Safer for older caulk lines, window trim, and painted details.
Pressure washing (use caution)
- Can drive water behind vinyl laps and aluminum seams, which can lead to moisture problems.
- Can dent aluminum and etch or “stripe” vinyl if you get too close or use a narrow tip.
- Can blow out old caulk and push water into window and door openings.
If you do use a pressure washer, keep it on a wide fan tip (often 40 degrees), stay back, spray downward with the lap direction, and never aim up under the siding. When in doubt, keep PSI on the lower side for siding and let the chemistry do the work.
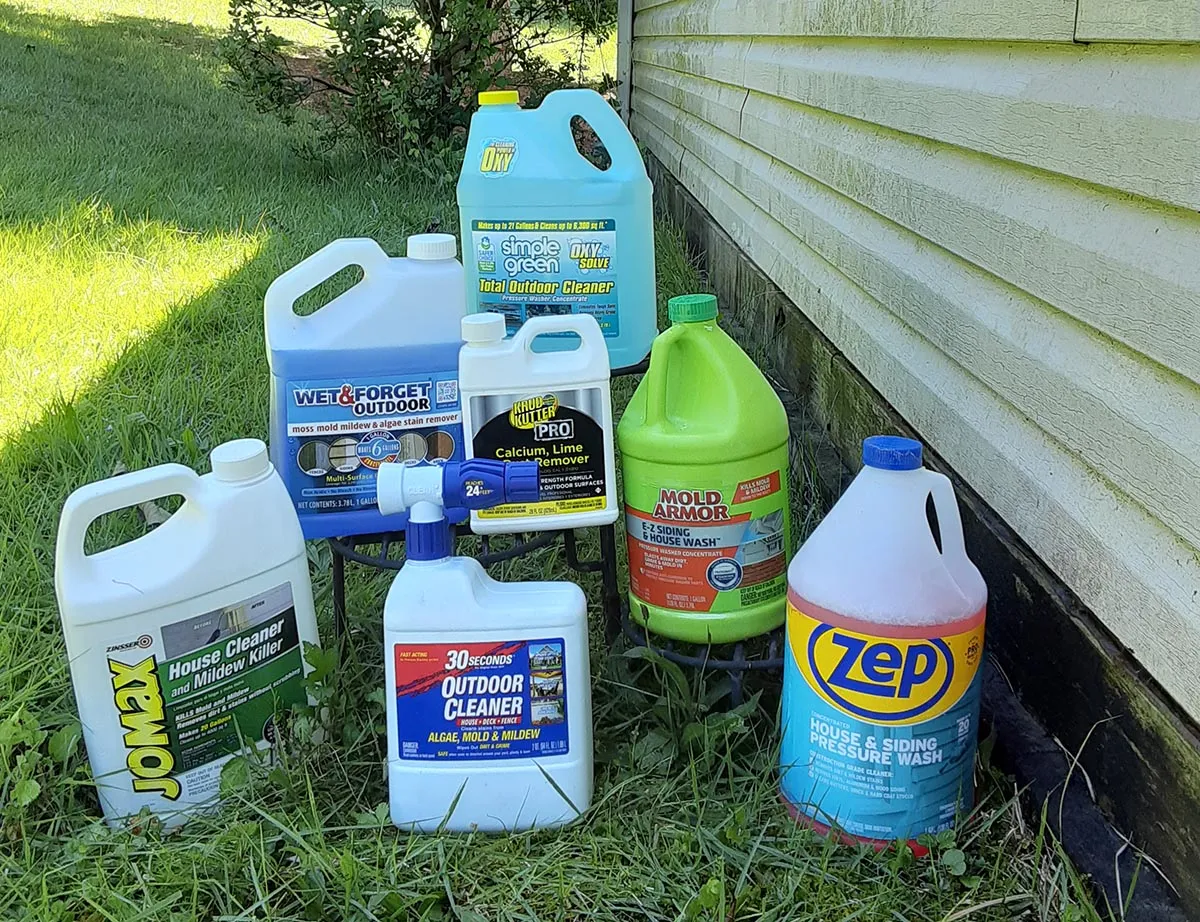
What to use: oxygen bleach for most homes
For typical green growth on vinyl or aluminum, I like oxygen bleach (sodium percarbonate). It is effective, widely available, and generally easier on landscaping and finishes than chlorine bleach.
My go-to mix (pump sprayer)
- Warm water: 1 gallon
- Oxygen bleach powder: use the manufacturer’s “exterior cleaning” ratio (common ranges are roughly 4 to 8 ounces by weight per gallon, but the label wins)
- Optional surfactant: a tiny squirt of clear, ammonia-free mild dish soap can help it cling (test first to avoid residue or streaking)
Important: Mix only what you will use that day. Oxygen bleach solutions lose punch as they sit.
Mixing safety notes
- Do not mix oxygen bleach with chlorine bleach, ammonia, or mystery cleaners.
- Avoid breathing mist, especially in still air or near soffits. Eye protection and gloves are worth it.
What I avoid unless the situation calls for it
- Chlorine bleach: works fast, but it can discolor fabrics, irritate lungs, and is tougher on plants. It can also lighten some painted finishes and accelerate corrosion on certain metals if overused.
- Harsh acids and “mystery” degreasers: risk to aluminum, window glass coatings, and landscaping.
If you have heavy mildew, repeated failures, or you are cleaning a large, tall home, professional soft washing sometimes uses stronger mixes. For DIY, start mild and step up only if you need to.
Tools and prep
- Pump sprayer or hose-end sprayer
- Garden hose with a spray nozzle
- Soft bristle brush on an extension pole (optional, for stubborn spots)
- Nitrile gloves and eye protection
- Plastic sheeting or old towels for delicate plants (optional)
Protect plants and prevent streaks
- Pre-wet landscaping with plain water so leaves are less likely to absorb cleaner.
- Work in shade if you can. Hot sun dries cleaner too fast and can leave streaks.
- Close windows and cover exterior outlets and light fixtures if they are exposed.
- Plan runoff: keep wash water out of storm drains and follow local guidance if you have it.
Older homes: paint safety
If your home is older and you have peeling or flaking paint on trim or nearby surfaces, assume it could contain lead until proven otherwise. Do not dry-scrub or aggressively brush areas that are shedding paint. Consider a pro if you are not sure how to handle it safely.
Step-by-step: remove green growth safely
This is the exact order I use so I don’t end up with drips and zebra stripes.
1) Rinse loose dirt first
Lightly rinse the wall with a garden hose. This removes grit that can scratch if you brush.
2) Apply cleaner from the bottom up
Spray the stained area starting low and working upward. Bottom-up application helps prevent streaks because you are not sending strong solution down over dry siding.
3) Let it dwell, but do not let it dry
Give it 5 to 15 minutes, depending on weather and how thick the growth is. Mist more solution if it starts to dry.
4) Light scrub only where needed
If a few spots hang on, use a soft brush with gentle pressure. Skip abrasive pads. If you are having to scrub hard, it usually means the cleaner is too weak or you did not give it enough dwell time.
5) Rinse top down, thoroughly
Rinse from the top down with a steady fan of water. Keep the spray angle downward with the siding laps, especially on vinyl.
6) Repeat on the worst areas
On the north side of a house, I often do two light applications rather than one aggressive pass.
When you finish a wall, give nearby landscaping a quick final rinse. I have “finished” jobs before and later noticed stressed leaves because I forgot that last step.
Ladder safety
I have done enough “just one more spot” ladder moves to learn this the hard way. Most DIY injuries outside are not from chemicals. They are from rushing on a ladder.
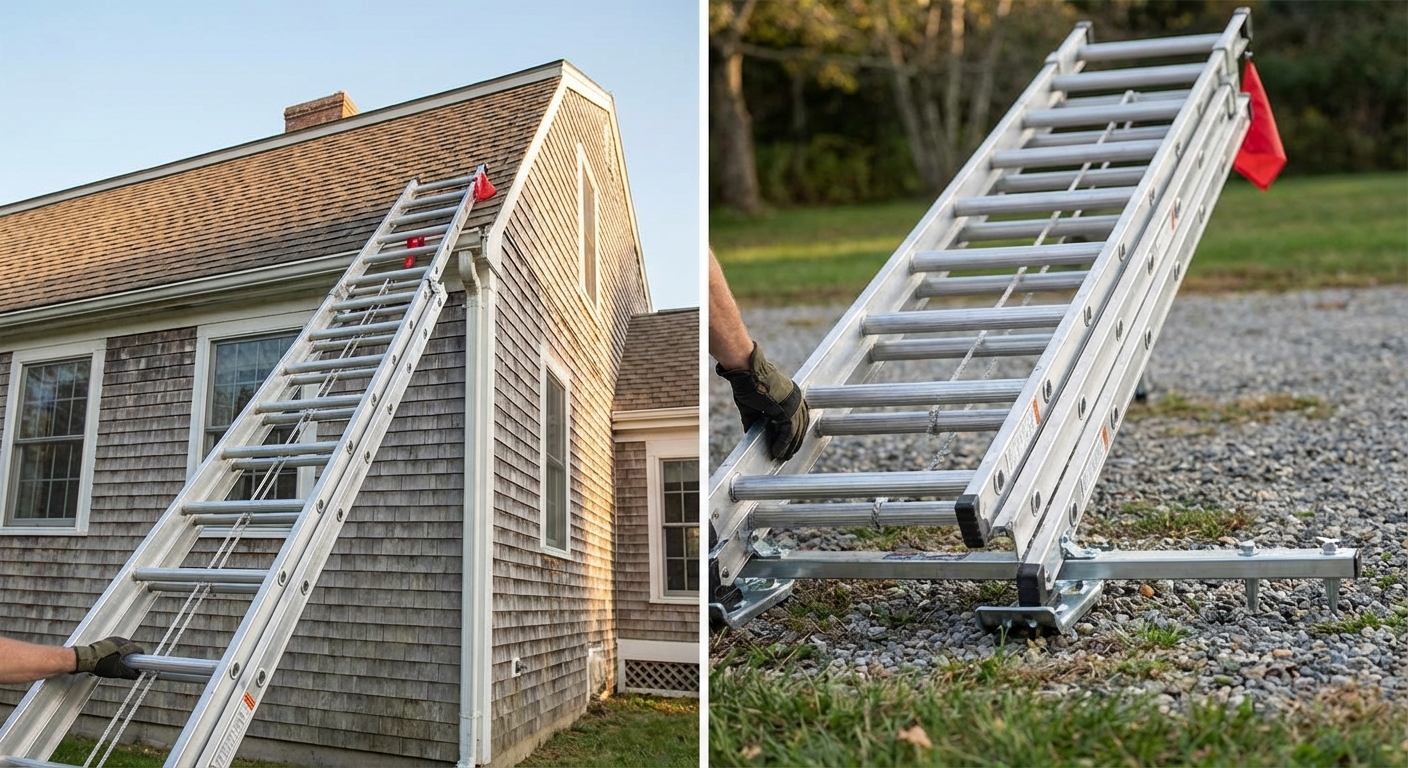
- Use the 4-to-1 rule: for every 4 feet of height, set the ladder base 1 foot out.
- Keep your belt buckle between the rails: if you are reaching, climb down and move the ladder.
- Do not carry a full bucket up: use a sprayer you can hoist, or keep solution on the ground and climb with both hands free.
- Watch the ground: mulch, wet grass, and sloped soil are ladder trouble. Use levelers if needed.
- Skip the top two rungs: you want stability more than height.
If the second story makes you uneasy, that is not a character flaw. It is good judgement. Consider an extension pole setup, or hire the high work out and handle the lower level yourself.
Preventing regrowth
Algae is a symptom. If you remove it but keep the wall wet, it will be back before the next barbecue.
Trim shade and improve airflow
- Prune shrubs and trees so siding can dry after rain.
- Aim for a few inches of clearance between bushes and the wall.
Check gutters and downspouts
- Clean gutters so water does not overflow and stripe the siding.
- Add or extend downspouts so roof runoff exits away from the wall and foundation.
Look for drip lines and splash zones
- Adjust sprinklers so they do not mist the house daily.
- Consider a small gravel strip below problem walls to reduce soil splash.
- Repair missing kick-out flashing where rooflines dump water into a wall.
Moisture control is boring, but it is the difference between cleaning every year and cleaning every few years.
Common mistakes (I have made most of these)
- Starting at the top and creating drip streaks that dry in place.
- Letting cleaner dry on hot siding, which can leave residue.
- Using a zero-degree pressure tip and carving lines into vinyl or denting aluminum.
- Using the wrong soap and leaving streaks. Keep it mild, clear, ammonia-free, and use very little.
- Forgetting to rinse plants after cleaning. Always do a final water rinse on landscaping.
- Chasing stains that are not algae. Rust and oxidation need different solutions.
When to call a pro
DIY is great, but there are a few times it is smarter to bring in help.
- You need to access steep roofs or tall gables.
- You suspect water is getting behind siding, or you see soft sheathing and peeling paint nearby.
- The staining returns in weeks, which can signal a drainage or ventilation problem that needs diagnosing.
- You have delicate landscaping, specialty coatings, or older aluminum that dents easily.
- You have an older home with peeling paint and you are concerned it could be lead-based.
Quick checklist
If you want the “why is my siding always green” problem to calm down long-term, this is the short list:
- Soft wash with oxygen bleach, rinse thoroughly
- Clean gutters and verify downspouts discharge away from the wall
- Trim back plants to boost sun and airflow
- Fix sprinkler overspray and heavy splash zones
- Recheck shaded sides each spring before growth gets thick
Do that, and your house will look sharper from the curb, plus you will be doing the unglamorous moisture basics that protect everything behind the siding.
About Marcus Vance
Content Creator @ Grit & Home
Marcus Vance is a lifelong DIY enthusiast and self-taught home renovator who has spent the last decade transforming a dilapidated 1970s ranch into his family's dream home. He specializes in budget-friendly carpentry, room-by-room renovations, and demystifying power tools for beginners. Through his writing, Marcus shares practical tutorials and hard-learned lessons to help homeowners tackle their own projects with confidence.