Before you start
If you can turn two shutoff valves and work in a cramped cabinet without bonking your head too hard, you can replace a kitchen faucet. The first time I did this in our 1970s ranch, I spent more time wedging my shoulders under the sink than I did installing the faucet. The good news is the steps are simple and repeatable.
Plan on 45 to 60 minutes if everything cooperates. If the faucet is older or the nuts are corroded, add another 30 minutes for “convincing” parts to come apart.
Quick safety note: If you do not have under-sink shutoff valves, if the valves will not fully close, or if your plumbing is older and you are not comfortable pushing on it in a tight space, shut the water off at the main and consider calling a plumber. Water damage is expensive, pride is free.
Compatibility check (takes 30 seconds): Look at your sink holes (1-hole vs 3-hole). If your new faucet is 1-hole but your sink has 3, you will usually use the included deck plate (escutcheon). Extra holes can be covered with the plate, a hole cover, a soap dispenser, or an air gap depending on your setup.
Tools and supplies
Most faucet installs come down to access and grip. These are the items that save the day in tight spaces.
- Basin wrench (the under-sink MVP for those hard-to-reach mounting nuts)
- Two small adjustable wrenches (or one wrench plus pliers, for a two-wrench method on supply connections)
- Adjustable pliers (or tongue-and-groove pliers)
- Plumber’s tape (PTFE tape for NPT tapered pipe threads only, if your setup uses them)
- Bucket (for residual water from supply lines)
- Old towel or rags (to catch drips and protect your cabinet floor)
- Flashlight or headlamp (you will be working in the dark under there)
- Safety glasses (rust, grit, and old putty love falling straight down)
- Penetrating oil (optional but very helpful for corroded nuts)
- Putty knife and mild cleaner (for cleaning the sink deck)
Quick parts check: Most shutoff valves are 3/8 inch compression. Many faucets use 3/8 inch supply connections too, but not all. Before your first hardware-store run, confirm what you have so you are not playing plumbing roulette.
Remove the old faucet
1) Clear the cabinet
Pull everything out from under the sink. Lay down a towel and set a bucket directly under the shutoff valves. Even when the water is off, the lines will dump a little water when you disconnect them.
2) Shut off hot and cold
Under the sink you should see two shutoff valves. Turn them clockwise to close. Stop when they are seated, do not crank hard. Then go up top and turn on the faucet to confirm the water is truly off. You should get a brief sputter and then nothing.
If your shutoff valves will not budge: do not force them until they snap. Shut water off at the main, then plan to replace the valves later. For this project, you just need the water off safely.
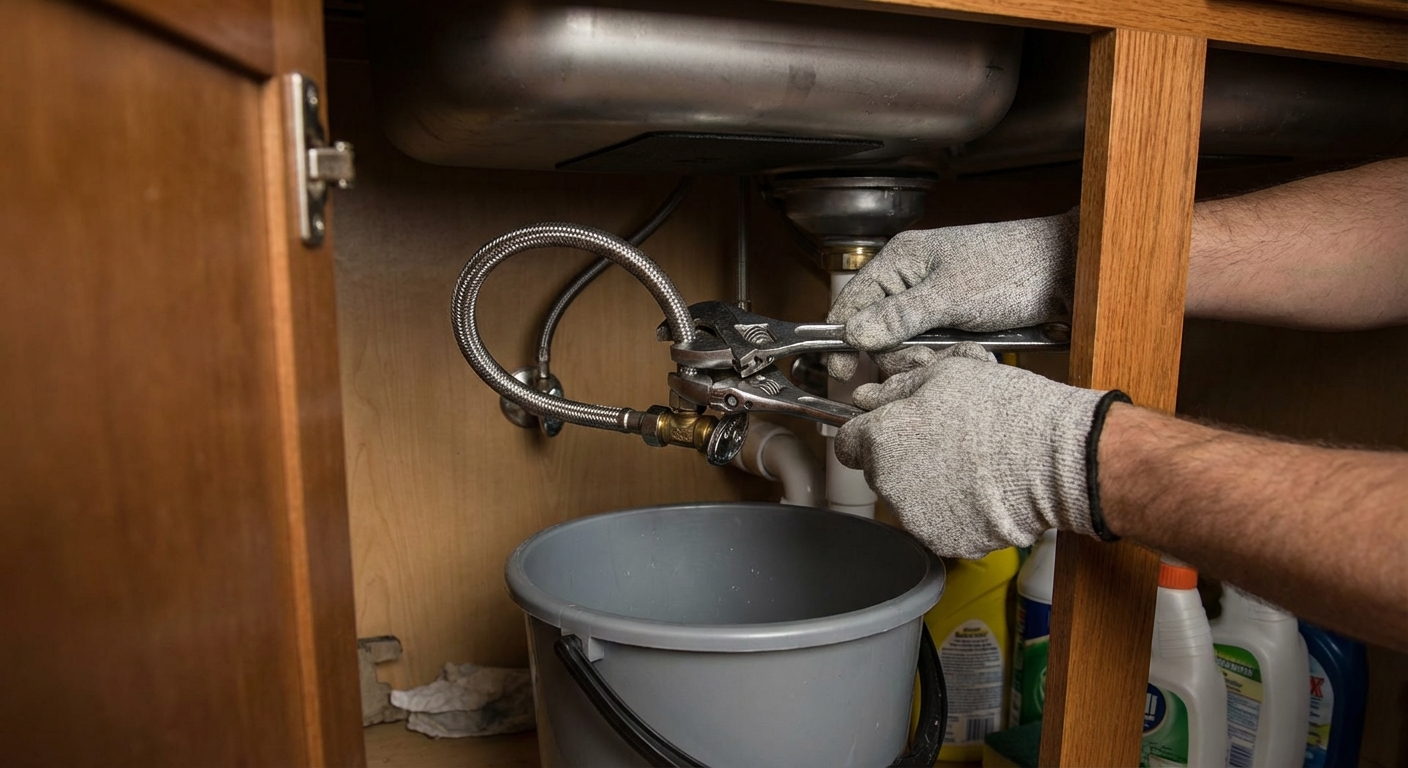
3) Disconnect supply lines
Keep the bucket underneath. Loosen the nuts where the faucet supply lines connect to the shutoff valves.
- Best practice: use a two-wrench method. One wrench holds the valve body steady (backup wrench), the other turns the supply nut. This helps you avoid twisting the valve or stressing older plumbing.
- Tip: If your faucet has built-in supply lines, you will disconnect them at the valves. If it uses separate braided lines, you might disconnect at both ends depending on what you are reusing.
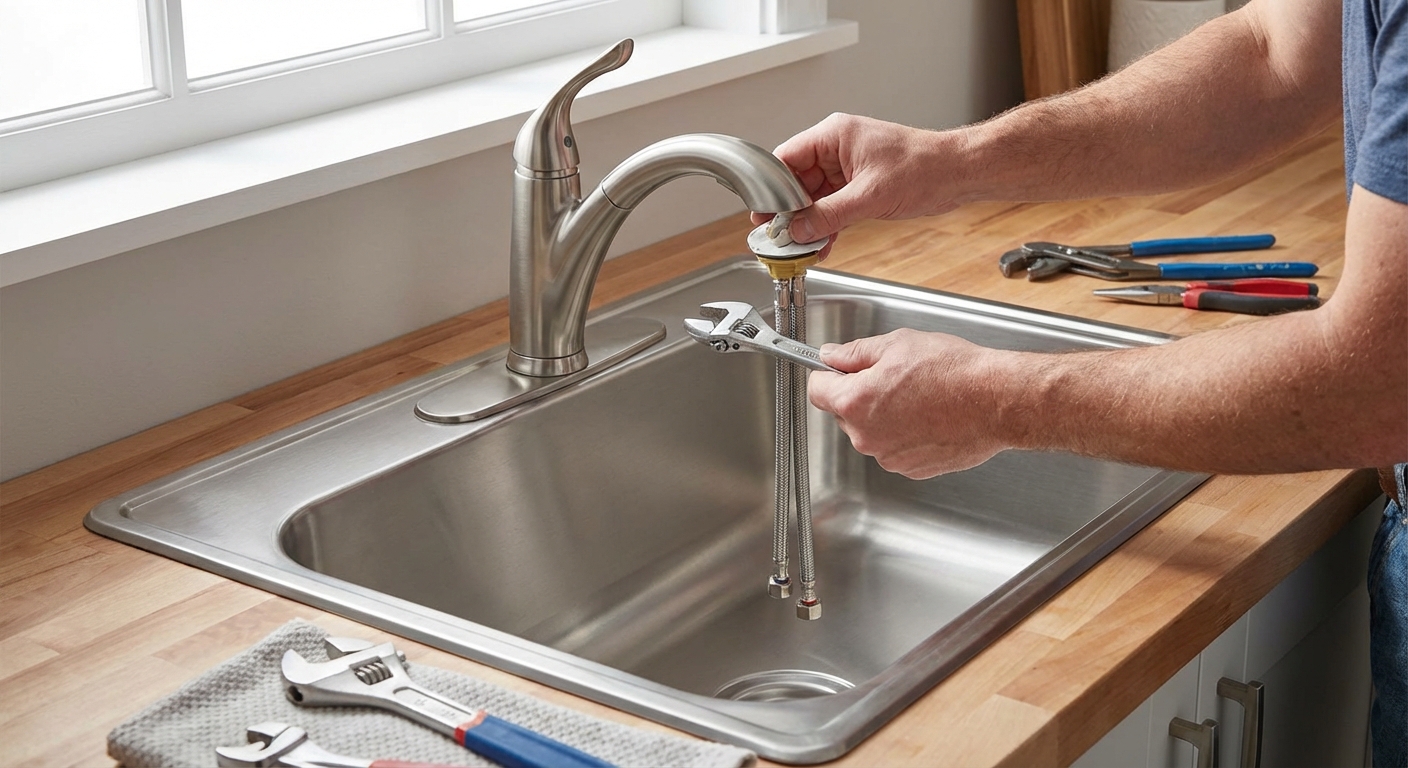
4) Disconnect the sprayer hose (if you have one)
Many newer faucets have a quick-connect fitting for the sprayer. Press the release or unscrew the connector, then feed the hose down through the sink hole once the faucet is free.
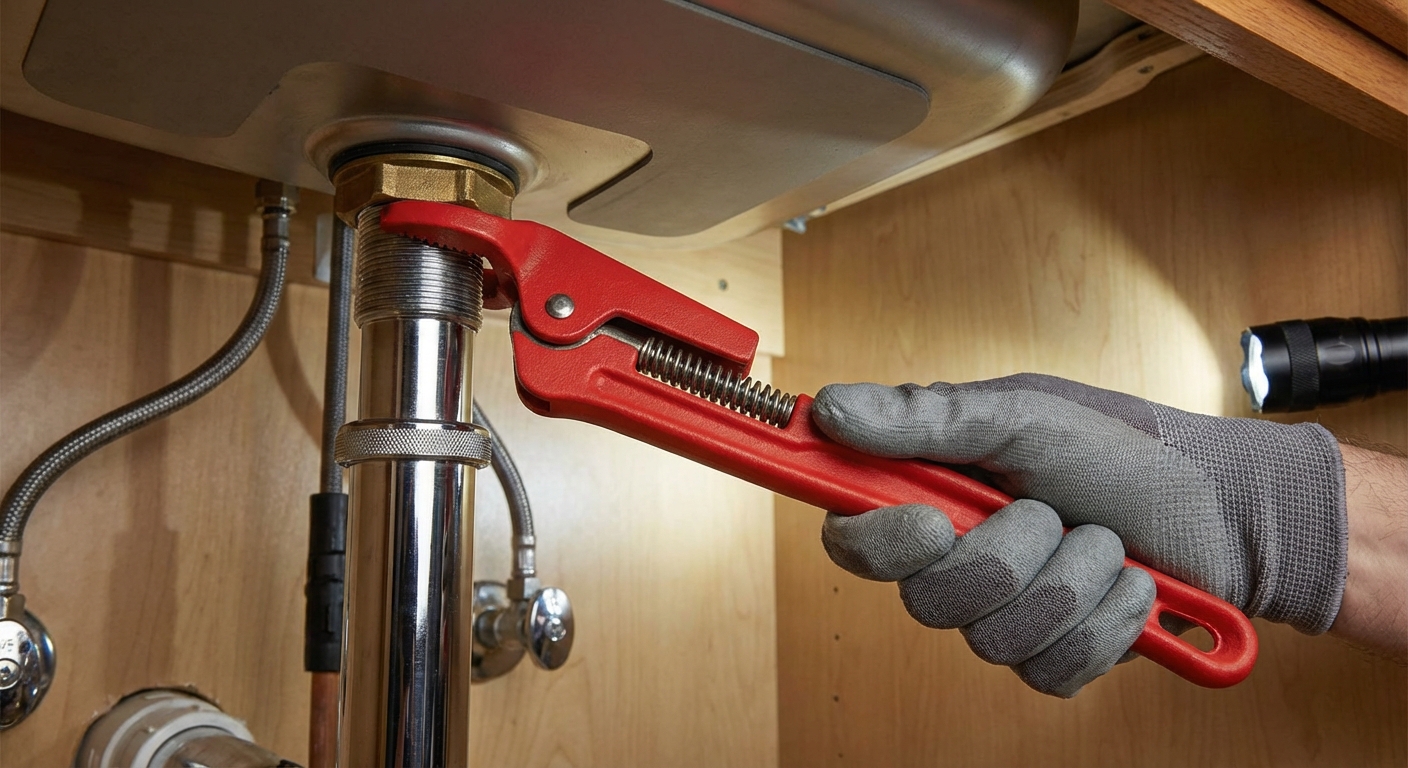
5) Remove the mounting nuts
This is where the basin wrench earns its keep. Reach up under the sink and locate the mounting nut or nuts holding the faucet to the sink deck. Use the basin wrench to loosen them counterclockwise.
Common complication: tight space
In some cabinets, the back wall and bowl leave you inches of room. A headlamp helps, and so does taking a steady, patient approach. Short turns are still turns. Flip the basin wrench jaw orientation if you need to, and reposition every quarter turn.
Need more room? If the trap or garbage disposal is blocking access, you can sometimes loosen the trap arm or move a flexible hose clamp out of the way. If you disconnect drain parts, put a pan underneath and be ready for a little water.
6) Lift out the old faucet
From above, pull the faucet straight up and out. If it feels glued in place, it probably is, just with years of mineral buildup or old putty. Wiggle gently while pulling up. Avoid prying against the sink with a screwdriver, since it can scratch or chip.
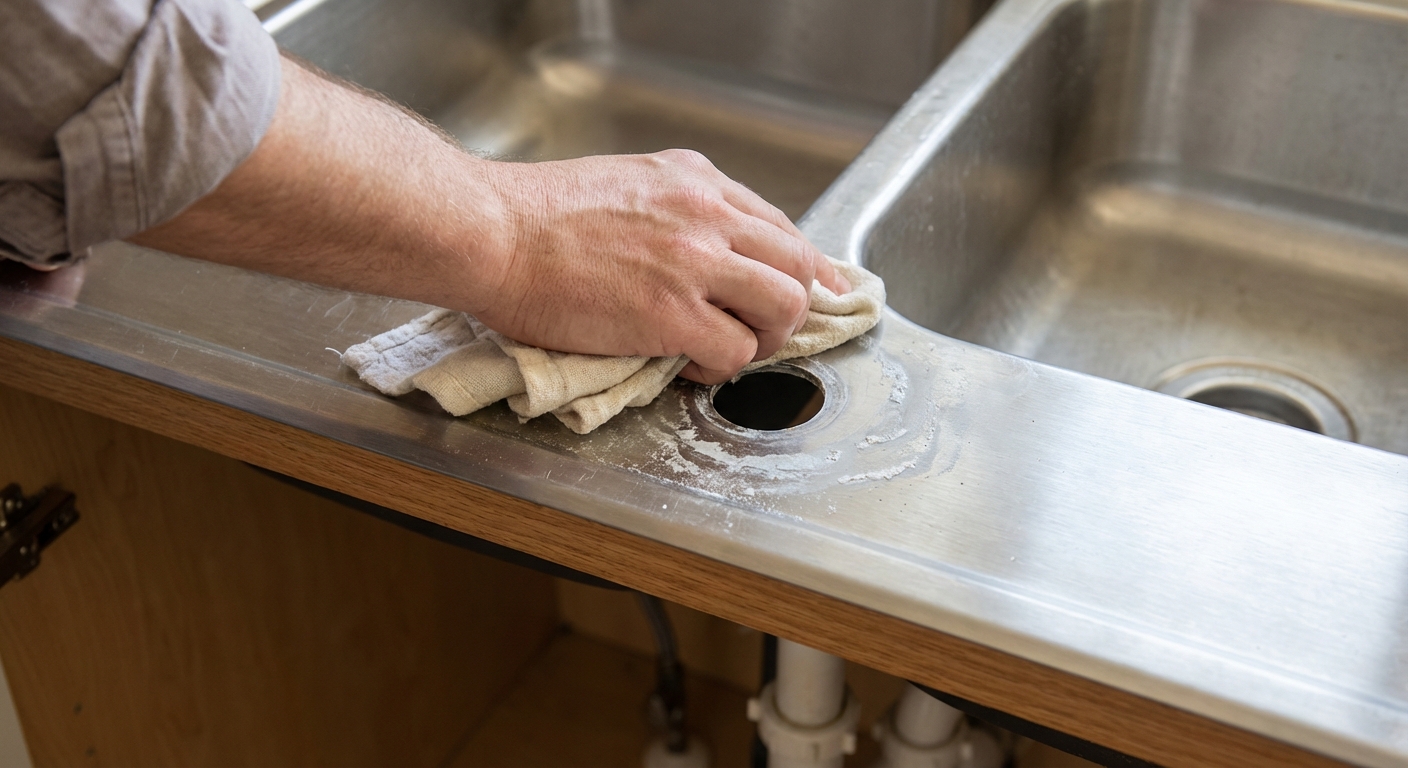
Prep the sink surface
A good seal starts with a clean surface. Scrape off old putty, gunk, and mineral crust around the faucet holes. Wipe the area with a mild cleaner and let it dry.
- Stainless sink: a plastic putty knife is your friend to avoid scratches.
- Stone or composite: go extra gentle and avoid harsh solvents unless the manufacturer allows them.
Install the new faucet
1) Dry fit
Set the faucet in place without tightening anything. If your faucet includes a deck plate to cover extra holes, align it now. Make sure the faucet is centered and facing straight forward.
2) Install the seal
Most modern faucets use a rubber or foam gasket. If your faucet instructions call for putty instead, apply a thin, even bead under the base or deck plate.
My thrifty rule: follow the manufacturer here. Some bases are designed to seal without putty, and adding it can actually make a mess or keep parts from seating correctly.
3) Tighten mounting hardware
From under the sink, thread on the mounting nut(s) or bracket. Snug them by hand first, then tighten with the basin wrench until the faucet feels solid. Aim for snug plus a bit, not “gorilla tight.” Over-tightening can deform thin stainless and can crack some composite or stone sinks.
4) Connect supply lines
Connect the hot and cold lines to the shutoff valves. Hand-tighten first so you do not cross-thread. Then give a final snug with a wrench.
- PTFE tape: use it only on NPT (tapered pipe) threads. Do not use it on compression fittings or on braided hose connections that seal with a rubber gasket.
- Hot on the left, cold on the right: it is the small detail that saves a big annoyance later.
5) Reconnect sprayer hose
Feed the hose through, click the quick-connect together, then attach the weight on the hose if your faucet includes one.
- Weight placement matters: most brands specify a distance from the sprayer head or from the bottom of the loop. Follow the diagram so the hose retracts smoothly.
- Make sure the hose moves freely and does not rub sharply on the cabinet or plumbing.
Test for leaks
1) Remove the aerator first
Before the first run, unscrew the aerator at the faucet tip and set it aside. New installs (and old pipes) can shake loose grit, and this keeps it from packing into the mesh right away.
2) Turn water on slowly
Open the hot shutoff valve slowly, then the cold. Watch each connection under the sink while you do this. A slow turn gives you time to catch a leak before it becomes a surprise shower in your cabinet.
3) Run the faucet and check every joint
Run water for 30 to 60 seconds. Then feel around each connection with a dry paper towel. Tiny leaks can be hard to see but easy to detect with a quick wipe.
Optional but helpful: Some pull-down faucets also have a small debris screen or check valve in the quick-connect or hose. If your flow seems weak even with the aerator off, check your manual for that hidden screen.
4) Check sprayer movement
Pull the sprayer out and retract it a few times. Make sure the hose does not snag and the weight does not clunk into anything important.
5) Reinstall the aerator
Once the water runs clean, reinstall the aerator.
6) Re-check tomorrow
Come back in 24 hours and run a dry paper towel under the connections again. Tiny seeps sometimes show up later.
Common issues
Corroded mounting nuts
- Spray penetrating oil on the nut and wait 10 minutes.
- Use a basin wrench with steady pressure. Short, controlled pulls beat wild yanking.
- If the nut is completely seized and the faucet is being replaced anyway, you can cut the old plastic nut (many are plastic) carefully with a multi-tool or hacksaw blade. Protect the sink and your fingers.
Shutoff valves leak after you touch them
This happens with older valves. Sometimes gently tightening the packing nut behind the handle fixes a small seep. If the valve continues to leak, stop and replace the valve before finishing the faucet install.
Supply lines are too short
Do not stretch them tight. Buy longer braided lines. They are inexpensive and a lot cheaper than water damage.
Handle hits the backsplash
If the faucet handle hits the backsplash or wall, you may need a different faucet style or a handle that tilts forward. Dry-fitting before tightening saves you from doing the job twice.
Quick checklist
- Cabinet cleared, towel down, bucket ready, safety glasses on
- Hot and cold shutoff valves off (clockwise), not over-tightened
- Supply lines disconnected using a two-wrench method, drained into bucket
- Sprayer hose disconnected (if applicable)
- Mounting hardware removed with basin wrench
- Sink surface cleaned and dried
- New faucet and deck plate dry-fit and aligned
- Faucet tightened snug plus a bit (not over-tight)
- Supply lines connected, sprayer connected, weight installed at the right spot
- Aerator removed, water turned on slowly, checked with paper towel for leaks
- Aerator reinstalled, then a 24-hour re-check
If you made it through leak-free, take a second to enjoy that moment. It is a small upgrade that makes the whole kitchen feel newer, and it is 100 percent the kind of “I built that” win Grit & Home is all about.
About Marcus Vance
Content Creator @ Grit & Home
Marcus Vance is a lifelong DIY enthusiast and self-taught home renovator who has spent the last decade transforming a dilapidated 1970s ranch into his family's dream home. He specializes in budget-friendly carpentry, room-by-room renovations, and demystifying power tools for beginners. Through his writing, Marcus shares practical tutorials and hard-learned lessons to help homeowners tackle their own projects with confidence.