
🚨 In a DIY emergency or rush?
Skip the details and jump straight to our 30-second cheat sheet for the most crucial info.
If you have one missing shingle after a windy night, you do not always need a full roof job. A single replacement is one of those rare roof repairs that can be truly DIY if you take safety seriously and you work methodically. I have patched plenty of “one-shingle problems” on my own 1970s ranch and I can tell you the difference between a clean fix and a call-the-pro job usually comes down to two things: how the roof is behaving around the damage and how comfortable you are moving on a slope.
This guide walks you through replacing an asphalt composition shingle (the most common type) including how to loosen the surrounding shingles, nail correctly, reseal the adhesive strip, and check your work so you are not chasing leaks later.
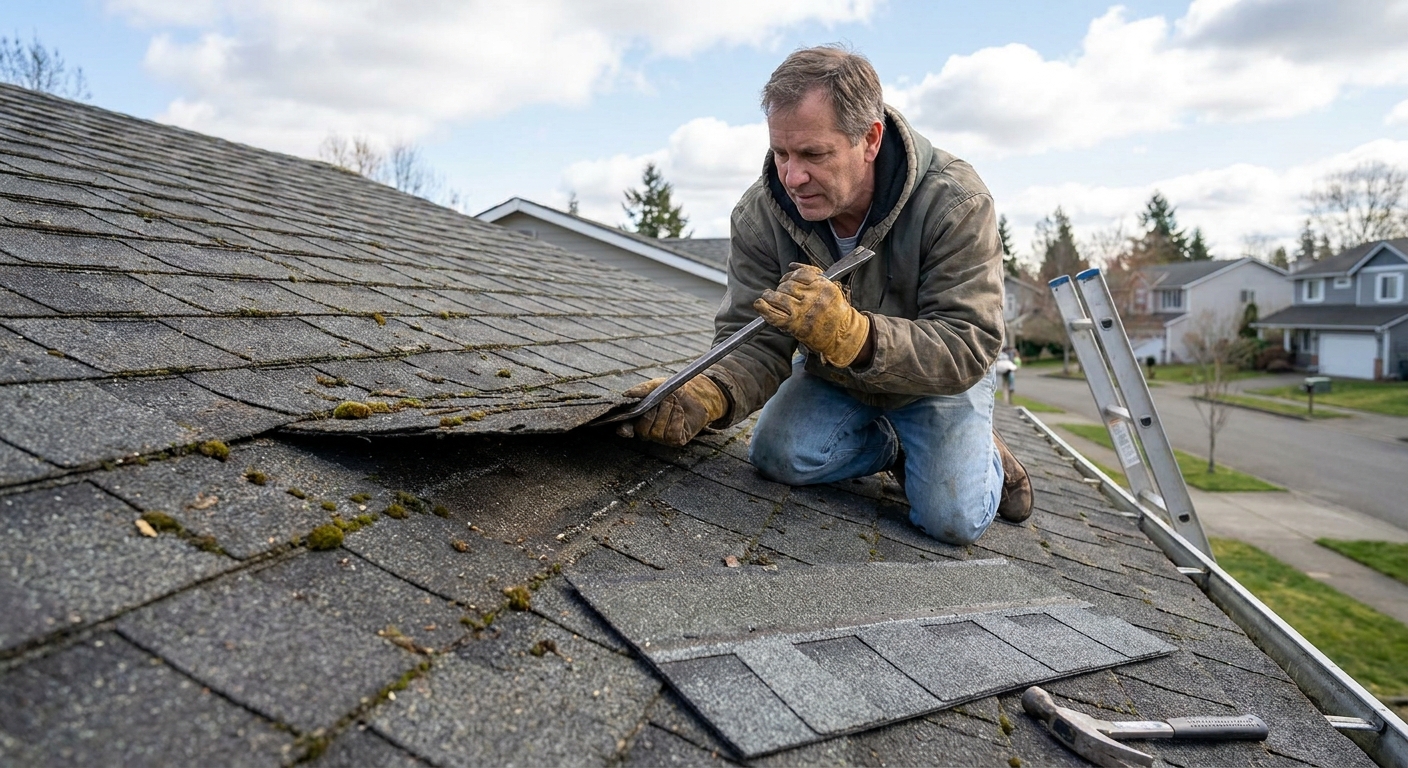
Before you climb: is this a safe DIY?
A missing shingle is often straightforward. But some roofs are not DIY-friendly, and some “one missing shingle” situations are a symptom of bigger failure.
Skip DIY and call a pro if:
- The roof is steep (if you feel like you have to lean into it to stand, or you cannot move confidently with three points of contact).
- It is wet, frosty, windy, very hot, or very cold. Hot shingles scuff and tear easily. Cold shingles can be brittle and crack when you lift tabs.
- You see widespread damage: lots of missing tabs, creased shingles, exposed fiberglass mat, or granules piled in gutters.
- There is soft decking (spongy feel underfoot) or sagging areas.
- Damage is near a valley, chimney, skylight, or dormer where flashing details matter.
- You have 3-tab shingles and many tabs are missing. That can point to age, poor nailing, or wind uplift across a whole slope.
- Your roof is near end-of-life (curling edges, lots of granule loss, brittle cracking everywhere).
My personal rule: if I cannot move confidently with three points of contact, I do not “push through.” Roof repairs punish hesitation.
Tools and materials
You do not need a truck full of roofing gear. You do need the right basics.
Tools
- Extension ladder (rated for your weight, set correctly)
- Roofing or flat pry bar (a “shingle ripper” style works great)
- Hammer (or roofing nailer if you know it well)
- Utility knife with sharp blades
- Tape measure
- Chalk or painter’s tape (optional, for marking alignment)
- Caulk gun (for roofing cement if needed)
Materials
- Replacement shingle(s) that match as closely as possible
- Roofing nails (galvanized, or stainless in coastal areas). Avoid staples. Use nails with a proper roofing head.
- Nail length: 1 1/4 inch is common on many asphalt shingle roofs, but do not guess. Choose a length that meets your shingle manufacturer instructions and local code, and penetrates the roof deck adequately (often through the deck or to a specified depth).
- Asphalt roofing cement (in a tube or can) for resealing tabs in cool weather or on older roofs. Use it sparingly. It is not a substitute for correct nailing, and overdoing it can make future repairs messy (and can be frowned on by some manufacturers).
Safety gear
- Non-slip shoes or boots
- Work gloves
- Eye protection
- Roof harness and anchor if you have any doubt about slope or footing
- A spotter on the ground is a smart bonus if you can swing it
How to match the shingle
Matching matters for looks, but it also matters for fit. Shingles vary by manufacturer, thickness, exposure, and adhesive strip location.
Step 1: Identify what you have
- 3-tab shingles have evenly spaced “slots” and three tabs per shingle.
- Architectural shingles (laminated) have a layered, textured pattern with no vertical slots.
Step 2: Get the closest match you can
- If you have extras from the original roof, use them. Best-case scenario.
- Check the garage, attic, or shed. Builders often leave a bundle behind.
- If you are buying new, bring a sample (or a clear photo plus measurements) to the store.
Color note: even the same “color name” can vary by batch and age. A new shingle may look brighter. Usually it blends in after a season or two, especially on roofs that get sun.
Safe access and setup
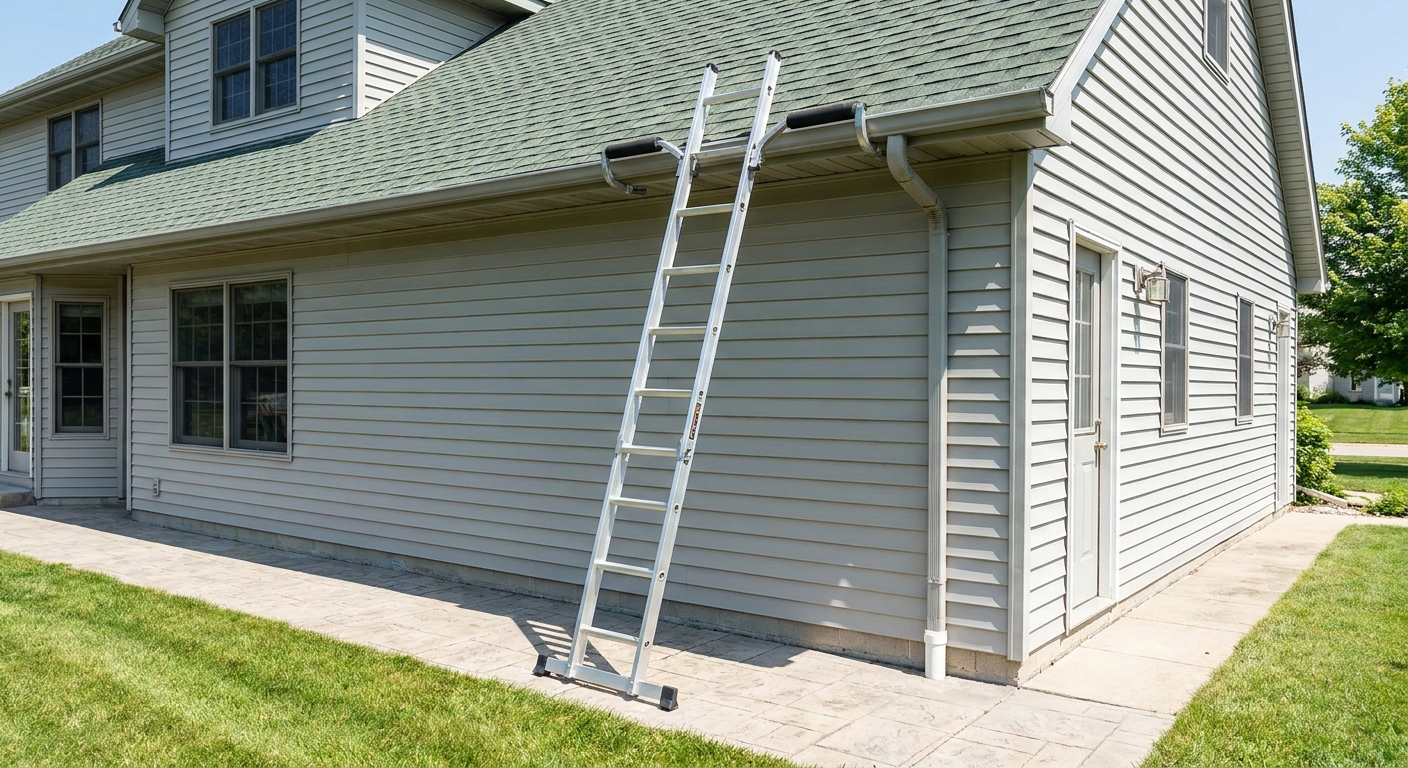
Set the ladder correctly
- Use the 4-to-1 rule: for every 4 feet of ladder height, the base should be 1 foot out from the wall.
- Extend the ladder at least 3 feet above the roof edge so you have handholds when stepping on and off.
- Stabilize the base on firm, level ground. If the ground is soft, add a solid board under the feet.
- If possible, use a ladder stabilizer to protect gutters and improve footing.
Choose the right time
Dry, mild weather is your friend. Shingles are less likely to tear when they are warm. Just do not work when the roof is baking hot. Early afternoon on a mild day is usually the sweet spot.
Move smart
- Stay off edges and weak-looking areas.
- Step flat-footed and deliberate. If anything feels spongy, get off the roof.
- If you can, have a spotter. At minimum, tell someone you are up there.
Step-by-step: replace the shingle
The basic idea is simple: lift the shingles above, remove nails, slide out the damaged shingle, slide in the new one, nail it correctly, then reseal. The details are where leaks get prevented.
1) Inspect the area
Look for:
- Missing shingle entirely, or just a torn tab
- Nail heads exposed
- Cracks or creases on surrounding shingles
- Any lifted edges that are no longer sealed
Quick underlayment check: if you can see torn underlayment, bare wood deck, or a hole that looks bigger than “one shingle,” stop and consider a pro. At minimum, you may need a temporary cover until it is repaired correctly.
2) Break the seal above
Asphalt shingles are stuck together by a factory adhesive strip. To replace one shingle, you typically need to gently lift the shingle above it (and sometimes the one above that) to reach the nails.
- Slide your flat pry bar under the shingle directly above the damaged one.
- Work slowly, lifting just enough to separate the adhesive bond.
- If the shingle is stubborn, do not force it. Let the sun warm the area first, or come back when the roof is a bit warmer.
Thrifty tip: tearing an extra shingle because you got impatient is the most expensive “free” repair.
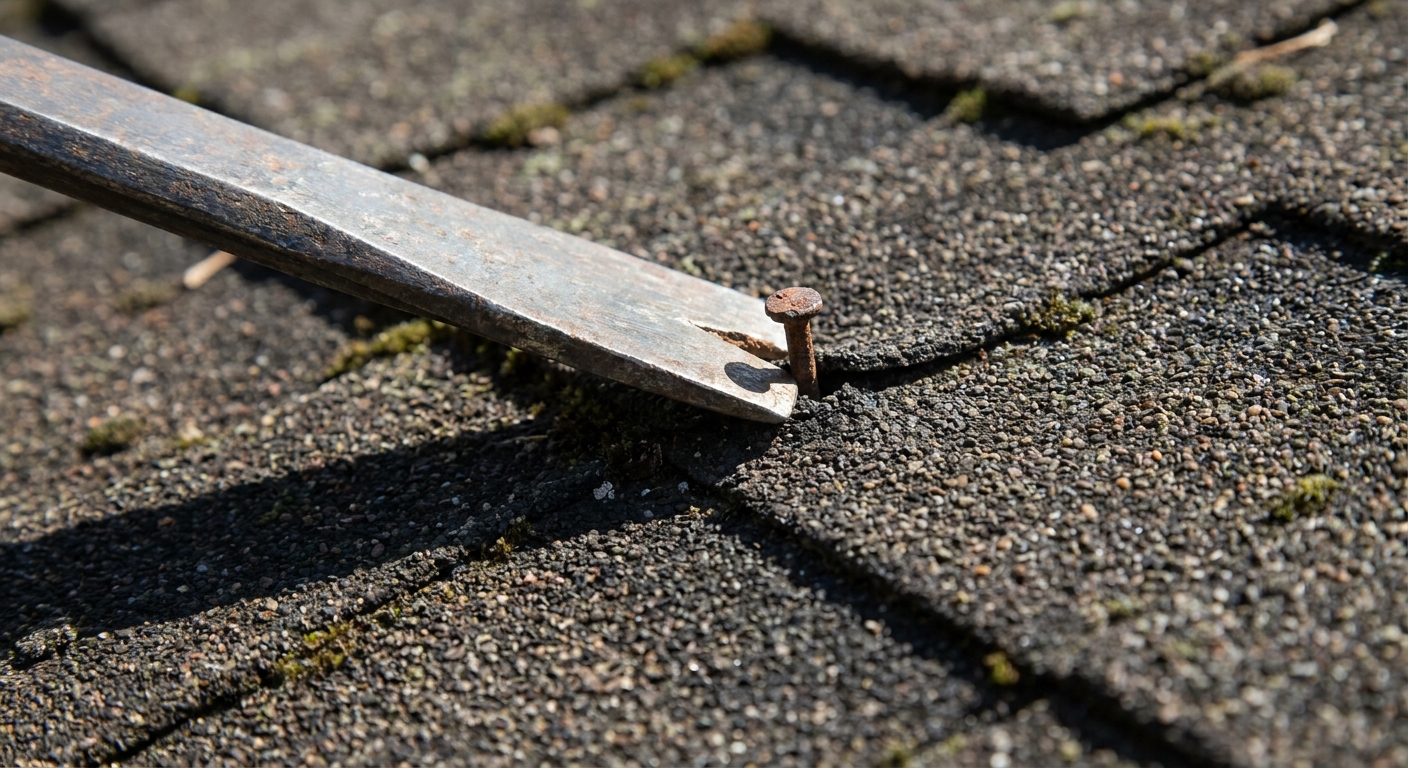
3) Remove the nails holding the damaged shingle
Most shingles are nailed near the top, under the shingle above. Once the upper shingle is lifted, you can find the nail heads.
- Use the pry bar to lift each nail, then pull it out.
- Remove nails from the damaged shingle and any nails that pin it down through overlap.
- Keep the pry bar flat to avoid gouging the shingle below.
4) Slide out the old shingle
With nails removed, the shingle should pull out. If it catches:
- Check for missed nails.
- Use a utility knife to slice through any stuck adhesive rather than yanking.
5) Prep the replacement shingle
- Dry-fit it first. Slide it into position and make sure the bottom edge aligns with the course next to it.
- If it is slightly long or you need to match a pattern line, trim with a utility knife on a scrap piece of plywood or a thick piece of cardboard.
6) Slide in the new shingle and align it
Line up:
- Bottom edge with neighboring shingles
- Side seams with the existing pattern
- For 3-tab, align the slots and tabs to match the course
- For architectural shingles, match the stagger and avoid lining up vertical joints with the shingles above and below
A small misalignment stands out from the driveway and can channel water in weird ways.
7) Nail it the right way
Use roofing nails (corrosion-resistant) and follow a nail pattern consistent with the rest of your roof and your shingle manufacturer instructions.
- Hit the manufacturer nail line: many shingles have a printed nail line or a clearly defined “nailing zone.” That is the target, even if it is slightly different from the shingles next to it.
- 3-tab shingles: nails are typically placed below the sealant strip and above the cutouts, in the standard nailing zone.
- Architectural shingles: the nail line is especially important because it is designed to catch and secure both layers of the laminated shingle. Miss it high or low and you can reduce wind resistance.
- Typically you will use 4 nails per shingle in standard conditions, more in high-wind areas or if your roof was installed that way.
- Drive nails flush with the shingle surface. Not sunk deep. Not proud. Flush.
Beginner warning: overdriving a nail can tear through the mat and reduce holding power. If you accidentally overdrive, add a new nail nearby in solid shingle material and seal the overdriven spot with a small dab of roofing cement.
8) Re-nail above (if needed)
If you had to remove nails from the shingle above to free the damaged shingle, replace them in the same general nail zone, then make sure the shingle lies flat.
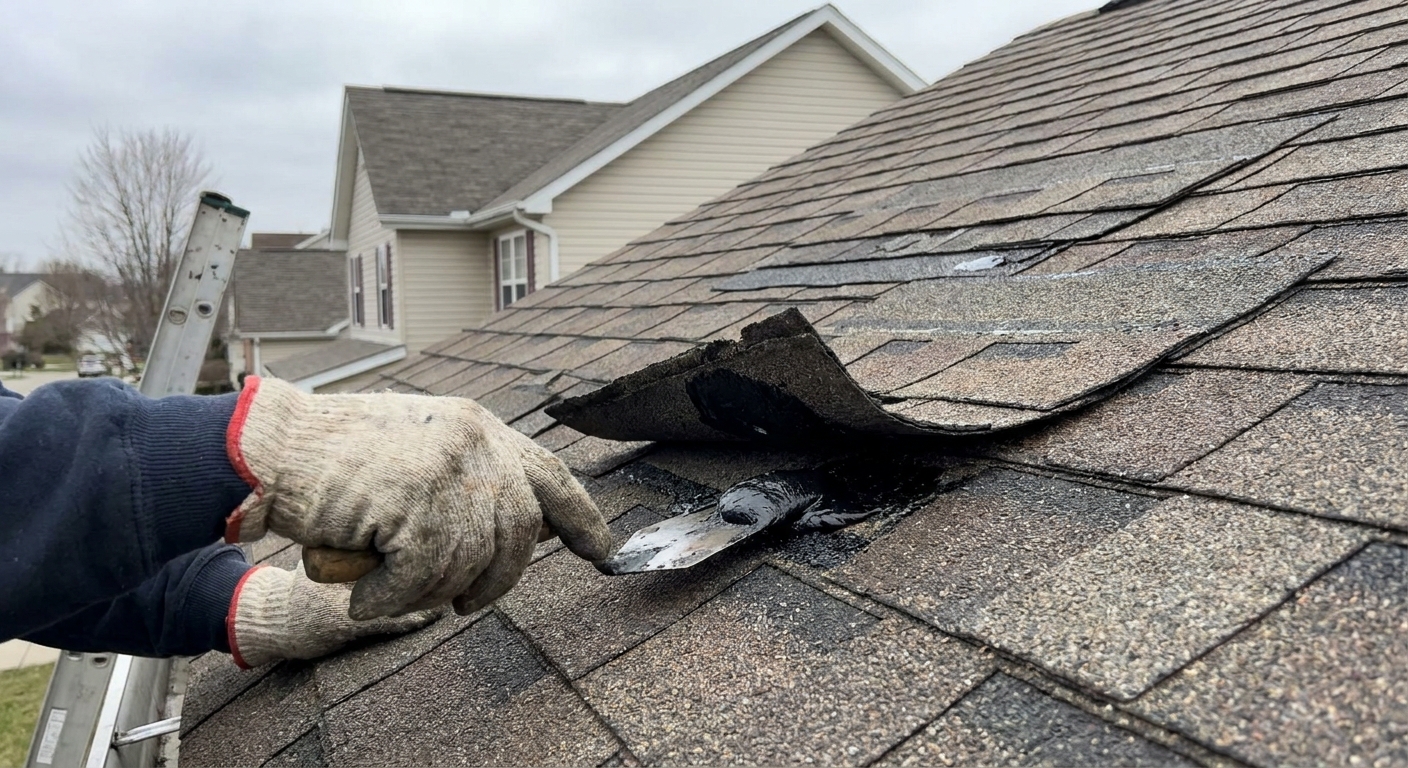
9) Reseal the lifted tabs
On a newer roof in warm weather, the adhesive may re-bond on its own. On older roofs, cool temperatures, or windy spots, help it out.
- Lift the shingle tab gently and apply a small quarter-sized dab of asphalt roofing cement underneath.
- Press the tab down firmly.
- Do not smear cement everywhere. More is not better. You just want a bonded spot that sheds water.
10) Final check
- All nail heads covered by the shingle above (no exposed nails where water runs)
- Shingle lies flat with no buckles
- Tabs resealed where you broke the bond
- No debris left behind (loose granules and old nails can become future problems)
My “success” test: from the ground, the repair should mostly disappear into the pattern, and nothing should look lifted or wavy.
Only a tab is missing?
If you have 3-tab shingles and only one tab blew off, you can sometimes replace just that shingle, but you cannot reliably “glue on” a loose tab and call it done. Once the fiberglass mat is torn, the shingle is compromised.
For architectural shingles, a broken corner or missing chunk is usually a replace-the-whole-shingle situation too. Water will find the path you hoped it would not.
Common mistakes
- Leaving exposed nails on the face of the shingle in the water path.
- Missing the nail line, especially on architectural shingles where the nail zone matters.
- Ripping surrounding shingles by prying too aggressively instead of gently breaking the seal.
- Misaligning the shingle so the courses look wavy and the overlaps are off.
- Overusing roofing cement until it squishes out and collects dirt. Use small dabs.
- Ignoring the “why”: if one shingle blew off because it was never sealed properly, others may be next.
When it is a bigger problem
Replacing a shingle fixes a hole, but it does not fix the forces that created it. Consider a broader inspection or pro help if you notice:
- Repeated blow-offs in the same area (wind edge, ridge, or corner) which often points to sealing issues, improper nailing, shingle age, or edge detailing. Ventilation issues can sometimes contribute indirectly by accelerating heat-related aging and poor sealing, but I look at fastening and edge conditions first.
- Granule loss that looks like sand in the gutters or at downspouts.
- Creased shingles across a wider patch, often from wind uplift.
- Moss or algae holding moisture, especially on the north side.
- Ice dam history and water staining at eaves, which may mean insulation and ventilation need work, not just shingles.
- Flashing concerns around plumbing vents, chimneys, and valleys.
If you are seeing more than a small handful of issues, the “cheap patch” can become a cycle. That is when a roof inspection pays for itself.
Quick FAQs
Can I replace a shingle in winter?
You can, but it is harder. Shingles are brittle in cold weather and the adhesive strip will not re-seal well. If you must do it, work gently and plan to use roofing cement to re-bond tabs.
Do I need to seal nail heads?
If nails are properly placed, they should be covered by the shingle above. If you end up with an exposed nail head because of a special situation, yes, seal it with a small dab of roofing cement.
How do I know if I have the right nails?
You want roofing nails with a wide head and corrosion resistance, long enough to meet manufacturer instructions and local code and to penetrate the decking adequately. When in doubt, match the type you see on the roof and verify length based on deck thickness.
The 30-Second Cheat Sheet
Essential takeaways for: Replace a Missing or Damaged Roof Shingle
What you’re doing
Replace a single missing or damaged asphalt shingle by lifting the course above, removing nails, sliding in a matching shingle, nailing it correctly on the proper nail line, then resealing the tabs.
Tools and materials
- Extension ladder, flat pry bar, hammer, utility knife
- Roofing nails (galvanized, or stainless in coastal areas), replacement shingle
- Asphalt roofing cement (for resealing tabs, especially in cool weather)
- Gloves, eye protection, non-slip shoes (harness if slope is sketchy)
Safety first
- Do not climb if roof is wet, icy, windy, very hot, very cold, or too steep for confident footing.
- Set ladder with 4-to-1 angle and extend 3 feet above roof edge.
- If possible, work with a spotter on the ground.
30-second steps
- Gently break the adhesive seal on shingles above the damaged one.
- Lift the upper shingle and remove nails holding the damaged shingle.
- Slide out the old shingle (check for missed nails if it sticks).
- Dry-fit and trim the new shingle if needed.
- Slide in, align with neighboring courses, and nail on the manufacturer nail line (often a printed line).
- Replace any nails you removed above.
- Add small dabs of roofing cement under lifted tabs to reseal.
- Final check: no exposed nails in the water path, shingle lies flat.
Call a pro if you see this
- Many missing tabs or shingles, creasing across a section, soft decking, sagging, or damage near valleys and chimneys.
- Torn underlayment, visible decking, repeat blow-offs, heavy granule loss, or signs of ice dams and chronic moisture.
💡 Tip: Scroll up to read the full article for detailed, step-by-step instructions.
⬆️ Back to top
About Marcus Vance
Content Creator @ Grit & Home
Marcus Vance is a lifelong DIY enthusiast and self-taught home renovator who has spent the last decade transforming a dilapidated 1970s ranch into his family's dream home. He specializes in budget-friendly carpentry, room-by-room renovations, and demystifying power tools for beginners. Through his writing, Marcus shares practical tutorials and hard-learned lessons to help homeowners tackle their own projects with confidence.