
When cleaning is not enough
I love a good scrub as much as the next DIYer, but here is the truth: if grout is cracking, turning sandy, or falling out, you are past the cleaning stage. At that point, the grout has lost strength or lost its bond to the tile edges. No cleaner can glue it back together.
The good news is that most small-to-medium grout failures in a shower are very repairable in a weekend, even if you are new to tile work. The key is doing two things most “clean your grout” articles skip: removing the failing grout and using the right replacement grout for your joint width.
Why shower grout crumbles
Grout does not fail for just one reason. Usually it is a mix of water, movement, and age.
- Moisture behind the tile: A slow leak, a failed caulk line, or a waterproofing issue can let water linger where it should not. If water is getting behind tile, grout is often the symptom, not the cause.
- Movement: Corners and changes of plane (wall to wall, wall to floor, around niches) move slightly. Grout is rigid, so it cracks. Industry best practice is to use a flexible sealant (usually 100% silicone) in those joints instead of grout.
- Wrong grout type: Sanded grout in tight joints can be hard to pack well, and unsanded grout in wide joints can shrink and crack.
- Poor mixing or over-washing: Too much water in the mix or too much water during cleanup can weaken the surface, leaving a dusty, sandy finish.
- Sealer confusion: Cement-based grout is porous whether you seal it or not. Sealer mainly helps with staining and slows absorption at the surface, but it is not waterproofing and will not stop a leak behind tile.
Quick gut-check: If tiles feel loose, sound hollow, or the wall flexes when pressed, grout repair alone may not hold. That points to substrate, waterproofing, or bonding issues underneath.
What to use
Tools and supplies
- Manual grout saw or carbide grout removal tool
- Utility knife and a stiff nylon brush
- Shop vacuum with a crevice tool
- Painter’s tape (optional, helps protect softer tile)
- Rubber grout float
- Two buckets and clean sponges
- Microfiber towels
- Grout (matched type and color)
- 100% silicone caulk for corners and changes of plane
- Penetrating grout sealer (for cement-based grout)
- Safety glasses (old grout chips love to fly)
- N95 (or better) dust mask for grout removal dust
Sanded vs unsanded
This is where a lot of repairs go sideways.
- Unsanded grout: often used for 1/16 inch to 1/8 inch joints (common on wall tile). It is smoother and packs into tight joints more easily.
- Sanded grout: often used for 1/8 inch to 1/2 inch joints (common on floors and some shower pans). Sand helps resist shrinkage and cracking in wider joints.
One important caveat: some modern grouts (single-component, “all-in-one,” polymer-modified, epoxy) allow different joint widths. Always check the manufacturer’s limits on the exact product you buy.
Tip from my own mistakes: do not guess by eyeballing. Measure one joint with a drill bit or a small ruler. Being off by just a hair can mean crumbly joints later.
Other grout options (quick note)
- Epoxy grout: very stain resistant and does not need sealing, but it is less forgiving to install and clean up.
- Single-component premixed grout: convenient for small repairs and often very stain resistant, but you still need to follow the joint width and cure rules on the label.
What I avoid for patch repairs
- Grout “renew” paint as a fix for missing grout. It can make stained grout look better, but it will not rebuild lost material.
- Latex acrylic caulk in wet shower areas. Use 100% silicone for corners and transitions.
Step-by-step repair
If you do nothing else, remember this order: remove, clean, dry, regrout, cure, seal.
1) Figure out the scope
- Circle failing areas with painter’s tape.
- Check corners and the wall-to-floor joint. If those are grouted and cracked, plan to remove grout there and replace with silicone.
- Look for signs of a leak: persistent wet smell, soft drywall on the other side of the wall, water staining below the shower, loose tiles.
2) Remove loose grout
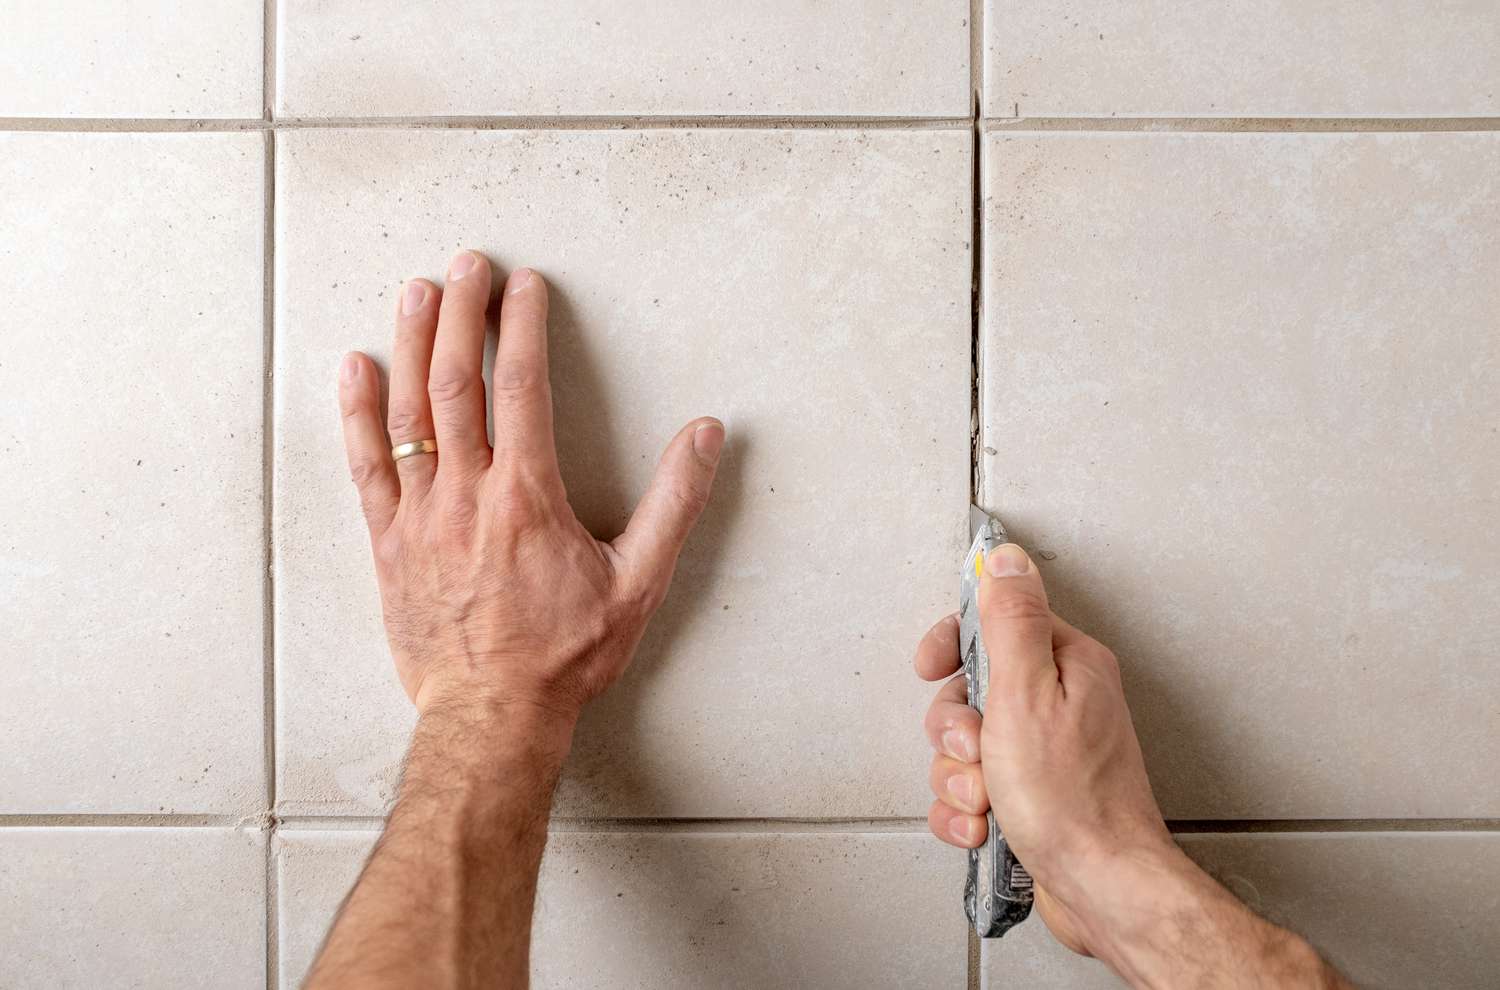
Safety first: put on safety glasses and an N95 (or better) dust mask. Grout dust can contain silica, and the little shards are sharp.
Use a manual grout saw for control. You are aiming to remove grout to about 2/3 of the grout joint depth (not tile thickness), or at least deep enough that the new grout has a solid layer to grab onto.
- Start with light pressure until you get a groove.
- Work slowly, especially on soft ceramic tile or glass tile.
- Do not dig into waterproofing details near pans, curbs, niches, or benches.
If grout is only missing in a tiny spot: still remove surrounding weak grout until you reach grout that is hard and well bonded. Patching over crumbs is a short-lived fix.
3) Vacuum and clean joints
Dust is the enemy of adhesion (and can lead to weak grout and pinholes).
- Vacuum the joints thoroughly.
- Scrub with a stiff nylon brush.
- Wipe with a barely damp sponge to pick up remaining powder, then let it dry.
Dry time matters: if the shower was used recently, give it at least 24 hours to dry out before grouting. A small fan helps.
4) Regrout field joints
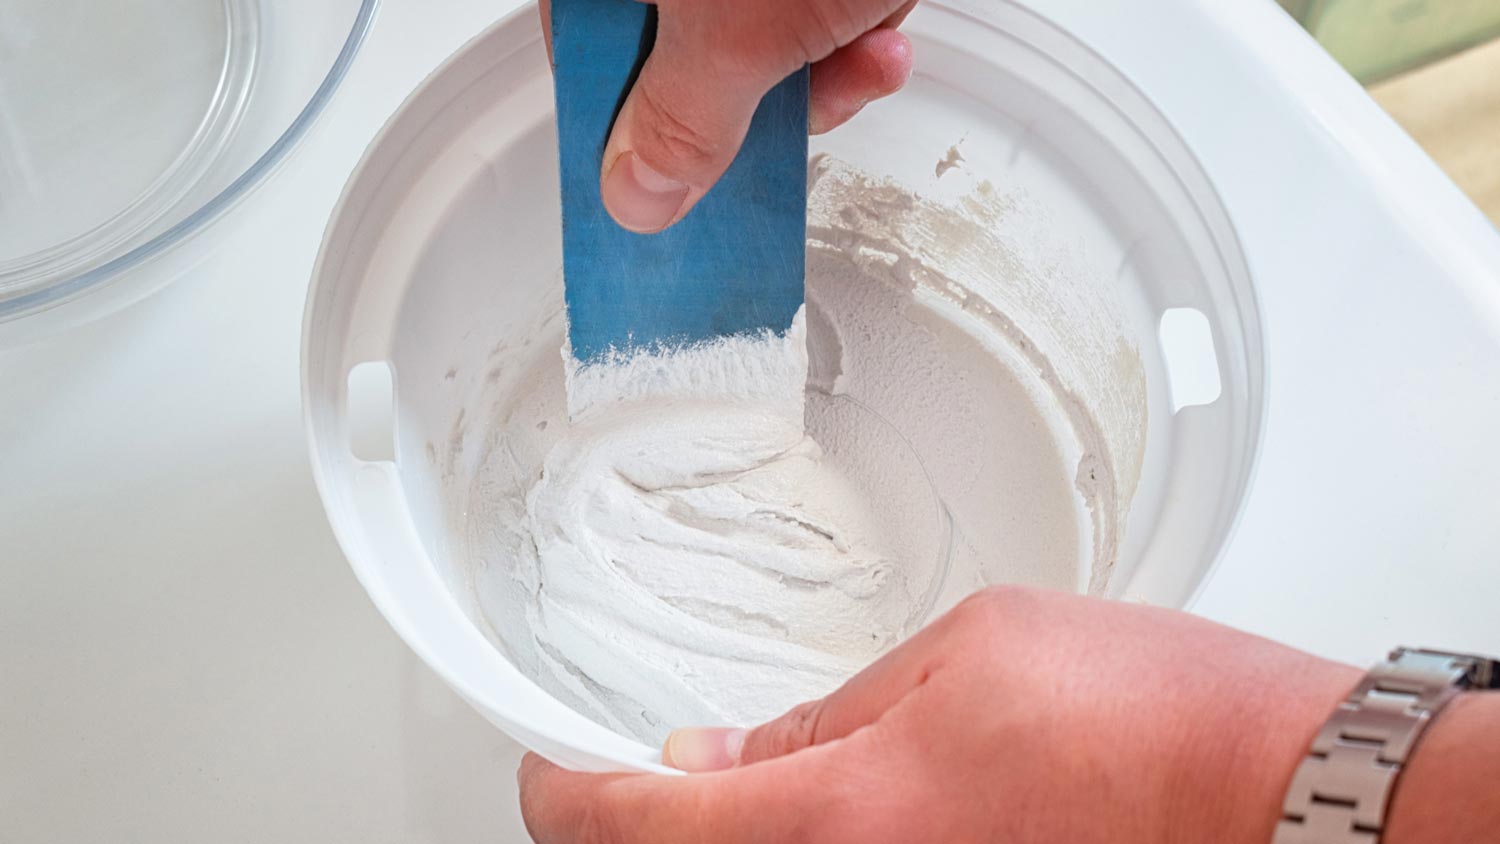
Mix grout to a thick peanut-butter consistency and let it slake (rest) if the manufacturer calls for it, then remix. Follow the bag exactly. This is not the moment for freestyle.
- Use a rubber float at a 45-degree angle and pack grout firmly into the joints.
- Work in small sections, especially on walls. Gravity is not your friend.
- Strike off excess by pulling the float diagonally across the tile.
5) Clean up gently
This is the most common DIY failure point. Too much water during cleanup can weaken the surface and cause that chalky crumble later.
- Wait until the grout firms up slightly (often 10 to 20 minutes, but vary by product and humidity).
- Simple cue: do a light “fingerprint test.” Press gently. It should resist and not smear, but still feel a little workable.
- Use a well-wrung sponge. Wipe lightly in one direction, rinse, repeat.
- After haze forms, buff with a microfiber towel.
6) Silicone corners and transitions
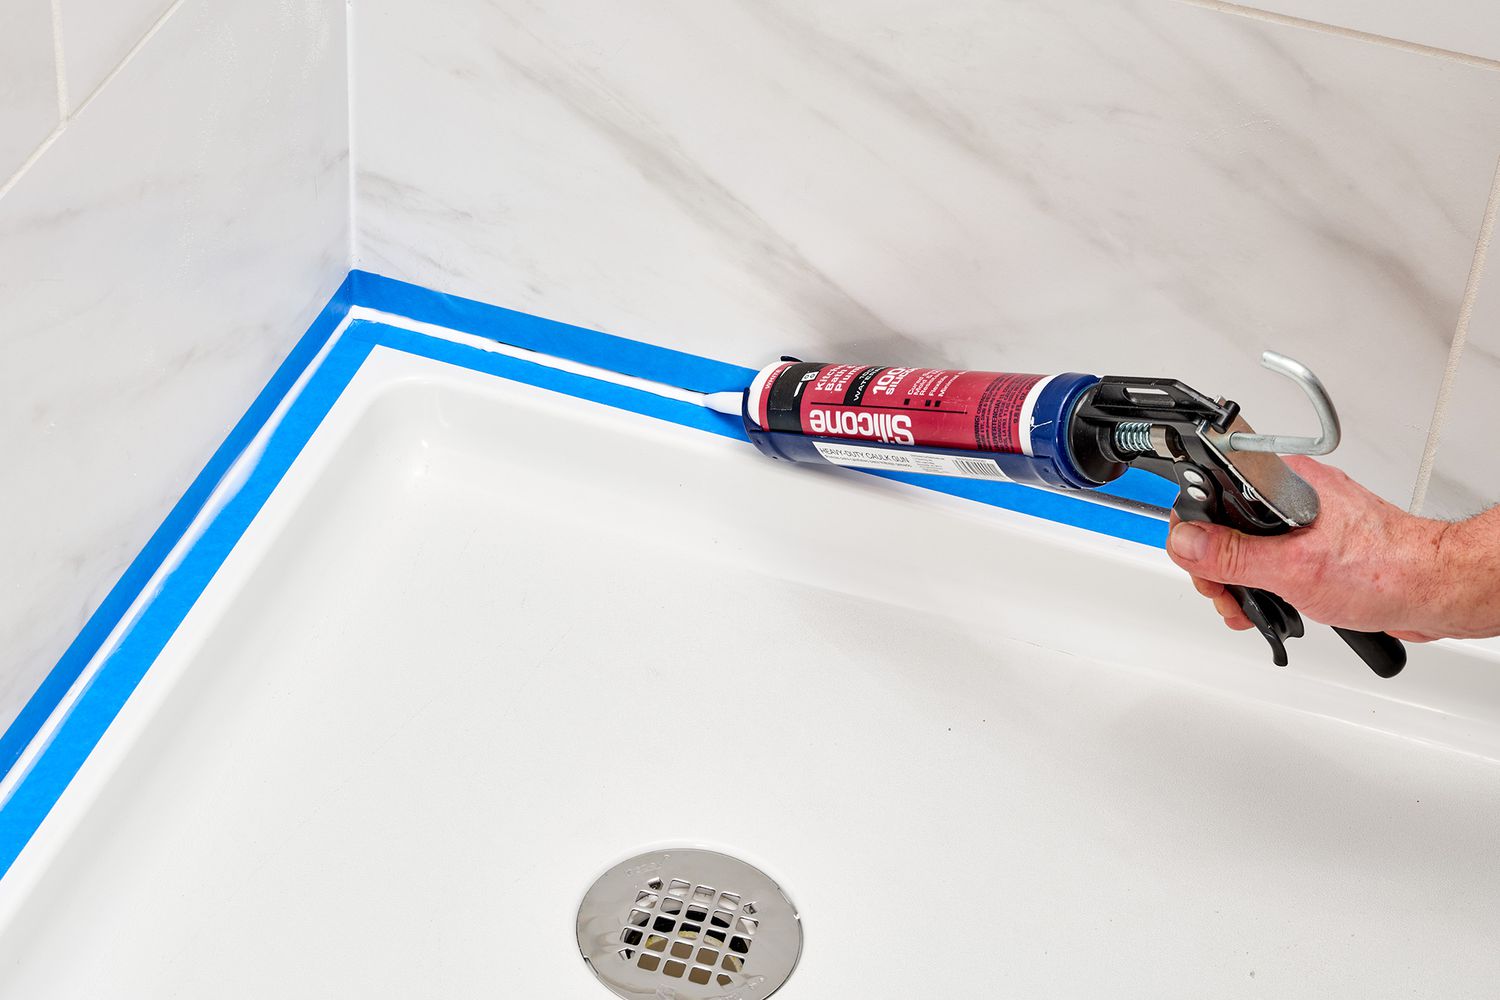
Any change of plane should be flexible. That usually includes:
- Wall-to-wall corners
- Wall-to-floor joint
- Edges of niches and benches (depending on design)
Remove old cracked grout or caulk first, clean, let dry, then apply 100% silicone and tool it smooth.
7) Cure, then seal (if needed)
Grout needs time to cure before it gets soaked. Many cement grouts want 48 to 72 hours before shower use, but some rapid-setting products are faster. Check your grout instructions and follow that number.
Once cured, apply a penetrating sealer to cement-based grout if the product calls for it. Two light coats usually beat one heavy coat. Wipe any sealer off the tile face before it dries.
Note: epoxy grout does not typically need sealing.
Patch or regrout?
- Patch repair works when: the failure is localized, tiles are solid, and the rest of the grout is hard and intact.
- Consider regrouting larger areas when: grout is powdery in multiple places, cracking repeats across whole walls, or color and texture are inconsistent from multiple old patches.
If you are dealing with widespread failure, it can be worth removing and redoing the majority of the joints for a uniform look and longer life.
One realism note: even with a perfect color match, new grout can look a little different next to older, aged grout. That is normal, especially in patch repairs.
Make it last
Repairing grout is satisfying. Repairing it twice is not. These are the habits and fixes that make the repair last.
- Use silicone in corners: grout cracks there because the building moves. Let it move.
- Run the bath fan during showers and for 20 minutes after. Moisture that hangs around is what slowly wins.
- Maintain caulk lines: if silicone peels or molds badly, replace it before water gets behind tile.
- Reseal cement grout as needed: many showers do well with resealing every 1 to 2 years, depending on use and sealer type.
- Fix the source: if a shower valve is leaking in the wall or a pan edge is compromised, grout will keep failing until the moisture problem is solved.
Troubleshooting
“My new grout cracked a week later”
- Check corners and transitions. If they were grouted, replace with silicone.
- Confirm you used sanded vs unsanded correctly for the joint width (and that your product allows that width).
- Make sure the shower was not used before full cure.
“The grout looks blotchy”
- Too much water during cleanup can lighten grout.
- Hard water and minerals can affect color as it cures.
- Mixing multiple small batches inconsistently can cause shade shifts. Measure water carefully.
“It is still crumbly”
- Likely over-watered mix or over-washed joints.
- Not enough depth of old grout removed, so the new grout layer is too thin and weak.
When to call a pro
I am all for DIY, but I have also learned when the right move is bringing in help.
- Multiple loose tiles, soft walls, or visible mold behind trim
- Recurring grout failure in the same area after a proper repair
- Suspected shower pan or waterproofing failure
Those issues can turn into structural damage if they are ignored.
My simple rule
If grout is dirty, clean it. If grout is missing or crumbling, remove it and replace it, then deal with the reason it failed. Do that, and you will not just make the shower look better, you will make it last.
About Marcus Vance
Content Creator @ Grit & Home
Marcus Vance is a lifelong DIY enthusiast and self-taught home renovator who has spent the last decade transforming a dilapidated 1970s ranch into his family's dream home. He specializes in budget-friendly carpentry, room-by-room renovations, and demystifying power tools for beginners. Through his writing, Marcus shares practical tutorials and hard-learned lessons to help homeowners tackle their own projects with confidence.