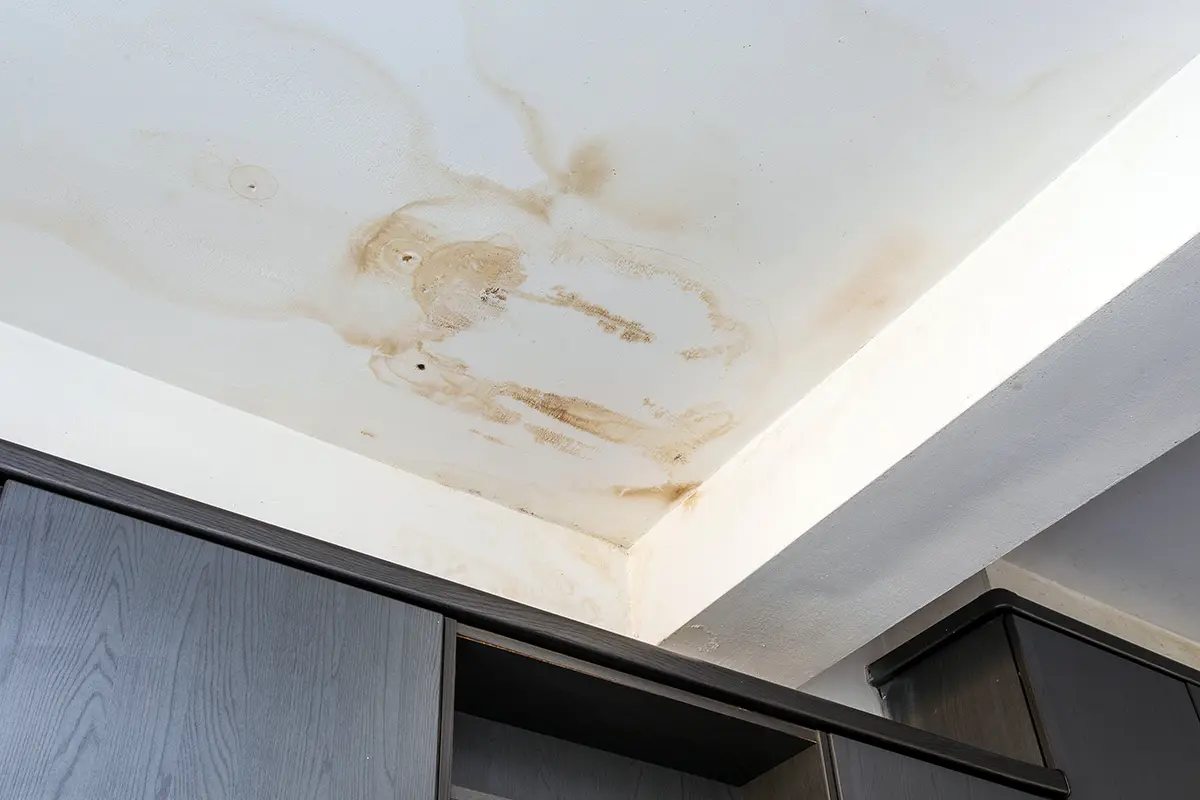
If you’ve got water showing up around a skylight frame, your brain immediately goes to worst-case roof leak. Sometimes that’s true. Other times it’s plain old condensation acting like a leak. The good news is you can usually narrow it down pretty quickly, then choose the right fix instead of smearing caulk everywhere and hoping for the best. Just know that some leaks are intermittent, so you might need more than one storm or cold snap to catch it in the act.
I’ve chased more than one “leak” that turned out to be warm bathroom air hitting a cold skylight. I’ve also ignored a small stain once and later found soggy roof decking. So we’re going to handle this in two phases: stop the water now, then fix the actual cause.
Know your skylight type
This helps you make sense of the fixes you will see later.
- Deck-mounted: Sits low and mounts directly to the roof deck. Usually paired with a manufacturer flashing kit.
- Curb-mounted: Sits on a framed box (the curb) that sticks up above the roof. Common on flat or low-slope roofs, and on many older installs.
If you are not sure, look from outside: if you can see a boxy frame under the unit, that is typically curb-mounted.
Condensation or a true leak?
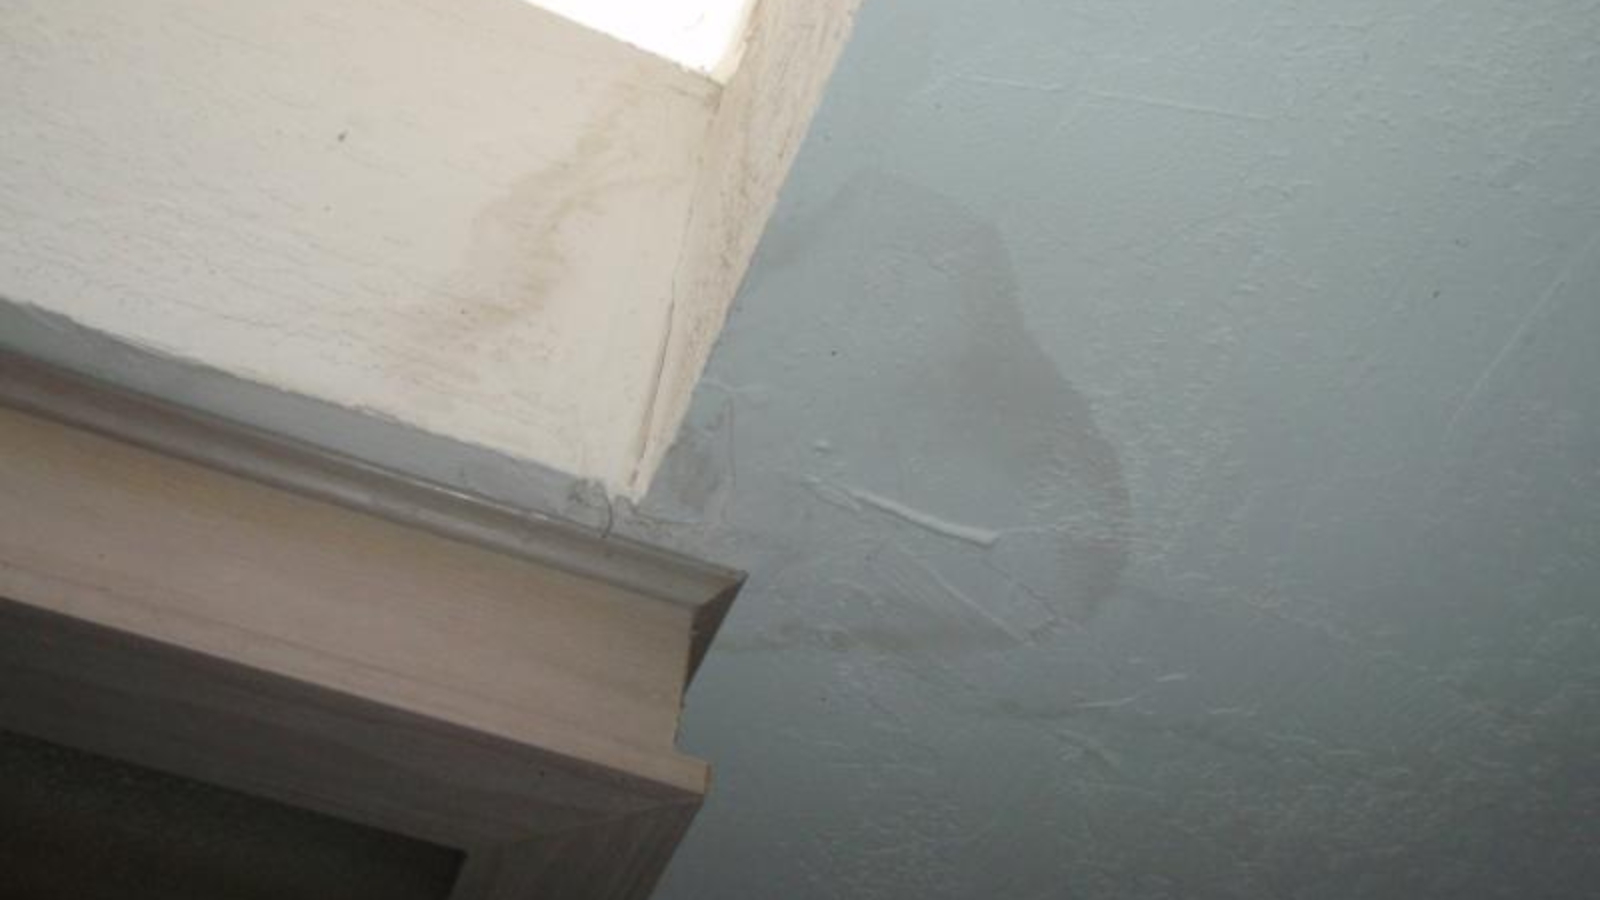
Start here. Condensation and roof leaks can look identical from below, but they behave differently.
Quick clues it is condensation
- Water shows up on cold mornings or after showers, cooking, or running a humidifier.
- Droplets form on the glass or on the interior frame, then run down.
- Moisture is evenly spread, not concentrated at one corner.
- The problem improves when you run a bath fan or dehumidifier.
Quick clues it is a real roof leak
- Water appears during rain or snow melt, especially windy storms.
- The stain is worse on one side of the skylight (often the downhill side, but not always).
- You see soft drywall, bubbling paint, or dripping that starts after a storm.
- In the attic, you find wet wood at the skylight curb or roof sheathing near it.
Two simple tests that tell you a lot
- Paper towel test: Wipe the interior frame and the drywall return (the sloped drywall “shaft” surfaces between the skylight and your room ceiling). If it is actively wet on interior surfaces (not just a stain), and you also see fogging or droplets on the glass, condensation jumps up the list.
- Attic check during rain: If you can access the attic safely, go up during or right after rain with a bright flashlight. Look for shiny wet wood, drips, or water tracks on the skylight curb framing. Follow the trail up-slope. Water often travels before it shows itself.
Safety note: Watch for electrical hazards. Avoid wet junction boxes, wiring, recessed lights, and bath fans. If the attic has no solid flooring, stay on joists and bring a piece of plywood to spread your weight. Also, do not step on insulation that might be covering drywall. No ceiling repair is worth a fall.
Stop the water fast
Temporary protection is about buying time without creating new damage. The goal is to keep water from soaking insulation, drywall, and framing until you can do the real repair.
Step 1: Catch and control the water inside
- Put a bucket down and protect the floor with a plastic drop cloth or old towels.
- If the ceiling is bulging with trapped water, do not poke a big hole. Instead, use an awl or small screwdriver to make a tiny drain hole at the lowest point, then catch the water. This reduces drywall blowout.
- If the ceiling is sagging significantly or there are lights nearby, shut off power to that area at the breaker and consider calling a pro. Water and electricity is a bad pairing.
- Remove any soaked trim that is holding water against drywall.
Step 2: Reduce moisture if you suspect condensation
- Run bath fans 20 to 30 minutes after showers.
- Use a dehumidifier. A common target is 30 to 50% indoor humidity, but in colder climates you may need to stay lower in winter to prevent condensation on glass and skylight frames.
- Make sure the skylight’s interior weep paths are not painted shut or clogged with debris.
Warranty note: Follow your skylight manufacturer’s instructions for cleaning weep paths and for any sealant use. The wrong product in the wrong spot can create leaks or void warranties.
Can you tarp it from inside?
People ask this because getting on a wet roof is sketchy, and I agree. Here’s the honest answer: you can reduce damage from inside, but you usually cannot fully “tarp” a skylight from inside or the attic the way you would from the roof.
What you can do from inside or the attic
- Create a drip diverter: In the attic, staple heavy plastic sheeting above the skylight area and slope it toward a bucket. Think of it like a mini gutter that guides drips away from insulation and drywall.
- Protect insulation: Pull wet insulation back from the leak path so it can dry and so it is not acting like a sponge.
- Mark the leak path: Use painter’s tape on framing where the water first shows up. It helps when things dry out and you are trying to remember what you saw.
Quick caution: Keep plastic away from hot fixtures, chimneys, and electrical wiring and boxes. Also avoid covering large areas so tightly that you create a bigger moisture trap than you started with. The goal is a small, temporary diverter, not a new vapor barrier project.
What not to do
- Do not spray foam around the frame thinking it seals water out. Foam can trap water, rot wood, and make future flashing work miserable.
- Do not rely on interior caulk as a waterproofing fix. If water is getting in from the roof, interior sealant just redirects it into your ceiling cavity.
Why water shows up at the frame
Most skylight “frame leaks” are actually flashing leaks or curb leaks. The water shows up at the frame because that is where the hole in the roof is.
Common causes
- Improper or failed flashing: Missing step flashing, wrong sequence with shingles, or deteriorated metal pieces.
- Failed underlayment around the opening: Ice and water shield not installed, not lapped correctly, or torn during install.
- Ice dams: In cold climates, ice can trap meltwater and force it up under shingles and flashing. This can mimic “bad flashing” even when the metal pieces are decent, especially if underlayment protection is lacking.
- Cracked seal at the skylight to curb connection: Especially on older curb-mounted units where gaskets harden.
- Clogged weep channels: Some skylights are designed to drain minor moisture. Paint, debris, or roof tar can block these.
- Roofing problems nearby: A nail pop, lifted shingle, or worn valley up-slope can send water toward the skylight.
- Glass seal failure: Usually shows as fogging between panes. That is not the same as a roof leak, but it can produce moisture issues.
Outside checks
If you can safely view the skylight from the ground or a window, do that first. If you must get on the roof, pick a dry day, use proper footwear, and consider a pro if the pitch is steep. Skylights are awkward obstacles and falls happen fast.
What to look for
- Shingles: Cracks, missing tabs, lifted corners, exposed nail heads, or shingles that look “bridged” over flashing instead of woven with it.
- Flashing condition: Rust, gaps, bent edges, or flashing that looks smeared with roof cement everywhere (often a sign of repeated failed attempts).
- Side flashing details: Proper step flashing should be layered with each shingle course, not one long piece on top.
- Head flashing (top/up-slope): This is a common entry point. Water coming down the roof hits this first.
- Back pan or cricket: On wider skylights, a cricket may be needed to divert water. Without it, debris and ice can dam up behind the unit.
- Curb height: On curb-mounted skylights, the curb should meet manufacturer instructions and local code. Too low makes leaks more likely, especially in snow areas.

Sealant: when it helps
I’m not anti-caulk. I’m anti-caulk-as-a-roof-system.
When sealant can be appropriate
- Sealing a small, visible crack in a gasket or a minor joint on the skylight frame itself, if the manufacturer allows it.
- As part of a flashing repair where sealant is used under specific components, not as a surface smear.
When sealant is a red flag
- If you are trying to bridge between shingles and skylight frame on the surface.
- If the leak happens during wind-driven rain. Water gets forced under shingles and flashing, and surface caulk rarely stops it for long.
- If there is any sign of rot or soft wood at the curb. Sealant does not fix rotten structure.
Thrifty truth: A tube of roof sealant is cheap. The ceiling repair after trapped water rots your curb is not.
Fixes that last
Pick the fix based on what you found. Here’s the usual ladder of solutions, from least invasive to most.
1) Clear weep paths and control moisture
If you confirmed condensation or blocked drainage paths:
- Clean weep holes per the skylight manual (often with a small brush or compressed air used gently).
- Improve ventilation in bathrooms and kitchens.
- Air seal and insulate the skylight shaft walls in the attic to reduce cold surfaces that cause condensation.
2) Re-flash the skylight
If the skylight is in good shape but flashing is suspect, re-flashing is the durable move. This typically means:
- Carefully removing shingles around the skylight.
- Installing ice and water membrane correctly around the opening.
- Installing the correct flashing kit or properly layered step flashing, head flashing, and sill flashing.
- Re-installing shingles in the right sequence so water naturally sheds.
Tip: Many modern skylights have manufacturer-specific flashing kits. If you can identify the brand and model, using the proper kit increases your odds of a long-term win.
3) Repair or rebuild the curb
If you find soft wood, gaps, or a curb that does not meet the skylight specs, you may need curb work:
- Replace rotten curb framing.
- Confirm curb height and details match manufacturer instructions and local code, especially in snow and ice regions.
- Re-wrap the curb with membrane before flashing.
4) Replace the skylight
If the skylight is older, has fogging between panes, cracked acrylic, or repeated leak history, replacement can be smarter than patching. A new unit plus proper underlayment and flashing often costs less long-term than:
- Multiple service calls
- Repeated ceiling repairs
- Hidden rot that spreads
Rule of thumb: If it’s 15 to 20+ years old and leaking, I start leaning toward replacement, especially if the glazing has issues or flashing kits are hard to source. Condition and install details still matter, so this is not automatic.
Fast troubleshooting
If you want the quick version, here’s how I’d triage it.
| Symptom | Likely cause | Next check |
|---|---|---|
| Drips on cold mornings, fogging or droplets on glass | Condensation | Indoor humidity, bath fan use, shaft insulation, weep paths |
| Leak only during wind-driven rain | Flashing detail or shingle uplift nearby | Head flashing, step flashing layering, shingle condition up-slope |
| Leak during thaw or after heavy snow | Ice dam or underlayment weakness | Ice and water protection, back pan or cricket, attic air sealing and insulation |
| Stain worse at one corner, repeats in storms | Flashing or curb corner issue | Attic drip track, curb wood condition, flashing transitions |
| Fogging between panes | Glass seal failure | Confirm it is not roof water, then consider sash or unit replacement |
How to talk to a roofer
If you hire this out, a little wording goes a long way. You are not asking for “a bead of caulk.” You are asking for a water-shedding roof detail.
Questions I would ask
- “Will you remove shingles and inspect the underlayment around the skylight?”
- “Are you installing a flashing kit or custom step flashing layered with the shingles?”
- “Will you check the curb for rot and confirm it meets manufacturer specs?”
- “If you find damaged decking, how will that be repaired and documented?”
What to be cautious about
- Anyone who proposes roof cement as the main solution.
- Repairs that do not involve removing any shingles around the unit.
- No plan to address stains, wet insulation, or attic moisture after the roof work.
After the leak
Even a small skylight leak can soak insulation and keep feeding moldy smells if you do not dry it out.
- Dry the cavity: Pull down any wet insulation, run fans, and use a dehumidifier.
- Check for mold: Small surface mold on framing can often be cleaned, but widespread growth or soft wood means it is time to call for help.
- Do not paint immediately: Let the area dry fully. Use a stain-blocking primer before repainting.
When to call a pro
I love sweat equity. I also love not falling off roofs.
- Your roof is steep, high, or slippery, or the skylight is near an edge.
- You see soft decking, sagging, or active dripping in multiple places.
- The skylight is tied into a tile, slate, or metal roof system you are not familiar with.
- The leak returns after one careful attempt, which usually means the issue is layered under shingles or underlayment.
If you want one simple next step: confirm condensation vs. leak, then plan for proper flashing and underlayment based on the skylight type and manufacturer details. That is what keeps skylights dry year after year.
About Marcus Vance
Content Creator @ Grit & Home
Marcus Vance is a lifelong DIY enthusiast and self-taught home renovator who has spent the last decade transforming a dilapidated 1970s ranch into his family's dream home. He specializes in budget-friendly carpentry, room-by-room renovations, and demystifying power tools for beginners. Through his writing, Marcus shares practical tutorials and hard-learned lessons to help homeowners tackle their own projects with confidence.