🚨 In a DIY emergency or rush?
Skip the details and jump straight to our 30-second cheat sheet for the most crucial info.
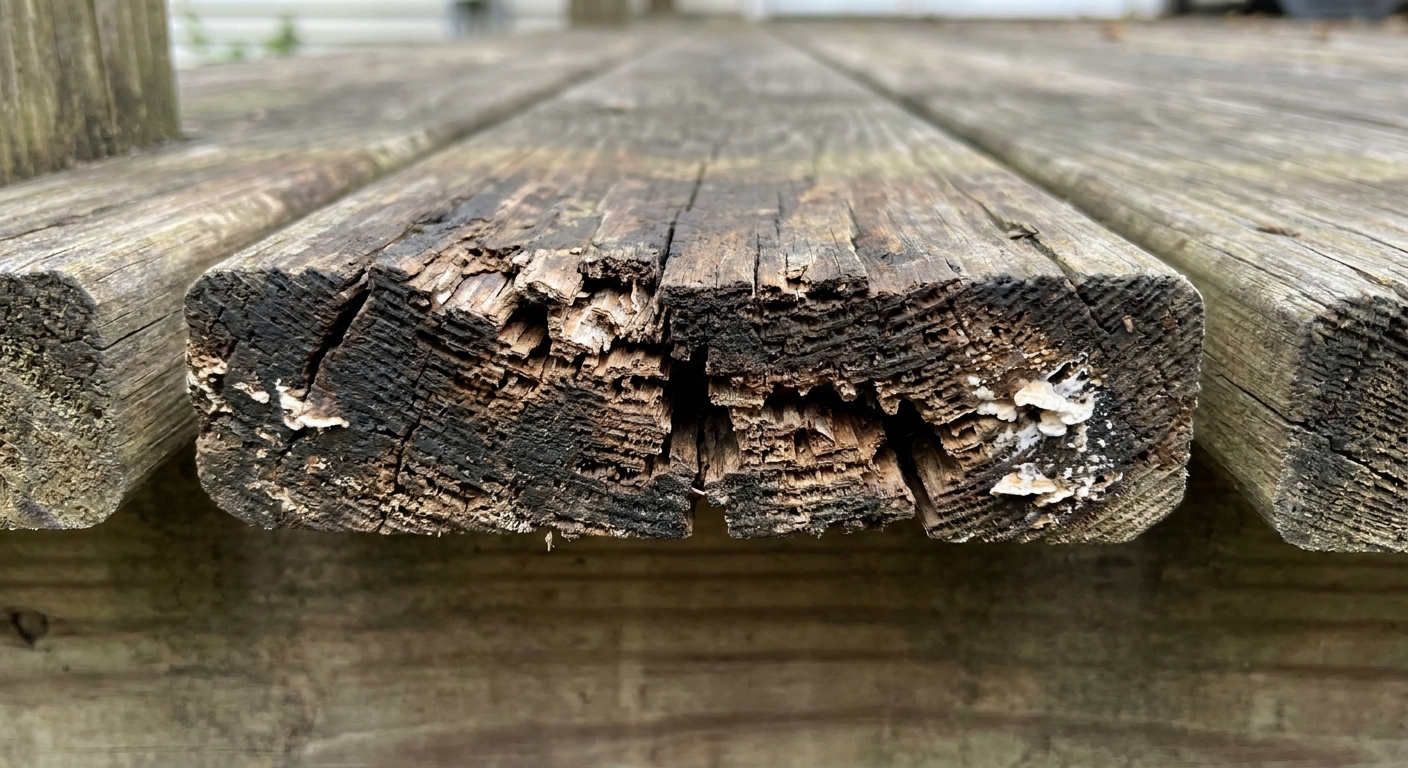
I’ve rebuilt plenty of things on my 1970s ranch because I had to. A deck is different. If only a handful of boards are soft or rotten, you can often fix the problem board-by-board and keep the rest of the structure. The trick is knowing what’s truly “surface ugly” versus what’s a structural issue hiding underneath.
This guide walks you through finding rot, checking the joists where failure starts, removing boards without damaging your railing, and blending the finish so it looks intentional instead of patched.
Before you start: when a board swap is enough (and when it is not)
Replacing deck boards is a great DIY repair when the deck frame is still solid. It’s not the right move when the framing or the ledger connection is compromised.
Board replacement is usually fine if:
- Only a few boards feel soft, spongy, or cracked.
- The joists look sound when you inspect them from below.
- Fasteners are not pulling out of mushy wood.
- The ledger area looks dry and firmly attached.
Pause and get more serious help if you see:
- The deck “bounces” a lot or feels wavy across multiple joists.
- Posts, beams, or joists show deep rot, splitting, or insect galleries.
- The ledger board is soft, stained, or pulling away from the house.
- You see rusted through hardware at the house connection.
If you’re unsure, start with the tests below. They’ll tell you whether this is a simple repair or a deeper safety issue.
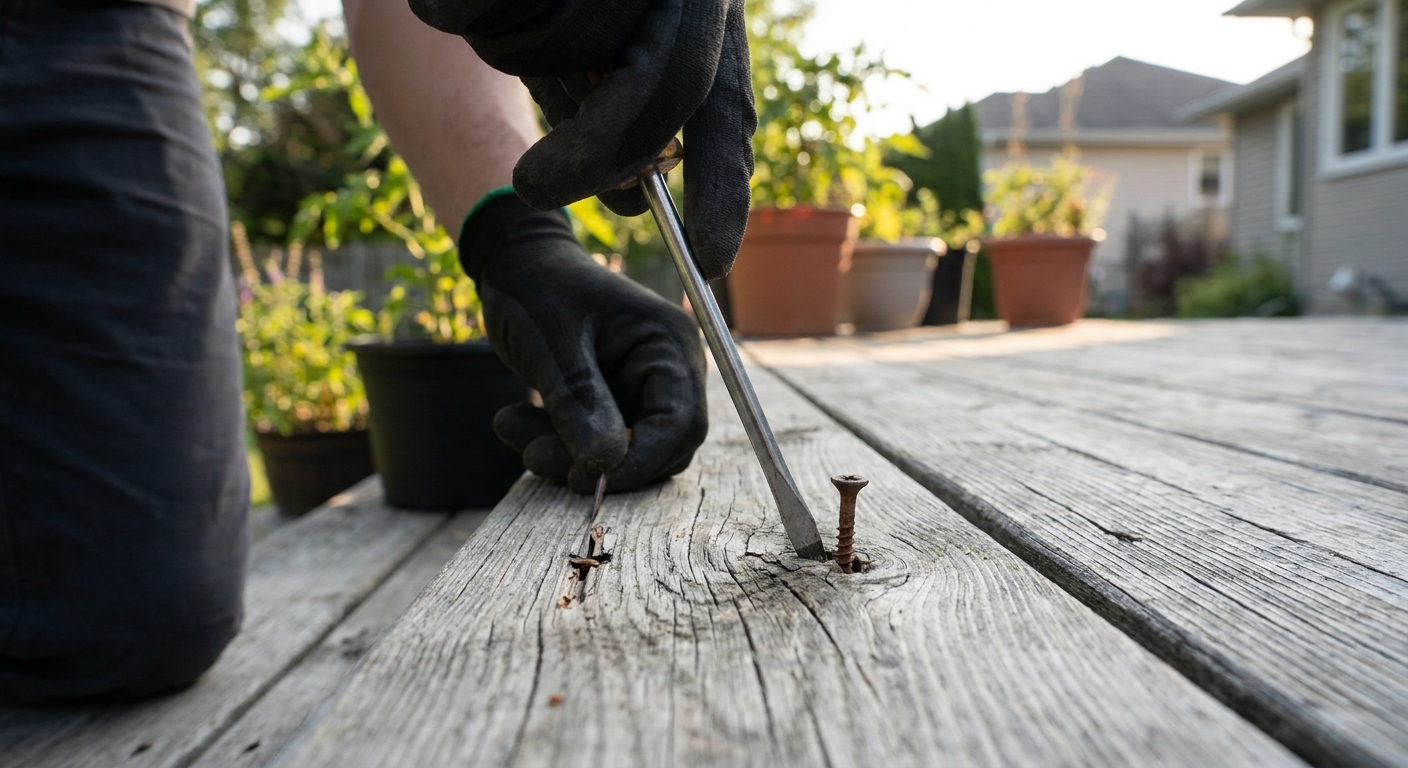
The screwdriver poke test (fast, simple, and surprisingly accurate)
This is my go-to first check because it turns “I think it’s bad” into “this wood is not wood anymore.”
How to do it
- Use a flathead screwdriver or awl. A pocketknife works in a pinch, but it’s easier to slip.
- Poke in several spots along the board, especially:
- Within 2 inches of screws or nails
- At board ends where they meet a rim joist
- Under planters, mats, grills, and corners that stay wet
- Healthy wood should resist. You might dent it, but it should not feel spongy.
How to read the results
- Pass: You can’t sink the tool in more than about 1/8 inch and it feels firm.
- Borderline: The surface is punky but firms up quickly. This often happens on old decking that’s weathered but not structurally rotten.
- Fail: The screwdriver sinks in easily, especially along fasteners or end grain. If it goes in roughly 1/4 inch or more with little resistance, that board is likely done. (Wood species, treatment, and moisture content can change the feel, so trust the overall pattern, not one single poke.)
My mistake to help you avoid: I used to poke only in the middle of boards. Rot loves the ends and the fastener lines. If you don’t test those spots, you miss the real problem.
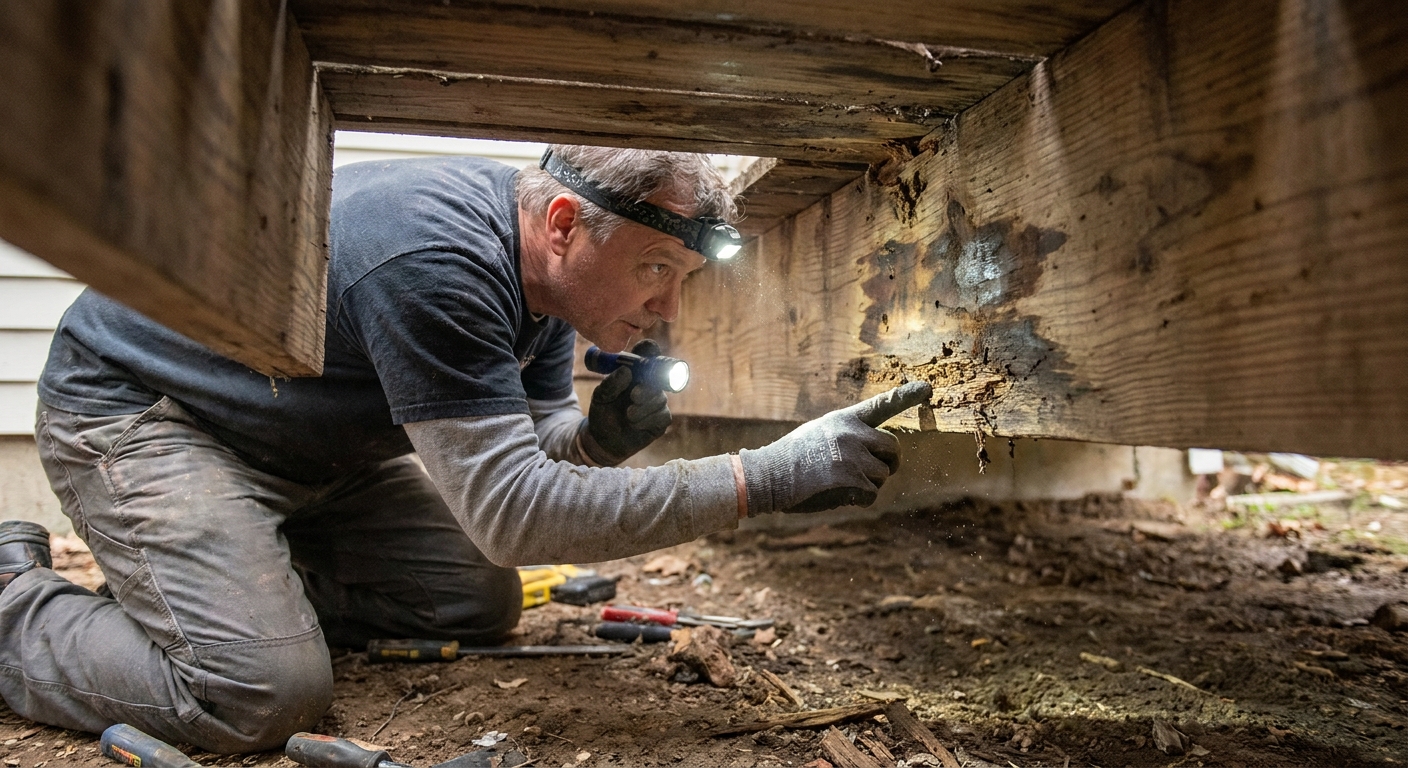
Inspect the joists where rot starts: at fasteners and at board ends
A deck board can be replaced in an afternoon. A rotten joist is the thing that turns a quick repair into a bigger project. So before you buy new boards, confirm the framing can actually hold them.
Check from above first
- Look for screw heads that are sunken into the decking more than the surrounding area.
- Look for “volcano” cracks around screws, which can trap water and accelerate rot.
- Pay attention to dark halos at the ends of boards. That often indicates water sitting at the rim area.
Then check from below
If you can safely access under the deck (or see the joists from the side), bring a bright flashlight and do a slow scan.
- Probe the joist top edge where the board fasteners penetrate. That’s often the wettest zone.
- Probe around knots and checks (cracks) that can hold moisture.
- Look for fasteners that are heavily corroded. Corrosion can mean long-term moisture even if the wood looks okay.
Quick joist “soundness” test
Poke the joist with a screwdriver near the top edge. If it’s firm everywhere except a tiny weathered surface, you’re likely fine. If the tool sinks in deeply or the wood crumbles, you need to address the joist before you re-deck that area.
Tools and materials for replacing a few deck boards
You don’t need a full carpentry shop. Here’s what makes this job smoother and cleaner.
Tools
- Drill or impact driver
- Oscillating multi-tool or reciprocating saw (helpful for stubborn fasteners)
- Circular saw (optional but great for cutting out a board in the field)
- Flat pry bar and a thin trim pry bar
- Cat’s paw nail puller (if you have nails)
- Hammer
- Measuring tape and pencil
- Safety glasses and hearing protection
- Work gloves
Materials
- Replacement boards (match thickness, width, and profile as closely as possible)
- Exterior-rated deck screws, ideally stainless or coated (and compatible with your lumber type)
- End-cut preservative for treated lumber cuts (especially if using pressure-treated decking)
- Butyl joist tape (optional upgrade, but it’s one of the best “do it once” moves you can make)
- Wood filler is usually not worth it for structural rot, but can help for tiny cosmetic chips
- Stain or sealer for touch-ups
Small compatibility note that saves headaches: Modern pressure-treated lumber (often ACQ/CA) is tougher on cheap fasteners. Use fasteners rated for treated lumber, and avoid mixing random metals that can corrode faster.
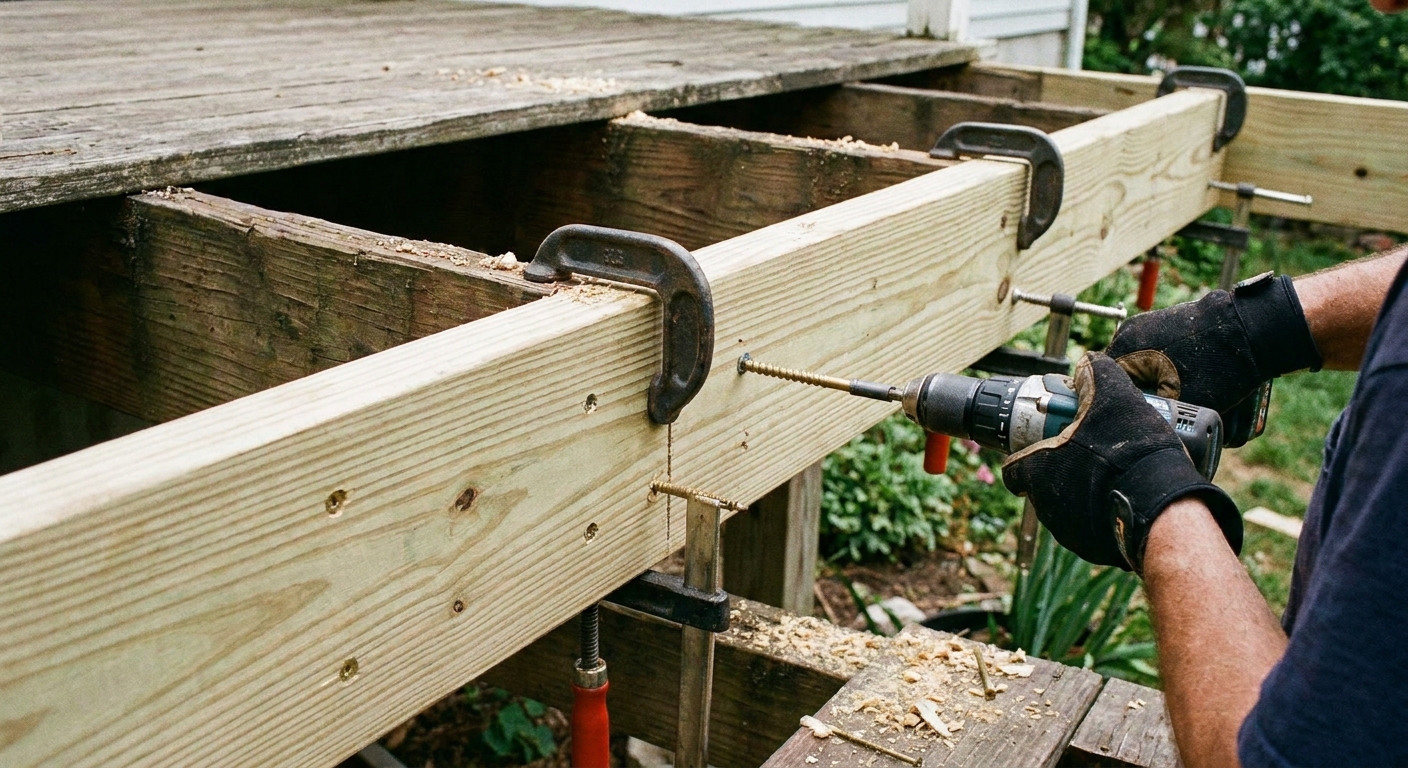
Remove damaged boards without harming rails and posts
Rail posts and balusters are where DIY deck repairs get annoying. Often, boards were installed before the railing, so you can’t just slide a full-length replacement board in place. The good news is you can still replace the board by cutting and fitting it in sections.
Step 1: Back out screws (or cut them)
- If screws are intact, use the right bit and steady pressure.
- If the head strips, try a screw extractor, or save time and cut the fastener with an oscillating tool.
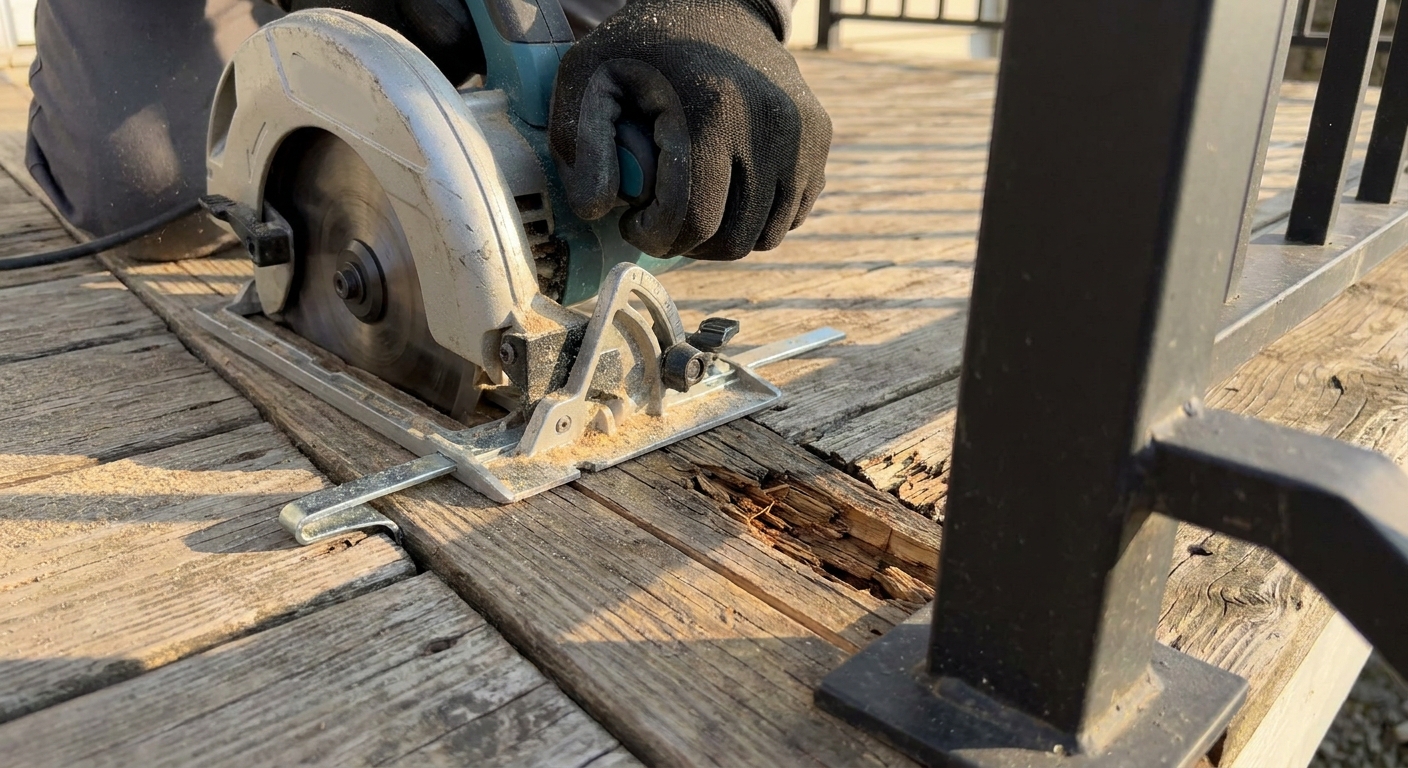
Step 2: If the board is trapped, cut it out in the middle
Set your circular saw depth to the decking thickness only. Cut a line down the center of the board between joists, then pry each half toward the center to free it. This keeps you from levering against rails and snapping balusters.
Quick safety check: If your deck has lighting, speakers, or an outlet nearby, take a peek underneath before you cut. Hidden wires happen.
Step 3: Clean up the joist top
- Scrape off old debris, trapped leaves, and punky wood.
- If you see minor surface rot on the joist top edge, scrape to firm wood and let it dry before re-covering.
Optional but smart: protect the joists with tape
If you have the decking open, this is the moment to add joist tape (butyl flashing tape) on top of the joists and rim where boards land. It helps keep water from sitting on the framing and rotting out the exact spot you just repaired.
Tip: Resist the urge to pry “up” hard at the board ends. That’s how you dent neighboring boards and loosen railing connections. Pry toward open space whenever you can.
Install the new boards so the fix lasts
Rot usually comes back for one reason: moisture gets trapped again. When you put the new boards in, you’re not just replacing wood. You’re improving drainage and fastener durability.
Step 1: Match the board and plan the gap
- Use the same thickness as existing decking, and match width/profile too so the field looks consistent.
- Leave consistent gaps for drainage. Typical wood-deck gaps land around 1/8 inch to 1/4 inch depending on the material and whether the board is wet or dry when installed.
- Composite note: Follow the decking manufacturer’s spacing specs, including any end-gap requirements. Composites move differently than wood.
- If you’re replacing only one board in the middle of a field, match the existing gap pattern so it looks intentional.
Step 2: Cut and treat ends
- Cut square, then brush end-cut preservative on any fresh pressure-treated cuts.
- If boards butt into a rim joist or picture frame, keep end cuts clean and tight, but do not jam them so tight that water has nowhere to go.
Step 3: Fasten correctly
- Use two screws per joist for standard decking, unless your decking or local code specifies otherwise.
- Keep screws about 3/4 inch to 1 inch in from board edges to reduce splitting.
- Pre-drill near board ends: If you’re within a couple inches of the end grain, pre-drilling is the most reliable way I know to prevent splits. Especially on dry, older lumber and hardwood decking.
- If the board ends land on a joist, avoid putting screws too close to the end grain.
Small but important: If your old deck used nails and you’re switching to screws, that’s fine. Just be consistent across the boards you replace so the pattern doesn’t look random.
If the joist looks questionable: sistering basics
Sometimes you pull a board and discover the joist top edge is soft around a few fastener holes, but the rest of the joist is still solid. That’s where sistering can help.
Sistering means fastening a new piece of lumber alongside the existing joist so the load is carried by solid wood again. This can be a smart “middle step” before a full rebuild.
When sistering can work
- The joist is mostly sound, with localized rot near the top edge.
- You can access the side of the joist to fasten a new member.
- The joist is not failing at a critical connection like a hanger or beam pocket.
Simple sistering approach
- Use the same size lumber as the existing joist when possible (for example, 2x8 to 2x8).
- Make the sister as long as you reasonably can. Longer is better than short patches.
- Clamp it tight, then fasten with structural screws or through-bolts using a code-appropriate fastener schedule (or the fastener manufacturer’s engineering tables).
- Do not sister over wet, mushy wood. Scrape out rot, let it dry, and replace what’s too far gone.
Also important: Sistering does not fix the moisture problem that caused the rot. Add drainage, clean the debris traps, and consider joist tape so you’re not back in the same spot next year.
Safety note: If the rot is at the joist end where it sits in a hanger or on a beam, sistering may not restore the connection. That’s a higher-stakes repair and worth a pro opinion.
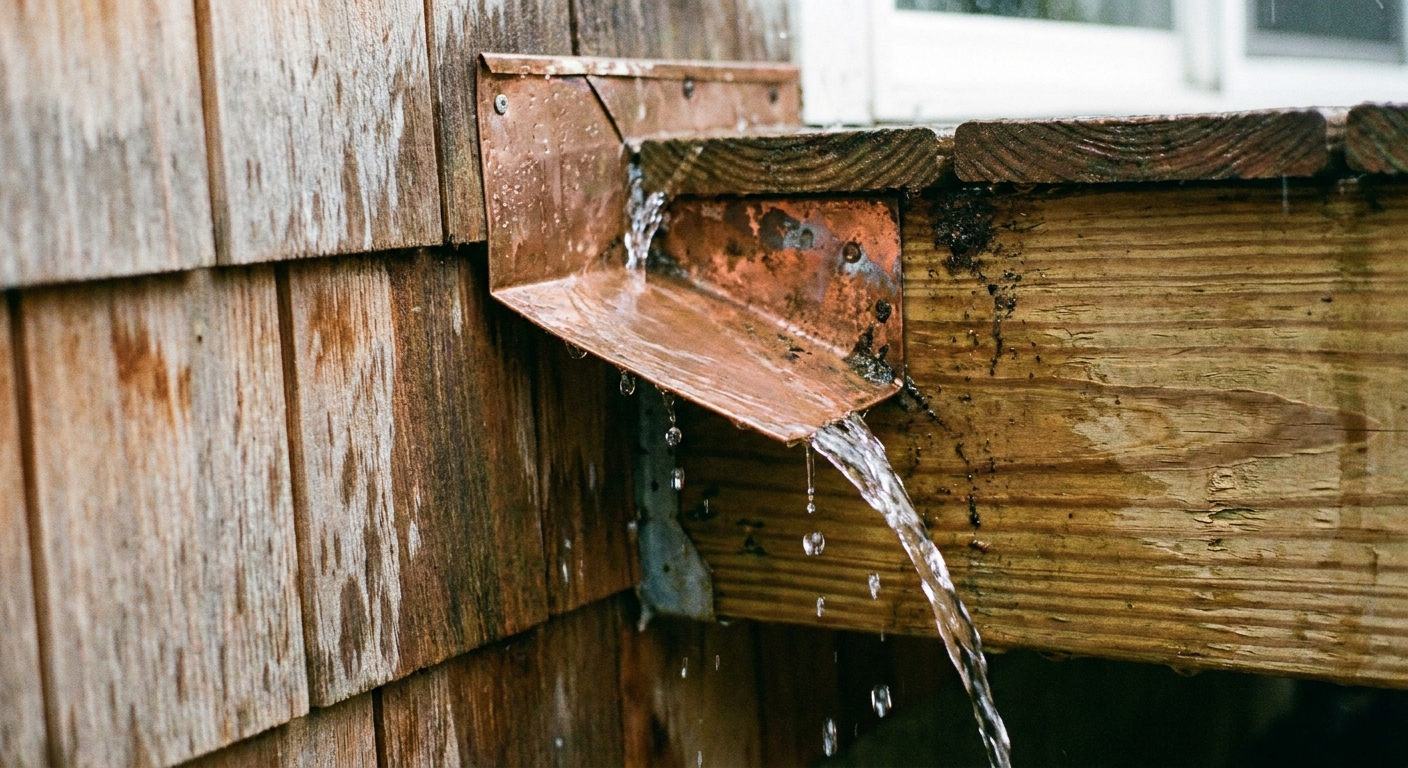
Ledger basics: flashing and red flags
The ledger is the board that attaches the deck to your house. Ledger failures are one of the most dangerous deck problems, and they are often linked to poor flashing and trapped water.
What you can check as a homeowner
- Look for flashing: There should be metal or a waterproof membrane directing water away from the ledger, not into it.
- Look for gaps that trap water: Debris packed between deck boards and the house can hold moisture against the ledger.
- Look for staining: Dark streaks or soft wood around the ledger area is a red flag.
- Look for movement: The deck should feel solid where it meets the house, not “peeling away.”
- Look at the hardware: If you can see the connection and it looks under-bolted, improvised, or missing pieces (like lateral load connectors where required), treat that as a sign to dig deeper.
Simple maintenance that helps
- Clean out leaf litter along the house line a few times a year.
- Make sure downspouts are not dumping directly onto the ledger area.
- Keep plants and planters from staying wet against that connection.
Important: Reflashing a ledger properly can get complex fast because it interacts with your siding and water-resistive barrier. If you suspect ledger rot, treat it like a safety issue, not a cosmetic one.
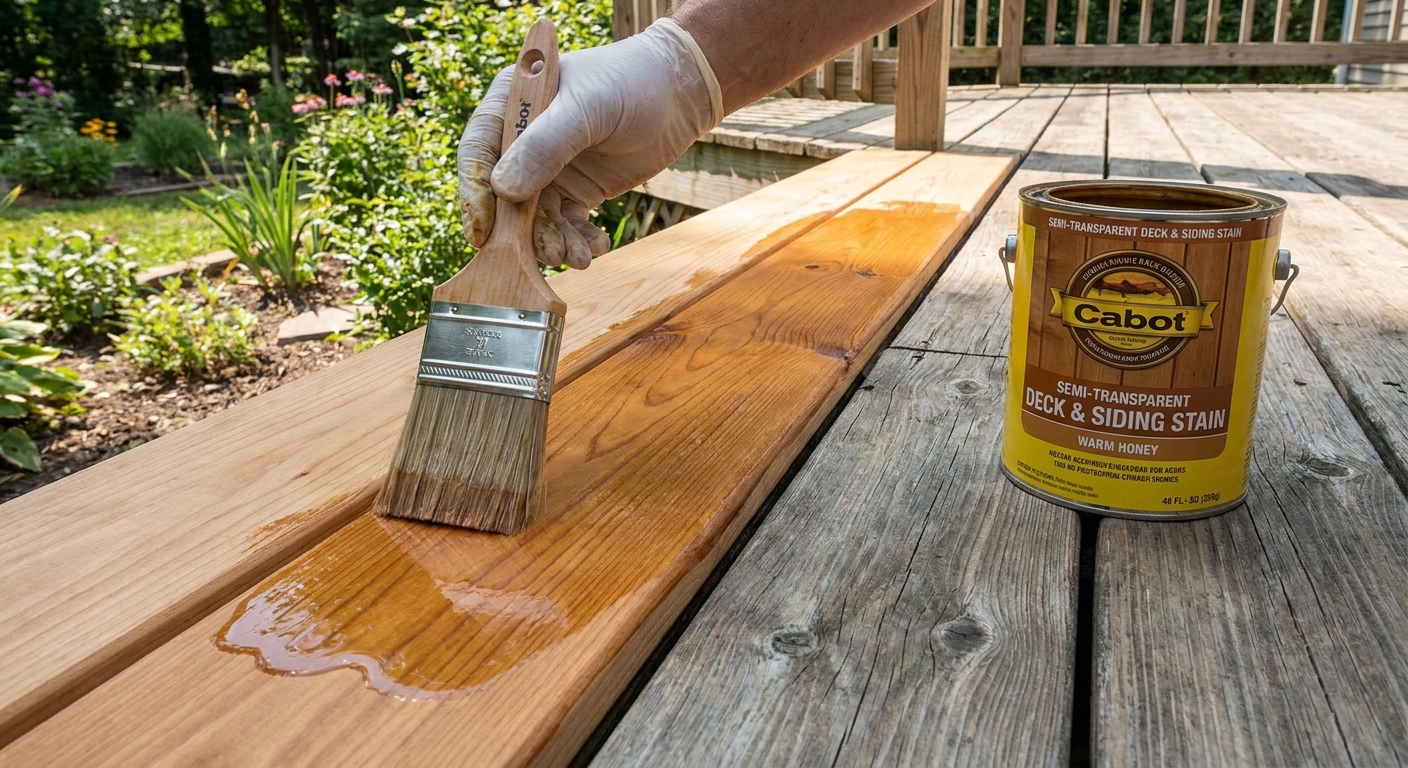
Blend the repair: sanding and stain matching
Fresh boards are bright. Old boards are sunbaked. If you do nothing, your repair will shout at you every time you step outside. A little finishing work makes it disappear.
Option A: Let new boards weather, then stain the whole deck
This is the cleanest look, especially if your deck is due for a refresh anyway.
Option B: Touch up just the new boards
- Lightly sand splinters and sharp edges with 80 to 120 grit.
- If you’re using a semi-transparent stain, test on an offcut first.
- Feather stain onto adjacent boards by a few inches to soften the transition.
Stain matching tips that actually work
- New wood drinks stain differently. A lighter coat often matches better than a heavy one.
- Do your test in the same lighting your deck normally gets. Shade versus sun changes everything.
- If your deck is dirty, clean it first. Staining one clean board next to six dirty boards never matches.
Common causes of deck board rot (so it does not come back)
- Constant wet zones: Under mats, planters, or outdoor rugs.
- Poor drainage: Gaps filled with debris and leaves.
- Fastener and crack traps: Split grain around screws that holds water.
- End grain exposure: Board ends and rim areas soak up moisture.
- Finish failure: Old stain that no longer repels water, especially on horizontal surfaces.
Fixing the board is step one. Fixing the moisture habit is what makes the repair last.
FAQ
Can I replace just one deck board?
Yes, if the joists underneath are solid and you can match the board thickness, profile, and spacing. One board is a totally reasonable repair.
Should I use pressure-treated boards for a repair?
If your existing deck is pressure-treated lumber, matching it is usually the easiest path. For composite decks, replace with the same product line when possible to match thickness and color.
Do I need to replace screws too?
If the old screws are corroded, stripped, too short, or not rated for treated lumber, replace them. Fasteners are cheap compared to doing the job twice.
What if rot is only at the ends of the board?
If the rot is localized and the rest is solid, you can sometimes cut back to good wood and replace only a section, but you must land the joint over solid framing. In many cases, a full board swap is simpler and stronger.
The 30-Second Cheat Sheet
Essential takeaways for: Soft or Rotten Deck Boards? Spot Damage and Replace Boards Without Rebuilding
Fast diagnosis
- Screwdriver poke test: Probe near fasteners and board ends. If the tool sinks in easily (roughly 1/4 inch or more, depending on species and moisture), that board is likely rotten.
- Check joists at fasteners: From below, probe the joist top edge where screws penetrate. Soft or crumbling wood means fix the joist before re-decking.
Replace boards without rebuilding
- Remove cleanly: Back out screws or cut them with an oscillating tool.
- Trapped by railing: Set circular saw depth to board thickness, cut the board down the middle, then pry halves inward toward open space.
- Prep joists: Scrape debris off the joist top so water does not get trapped again.
- Optional upgrade: Apply butyl joist tape over joist tops before installing the new boards to protect the framing from future moisture.
- Install new boards: Match thickness and profile, keep drainage gaps consistent (follow manufacturer spacing for composite), and use exterior-rated screws (stainless or coated).
- End-split prevention: Pre-drill near board ends to reduce splitting.
If joists are questionable
- Sistering hint: Reinforce a mostly-sound joist by fastening a same-size joist alongside it using a code-appropriate fastener schedule. Longer sisters are better than short patches.
- Do not ignore end rot: If rot is at the joist end near a hanger or beam, treat it as a higher-stakes structural repair.
Ledger flashing basics
- Look for flashing directing water away from the ledger.
- Keep the house-side gap free of leaves and gunk.
- If the ledger is soft, stained, or separating from the house, stop and investigate further.
- Extra red flag: Missing or questionable ledger hardware (like lateral load connectors or proper bolts) is worth a closer look by a pro.
Make the patch disappear
- Sand sharp edges.
- Test stain on an offcut.
- Feather stain slightly onto neighboring boards for a less obvious transition.
💡 Tip: Scroll up to read the full article for detailed, step-by-step instructions.
⬆️ Back to topAbout Marcus Vance
Content Creator @ Grit & Home
Marcus Vance is a lifelong DIY enthusiast and self-taught home renovator who has spent the last decade transforming a dilapidated 1970s ranch into his family's dream home. He specializes in budget-friendly carpentry, room-by-room renovations, and demystifying power tools for beginners. Through his writing, Marcus shares practical tutorials and hard-learned lessons to help homeowners tackle their own projects with confidence.