🚨 In a DIY emergency or rush?
Skip the details and jump straight to our 30-second cheat sheet for the most crucial info.
If your bathroom floor feels soft, bouncy, or spongy near the tub or toilet, your house is trying to tell you something. Sometimes it is as simple as a loose toilet or cracked grout. Other times it is a slow leak that has been quietly chewing through your subfloor for months.
I have been the guy who “kept an eye on it” a little too long. The floor did not get better. It got more expensive.
This guide walks you through the most common causes, what you can check in an hour with basic tools, and what to do next depending on what you find. We will focus on floors near tubs and toilets, not a deep dive into shower pan failures.
Why it happens
Bathroom floors get soft for two main reasons:
- The floor covering is moving because the subfloor underneath is flexing, damaged, or not properly supported.
- The subfloor is compromised from moisture, most often a slow leak at the toilet flange, tub plumbing, or a supply line.
Tile makes this show up faster. Tile and grout do not like movement. If the subfloor flexes, you might hear cracking, see grout lines opening, or feel a “trampoline” effect even before you see staining.
Quick safety note
If the floor feels like it could give way, treat it seriously. A rotten subfloor can fail around a toilet, and a toilet can crack if it rocks hard enough.
- Shut off water to the toilet if you suspect an active leak.
- Avoid standing with full weight on the softest spot.
- If you see moldy insulation or a strong musty smell in a crawlspace, wear a respirator and gloves.
Common causes and clues
1) Failed toilet wax ring (or a loose toilet)
This is the classic. The wax ring seals the toilet to the closet flange and drain pipe. If the toilet rocks, the seal can break. Every flush can release a small amount of water under the toilet. You might not see it on top at first.
- Clues: toilet rocks when you grab the bowl and push gently, faint sewer smell, staining around the toilet base, soft flooring in a crescent shape around the front or sides.
- Common trigger: loose closet bolts, uneven floor, or a toilet that was shimmed poorly.
Important note: A wax ring can fail without obvious water on the bathroom floor. The water can go straight into the subfloor and joist bay.
2) Slow leak at the toilet supply line or shutoff
Small drips add up. A compression fitting that seeps can keep the subfloor damp all the time, which is the perfect recipe for rot.
- Clues: mineral deposits on the shutoff valve, dampness on the braided supply line, water stains on the wall or baseboard behind the toilet, swollen or peeling trim.
- Easy check: wipe the valve and line dry, then wrap with a paper towel and check it after a few hours.
3) Tub plumbing seepage (drain, overflow, or supply)
Near the tub, the usual suspects are the drain shoe, overflow gasket, or supply connections if you have an access panel or plumbing wall behind the tub.
- Clues: soft spot near the tub’s drain end, staining on the ceiling below, musty smell at the tub base, caulk line separating between tub and wall.
4) Tile deflection from underbuilt subfloor
Sometimes the floor is not rotten. It is just too flexible for tile. Many older bathrooms have thin subflooring or a patchwork of plywood repairs. Tile needs a stiff floor system.
- Clues: cracked grout or tile in multiple spots, no musty smell, no staining below, problem feels springy but not damp.
- Typical scenario: a DIY tile job installed over a single thin layer of plywood without proper underlayment, or over an old floor with hidden seams.

5) Subfloor rot from splashes and failed caulk
Not every moisture problem is a plumbing leak. Around tubs, years of splashing plus a failing caulk joint can let water run behind the tub edge and into the floor.
- Clues: darkened or swollen baseboard, peeling paint near the tub, caulk missing or moldy, soft spot tight to the tub apron.
6) Vinyl or laminate issues (and how to tell)
With sheet vinyl, LVP, or laminate, a “spongy” feel can come from a few different places: underlayment swelling, foam pad compression, a seam that has released, or true subfloor damage.
- Clues it might be the floor covering or underlayment: soft spot feels uniform and pillowy, seams are curling or peaking, surface looks fine but feels squishy, the area changes a bit with seasons.
- Clues it might be subfloor damage: soft spot is localized and getting worse, there is staining or odor, fasteners squeak, trim is swelling, or you see damage from below.
If you can inspect from below, do it. That is the fastest way to separate “annoying floor problem” from “wet wood problem.”
7) Hidden previous repair or patched hole
I have opened up more than one floor and found a “repair” that was basically a scrap of plywood floating between joists. It can feel fine until it does not.
- Clues: soft spot has very defined edges, floor squeaks in one isolated square, nearby tile looks newer than the rest.
What to do next
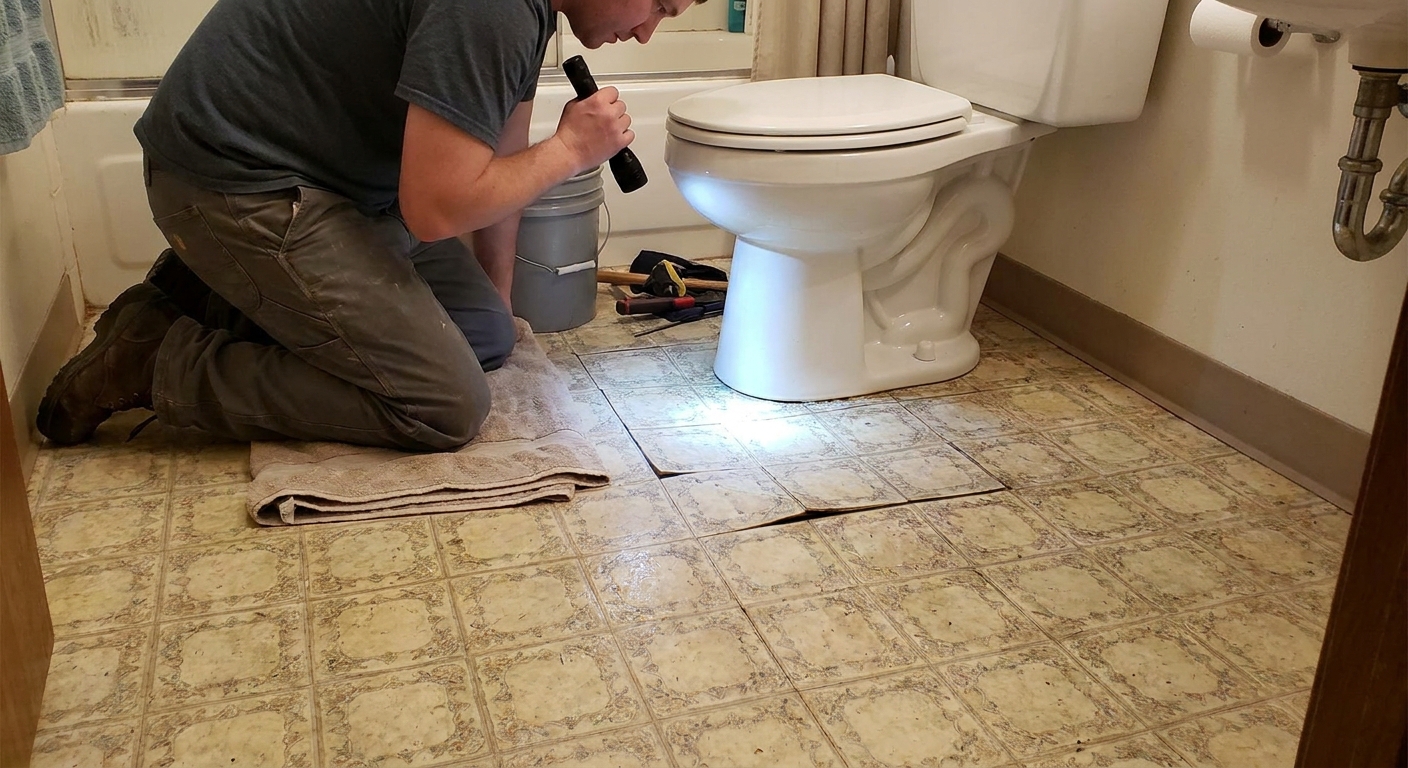
Step 1: Check for active water
Before you plan a repair, figure out whether moisture is active.
- Toilet rocking test: grip the bowl near the seat hinges and gently push side to side. Any noticeable movement should be addressed.
- Supply line and valve check: feel for moisture, then do the paper towel test on the shutoff valve and braided line.
- Surface clues: dark grout, swollen vinyl seams, bubbling paint on nearby trim.
- Smell test: musty often means ongoing dampness, sewer odor points toward toilet seal issues.
If you have a moisture meter, this is the moment to use it. High readings around the toilet base or tub edge are your flashing red light.
Step 2: Look from below
If you can see the underside of the bathroom, you can save yourself a lot of guessing.
- Bring: flashlight or headlamp, awl or small screwdriver, tape measure, phone for photos.
- Look for: dark staining on subfloor, sagging insulation, rusty nail tips, white mineral trails on pipes, mold growth.
- Probe the wood: gently press an awl into the subfloor from below. Solid wood resists. Rotten wood feels punky and can crumble.
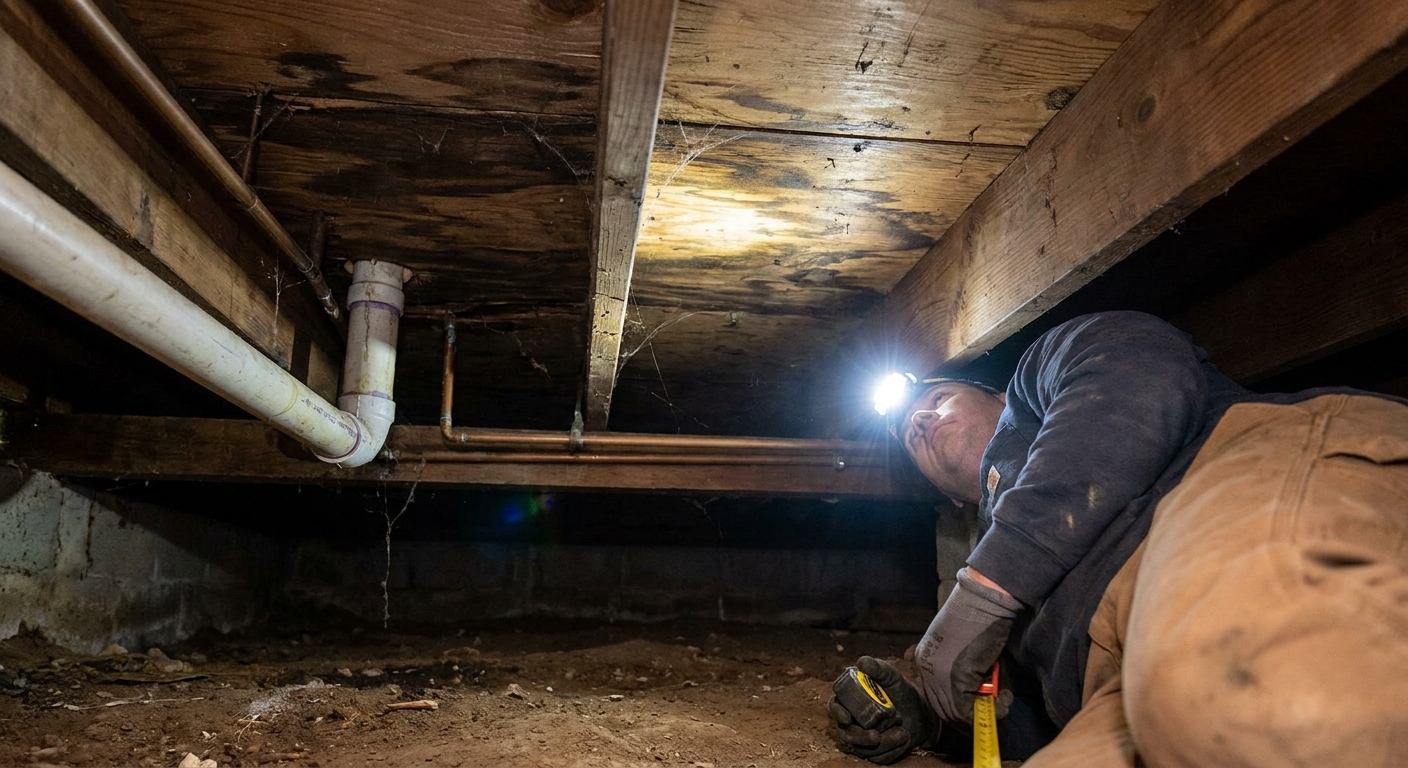
Pro tip: A leak at the toilet often shows up as staining around the drain pipe and on the sides of adjacent joists, not just directly under the toilet.
Step 3: Stabilize temporarily (if appropriate)
Temporary stabilization is not a repair, but it can reduce damage while you wait for parts or a contractor.
- If the toilet rocks: do not keep using it “carefully.” Turn off the supply at the valve, flush to empty the tank, and avoid use until it is reseated. Rocking toilets break seals and worsen rot.
- If you can access from below: you can sometimes add a short-term support under the soft area. Use a 2x4 or 4x4 post on a solid base (like a concrete slab or a proper pier block) and snug it up under a joist. Do not jack it hard, just remove the bounce. Keep the support off plumbing and do not rely on dirt alone for bearing.
- Control humidity: run the bath fan longer, and consider a dehumidifier in the basement or crawlspace if it is damp.
If the wood is actively wet, stabilization alone is not enough. You need to stop the water source first.
Step 4: Match the fix to the symptoms
Use this as a practical decision tree:
- Toilet rocks or there is odor: plan on pulling and resetting the toilet with a new wax ring (or a wax-free seal), new closet bolts if needed, and proper shimming. Check the flange height and condition.
- Supply line or valve shows moisture: replace the supply line, rebuild or replace the shutoff valve, and dry the area thoroughly.
- Staining below near tub drain end: suspect tub drain shoe or overflow gasket seepage. This may require access behind the tub or from below.
- No moisture signs but tile cracks and floor flexes: you likely have a structural stiffness problem. The long-term fix is improving subfloor thickness, underlayment, and sometimes joist support.
- Wood is soft, delaminated, or crumbling: you are beyond “tighten and caulk.” You are in subfloor replacement territory.
How bad is it?
Here is how I think about spongy bathroom floors in the real world:
- Mild: tiny bounce, no staining below, no odor, toilet is stable. Often underlayment or tile prep issue.
- Moderate: noticeable softness, minor staining below, toilet may start rocking. Subfloor edges could be damp.
- Severe: floor feels compressible, toilet rocks easily, visible rot or mold below, sagging subfloor between joists. You should stop using fixtures until repaired.
Rot tends to spread farther than you think, especially along plywood seams and around fasteners.
DIY fixes (and the line)
Resetting a toilet
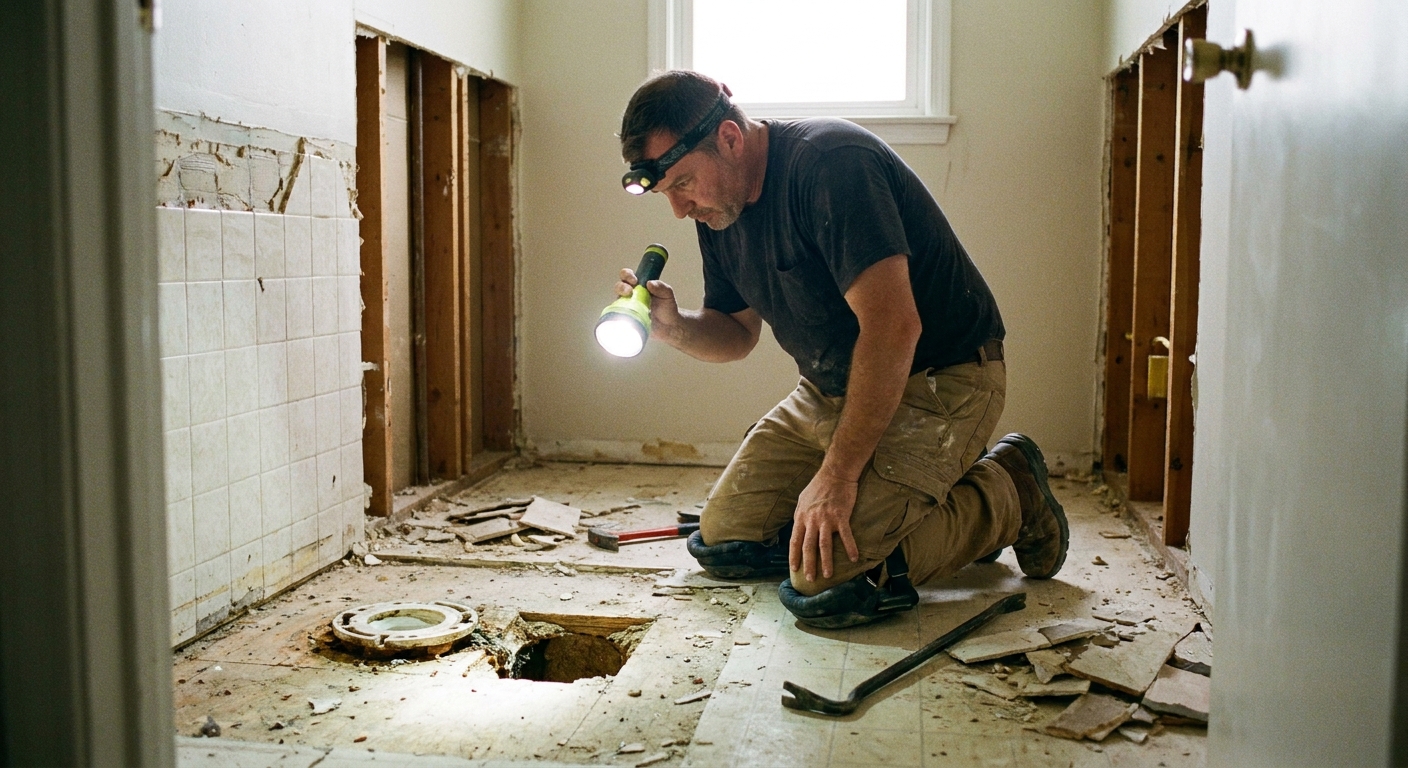
If the toilet rocks or you suspect the wax ring, resetting the toilet is often the right first repair.
- DIY-friendly when: the flange is intact, the floor under the toilet is still firm enough to hold screws, and you are comfortable lifting the toilet.
- Not DIY-friendly when: the flange is broken, subfloor is mushy, or you see significant rot. You can still pull the toilet to assess, but plan on carpentry work.
Big mistake I made once: tightening closet bolts to “stop the wiggle” without shimming. That can crack the porcelain. Shims stop movement. Bolts simply hold the toilet down.
Quick flange note: in many installs, the flange wants to sit on top of the finished floor, or slightly above it (often around 1/4 inch). If it is low, a flange extender or repair ring may be needed. This is also where a pro can save you time.
Minor tile fixes
If the subfloor is solid and dry, but a couple tiles are loose, you may be able to replace tiles and regrout. But if the floor flexes, tile repairs will fail again.
Small subfloor patches
Small patches can work if you can cut back to solid wood and land your patch edges on framing. In bathrooms, patches get tricky because tubs, toilets, and tight rooms make it hard to cut and fasten correctly.
If you cannot tie into joists or add blocking cleanly, that is a sign the job is bigger than a patch.
When to call a pro
Call a plumber, contractor, or both if any of the following are true:
- The toilet flange is cracked, loose, or below the finished floor height and needs correction.
- You see rot, mold, or delamination in the subfloor.
- The soft area is larger than about a couple square feet, or it extends under the tub.
- There is staining on ceiling drywall below, or multiple fixtures seem involved.
- You have tile and you suspect the subfloor assembly is underbuilt for it.
What I tell pros to speed things up:
- “Soft spot is X inches wide and located Y inches from the toilet base.”
- “I checked the crawlspace and saw staining on the subfloor around the toilet drain” or “no staining but the floor deflects.”
- “Toilet does or does not rock.”
- “Ceiling below is or is not wet and it started on this date.”
After you stop the leak
Stopping the leak is step one. Then you need to get materials dry so you do not trap moisture under a new floor.
- Dry aggressively: fans, dehumidifier, and airflow from below if you have access.
- Remove wet insulation: insulation holds water and keeps wood damp. Replace it after everything is dry.
- Watch for mold: if you see growth, or the smell persists, do not just cover it up.
Preventing round two
- Keep the toilet from rocking: use quality shims and trim them cleanly. For caulk, many pros caulk the front and sides for stability and cleanup, and leave a small gap at the back so a future leak shows itself. Some plumbers and inspectors prefer full caulk for sanitation, so follow local expectations.
- Use the bath fan: humidity alone is not usually the only cause of rot, but chronically high humidity and poor ventilation can contribute to moisture buildup and condensation, especially in crawlspaces and cold climates.
- Re-caulk the tub when it needs it: missing caulk is an open door for splash water.
- Fix grout cracks early: cracked grout is often the symptom of movement, not the cause, but it is still a moisture path.
Bottom line
A spongy bathroom floor near a toilet or tub is rarely “nothing.” Your job is to answer two questions quickly: Is water still getting in? and is the subfloor still structurally sound?
If you catch it early, you might get away with a toilet reset or a plumbing fitting fix. If you wait, you are looking at subfloor replacement, joist repairs, and sometimes mold remediation. When in doubt, pull the toilet, inspect from below, and stop using anything that rocks or leaks until you know what is going on.
The 30-Second Cheat Sheet
Essential takeaways for: Soft or Spongy Bathroom Floor Near the Tub or Toilet? Causes and What to Do Next
Fast diagnosis
- Soft or spongy near toilet: most often a failed wax ring from a rocking toilet, or a slow supply line or shutoff leak.
- Soft near tub drain end: often a tub drain shoe or overflow gasket seepage, or years of splash water getting past failing caulk.
- Bouncy tile but no moisture signs: likely subfloor deflection or an underbuilt tile base, not rot.
- Soft vinyl seams or “pillowy” feel: could be underlayment swelling or compressing, or it could be subfloor damage. Check from below to confirm.
Do this first (in order)
- Test toilet movement: if it rocks at all, stop using it until it is reset.
- Check for active water: feel around shutoff valve and supply line, look for staining, sniff for sewer odor.
- Look from below: in crawlspace or basement, check for dark staining, sagging insulation, and probe wood for softness.
- If ceiling below is wet: stop using the fixture, shut off water if needed, and start drying right away.
Temporary stabilization
- If toilet rocks: shut off the valve, flush to empty tank, avoid use until reseated.
- If you have access from below: add a snug temporary support under a joist to reduce bounce (do not jack hard). Only do this where there is solid bearing (slab, proper pier block, or footing) and you are not pushing on plumbing.
- Dry it out: run fan longer and dehumidify the space below if damp.
Call a pro when
- Subfloor is soft, crumbling, delaminated, or moldy.
- The toilet flange is broken, loose, or too low.
- The damaged area is bigger than a couple square feet or extends under the tub.
- You see ceiling stains below or multiple fixtures are involved.
What to tell them
- Exact location and size of soft spot.
- Whether the toilet rocks and whether there is sewer odor.
- What you saw from below: staining, wet insulation, soft plywood, or no moisture.
- Whether the ceiling below is wet and when you first noticed it.
💡 Tip: Scroll up to read the full article for detailed, step-by-step instructions.
⬆️ Back to topAbout Marcus Vance
Content Creator @ Grit & Home
Marcus Vance is a lifelong DIY enthusiast and self-taught home renovator who has spent the last decade transforming a dilapidated 1970s ranch into his family's dream home. He specializes in budget-friendly carpentry, room-by-room renovations, and demystifying power tools for beginners. Through his writing, Marcus shares practical tutorials and hard-learned lessons to help homeowners tackle their own projects with confidence.