
Spring is when your house tells you what winter did. A tiny leak that froze, a gutter packed with grit, a roof shingle that lifted under ice. None of these are fun to discover in the middle of a downpour. The good news is most spring maintenance is simple, cheap, and very DIY-friendly when you tackle it in a calm, organized way.
Below is the exact kind of checklist I use on my own 1970s ranch. It’s broken into bite-sized jobs you can knock out over one or two weekends, with quick notes on what to look for and when to call in a pro.
Before you start
Pick a safe day and do a quick walk-around
- Wait for a dry day so you’re not climbing ladders or walking on slick surfaces.
- Do a full lap around the house and jot down anything obvious: loose downspout, peeling caulk, missing shingle, damp spot in the attic.
- Take photos as you go. It helps you track before and after and remember what to buy.
Quick ladder safety (worth 30 seconds)
- Set the ladder on firm, level ground and don’t overreach. Climb down and move it.
- Keep three points of contact and take a break if you’re rushing.
- If you’re doing a lot of gutter work, a ladder stabilizer is one of those purchases you don’t regret.
My basic spring kit
- Work gloves, eye protection
- Ladder (set on firm, level ground)
- Small plastic gutter scoop or trowel, bucket
- Garden hose with spray nozzle
- Caulk gun and exterior-rated caulk
- Utility knife, putty knife, rags
- HVAC filter(s) in the right size
1) Replace or clean HVAC filters
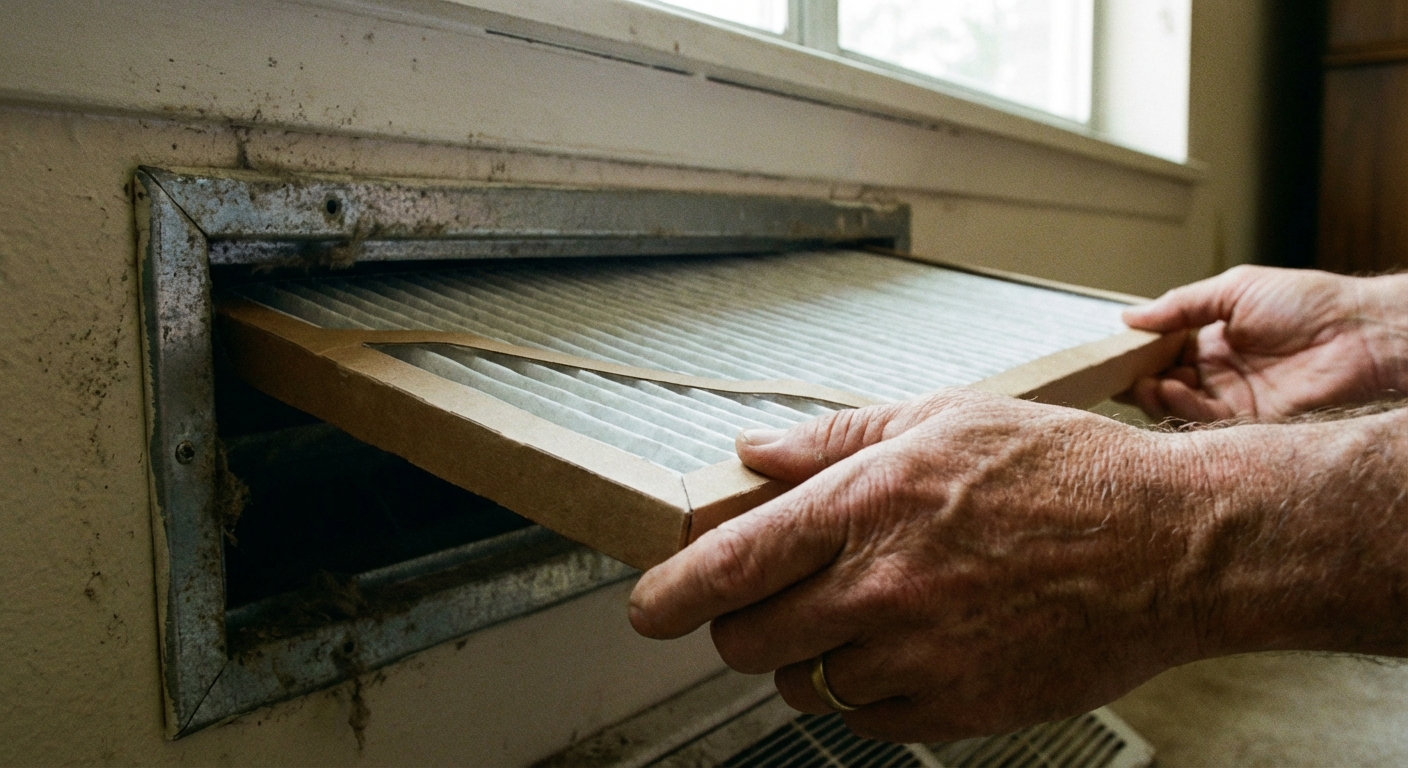
If you only do one spring task, this is usually the best bang for your buck. That said, if you’ve got an active leak, moisture problem, or an alarm that won’t test, handle the safety stuff first. After that, a clean filter helps airflow, lowers strain on the system, and can reduce dust that built up while the house was closed up all winter.
Checklist
- Turn the thermostat to Off before swapping filters.
- Match the size printed on the old filter (for example 16x25x1).
- Install with the airflow arrow pointing toward the furnace or air handler.
- Write the date on the filter frame with a marker. I also toss a reminder in my phone for the next change.
Thrifty tip
For most homes, a basic pleated filter changed regularly beats an expensive, ultra-high rating filter changed once in a blue moon. Some systems can struggle if you go too restrictive, especially with 1-inch filters. As a rough rule of thumb, if you’ve got airflow issues, jumping to something like MERV 11 to 13 in a 1-inch format can be too much for some setups. When in doubt, check your equipment specs or ask your HVAC tech what your system can actually handle.
2) Clean gutters and check downspouts
Winter grit and early spring buds can turn gutters into a soggy compost bin. When gutters overflow, water ends up where you don’t want it: behind fascia, along foundation walls, and down into basements or crawlspaces.
Checklist
- Scoop out debris into a bucket. Work toward the downspout so you’re not pushing gunk into the outlet. If a section is really packed, I’ll start in the middle, clear a “landing zone,” then work both directions.
- Flush with a hose and watch for standing water. Standing water usually means the gutter is sagging or pitched the wrong way.
- Check the downspout outlet and extensions. You want water to discharge several feet away from the foundation.
- Look for loose spikes or hidden hangers, separated seams, and rusty pinholes.
What to watch for after winter
- Ice pull-out: sections that look slightly twisted or pulled from the fascia.
- Drip lines: dark streaks on siding directly below a seam or end cap.
- Window wells and drains: if you’ve got window wells, make sure their drains and covers aren’t clogged with leaves and grit.
If you find a small leak at a seam, that’s usually an easy DIY fix with gutter sealant on a dry day. If the fascia behind the gutter feels soft or crumbly, pause and investigate before reattaching anything. Rotten wood is one of those pay me now or pay me later problems.
3) Inspect the roof for ice and wind damage

You don’t need to walk on the roof to do a useful inspection. I do most of mine from the ground with binoculars, then from a ladder at the eaves if needed. Your goal is to spot trouble early, before spring rain turns it into a ceiling stain.
Checklist
- Look for missing, cracked, or curled shingles.
- Check ridge caps (the top) for pieces that lifted.
- Inspect flashing around chimneys, skylights, and plumbing vents for gaps or lifted edges.
- Scan the soffit and fascia for water staining.
Possible ice dam clues
- Granules collecting at the ends of downspouts more than usual
- Wavy shingle edges along the lower few feet of roof (could also be age or installation, but it’s worth a closer look)
- Water staining in the attic near exterior walls
Call a pro if you see widespread shingle loss, soft spots, or damaged flashing on steep sections. Roof work gets dangerous fast, and the cost of a fall isn’t worth saving money.
4) Test outdoor faucets for freeze cracks
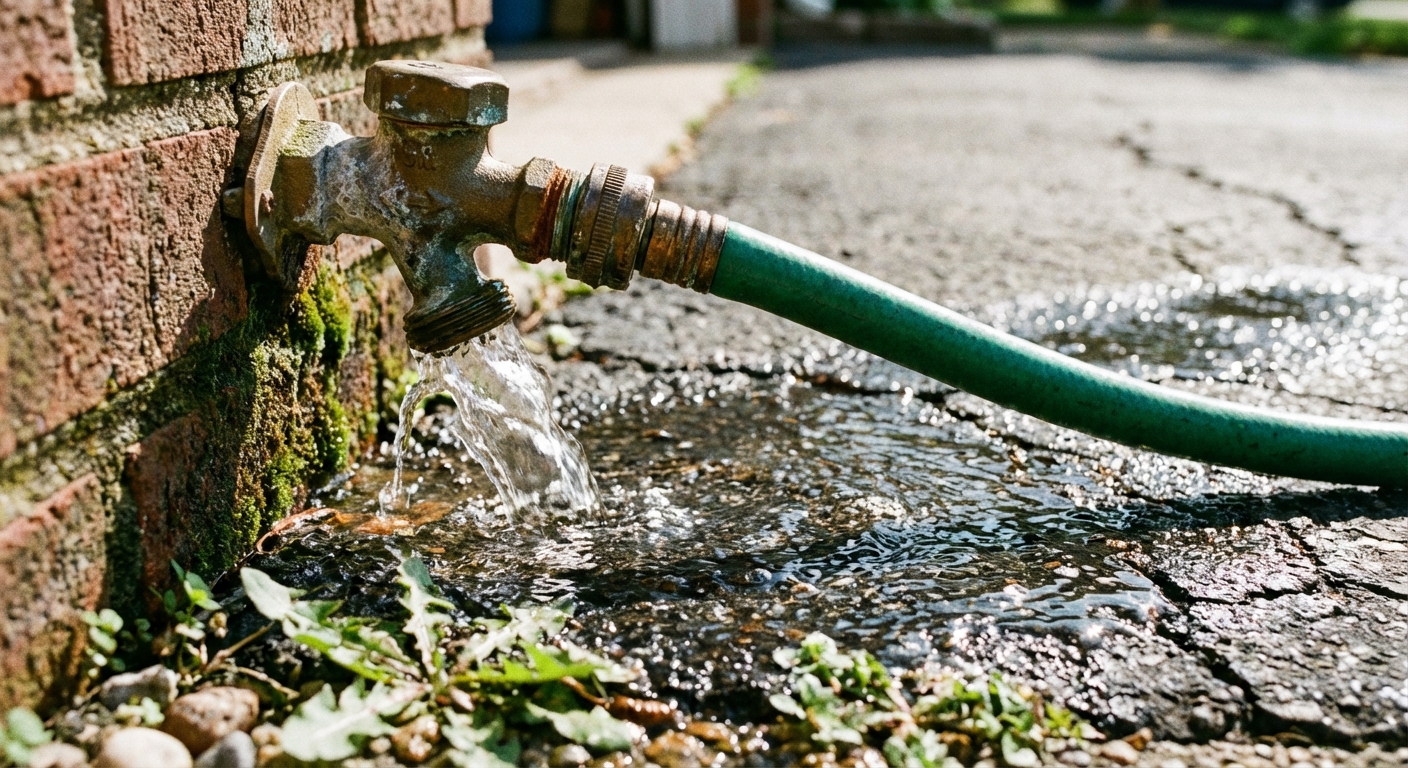
This one’s sneaky. A hose bib can look fine from the outside and still be cracked inside the wall. The first time you turn it on, you can end up watering the inside of your house instead of the lawn.
Checklist
- Before turning anything on, disconnect hoses and check that the spigot handle turns smoothly.
- Turn the faucet on slowly and listen. A steady rush is normal. A hiss behind the wall isn’t.
- Check for drips at the packing nut (behind the handle) and at the spout threads.
- Go inside and look for water staining or dampness near the pipe route, especially in basements and crawlspaces.
If you find a leak
Start with the simple fixes: snug the packing nut slightly. On older, standard hose bibs, you might be able to replace a worn washer. On frost-free models, leaks are often a vacuum breaker or internal cartridge and may need a rebuild kit. If water appears inside the wall when the faucet is on, shut it off and plan a proper repair. That’s usually a cracked pipe or split frost-free faucet body.
5) Power wash siding and outdoor surfaces
Power washing is satisfying, but it can also force water where it doesn’t belong if you get aggressive. Think of it like sanding. Let the tool do the work.
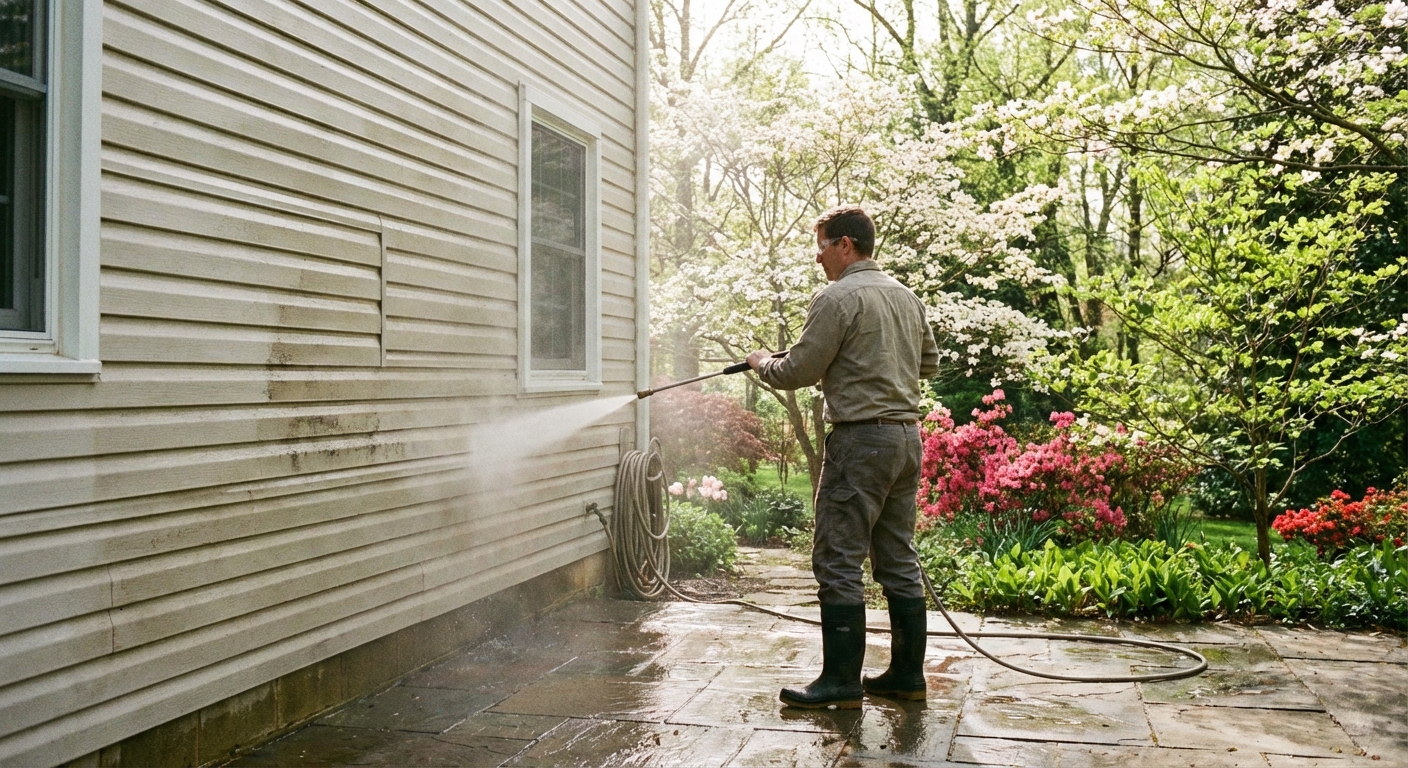
Checklist
- Start with a wide fan tip and keep the wand moving.
- Spray downward on siding and trim to avoid driving water behind panels.
- Protect outlets and fixtures, and close windows fully. Avoid blasting directly into vents, soffit intakes, or gaps under siding.
- Test a small, hidden spot first, especially on older paint.
- Keep your distance and match pressure to the material. Vinyl and wood aren’t concrete.
Common beginner mistake (I’ve done this)
Getting too close to wood or painted surfaces can gouge the grain or peel paint in seconds. If you see fuzzing wood fibers or paint lifting, back up and lower pressure.
6) Lawn aeration and yard reset
Your house sheds water and your yard absorbs it, so spring maintenance isn’t just the building. A compacted lawn can lead to runoff pooling near the foundation. Aeration helps water soak in and helps roots breathe.
Checklist
- Rake out heavy thatch and winter debris.
- Aerate if the soil is compacted, the lawn gets heavy foot traffic, or you see puddling after rain.
- Overseed bare spots and top dress lightly if needed.
- Confirm soil slopes away from the house and that downspouts discharge away from the foundation.
If you’re choosing between aeration and fertilizer on a tight budget, I lean toward aeration and overseed in problem areas. You get more long-term improvement for the money.
7) Check window caulk and weather stripping
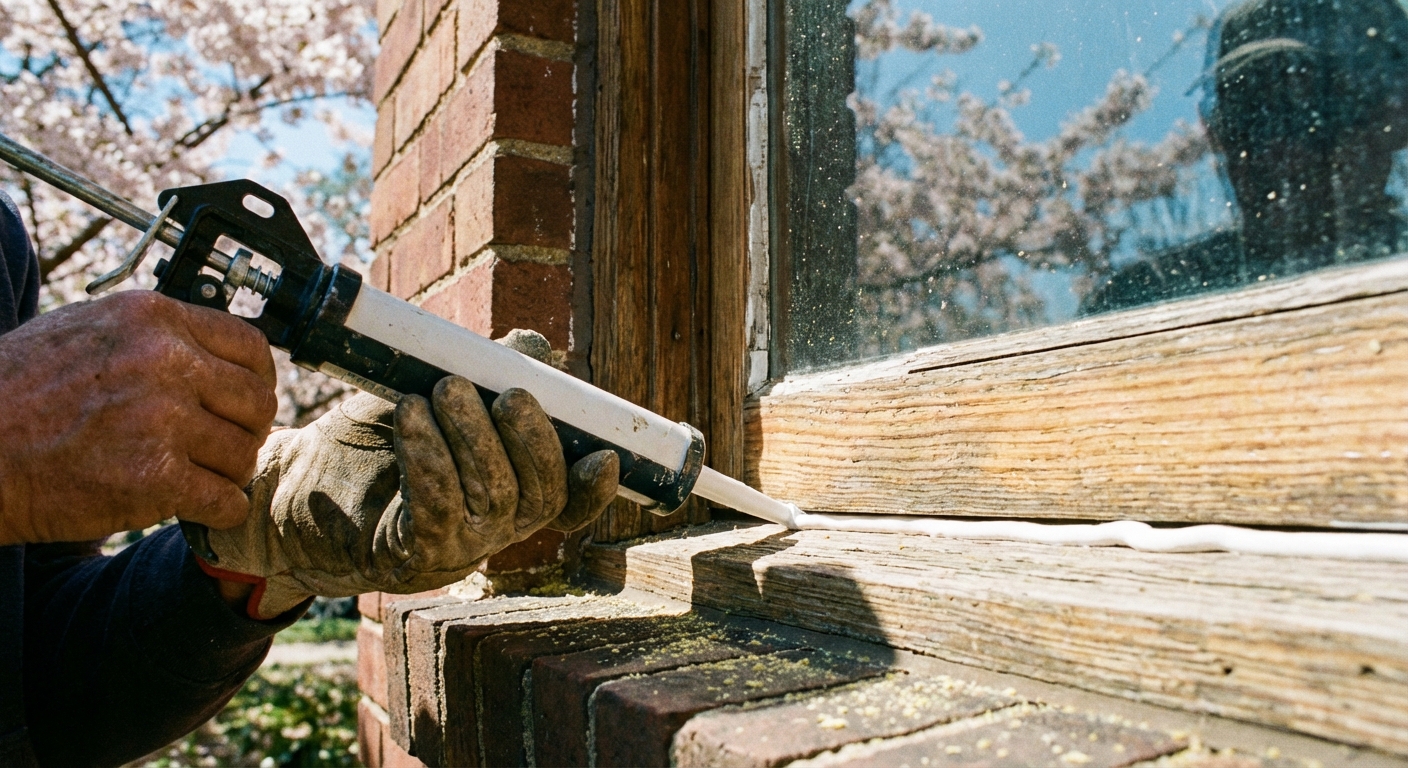
Spring is perfect for this because you can feel drafts, spot gaps, and work in mild temperatures. Good sealing keeps out water, bugs, and that humid summer air that makes your AC work overtime.
Checklist
- Outside, inspect caulk where trim meets siding and around window frames.
- Inside, check for air leaks on windy days by running your hand around the frame.
- Replace brittle or flattened weather stripping on operable windows and doors.
- Look for signs of water intrusion: bubbling paint, soft trim, or discoloration at corners.
Caulk tips that save you frustration
- Remove loose caulk first. New caulk over failing caulk doesn’t last.
- Use exterior-rated caulk and confirm it’s paintable if you plan to paint.
- Keep the bead small and tool it smooth with a damp finger or caulk tool.
Bonus checks (fast but worth it)
Smoke and CO alarms
- Test all alarms.
- Replace batteries if you don’t have sealed 10-year units.
- Check the manufacture date. Many smoke alarms are due around 10 years, and many CO alarms are due around 5 to 10 years depending on the model. If you can’t find a date, I treat it as suspect.
- Vacuum dust from vents.
Basement, crawlspace, and attic scan
- Look for dampness, musty smell, or new staining after snowmelt.
- Check for pests and blocked vents.
- Confirm bathroom and dryer vents are exhausting properly to the exterior.
- Quick safety note: watch for exposed nails, loose wiring, and deep insulation. Don’t step where you can’t see solid framing.
AC condenser quick cleanup
- With power off at the disconnect, clear leaves and mulch from around the outdoor unit.
- Trim plants back for airflow. I aim for about 2 feet of breathing room.
- If the fins look packed with fuzz, a gentle rinse from the outside can help. Don’t blast it like a driveway.
Sump pump (if you have one)
- Pour water into the pit until the float lifts and confirm it turns on and pumps out.
- Make sure the discharge line drains away from the house and isn’t blocked.
Decks, steps, and railings
- Tighten loose railings and replace rusty fasteners.
- Check for soft boards, popped nails, and splinters.
- Spot-seal exposed end grain on wood to slow rot.
Simple weekend plan
If you like a schedule, here’s a realistic way to knock this out without burning your whole Saturday.
Weekend 1 (2 to 4 hours)
- Test smoke and CO alarms (and check dates)
- HVAC filter
- Outdoor faucet test
- Window and door caulk check
- Basement or attic scan
- Sump pump test (if applicable)
Weekend 2 (3 to 6 hours)
- Gutter cleanout and downspout check
- Roof inspection from the ground
- AC condenser cleanup
- Power wash (if needed)
- Yard reset and aeration planning
Printable checklist
Copy and paste this into your notes app, or print it and stick it on the fridge.
- ☐ Test smoke and CO alarms (and check replacement dates)
- ☐ Replace HVAC filter(s)
- ☐ Clean gutters and flush downspouts
- ☐ Inspect roof shingles and flashing for winter damage
- ☐ Test outdoor faucets and check for leaks inside
- ☐ Clear debris around AC condenser and trim plants back
- ☐ Power wash siding, steps, and driveway as needed
- ☐ Aerate lawn if compacted; overseed bare spots
- ☐ Inspect window caulk and replace weather stripping
- ☐ Quick scan of attic, basement, crawlspace for moisture
- ☐ Test sump pump (if you have one)
- ☐ Check deck and railings for loose or soft boards
Don’t aim for perfect. Aim for progress. Every box you check now is a problem you’re less likely to pay for later.
About Marcus Vance
Content Creator @ Grit & Home
Marcus Vance is a lifelong DIY enthusiast and self-taught home renovator who has spent the last decade transforming a dilapidated 1970s ranch into his family's dream home. He specializes in budget-friendly carpentry, room-by-room renovations, and demystifying power tools for beginners. Through his writing, Marcus shares practical tutorials and hard-learned lessons to help homeowners tackle their own projects with confidence.