🚨 In a DIY emergency or rush?
Skip the details and jump straight to our 30-second cheat sheet for the most crucial info.
If your string trimmer will not start, it is tempting to assume it is “just dead” and start shopping. I have been there. Most of the time, the fix is simple and cheap, especially after the first mow of the season when old fuel and gummed-up carbs are the real culprit.
This guide walks you through the same order I use in my own garage: the fast checks first, then the slightly fussier stuff. Take it one step at a time and stop as soon as it starts.
Quick note: This is written for gas 2-stroke string trimmers. If yours is battery or corded, it has a different troubleshooting path.

Safety first and a 60-second setup
String trimmers are small engines, but they can still bite. Do these before you start troubleshooting.
- Turn the switch to OFF and let the engine cool.
- Disconnect the spark plug boot before you put hands near the head, clutch, or flywheel area.
- Work outside or in a well-ventilated garage with the door open.
- Wear gloves and eye protection, especially when cleaning around the head and muffler area.
Tools that help: spark plug socket, small brush, compressed air or a can of air, screwdriver set, clean rag, a small wire brush (for the spark arrestor screen), and a fresh spark plug (they are cheap insurance).
Step 1: Quick checks (it gets everyone once)
Make sure the controls are actually set to start
- On/Off switch: ON.
- Choke: FULL CHOKE for a cold start, then move to RUN or half choke once it pops.
- Throttle lock: Some trimmers require you to hold the throttle or engage a start latch.
- Fuel cap: Snug, but not cross-threaded.
If it briefly fires and then dies, that is usually fuel delivery or exhaust restriction, not “no spark.” Keep going.
Step 2: Do a quick compression feel test
This is not a perfect compression test, but it can save you time if the engine is already toast.
- Slowly pull the starter cord.
- Normal: firm, springy resistance and a healthy “bounce” as it comes over compression.
- Bad sign: the cord pulls unusually easy with very little resistance, and it never even tries to “pop” no matter what you do.
If it feels like there is basically no compression, you may be looking at piston or cylinder damage, and the rest of the basic steps may not bring it back.
Step 3: Old fuel is one of the most common causes
If the fuel in the tank is older than about 30 to 60 days untreated (or you are not sure), treat it as suspect. Modern pump gas can go stale fast, and ethanol blends love to leave varnish inside tiny carb passages. If you used stabilizer or a sealed small-engine canned fuel, it can last much longer.
What to do
- Dump the tank into an approved gas can.
- Do not dilute it into your car’s tank as a “get rid of it” trick. If it is questionable, store it safely for proper disposal, or use it only in appropriate equipment if you know it is clean and still usable.
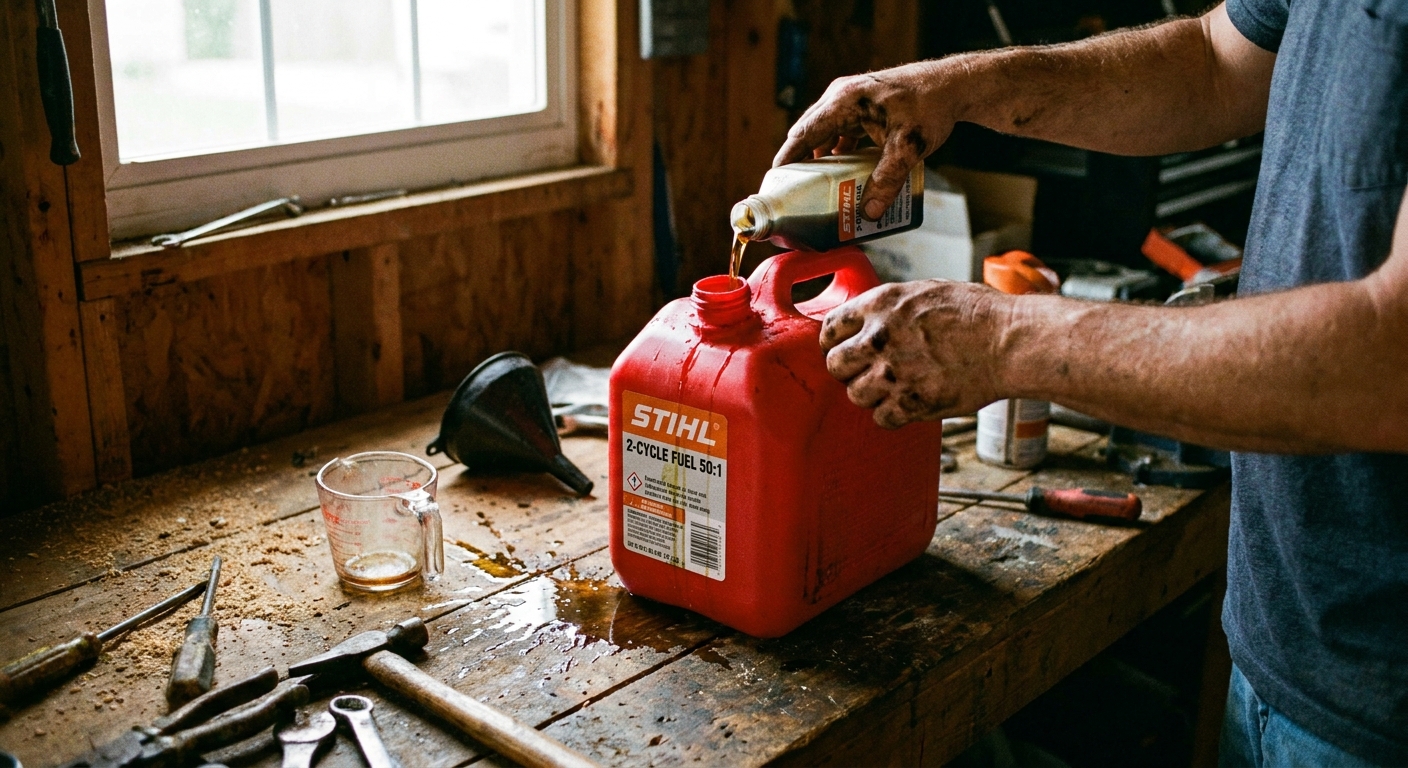
- Mix fresh fuel using the ratio on your trimmer (commonly 50:1). Use a proper 2-cycle oil.
- Refill and prime (more on priming below).
My thrifty rule: If you only use your trimmer occasionally, buy the smallest can of ethanol-free gas you can find, or use a quality small-engine fuel that stays stable longer. It costs more per gallon, but it is cheaper than replacing carb parts.
Step 4: Spark plug check
A fouled plug can keep a trimmer from starting even if everything else is perfect. Two-stroke engines are especially prone to plug fouling if they were run with a rich mix, idled a lot, or stored with old fuel.
How to inspect it
- Pull the boot and remove the plug.
- If the plug tip is wet with fuel, the engine may be flooded. See the flooding section below.
- If it is black and sooty, it is likely fouled. Replace it.
- If it is white and crusty, the mix may be off or the engine ran hot. Still replace it and correct fuel going forward.
Basic spark test (no special tools)
This works, but an inline spark tester is safer and more reliable if you have one.
- Reconnect the boot to the plug.
- Hold the metal threads of the plug firmly against bare metal on the engine using insulated pliers or a gloved hand.
- Keep the plug and plug hole away from spilled fuel or fuel vapors.
- Pull the starter and look for a bright blue spark.
No spark? Double-check the on/off switch, then inspect the plug boot for damage. If the ignition coil is bad, that is a bigger repair, but most “no start” cases I see are still fuel-related.
Step 5: Air filter and airflow
A clogged air filter can make a trimmer hard to start, make it bog down, or make it only run on choke. This is one of those fixes that feels too simple until it works.
What to do
- Remove the air filter cover.
- Foam filter: Wash with warm soapy water, rinse, squeeze dry (do not wring), then lightly oil if your manual calls for it.
- Paper filter: Tap gently to knock dust loose, or replace. Do not soak paper filters.
- Clean debris out of the air box before reinstalling.

Step 6: Primer bulb and carb basics
If your trimmer sat with fuel in it, the carburetor can gum up. You can often get it running again with the right priming and a little patience.
Prime it the right way
- Press the primer bulb slowly until you see fuel moving through the clear fuel lines (if visible).
- Most models like 6 to 10 presses, but follow your housing label if it lists a number.
- Heads up: some primer systems circulate fuel back to the tank and the bulb may not look “full” all the time. What matters is that it moves fuel and does not just suck air.
If the primer bulb will not work
- Cracked bulb: It leaks air and will not draw fuel. Replace the bulb.
- Fuel lines: Look for cracked, brittle lines, especially where they pass through the tank grommet.
- Fuel filter in the tank: Fish it out with a bent wire hook and replace if dirty.
A simple carb “wake up” attempt
If you have fresh fuel and it still will not start, try this before tearing anything apart:
- Set choke to FULL.
- Prime as directed.
- Pull until it pops once (or up to 5 pulls).
- Move choke to HALF or RUN.
- Pull again.
What you are listening for: a single pop means you are close and should reduce choke. If you keep pulling on full choke after it pops, you can flood it.
Step 7: Fix a flooded engine
Flooding happens when there is too much fuel in the cylinder for the spark to ignite properly. It is common after repeated start attempts on full choke.
How to clear it
- Switch OFF and remove the spark plug.
- Pull the starter cord several times (usually 10 to 20 pulls) to vent the cylinder.
- Let it sit a few minutes, and let the plug dry, or replace it if it is fouled.
- Reinstall the plug.
- Try starting with choke OFF (RUN) and throttle held open.
If it starts and runs rough for a few seconds, that is normal as it clears itself out.
Step 8: Check for a bound-up trimmer head
On many trimmers, the engine should still start even if the head is dirty, but a severely jammed head, wrapped weeds, or a stuck clutch, driveshaft, or gearbox can add drag and make starting harder. It is worth a quick inspection, especially if the cord feels unusually hard to pull.
What to look for
- Wrapped string, vines, or wire around the head.
- Grass packed under the guard or around the gearbox.
- Head spins freely? With the plug boot disconnected, rotate the head by hand. It should turn without grinding.
Clean it out, then try starting again. While you are there, make sure you are using the correct diameter line. Too thick can overload the trimmer and cause bogging once it does start.

Step 9: Check the spark arrestor screen
This is the sneaky one that gets missed. Many 2-stroke trimmers have a small spark arrestor screen in the muffler. If it gets packed with carbon, the engine can be hard to start, start and die, or run but bog down and refuse to rev.
How to inspect and clean it
- Let the muffler cool completely.
- Remove the muffler cover (if equipped) and locate the small screen.
- If it is coated in carbon, gently clean it with a small wire brush.
- If it is damaged, replace it.
If your trimmer starts and then immediately bogs like it cannot breathe, this step is worth doing before you order a carb.
Step 10: When to suspect the carburetor needs cleaning or replacement
If you have fresh fuel, a good plug, a clean air filter, correct priming, and a clean spark arrestor screen, but the trimmer still will not start or only runs for a second on choke, the carb is likely varnished.
Signs it is carb-related
- It starts briefly with choke, then dies when you move to RUN.
- Primer works, but it never stays running.
- It ran fine last season, then sat with fuel in it for months.
Your options
- Quick attempt: Add a small-engine fuel system cleaner to fresh fuel and run (only works if it will start).
- Best fix: Remove and clean the carb, or install a carb rebuild kit.
- Most practical fix on budget trimmers: Replace the carb assembly. Often $15 to $40 for aftermarket carbs online, and OEM may cost more.
If you go this route, take photos as you disassemble. Fuel line routing is the easiest thing to forget, and I have absolutely had to backtrack because I trusted my memory.
Before you replace the whole trimmer
Here is my personal “replace or repair” checkpoint:
- If it needs fuel, plug, air filter, and spark arrestor cleaning, fix it. That is normal maintenance.
- If it needs a carb and your trimmer is otherwise solid, fix it. It is a common wear item.
- If it has very low compression, severe internal damage, or parts are discontinued, replacement may make sense.
If you want to stretch the life of the next one, the single best habit is running it dry before storage or using stabilized, ethanol-free fuel.
The 30-Second Cheat Sheet
Essential takeaways for: String Trimmer Won’t Start? Fix This First
Fast diagnosis order (do this in sequence)
- Confirm it is a gas 2-stroke: This checklist is for gas 2-cycle trimmers. If yours is battery or corded, skip to power and safety checks in the manual.
- Quick compression feel: Pull the cord slowly. You should feel firm, springy resistance. If it pulls unusually easy with almost no resistance, you may have low compression (internal damage) and the rest of the steps may not help.
- Fresh fuel: Dump gas that is old, unknown, or untreated past about 30 to 60 days. Refill with correctly mixed 2-cycle fuel (stabilized or canned fuel lasts much longer).
- Correct start settings: Switch ON, full choke for cold start, then move to half or RUN after it pops.
- Air filter: Clean or replace. A clogged filter can make it only run on choke.
- Spark plug: Replace if wet, black, or questionable. Confirm a bright blue spark if you can (use insulated pliers and keep away from spilled fuel).
- Prime properly: Usually 6 to 10 presses, slow and steady. Some primer bulbs do not fill solid because they circulate fuel back to the tank. If the bulb will not move fuel at all, check fuel lines and the in-tank fuel filter.
- Clear flooding: Wet plug or strong gas smell. Remove plug, pull cord several times (10 to 20), let it sit a few minutes, reinstall, start on RUN with throttle open.
- Head binding: With plug boot off, make sure the head spins freely. Remove wrapped weeds or packed grass. If the clutch, driveshaft, or gearbox is seized, starting can be hard.
- Spark arrestor screen: If it starts then bogs, will not rev, or dies quickly, inspect and clean the muffler spark arrestor screen.
- Carb suspect: If it only runs briefly on choke or dies in RUN after fresh fuel and a new plug, the carb likely needs cleaning or replacement.
Most common fixes that cost under $20
- Fresh fuel mix
- New spark plug
- Cleaned air filter (or replacement)
- New in-tank fuel filter
- Cleaned spark arrestor screen (free)
Stop and replace parts when
- Primer bulb is cracked or will not move fuel
- Fuel lines are brittle or leaking
- Spark arrestor screen is damaged and will not clean up
- Carb is varnished and the trimmer sat with fuel over winter
- Pull cord has unusually low resistance (possible low compression)
💡 Tip: Scroll up to read the full article for detailed, step-by-step instructions.
⬆️ Back to topAbout Marcus Vance
Content Creator @ Grit & Home
Marcus Vance is a lifelong DIY enthusiast and self-taught home renovator who has spent the last decade transforming a dilapidated 1970s ranch into his family's dream home. He specializes in budget-friendly carpentry, room-by-room renovations, and demystifying power tools for beginners. Through his writing, Marcus shares practical tutorials and hard-learned lessons to help homeowners tackle their own projects with confidence.