🚨 In a DIY emergency or rush?
Skip the details and jump straight to our 30-second cheat sheet for the most crucial info.
First: what the beeping is actually telling you
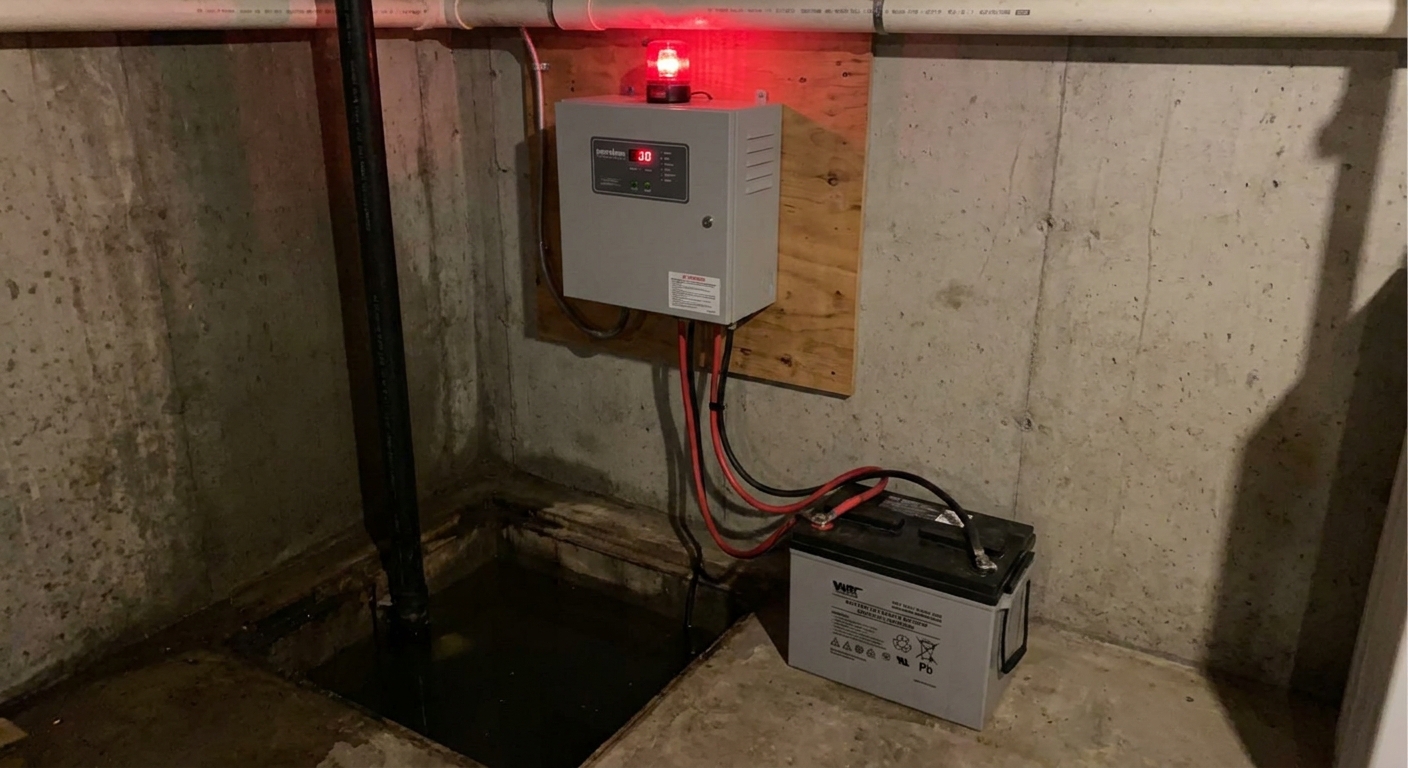
Most battery backup systems are pretty simple at heart: a charger keeps a battery topped off, and an inverter or DC pump takes over if your main sump can’t run. When the control box beeps, it’s usually warning you about one of four things:
- AC power problem (the unit isn’t getting wall power)
- Battery problem (low charge, weak battery, or battery not connected)
- Pump or float problem (the backup tried to run or self-test and didn’t like what it saw)
- Wiring or connection fault (loose terminals, corrosion, reversed polarity, blown fuse)
The tricky part is that every brand uses slightly different beep codes and timing. Treat the patterns below as general tendencies, not universal codes. The goal here is to help you narrow it down fast with a few safe checks, even if you don’t have the manual in hand.
Safety and sanity check
I know the temptation: yank the buzzer wire or silence it and deal with it later. I’ve done that. It’s also how you end up with a soaked carpet because the backup was trying to warn you for weeks.
Do these quick checks first
- If water is rising in the pit, ignore the beeping and focus on pumping. Plug in the primary pump to a different outlet if you can, or start removing water with a utility pump.
- Unplug only what you understand. Many systems share an outlet with the primary pump. Don’t kill power to the only pump that’s currently working.
- Keep hands dry. Basements love to surprise you with wet concrete and leaky fittings.
- Hydrogen gas note: flooded lead-acid batteries can vent gas while charging. Keep sparks and open flame away.
Common alarm patterns
Think of these as “most likely” translations, and use your panel lights and labels as the tie-breaker. Your panel may use different words like AC, Power, Charger, Battery, Pump, Float, or System.
1) Constant beep
- Most common causes: AC power loss, battery disconnected, reversed battery cables, blown inline fuse, or an active high-water or float alarm.
- What to look for: a red “Alarm” light, an “AC Power” light off, or a “Check Battery” light on.
2) Beep every 20 to 60 seconds
- Most common causes: battery is weak, battery isn’t charging, or the system failed a self-test.
- What it feels like: it’s a steady nag. Annoying, yes, but it’s the classic “fix me before you need me” warning.
3) Rapid beeping for a short burst, then quiet
- Most common causes: self-test cycle ran, a float was bumped, or the unit saw a momentary voltage dip.
- What to do: check that the battery cables are tight and the float isn’t tangled. If it repeats on a schedule, the battery is often on its way out.
4) Beeping only during storms
- Most common causes: battery capacity is too low for the workload, the battery is sulfated and weak, or the charger can’t keep up.
- Translation: your backup may technically work, but it’s tired. This is when people learn their “7.5 hour runtime” is marketing math.
What to check first
This is my go-to order because it catches the common stuff quickly and avoids creating new problems.
Step 1: confirm real AC power
- Make sure the backup is plugged in fully.
- Check the breaker. If it tripped, reset it once.
- If it trips again, stop and investigate. Repeated trips can point to a failing pump motor, water intrusion in a cord or outlet, or a wiring fault.
- If the outlet is a GFCI, reset it. Many basement outlets are protected by a different GFCI upstream.
- Plug in a lamp or phone charger to confirm the outlet is live.
Thrifty lesson learned: I once chased a “bad battery” for an hour before realizing the power strip feeding the charger was switched off.
Step 2: check battery and terminals
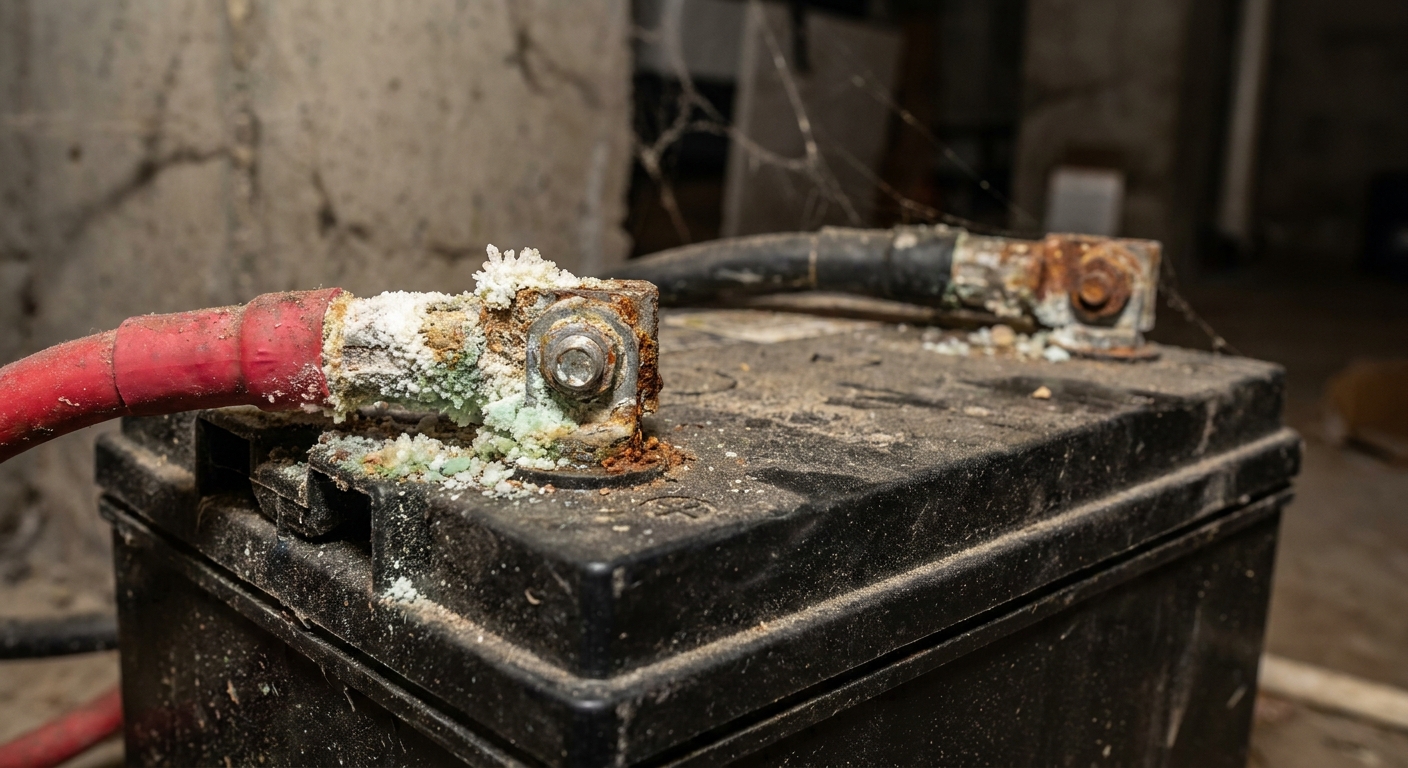
- Loose wing nuts or clamps: snug them down. Loose connections cause voltage drop, heat, and false alarms.
- Corrosion: white or green crust on terminals is a common culprit. Disconnect the black cable first, then red. Clean and reconnect red first, then black.
- Polarity: red to positive (+), black to negative (−). Reversed cables can blow an inline fuse or trigger a fault alarm.
- Inline fuse: many systems have a fuse on the positive lead. If it’s blown, the unit may beep like the battery is missing.
Step 3: check battery age and type
Battery backups are only as good as the battery, and batteries are consumables.
- Typical replacement cadence: every 3 to 5 years for many lead-acid batteries in real basement conditions. Shorter if it runs often or sits in high heat.
- Battery type matters: some systems want a deep-cycle marine battery, others want an AGM sealed battery, and some require a specific brand or size. Using the wrong type can lead to constant alarms, short life, and warranty issues.
- Date code: look for a sticker or stamped code on the battery case. If you can’t find one and you don’t remember buying it, assume it’s old.
- Recycle it: lead-acid batteries should be recycled. Most auto parts stores will take the old one.
Step 4: confirm it’s actually charging
Most control boxes have a “Charging” light. If it never comes on, the problem may be the charger, not the battery.
- If your model has indicator lights or a screen, trust those first.
- Some modern chargers are silent and stay cool, so don’t rely on a hum or warmth alone.
- If you own a multimeter, a healthy 12V lead-acid battery will vary by stage and type. As a rough guide at room temperature: float is often about 13.2 to 13.8V; bulk or absorption can be about 14.2 to 14.7V (varies by model and battery). A resting battery is often around 12.6V when fully charged.
- If the battery sits around 12.0V to 12.2V and never rises, the charger, fuse, or wiring may be at fault.
Charger and inverter basics
Homeowners get tripped up here because different backup systems use different designs.
Two common setups
- Battery + separate DC backup pump: The battery runs a dedicated pump when needed. These are common and usually efficient.
- Battery + inverter to run an AC pump: The inverter turns battery power into household-style power. This can work well, but it’s harder on the battery and runtime can be shorter.
Either way, the charger’s job is to keep the battery topped off without cooking it. If the charger fails, the system may still look “fine” until the next outage, then it alarms or dies quickly.
How to test your backup safely
Testing is where confidence comes from. I like tests that are controlled, reversible, and done on a day when the weather is calm.
Option A: use the test button
- Press and hold the Test button per your unit’s instructions (often 1 to 3 seconds).
- Listen for the pump to run briefly and watch for indicator lights changing.
- If it alarms during test, note which light is on. That’s your clue.
Option B: simulate an outage
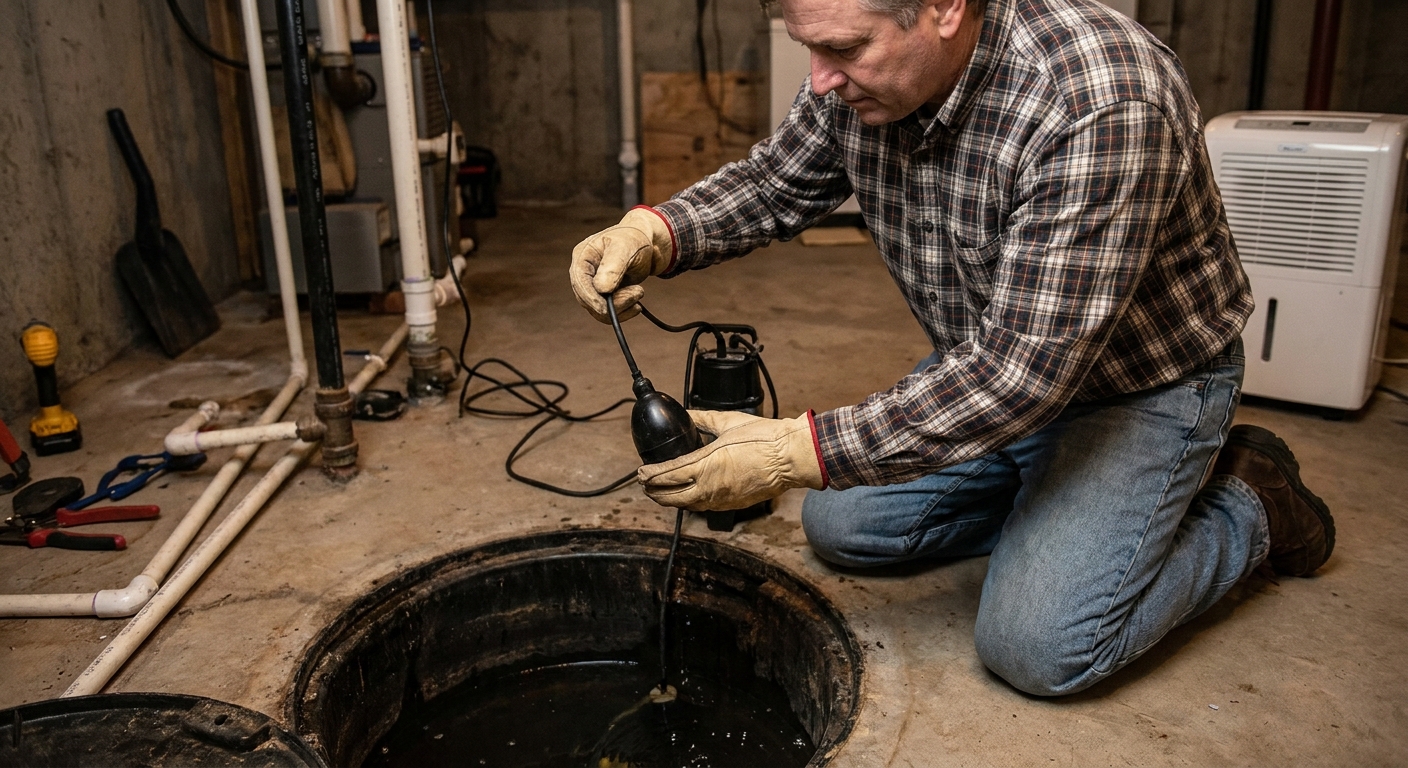
This checks the handoff from wall power to battery, which is what matters in real life.
- Make sure the sump pit isn’t actively filling fast.
- Unplug the backup charger or control unit from the wall to simulate AC loss.
- If your model requires it, lift the backup float gently to force a run cycle.
- Plug it back in after the test. Confirm it returns to “charging” or “ready” mode.
Tip: If you unplug the primary pump by mistake, the water level can rise quickly. Double-check cords before you pull anything.
Option C: water test
- Pour a few buckets of water into the pit to raise the float slowly.
- Confirm the backup float triggers the backup pump and the discharge line moves water.
- Stop if anything looks questionable: short cycling, grinding noise, or no water flow.
Float placement check
- Make sure the backup float is mounted and tethered so it activates above the primary pump’s normal on point, but still below a true overflow situation.
- Check that the float can move freely and isn’t rubbing the pit wall, tangled in cords, or hung up on the discharge pipe.
When it’s actually the primary pump
Here’s a sneaky scenario I see a lot: the backup is fine, but it’s beeping because it’s being forced to do the main pump’s job.
Clues your primary pump is failing
- The backup runs often even when the power is on.
- The pit water level is higher than normal.
- The main pump hums but doesn’t move water, or it trips the breaker.
- You hear repeated on-off cycling every few seconds (short cycling).
If the main pump is weak, the backup battery will drain faster, then you’ll get low-battery alarms and a lot of beeping. Fix the primary issue and the “mystery alarms” often disappear.
Quick fixes that stop beeping
OK to do
- Press Silence or Reset after you’ve identified the problem.
- Reseat battery cables and tighten terminals.
- Reset a tripped GFCI once and monitor.
- Replace an old battery with the correct type and capacity.
One small gotcha: many systems will re-alarm after a set number of hours in Silence mode. That’s not the unit being dramatic, it’s it refusing to let you forget.
Don’t do this
- Don’t permanently disconnect the buzzer and forget it.
- Don’t swap random car batteries in “just to test.” Starting batteries aren’t designed for deep discharge.
- Don’t ignore a burning smell, melted insulation, or hot terminals. Shut down and call for help.
Battery vs system replacement
If your backup is beeping and the battery is older than 3 to 5 years, battery replacement is the first bet.
Replace just the battery if
- The charger shows it’s charging normally.
- Connections are clean and tight.
- The system passes a self-test with a new battery.
Replace the backup system if
- The charger won’t charge a known-good battery.
- The control panel has persistent fault lights after you verify wiring.
- The backup pump is noisy, jams, or doesn’t move water reliably.
- The unit is very old and parts aren’t available.
- Your system uses a proprietary battery or charger and replacements are expensive or hard to source. Mixing parts can cause alarms and may void a warranty.
Call a pro if you see these
- Water is within a few inches of the basement floor level or rising fast.
- You suspect the discharge line is frozen, blocked, or broken outside. A blocked discharge or stuck check valve can mimic pump failure.
- Repeated breaker trips or signs of overheating at outlets or terminals.
- You have a radon mitigation tie-in, battery backups combined with alarms, or a more complex setup you aren’t confident with.
The 30-Second Cheat Sheet
Essential takeaways for: Sump Pump Battery Backup Beeping? Alarm Patterns and What to Check First
Fast decode: what the beeping usually means
- Constant beep: AC power loss, battery disconnected, polarity wrong, blown inline fuse, or an active high-water alarm. Treat this as a general tendency, not a universal code.
- Beep every 20 to 60 seconds: weak or aging battery, battery not charging, or failed self-test. Timing varies by brand, so use this as a clue, not a guarantee.
- Only beeps during storms: battery capacity is low, the battery is tired, or the primary pump is struggling and forcing the backup to work too hard.
What to check first (in this order)
- AC power: confirm the outlet is live, reset the breaker or GFCI. If it trips again, stop. Repeated trips can point to a failing motor, water intrusion, or a wiring fault.
- Battery connections: tight terminals, no corrosion, red to + and black to −.
- Inline fuse on the battery lead: replace if blown.
- Battery age: if it’s 3 to 5+ years old, plan to replace.
- Charging: look for a “Charging” light. If you have a multimeter, float is often about 13.2 to 13.8V; bulk or absorption can be about 14.2 to 14.7V (varies by model and battery type).
Safe test that actually matters
- On a calm day, unplug the backup charger or control for 1 to 2 minutes to simulate an outage.
- Lift the backup float (if your model calls for it) or use the Test button to make it run briefly.
- Plug back in and confirm it returns to ready or charging mode.
Replace the battery vs the whole unit
- Replace the battery if the charger seems normal and the old battery is 3 to 5 years old.
- Replace the system if it won’t charge a known-good battery, shows persistent fault lights, or the backup pump won’t move water.
Do not ignore these
- Water rising fast, burning smell, hot terminals, or repeated breaker trips: stop and call a pro.
💡 Tip: Scroll up to read the full article for detailed, step-by-step instructions.
⬆️ Back to topAbout Marcus Vance
Content Creator @ Grit & Home
Marcus Vance is a lifelong DIY enthusiast and self-taught home renovator who has spent the last decade transforming a dilapidated 1970s ranch into his family's dream home. He specializes in budget-friendly carpentry, room-by-room renovations, and demystifying power tools for beginners. Through his writing, Marcus shares practical tutorials and hard-learned lessons to help homeowners tackle their own projects with confidence.