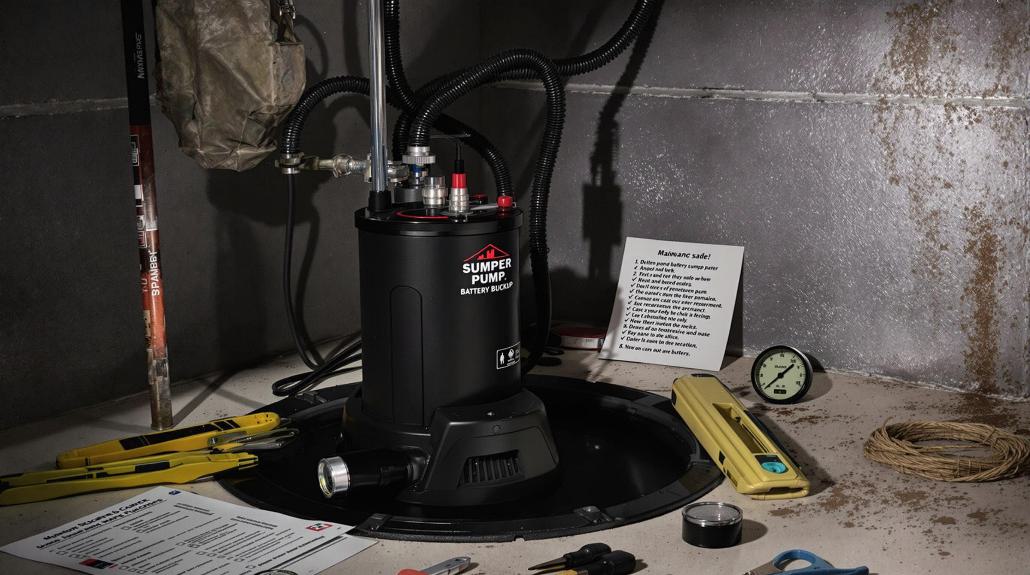
Before you start: safety first
When a battery backup sump pump will not run, it usually comes down to one of five things: the backup never gets the “turn on” signal (float or sensor issue), the battery cannot deliver power (dead or bad connection), the charger is not charging, the wiring is incorrect, or the controller has faulted out.
A couple safety notes from someone who has learned the hard way in a damp pit:
- Unplug the primary sump pump before you test the backup. You want the backup to be the only thing trying to run.
- Electric shock is a real risk around a sump pit. If you are touching wiring, terminals, or anything you suspect is compromised, shut off power at the breaker first.
- Use GFCI protection. If your sump outlet is GFCI, test and reset it. If it is not, consider having one added.
- Keep hands out of standing water while handling cords, chargers, or terminals.
- Remove jewelry and avoid sparks when working around batteries. A short across battery terminals can turn a ring or watch into a heater instantly.
- Have a plan if the pit is filling fast: a wet dry vac, a secondary utility pump, or a neighbor you can call. Troubleshooting is easier when you are not racing a flood.
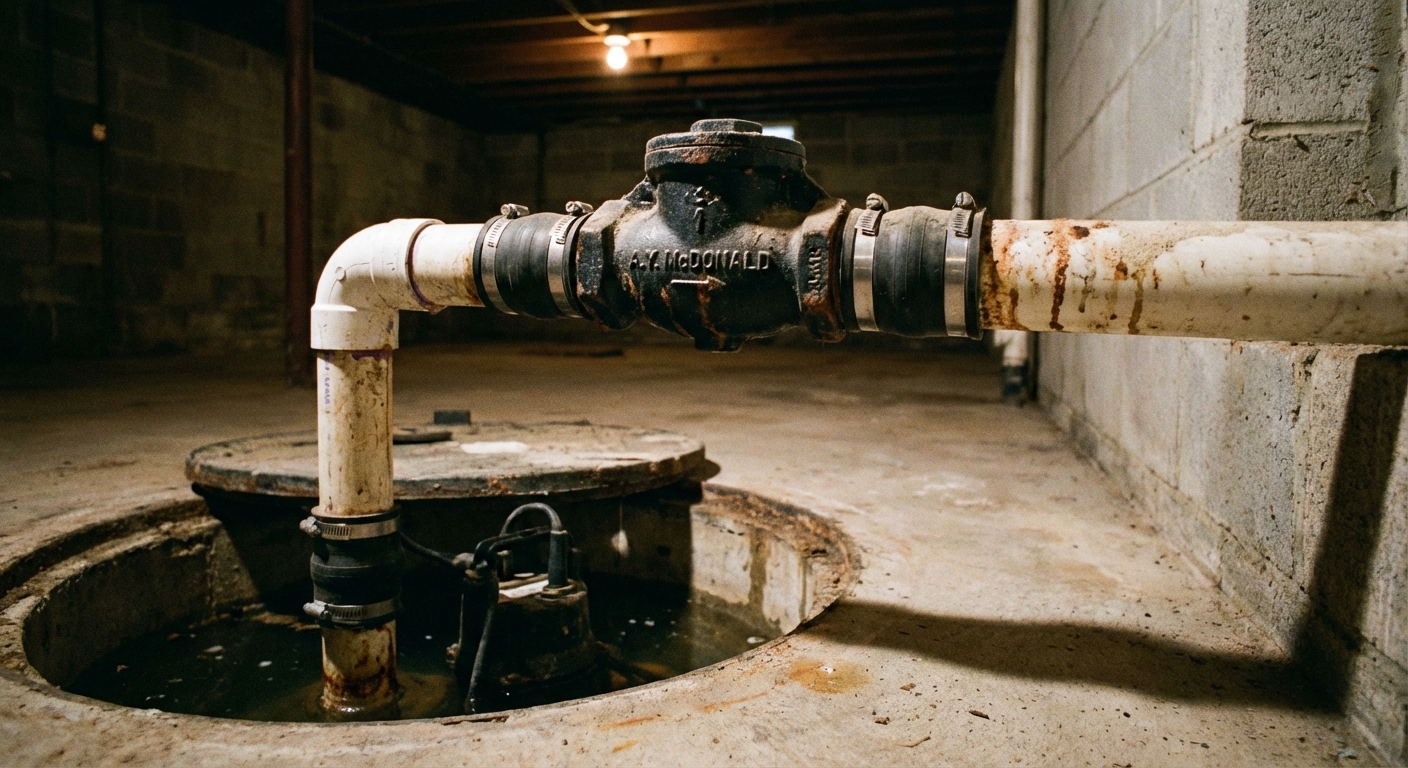
Know your system
Battery backups come in a few common flavors. Identify yours quickly so you are troubleshooting the right parts.
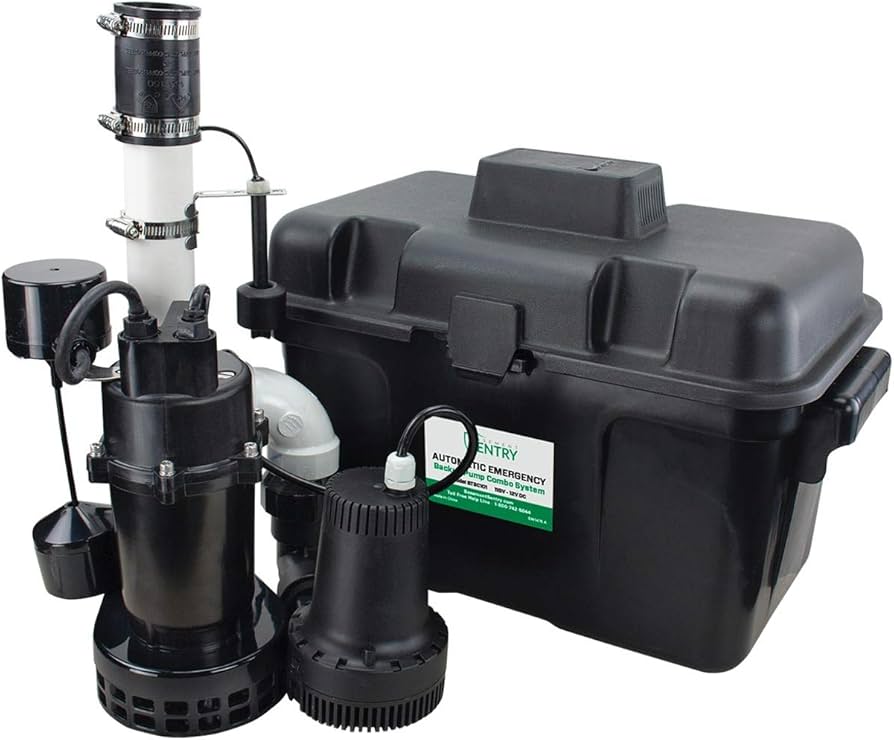
- Separate backup pump + controller + battery: A small pump sits in the pit with its own discharge connection. A controller box monitors charging and pump operation.
- Combo primary pump with backup built in: One housing does both jobs, but still uses a controller and battery.
- Inverter style backup: An inverter powers your main AC pump from a battery during an outage. These can work, but sump pumps have high start-up surge and inverters add losses. Runtime depends heavily on battery capacity and pump wattage.
Quick scope note: Some homes use water-powered backups (municipal water pressure) instead of batteries. This guide is specifically for battery backup systems.
If you are not sure what you have, look for the controller model number and battery type. Take a quick phone photo of how it is wired before you touch anything.
Fast triage: what does “won’t run” mean?
Different symptoms point to different causes. Pick the one that matches your setup.
- No lights, no beeps, nothing on the controller: no AC power to charger/controller, blown fuse, disconnected battery, or dead controller.
- Controller has power but backup pump never turns on: float/sensor problem, wiring issue, or pump jam.
- It tries to run then immediately stops: weak battery, corroded terminals, undersized cables, or a failing pump drawing too many amps.
- Alarm beeps “replace battery” or “charging” forever: bad battery, bad charger, or the wrong battery type or setting.
- Works on test button but not when water rises: float switch not moving freely, stuck, mispositioned, or unplugged.
Alarm tip: lights and beep codes vary a lot by brand. If your controller is blinking or beeping a pattern, look up the model’s code chart in the manual or on the manufacturer site before you start swapping parts.
Step 1: Confirm the “turn on” signal
Test the float switch or water sensor
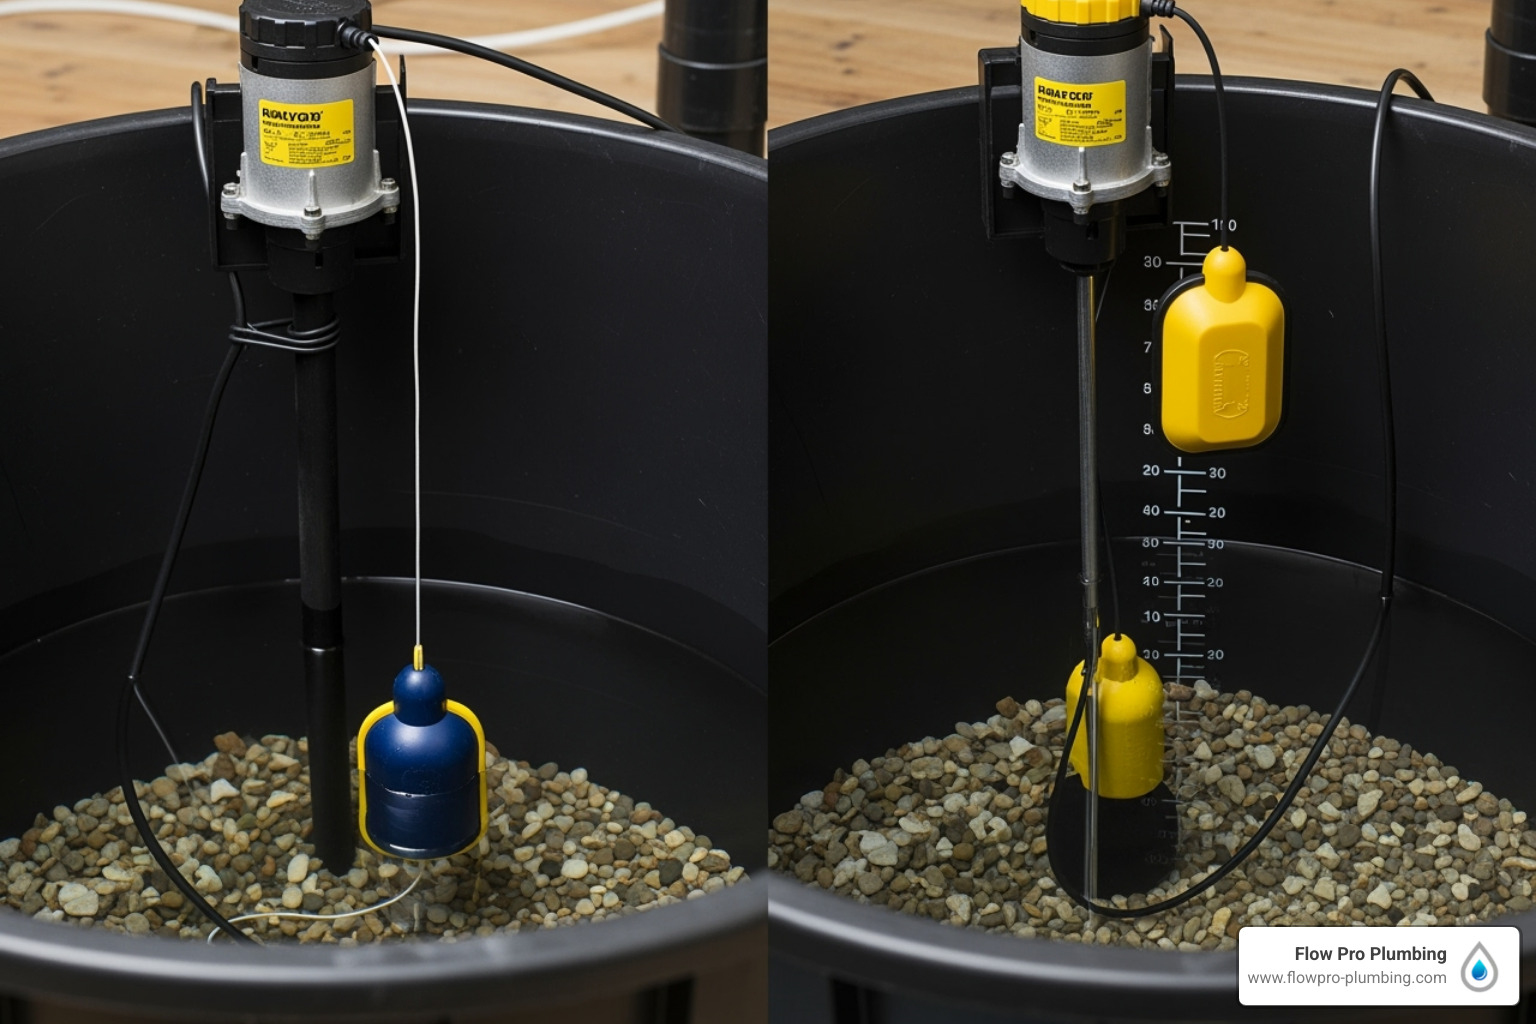
Most dedicated backup pumps use a float switch, a pressure switch, or a water sensor. The backup will never run if the “turn on” signal never happens.
- Float switch: Lift the float by hand. You should hear a click and the controller should indicate pumping, or the pump should run depending on model.
- Water sensor: Some systems use a small sensor probe or a switch that triggers at a certain water level. Clean it and make sure it is positioned correctly.
- Mechanical obstruction: Check for zip ties, discharge pipe, cords, or pit cover edges blocking float travel. I have personally “fixed” a backup just by re-routing one cord so the float could rise.
If the float is stuck with sludge, rinse it with clean water and wipe it down. Avoid solvents in the pit.
Do a controlled water test
With the primary pump unplugged, slowly add water to the pit (a few buckets or a garden hose). Watch the float and confirm it rises freely. The backup should start once it reaches its activation point.
Stay with it. If the water rises faster than the backup can handle, stop the test and switch to damage control.
If it runs during this test, your problem might have been a one-time float hang-up, or your activation level is set too high. The backup should typically kick on before the water reaches the top of the pit.
Step 2: Check the battery
A battery backup is only as good as the battery. Deep-cycle batteries age out quietly, especially if they live in a warm basement and only get used once a year.
Make sure it is the right type
- Deep-cycle marine or AGM is usually recommended.
- Standard car batteries can work in a pinch but often fail early in this application.
- Some controllers require AGM only or have different charge modes. Using the wrong type can cause chronic undercharging or overcharging.
Battery size matters (runtime)
If you are replacing the battery, look at capacity in amp-hours (Ah). In general, more Ah means more runtime during an outage. Your actual runtime depends on the pump’s draw, how often it cycles, and how high it is lifting water.
Quick voltage check (multimeter)
For the most accurate “at rest” reading, measure after the battery has been off the charger for a while. Many chargers float the battery at a higher voltage, which can make a fresh reading look better than it really is.
- About 12.6V to 12.7V: fully charged lead-acid battery at rest (good sign). A freshly charged battery may briefly read a bit higher.
- About 12.2V to 12.4V: partially charged.
- Below about 12.0V: likely discharged or failing.
During pumping, voltage will drop. A brief dip during motor start is normal. What you are watching for is sustained sag under load, especially if it stays low (often around 10.5V or below) and the pump stalls, chatters, or the controller alarms.
Load test without fancy tools
Many controllers have a test button. Run a test cycle. If the pump sounds strained, runs for a moment and quits, or the controller alarms immediately, suspect the battery or the connections.
If your battery is older than 3 to 5 years, replacement is often the most reliable fix. In my experience, people wait until the first storm outage to discover their “backup” is basically a paperweight.
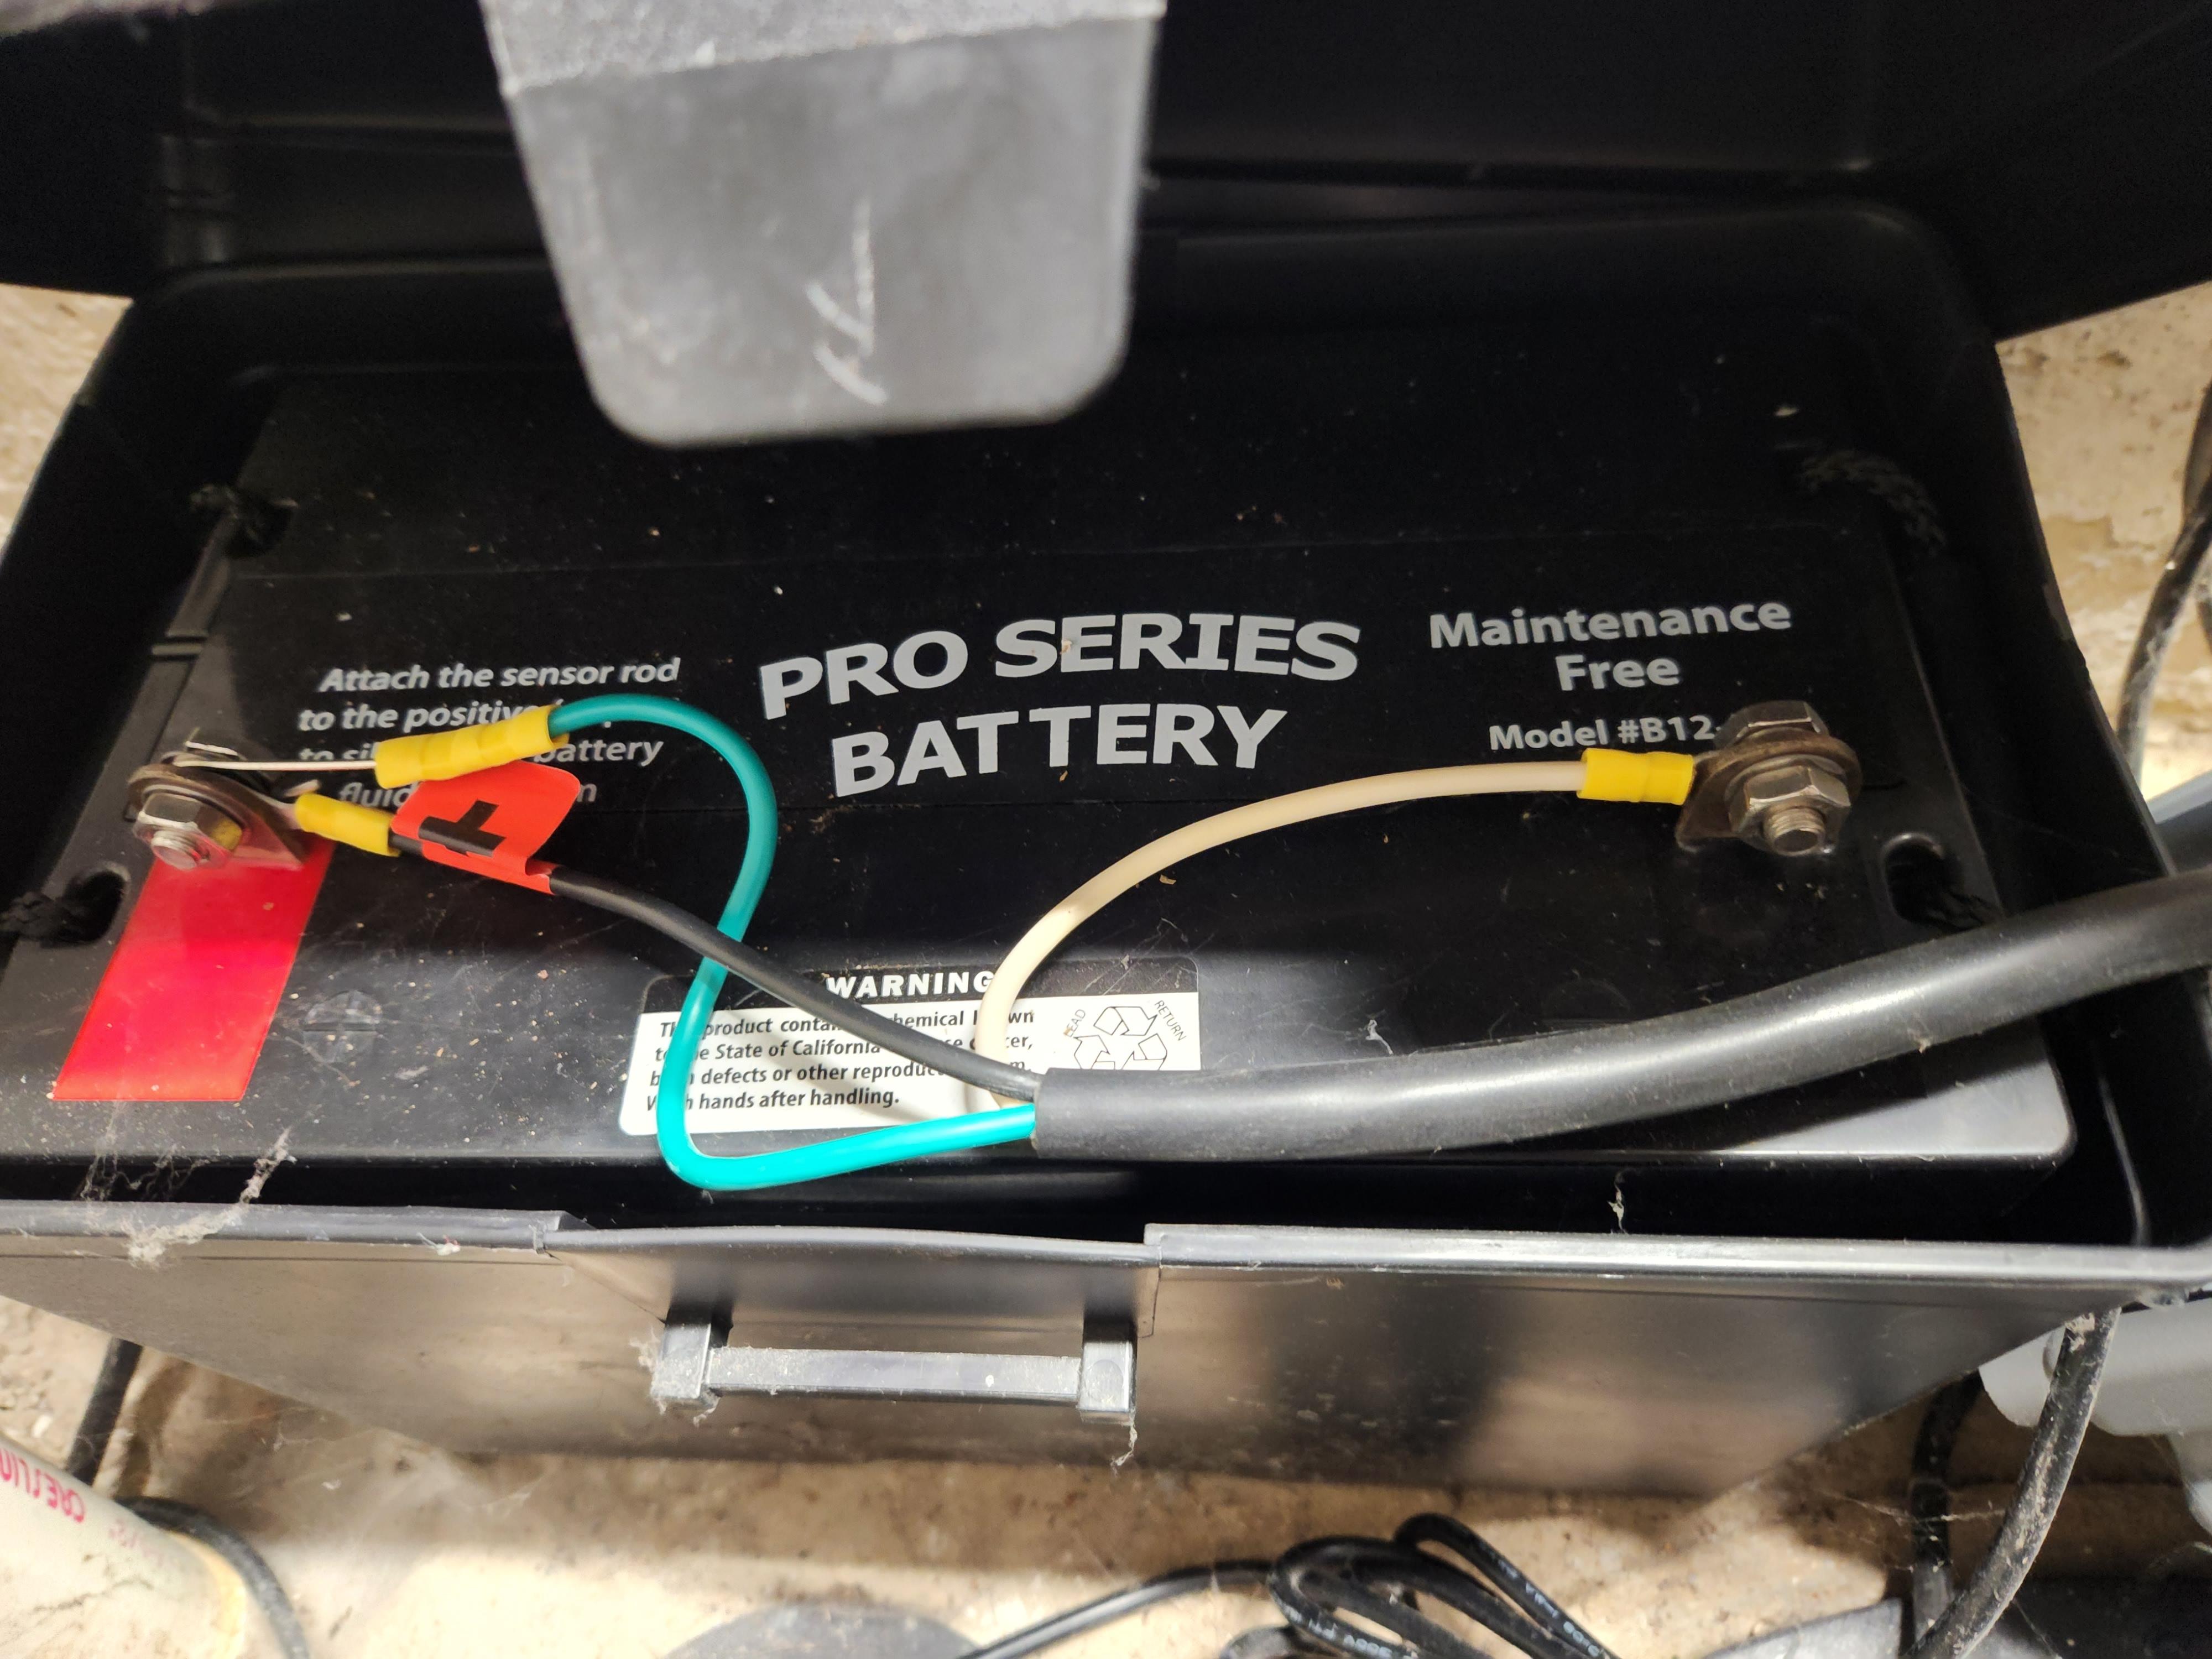
Step 3: Inspect terminals and cables
Backups need high current to start the pump. A little corrosion can act like a bottleneck and keep the motor from starting.
- Look for white or green crust on battery posts and ring terminals.
- Check for loose wing nuts or stripped hardware.
- Inspect the cable insulation for swelling, cracks, or heat damage.
Clean and tighten correctly
- Ventilate the area and keep flames and sparks away. Batteries can vent hydrogen while charging.
- Disconnect negative first, then positive.
- Clean posts and terminals with a battery brush or fine sandpaper.
- Reconnect positive first, then negative.
- Make the connection snug. Loose is bad, but do not twist a post off by over-tightening.
After cleaning, a light coat of battery terminal protectant can slow future corrosion.
Step 4: Verify charger and AC power
If the charger is not working, the battery slowly drains over weeks or months. Then the first time you need it, nothing happens.
Confirm the outlet has power
- Plug in a lamp or outlet tester.
- If it is a GFCI outlet, press reset. Check upstream GFCIs too.
- Look for a tripped breaker labeled sump, basement, or utility.
Check lights and fault codes
Every controller is different, but most have some combination of power, charging, and replace battery indicators. If the controller shows “charging” constantly and the battery never reaches full, the charger could be weak or the battery could be sulfated and not accepting charge.
Signs the charger is failing
- Battery voltage never improves meaningfully after extended charging.
- Charger or controller feels unusually hot.
- Frequent nuisance alarms or “check charging” warnings.
If your controller uses an external wall-wart style charger, make sure it is the correct OEM unit. Swapping in a random charger is a common mistake and can damage the battery or controller.
Step 5: Check wiring and discharge
Battery backups usually have at least three plug or wire groups: AC power for charging, battery cables, and pump leads. One wrong connection can make the system look alive but never pump.
Common wiring issues
- Reversed polarity on the battery terminals: positive to negative or vice versa. Many controllers will alarm or refuse to run.
- Pump plugged into the wrong port on the controller (or not plugged in fully).
- Float switch unplugged or plugged into the wrong jack.
- Inline fuse blown on the battery positive lead. Some systems have a replaceable automotive style fuse near the terminal.
Check the discharge setup
A backup pump can run perfectly and still not move water if the discharge is wrong.
- Confirm the backup has a working check valve if required by the manufacturer.
- Follow the manufacturer instructions and local code on check valve placement. Adding an extra valve in the wrong spot can create its own problems, so avoid improvising a “check-valve sandwich.”
- Make sure the discharge is not blocked, frozen, or tied into a line that is already clogged.
- If you have a combo discharge line, ensure fittings are tight and not sucking air.
Step 6: Rule out a bad backup pump
Backup pumps sit unused for long stretches, which is not great for any motor. Debris can lock an impeller, and small pumps can burn out if they run dry or cycle too frequently.
What to check
- Listen during a test. A hum with no pumping can mean a jam.
- Pull the pump (if your setup allows), inspect the intake for gravel, zip tie scraps, or sludge.
- Inspect the pump’s intake screen and impeller area per the manual.
If the controller indicates the pump is running but the pit level does not drop, focus on the pump and discharge path.
Step 7: Controller or inverter faults
If you have an inverter-based system or a smart controller, an internal fault can stop operation even with a good battery.
Reset and self-test
- Unplug AC power.
- Disconnect the battery leads (negative first).
- Wait 1 to 2 minutes.
- Reconnect battery (positive first), then restore AC power.
- Run the built-in test.
Failure clues
- Burnt electronics smell.
- Repeated error codes that return after a reset.
- No charging output even with verified AC input.
- Inverter alarms or immediate shutdown under load.
At this point, I recommend checking your model’s manual for the exact code meanings. If the unit is older and out of warranty, replacing the controller can be more cost-effective than chasing an intermittent fault.
Common install mistakes
- Float set too high: the backup never triggers until the pit is nearly overflowing.
- Float set too low: the backup short-cycles and wears out early.
- Shared discharge plumbed wrong: the tee or check valve arrangement allows backflow, recirculation, or airlock.
- Cords routed poorly: a float is fine until one cord catches it at the worst moment.
Seasonal test checklist
If you only do one thing after you fix the issue, do this. I schedule it when I change smoke detector batteries and again before spring storms.
- Visual check: no corrosion, no bulging battery case, no loose cables.
- Outlet check: confirm charger outlet works, GFCI is not tripped.
- Run a real water test: unplug primary, add water, verify backup starts and pumps down.
- Listen: smooth start, steady pumping, no grinding.
- Check battery age: write install month and year on the battery case with a marker.
- Inspect discharge: confirm check valves are present where required and the line is clear outside.
If you live in a cold climate, add a winter step: confirm the discharge termination is not buried by snow or iced shut.
Maintenance that prevents failures
Keep the pit clean
Sludge and gravel are float switch killers. Scoop out sediment occasionally and make sure cords are routed so nothing snags.
Replace batteries on a schedule
Even well-maintained lead-acid batteries are consumables. If your basement is humid or warm, expect shorter life. When in doubt, replace it before the rainy season, not during it.
Do not ignore alarms
The annoying beep is usually trying to save you from a wet carpet. If your controller offers a mute button, use it, but follow up with the fix.
When to call a pro
I am all for DIY, but a sump system is also your home’s insurance policy. Bring in a plumber or electrician if:
- You have recurring breaker trips, melted plugs, hot wiring, or any signs of overheating.
- The discharge plumbing needs rework or the check valve setup is confusing.
- You suspect your pit is undersized or your pump is cycling excessively.
- Water is actively rising and you cannot stabilize the situation quickly.
A one-hour service call is cheaper than replacing drywall and flooring.
Quick troubleshooting summary
- Works on test button, not on rising water: float or sensor issue, snagged cord, activation level too high.
- Controller on, pump does nothing: pump lead unplugged, blown fuse, controller fault, jammed pump.
- Runs briefly then stops: weak battery, corroded terminals, bad cable connection, failing pump.
- Battery never seems charged: charger problem, wrong battery type or setting, old sulfated battery.
If you want, tell me your controller model and what lights or beeps you are getting, and I can help narrow it down to the most likely culprit.
About Marcus Vance
Content Creator @ Grit & Home
Marcus Vance is a lifelong DIY enthusiast and self-taught home renovator who has spent the last decade transforming a dilapidated 1970s ranch into his family's dream home. He specializes in budget-friendly carpentry, room-by-room renovations, and demystifying power tools for beginners. Through his writing, Marcus shares practical tutorials and hard-learned lessons to help homeowners tackle their own projects with confidence.