If your sump pump runs, shuts off, and then kicks right back on a minute later, it is tempting to blame the pump. Often, the real culprit is a small fitting on the discharge pipe called the check valve. When it fails, water that was just pumped out can fall right back into the pit, forcing the pump to do the same work twice.
On my first fixer-upper basement, I replaced a perfectly good pump before I learned this lesson. The check valve was stuck open, the pit refilled instantly, and the “new” pump acted just as annoying as the old one. Let’s save you that money.
What the check valve does
The check valve is a one-way door in the discharge pipe. It lets water leave the sump pit, but it is supposed to stop water from coming back down once the pump shuts off.
Why it matters
- Prevents backflow into the pit, which reduces how often the pump runs.
- Reduces wear on the pump motor and switch because it avoids rapid on and off cycling.
- Helps performance because the pump is not repeatedly re-pumping the same water.
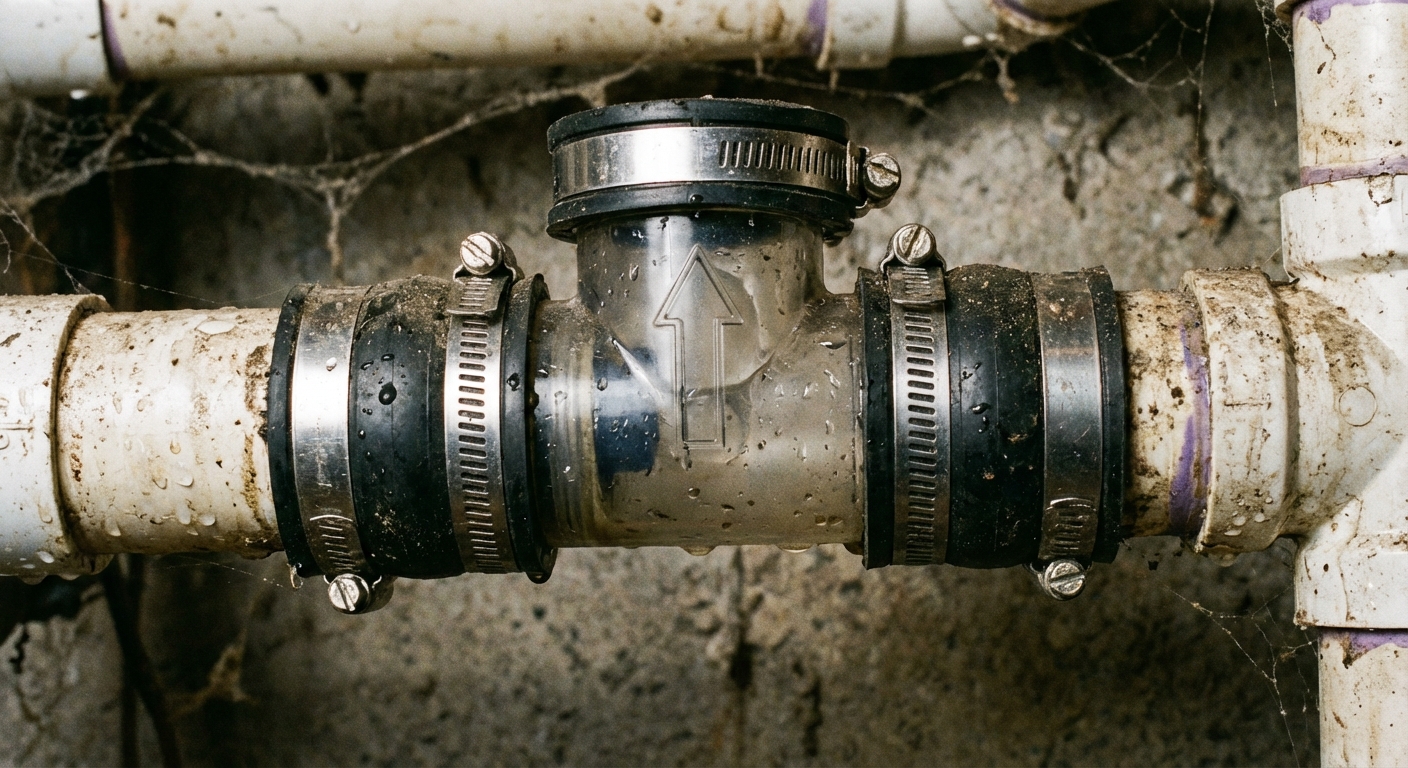
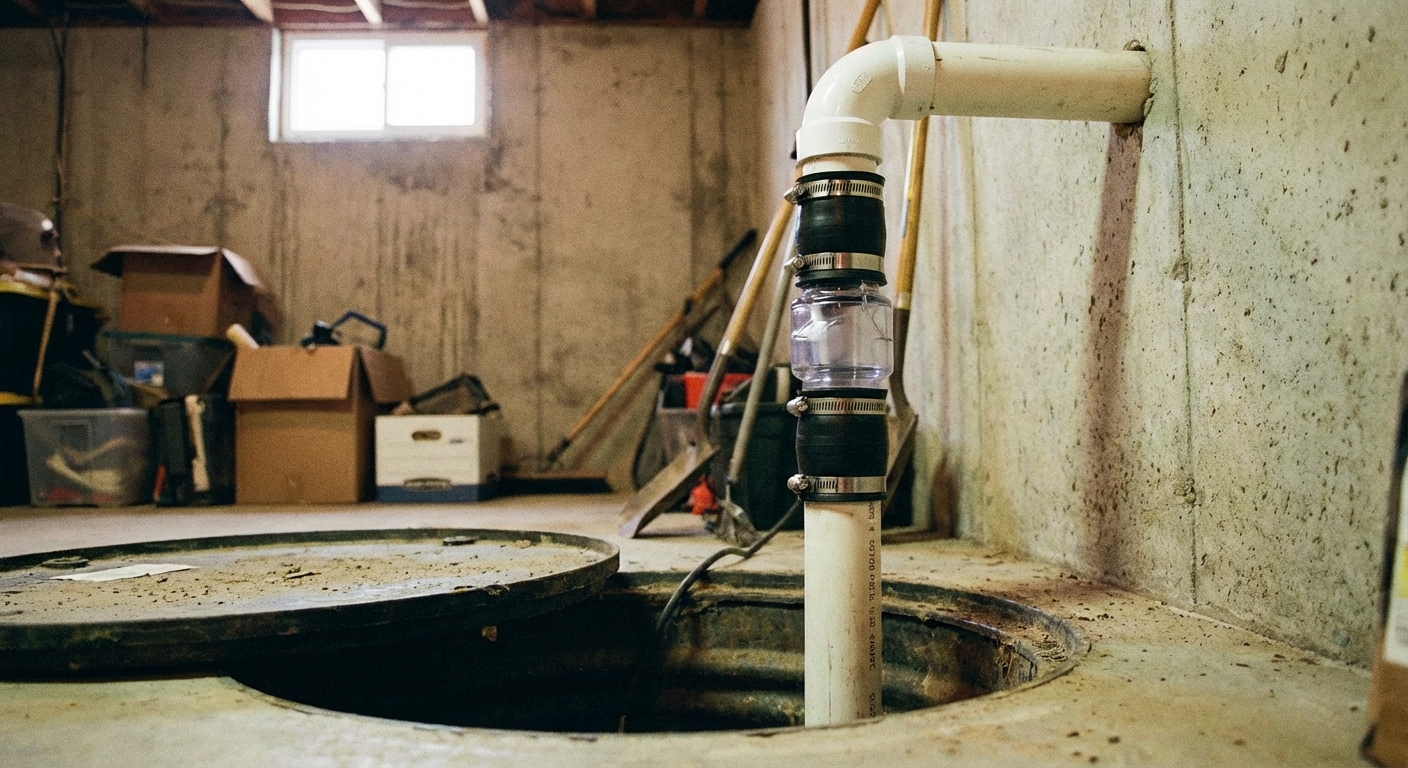
Most check valves are installed on the vertical discharge pipe a short distance above the pump, typically just above the sump pit cover. Many valves have an arrow on the body showing the flow direction.
Rule out other common causes
A bad check valve is a very common reason for short cycling, but it is not the only one. Before you buy parts, take a quick look at these frequent trouble spots too:
- Float switch issues: stuck float, tangled cord, wrong adjustment, or a failing switch.
- High inflow: heavy groundwater, undersized basin, or a pump that cannot keep up.
- Blocked or frozen discharge: especially outside in winter or where the line ties into a buried run.
- Clogged intake or impeller: debris in the pit can reduce flow and cause odd cycling.
- Backup pump interactions: if you have a battery backup, confirm both floats are not fighting each other.
Common signs the check valve failed
A check valve usually fails in one of three ways: stuck open, stuck closed, or leaking. Here is what that looks like in real life.
1) Water dumps back into the pit after shutoff
This is the classic symptom. The pump turns off, and you hear a noticeable rush or splash as water falls back down the pipe into the basin. I call this the “dump back.”
2) Short cycling
If backflow refills the pit quickly, the float switch rises and triggers the pump again. Over time, short cycling can burn up a motor or kill a switch.
3) Water hammer or loud banging
A loud thud right when the pump shuts off often points to a valve that is slamming shut too aggressively, installed backward, or failing mechanically. Some traditional flapper style valves are naturally noisy, but a sudden change in sound is a clue.
4) Reduced pumping or no discharge
If the valve is stuck closed (or installed backward), the pump may hum and run but move little to no water. This can also lead to overheating, although many pumps have thermal overload protection that will shut them down if they get too hot.
5) Basement dampness that seems “new”
When the system is less efficient, the pit level can stay higher longer, which increases the odds of overflow during heavy rain. A bad check valve is rarely the only reason a basement gets wet, but it can be one link in the chain.
How to confirm a bad check valve
You do not need special tools to get a strong answer. You just need to watch a full pump cycle and pay attention to the pit level and the sound of the water.
Step 1: Run a controlled test cycle
- Cut power first: unplug the pump before you move the cover or reach into the pit. As an extra precaution, flip the breaker off too, especially if the outlet is not right next to you.
- Plug it back in (or turn the breaker back on) and add water to the pit slowly using a bucket until the float triggers.
- Watch the water level as the pump runs and after it shuts off.
Step 2: Look for fast rebound
After shutoff, a small amount of water returning is normal because water trapped between the pump and the check valve will drain back. What is not normal is a big refill that brings the float right back up.
Step 3: Listen for the dump back
Stand near the pit when the pump shuts off. A gentle trickle is one thing. A loud gurgle and splash that sounds like a bucket being poured back into the basin usually means the valve is not sealing.
Step 4: Quick visual inspection
- Confirm flow direction: check the arrow on the valve body. It must point away from the pump, toward the discharge.
- Check for leaks: look at couplings, clamps, and joints. Sometimes the valve is fine, but the connection is not.
- Look for debris: if you can safely remove the valve, sediment can keep a flapper from closing.
Safety note: If your sump has any chance of sewage or gray water (an ejector setup), stop here and call a pro. That is a different system with different parts and hazards.
Electrical note: Wet basement floors and electricity are a bad mix. Keep your hands dry, do not stand in water, and make sure your pump is on a GFCI protected outlet if required in your area.
Traditional vs silent check valves
When you shop for a replacement, you will usually see two styles: a traditional flapper style and a “silent” style. Either can work well if installed correctly, but they behave differently.
Traditional flapper (swing) check valve
- Pros: widely available, usually cheaper, straightforward design.
- Cons: can be noisy when it closes, can be more sensitive to debris, the slam can create water hammer in some setups.
Silent (spring assisted) check valve
- Pros: quieter operation, often reduces water hammer, tends to close more gently.
- Cons: higher cost, may have a slightly higher resistance to flow, which can matter on weaker pumps or long discharge runs.
In most typical residential basements, I like silent valves if the pump is near finished space or a bedroom wall. If your pump is already working hard to push water up and out, stick to a quality traditional valve unless the manufacturer recommends otherwise.
What to buy before you start
Match the new valve to your existing discharge pipe. Also keep in mind that many sump pumps have a 1-1/2 inch outlet but get adapted to 1-1/4 inch or 1-1/2 inch pipe. In other words, match what is actually installed, not just what the pump box says.
- Pipe size: Common sizes are 1-1/4 inch and 1-1/2 inch. Best option is to read the size printed on the pipe. If you measure, measure the pipe itself (not a fitting or adapter). When in doubt, bring the old valve or coupling to the store to match it.
- Valve type: PVC solvent weld valves exist, but many homeowners use a rubber coupling style with stainless hose clamps for easier future service.
- Couplings and clamps: If your valve does not include them, buy two rubber couplings sized for your pipe. Shielded couplings may be required by local code or preferred by some manufacturers, so check your situation.
- Primer and cement: Only if you are gluing PVC.
- Basic tools: Flathead screwdriver or nut driver for clamps, tape measure, marker, bucket, and a PVC saw or hacksaw if cutting is needed.
How to replace a sump pump check valve
This is a very doable Saturday project. The key is planning for the water that will drain out of the pipe when you open it.
1) Cut power and protect the area
- Unplug the sump pump from the outlet. Do not rely on a switch.
- For extra safety, switch the circuit breaker off too, especially if you will be working in a tight or damp spot.
- Put down a towel and have a bucket ready. The vertical pipe above the check valve may hold water.
2) Relieve trapped water
If your setup has a small weep hole between the pump and check valve, you may have less water in the line. If not, expect some drain back once you loosen the connections.
Weep hole tip: If your pump manual calls for a weep hole, it will spray water during operation. That is normal. Make sure it is aimed back into the pit so it does not mist the basement.
3) Remove the old valve
- Clamp style valve: Loosen the hose clamps and slide the couplings off.
- Glued PVC valve: You will likely need to cut out the valve and add a coupling to rebuild the section. Leave yourself enough straight pipe to work with.
4) Dry fit in the correct direction
Find the arrow on the valve body and point it upward, away from the pump, toward the discharge run.
5) Tighten or glue connections
- Rubber couplings: Seat the valve fully, center the couplings, then tighten clamps evenly. Snug is good. Over-tightening can distort the rubber.
- PVC glue: Follow the primer and cement directions. Work quickly and hold each joint for a few seconds to prevent push out.
6) Test several cycles
- Restore power and plug the pump back in.
- Add water until it runs, then watch the pit level after shutoff.
- Listen for reduced backflow splash and confirm the pump stays off longer.
- Check for leaks at every joint.
My best thrifty tip: If your discharge is glued solid with no unions, consider adding a serviceable coupling or union while you are in there. Future you will thank you when the next repair comes along.
Replacement mistakes to avoid
- Installing it backward: Follow the arrow on the valve body and confirm it points toward the discharge.
- Placing the valve too high: Keep it close enough to the pump that it prevents most backflow. Too high means more water drains back each cycle.
- Skipping a weep hole when required: Some pumps require a small relief hole in the discharge pipe between the pump and the check valve to prevent air lock. Check your pump manual. Do not add a hole if the manufacturer does not call for it.
- Ignoring a failing float switch: If the pump still short cycles after a new valve, the float switch may be sticking, failing, or set too tight.
- Not addressing water hammer: If noise is your main complaint, a silent check valve and better pipe strapping often help more than simply swapping to another flapper valve.
- Poor support: Make sure the discharge piping is supported and strapped so the weight of the pipe is not hanging on the valve and couplings.
When to call a pro
Most check valve replacements are straightforward, but I recommend calling a plumber or basement waterproofing pro if:
- Your system is tied into an ejector or any sewage setup.
- The discharge piping disappears into a finished wall and you cannot access connections.
- You suspect a frozen or blocked discharge line outside.
- The pump runs but cannot move water even with the valve removed, which suggests a pump failure or a clogged impeller.
Quick checklist
- After shutoff, only a small amount of water should return to the pit.
- Short cycling often means backflow or a float problem, and occasionally a blocked discharge.
- Confirm valve arrow direction before tightening anything.
- Choose a silent valve if noise and water hammer are the issue, but match it to your pump and pipe size.
- Test multiple cycles and check for leaks before you call it done.
If you want, tell me your pump’s discharge size (1-1/4 or 1-1/2 inch) and whether your valve is glued or clamp style, and I can help you map out the cleanest replacement approach.
About Marcus Vance
Content Creator @ Grit & Home
Marcus Vance is a lifelong DIY enthusiast and self-taught home renovator who has spent the last decade transforming a dilapidated 1970s ranch into his family's dream home. He specializes in budget-friendly carpentry, room-by-room renovations, and demystifying power tools for beginners. Through his writing, Marcus shares practical tutorials and hard-learned lessons to help homeowners tackle their own projects with confidence.