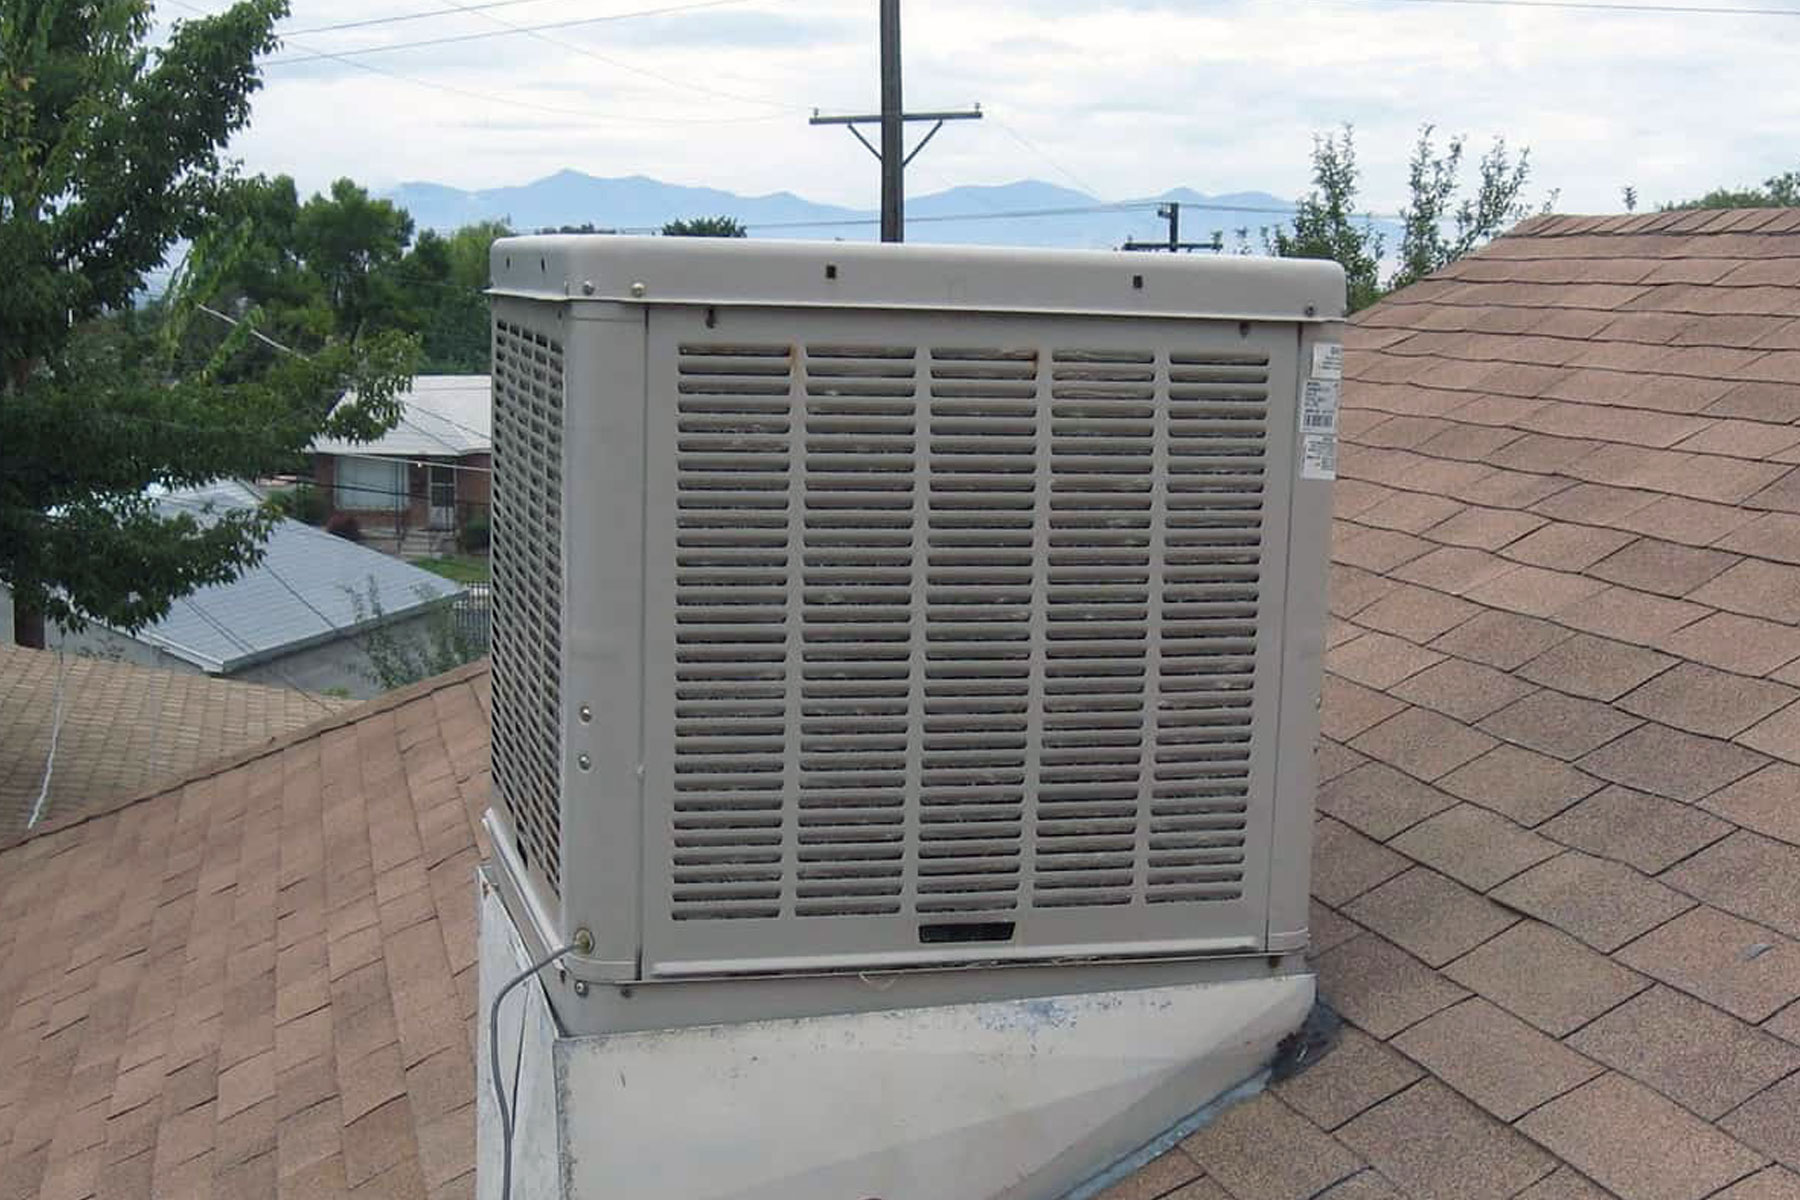
When an evaporative cooler (also called a swamp cooler) stops feeling “icy,” it’s tempting to assume something big broke. Most of the time it’s one of a few simple issues: dry pads, weak water flow, restricted airflow, or plain old weather that is too humid for the cooler to do its job.
I’m going to walk you through a calm, organized troubleshooting path. Start with the quick checks, then move into the parts that take a screwdriver. By the end you’ll know whether you can fix it in an hour, or if the performance you’re seeing is actually normal for your conditions.
First: what “normal” cooling looks like
Swamp coolers work by evaporating water into moving air. That means their best-case cooling depends on how dry the outdoor air is, not on a refrigerant cycle like an AC.
A quick rule of thumb
- Hot and dry: big temperature drop possible (often 15°F to 25°F). On ideal days it can be more, but it always tracks how far your outdoor temperature is above the wet-bulb temperature.
- Warm and humid: small drop (single digits to low teens). The air may feel clammy even if the temperature drops a little.
A practical expectation: supply air is often near outdoor wet-bulb plus a few degrees, depending on pad condition, airflow, and the unit’s efficiency.
If it suddenly stopped cooling compared to last week, that points to a maintenance or airflow problem. If it “stopped cooling” compared to spring, but it’s now monsoon season or you had a humid weather shift, that may simply be the cooler hitting its limits.
Safety and tools (keep it simple)
Safety
- Turn power off at the disconnect or breaker before opening panels.
- Shut off the water supply if you’ll be disconnecting tubing or working on the float.
- If yours is roof-mounted, use solid ladder practices and avoid windy or wet conditions.
Helpful tools
- Screwdriver or nut driver set
- Flashlight
- Small brush and shop vac
- Adjustable wrench or pliers
- Bucket and a few old towels
- Optional: multimeter and a clamp-on amp meter if you are comfortable
Quick checks that fix a lot of “not cooling” calls
1) Make sure it’s on COOL, not just FAN
This sounds obvious, but it gets everyone once. “Fan” mode moves air without running the pump. Airflow will feel strong, but the air will be warm and dry.
2) Check the thermostat (if you have one)
Many newer swamp coolers use a digital wall thermostat or controller.
- Replace batteries if the screen is dim, blank, or acting glitchy.
- Check the settings (COOL vs VENT/FAN, setpoint, schedule).
- If it is hardwired and you’re comfortable: look for loose low-voltage wires at the thermostat or control board. If you are not comfortable, skip this and call a pro.
3) Confirm you have water at the cooler
- Check the shutoff valve is open.
- Look for kinked plastic tubing or a crushed copper line.
- If you have a saddle valve on a pipe, know that they clog easily. A proper shutoff with a small filter is more reliable long term.
4) Check that the pads are actually wet
Open the access panel and look at the media. On COOL mode, pads should be evenly damp within a few minutes (soak time varies by pad type and distribution design). If the pad is only wet in one corner or the top is dry, you will get warm air.
Quick performance check (optional but helpful)
If you like a simple measurement: after the unit has run on COOL for 10 to 15 minutes, use a basic thermometer to check the air coming out of a vent and compare it to outdoor temperature. A meaningful drop on a dry day tells you the cooling side is working and you should focus on airflow and venting. A tiny drop on a humid day may be normal.
Pads: the #1 cooling bottleneck

What to look for
- Scale buildup: white crusty minerals that block airflow and water absorption.
- Gaps or sagging: air bypasses the media instead of cooling through it.
- Musty smell: biological growth from stagnant water or poor flushing.
Try this
- Inspect pads yearly and replace when they are stiff, crusty, torn, or moldy, regardless of age. (Lifespan varies a lot based on water hardness and run time.)
- Verify fit and seals. Pads should sit tight in their frames so air cannot shortcut around them.
- Match pad type to your unit. Aspen pads and rigid media pads behave differently. Use what your manufacturer recommends.
Thrifty note from my own mistakes: I tried to stretch one set of pads “just one more month.” Cooling dropped, dust increased, and the unit worked harder. Pads are one of the cheapest performance upgrades you can buy for a swamp cooler.
Pump and water distribution: no water, no cooling
How to tell if the pump is the issue
- Cooler is set to COOL, fan runs, but pads stay mostly dry.
- You hear the pump humming but see weak or no water flow.
- Some pads wet, others dry, often caused by a clogged distribution line.
Next steps
- Clean the pump screen if your pump has one. Debris and scale can choke it quickly.
- Check the pump pickup sits in the water and the water level is high enough (more on float valves below).
- Clear the spider tube (the small water distribution tube or manifold that feeds the pads) and any tiny holes. A paper clip and rinse can restore flow.
- Inspect the pump for a stuck impeller. Sometimes mineral grit jams it. With power off, you can often free it, but replacement is cheap if it is worn.
If your pump runs hot, trips a breaker, or refuses to start, replace it rather than fighting it for hours. Also note: a tripped breaker can point to wiring or electrical problems, too. If anything looks scorched, smells burnt, or feels beyond basic DIY, call a pro.
Float valve and water level: too low or too high both cause problems
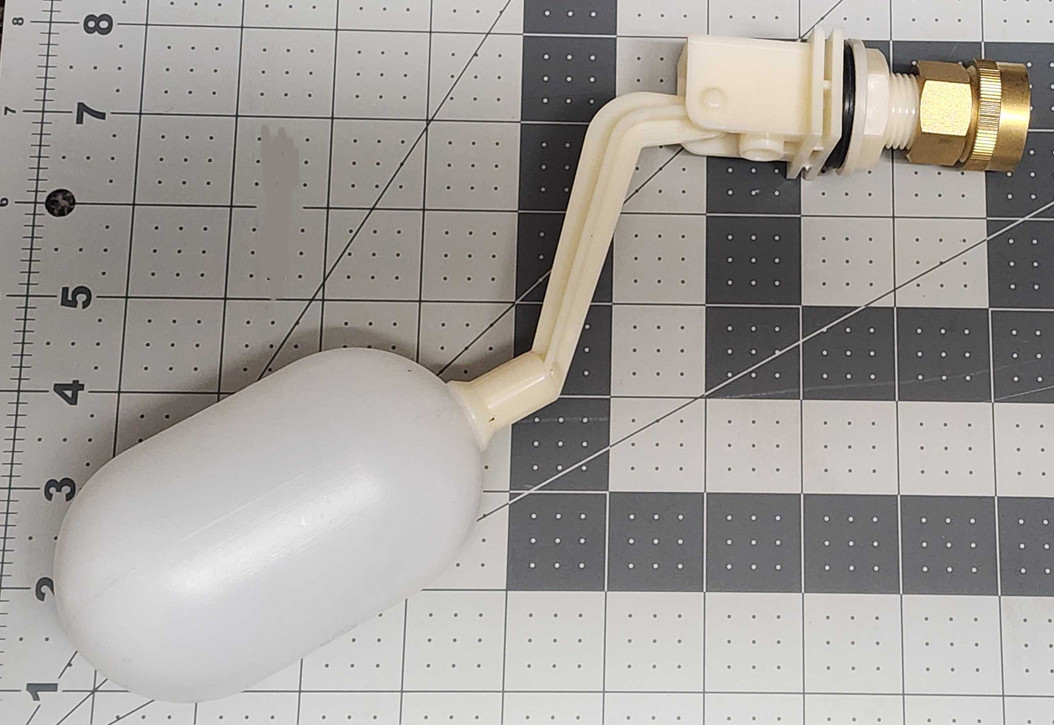
Symptoms of low water level
- Pump sucks air or spurts water intermittently.
- Water flow starts strong then fades.
- Pads are patchy wet.
Symptoms of high water level
- Water sloshes into the blower area.
- Overflow line drips constantly.
- You get a swampy smell from stagnant water and poor purge.
Try this
- Adjust the float so the water level sits where your manual specifies, typically below the top of the pan but high enough for steady pump pickup.
- Clean or replace the float valve if it sticks from scale.
- Check the supply line filter if you have one. A clogged filter can mimic a bad float valve.
Belt, motor, and blower: airflow is half the equation
Even with perfect wet pads, you need strong airflow through the house. Evaporative cooling is a “move a lot of air” game.
If your cooler has a belt drive
- Check belt tension. A loose belt slips and the blower turns slowly.
- Look for glazing or cracks. A shiny, hardened belt is usually a weak belt.
- Check pulley alignment. Misalignment eats belts and reduces efficiency.
Motor and blower wheel checks
- Listen for bearing squeal or grinding, which can reduce speed and eventually seize.
- Clean the blower wheel. Dust and lint buildup reduces airflow like a dirty ceiling fan blade.
- Verify the motor actually changes speeds if your switch has multiple fan settings.
If you smell electrical burning, see smoke, or the motor is too hot to touch after a short run, shut it down and call a pro. That is not a “try one more thing” moment.
Intake screens, filters, and pads frames
Some units have insect screens, pre-filters, or mesh that clogs with cottonwood fuzz and dust. When that happens, airflow drops and cooling drops with it.
- Vacuum or rinse screens and filters (and let them dry if required by your model).
- Make sure pad frames are seated correctly and not blocking the intake path.
Airflow and venting: your home needs an exit path
This is the most misunderstood swamp cooler issue. Unlike AC, you typically want a few windows or vents partially open so hot air can leave. If the house is sealed tight, the cooler pressurizes the home and airflow slows down. Cooling suffers.
What to do
- Open a window in the room you want coolest, usually 1 to 2 inches to start.
- Try one window at a time. Too many open windows can dilute airflow and reduce the “cool breeze” effect.
- Use a vented relief path if your home has one, like an up-duct or dedicated relief vent sized for the unit.
- Check for blocked registers or closed dampers in ducted systems.
Signs your venting is wrong
- Air barely comes out of the vents even on high.
- Doors are hard to close because the house feels pressurized.
- The cooler sounds like it is working, but the air inside stays stagnant.
Damper and duct issues (easy to miss)
Two common “it runs but doesn’t cool the house” problems are hidden in plain sight.
- Seasonal damper: Many down-draft units have a winter/summer damper. If it is stuck closed (or half-closed), airflow into the house can be terrible.
- Duct leaks or disconnects: Especially on roof units, a loose duct connection can dump cool air into an attic or cavity instead of the rooms. If the unit seems strong at the cooler but weak at the vents, take a look.
Water quality and scale buildup: the quiet performance killer
Hard water deposits reduce cooling in three ways: they clog the pump and lines, they crust over the pads so air cannot pass, and they leave a layer of “mud” in the pan that breeds odor.
Try this
- Clean the pan at the start of the season and mid-season if you have very hard water.
- Flush and drain regularly. Some coolers have a bleed-off line or purge pump designed to dump mineral-heavy water.
- Replace cracked or clogged distribution tubing. Old tubing gets brittle and plugs internally.
- Consider a simple inline filter on the water supply to reduce sediment.
Avoid harsh chemicals unless your manufacturer approves them. Many “miracle descalers” are rough on metal parts and can shorten the life of the pan and fittings.
Humidity limits: when your cooler is doing its best and still feels weak
If the air outside is already moist, evaporation slows down. In plain language: the cooler cannot “spend” water to buy you cold air the way it can on a dry day.
How to spot humidity as the main culprit
- Cooler blows air that is only slightly cooler than outside, but pads are wet and airflow is strong.
- The house temperature drops some, but comfort is worse because indoor humidity climbs.
- Performance is dramatically better in the morning and worse after a humid afternoon storm.
What you can do
- Use higher fan speed to increase air movement. This can improve comfort for some people, but on muggy days indoor humidity can still rise quickly.
- Be strategic with windows. Exhaust humid indoor air from one or two spots rather than cracking every window.
- Switch to AC if you have it, during high humidity days. That is not failure, that is using the right tool for the conditions.
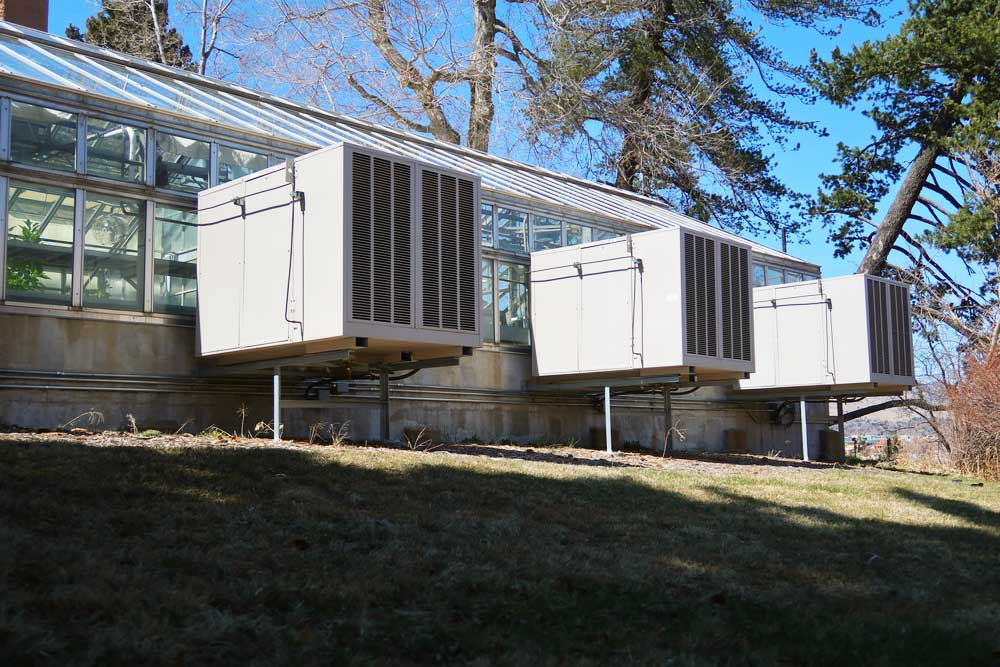
Is a swamp cooler right for your region?
Evaporative coolers shine in climates with low to moderate humidity. They struggle in consistently humid regions where the air is already near saturation.
Typically a good match
- Desert and high plains climates
- Hot days with cool, dry nights
- Areas where you can comfortably vent air out windows without pulling in heavy humidity
Typically a tough match
- Coastal humidity
- Long stretches of high dew points
- Homes that cannot be vented properly due to smoke, pollen sensitivity, or outdoor air quality concerns
Maintenance cadence (simple and realistic)
- Start of season: clean pan, inspect and replace pads as needed, clear distribution holes, test pump, check belt tension, oil bearings if your motor requires it (many do not).
- Monthly in season: check pad wetting, look for scale, rinse screens and filters, confirm the bleed-off or purge is working if you have one.
- End of season: drain the unit, clean out sludge, shut off the water supply, and set the damper to winter position (if your model uses one).
Troubleshooting checklist (printable logic)
- Airflow weak? Check belt tension, blower wheel cleanliness, motor speed, intake screens/filters, damper position, duct restrictions, and venting windows.
- Airflow strong but warm? Confirm COOL mode, confirm water supply, verify pump runs, check pads are evenly wet, clear the spider tube/manifold.
- Some rooms cool, others not? Adjust which window is open, check duct dampers and registers, and verify the unit is sized for the home.
- Musty smell? Clean pan, replace pads, flush minerals, verify purge or bleed-off is working.
- Works on dry days, fails on humid days? That is a humidity limit, not a broken cooler.
- Nothing responds? Check the thermostat/controller (batteries and settings) and confirm power at the disconnect or breaker.
When to call a pro
If you are comfortable with basic cleaning and part swaps, most swamp cooler issues are DIY-friendly. Bring in a technician when:
- The motor overheats, trips breakers repeatedly, or smells like burning insulation.
- You suspect electrical issues in the switch, relay, control board, or wiring.
- The cooler is roof-mounted and access is unsafe for you.
- The pan is rusted through or leaking into the structure.
My goal is always the same: fix what is actually broken, skip the expensive guesses, and get you back to that satisfying moment where you feel cool air and think, “Yep. I handled that.”
About Marcus Vance
Content Creator @ Grit & Home
Marcus Vance is a lifelong DIY enthusiast and self-taught home renovator who has spent the last decade transforming a dilapidated 1970s ranch into his family's dream home. He specializes in budget-friendly carpentry, room-by-room renovations, and demystifying power tools for beginners. Through his writing, Marcus shares practical tutorials and hard-learned lessons to help homeowners tackle their own projects with confidence.