🚨 In a DIY emergency or rush?
Skip the details and jump straight to our 30-second cheat sheet for the most crucial info.
What “slow fill” usually means
When a toilet tank fills slowly after you flush, the toilet is telling you one thing: not enough water is flowing into the tank. That restriction can happen at the shutoff valve, inside the supply line, at the fill valve’s inlet, or at the house plumbing level if your water pressure is low.
Good news. This is one of those DIY fixes that looks intimidating until you do it once. Most of the time you can solve it in under 30 minutes, and you usually do not need a full toilet rebuild.
Before you start: safety and setup
- Turn off the water at the toilet shutoff valve (the small valve near the wall behind the toilet).
- Flush once to empty most of the tank.
- Keep a small bowl and towel handy for drips from the supply line.
- If you have an old, crusty shutoff valve that has not moved in years, turn it gently. If it fights you hard, stop and plan on replacing the valve instead of forcing it.
Tools you might need: adjustable wrench or channel-lock pliers, small bucket or bowl, old toothbrush, and optionally a new braided supply line and a new fill valve.
Fast diagnosis: where the slowdown is
Use this order. It goes from easiest and most common to more involved.
1) Is the shutoff valve fully open?
This is the number one “I can’t believe that was it” fix. Many toilet stop valves are multi-turn. If it is only opened a turn or two, the tank can fill painfully slowly.
- Turn the valve counterclockwise until it stops (do not crank it).
- Flush and listen. A healthy fill usually sounds like a steady rush, not a weak hiss.
2) Is the supply hose kinked or crushed?
If someone recently cleaned behind the toilet, installed flooring, or shoved a vanity organizer back there, the supply hose can get pinched. A kink can cut flow by a lot.
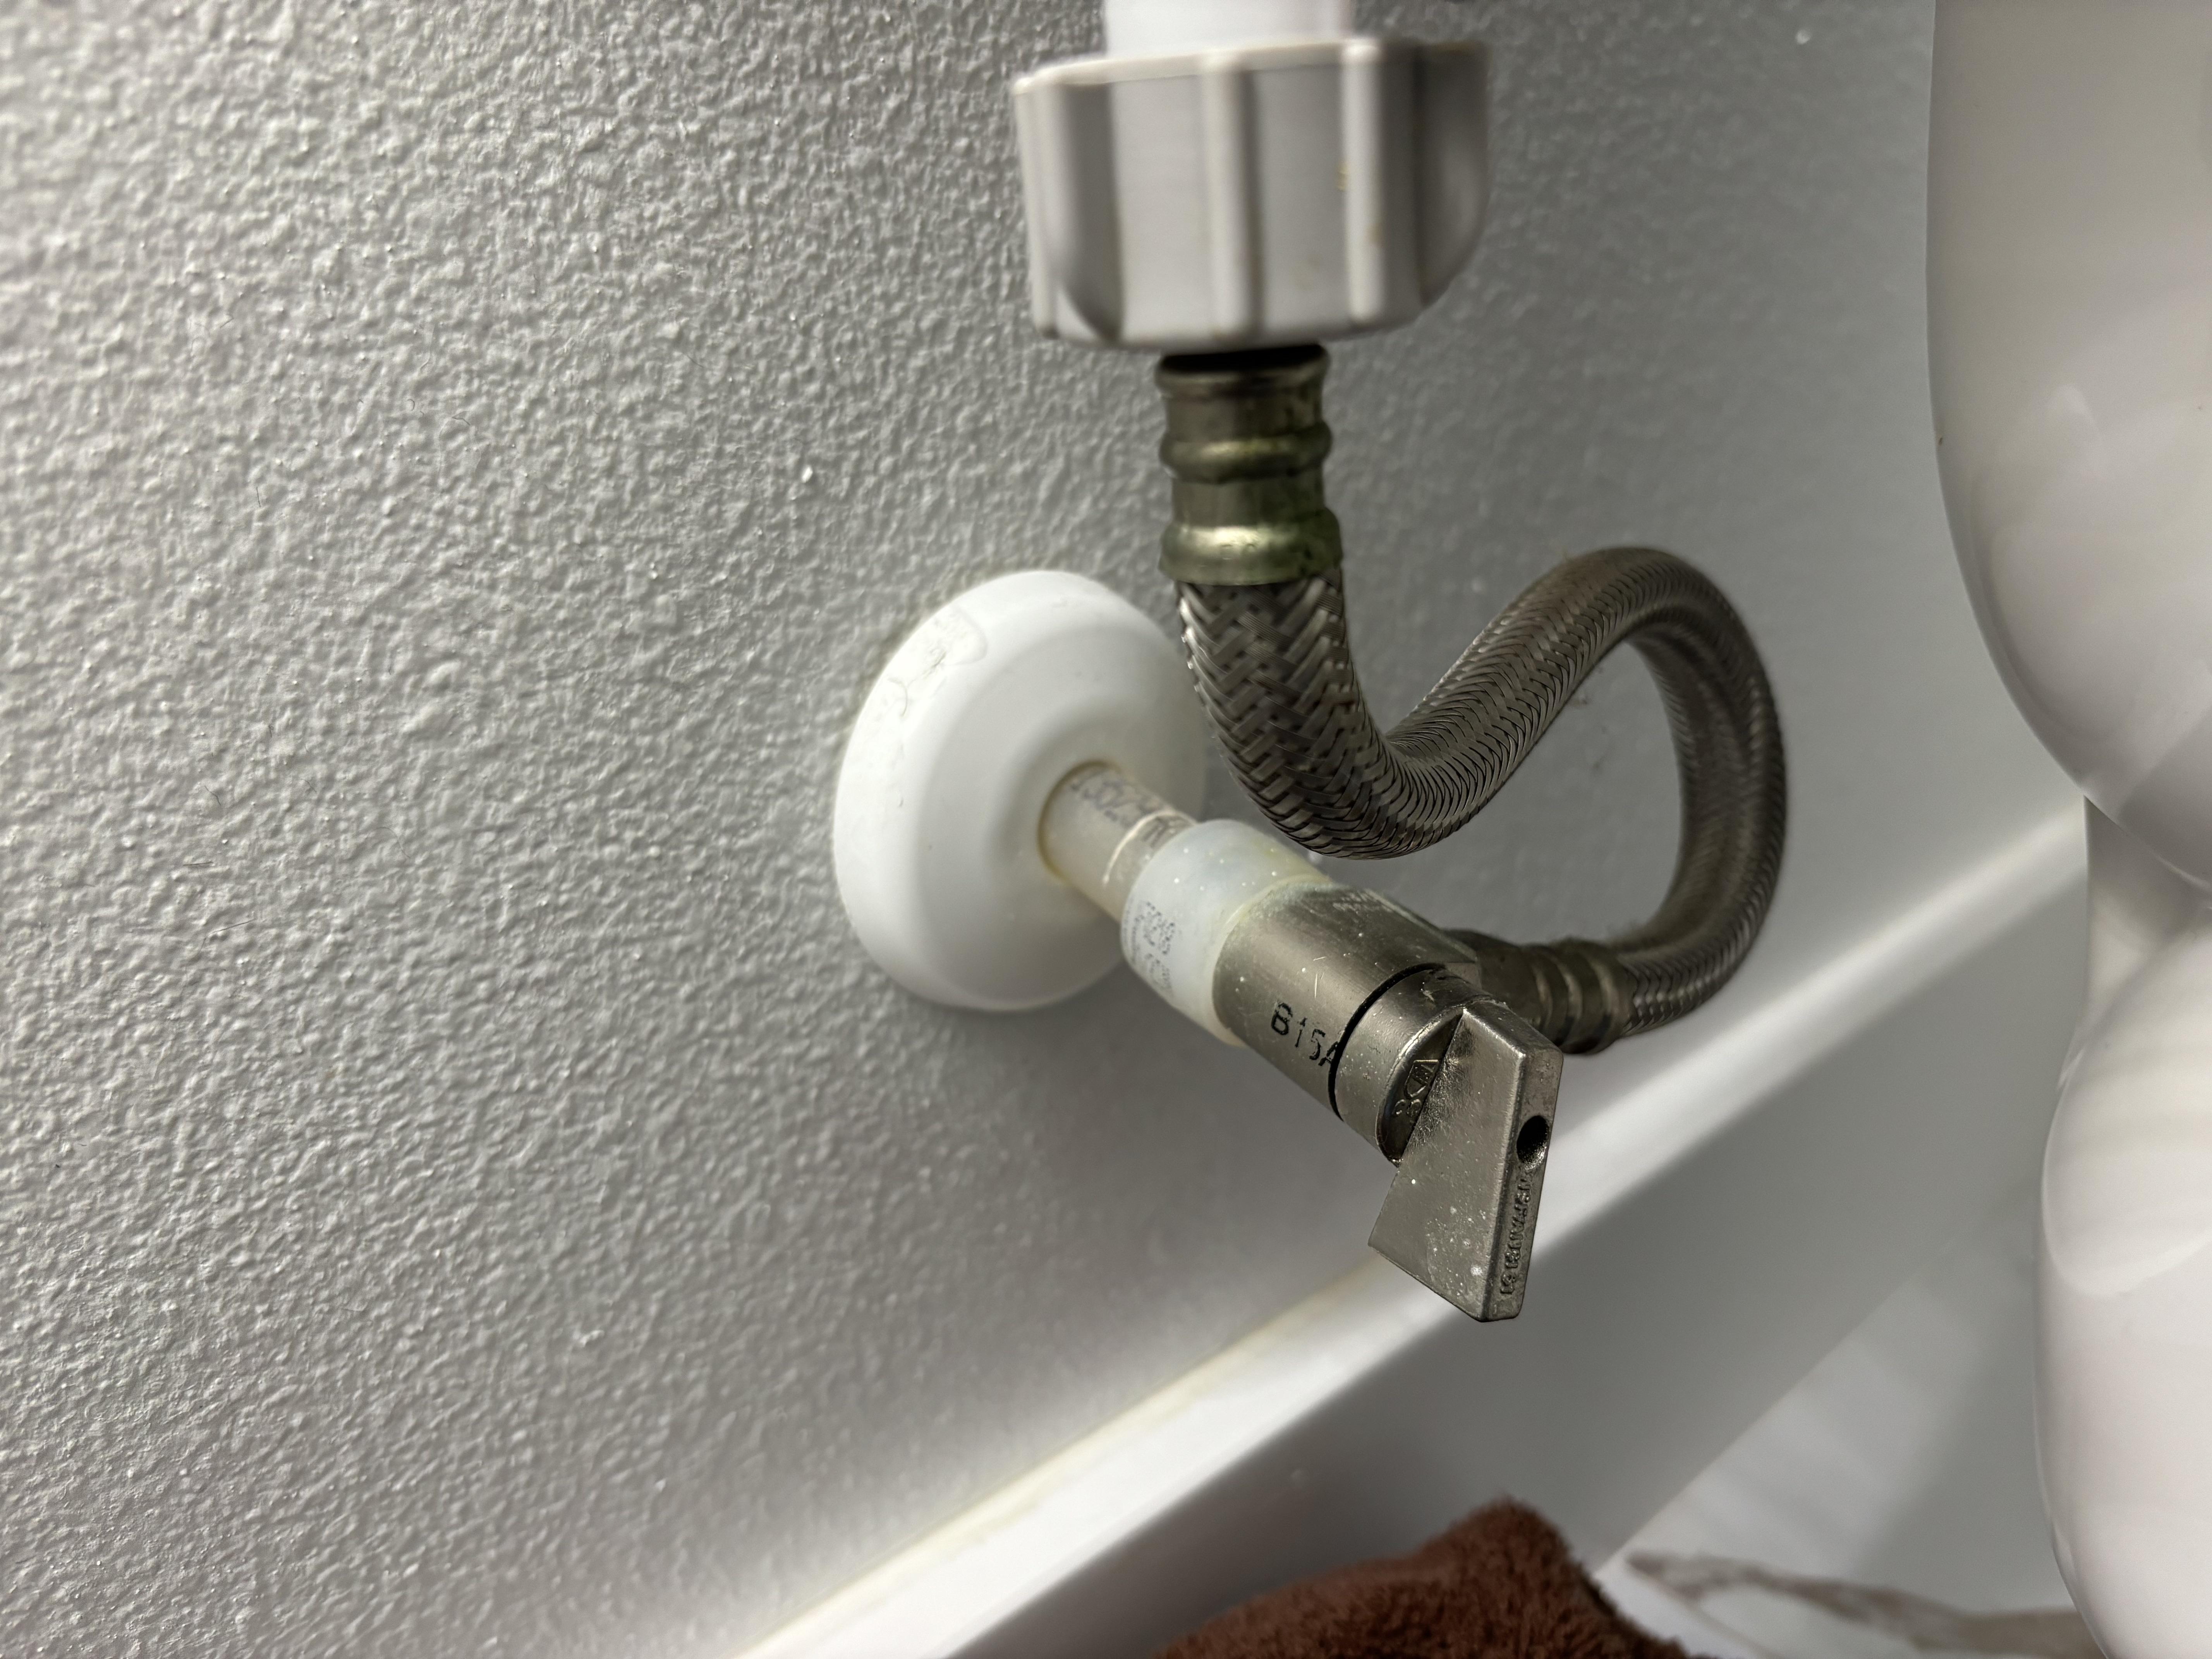
- Look for a sharp bend or flattened spot.
- If it is a plastic line, consider swapping to a braided stainless steel connector. They resist kinking and are cheap insurance.
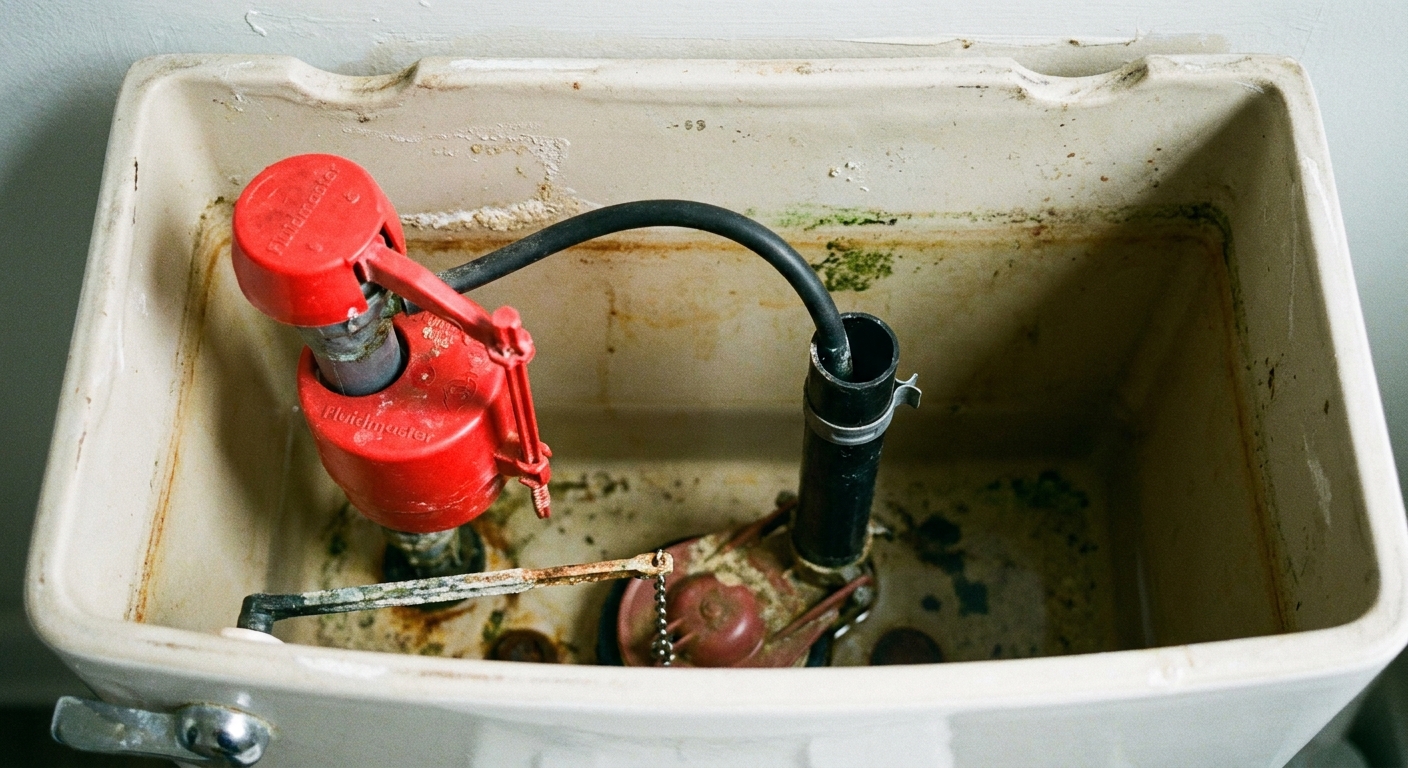
3) Is the fill valve clogged?
If the shutoff is open and the hose looks fine, the next most common culprit is the fill valve itself. Depending on the model, the restriction is usually either debris at the inlet screen (down at the threaded shank) or grit in the seal under the top cap.
4) Is it filling, but stopping too soon?
Sometimes the “slow fill” complaint is really early shutoff. The tank stops at a low water level so it takes multiple flushes to feel normal. That is typically a float adjustment issue, not a clog.
Cause #1: Shutoff valve restriction
Shutoff valves can fail internally. Mineral buildup or a worn washer can restrict flow even when the handle is open. Older multi-turn valves are common culprits.
How to test it
This is a quick flow test that tells you whether the restriction is upstream of the fill valve.
- Turn off the shutoff valve.
- Place a bowl under the supply connection at the bottom of the tank.
- Disconnect the supply line from the tank shank (plastic threads on the tank side are easy to crack, so go gentle).
- Point the supply line into the bowl.
- Crack the shutoff valve open briefly and observe flow.
What you want to see: a strong, steady stream. If it is weak here, your toilet fill valve is not the problem. The shutoff valve, the supply line, or house pressure is.
Fix options
- Best fix: Replace the shutoff valve if it is old, stuck, or clearly restricted.
- Temporary workaround: Sometimes opening and closing the valve a few times can break loose minor buildup, but it can also start a drip on old valves. Use your judgment.
Cause #2: Fill valve debris (very common)
Most modern fill valves have small passages that catch grit. After a water main repair, a shutoff replacement, or even normal plumbing aging, you can end up with sand, scale, or rust flakes choking the flow. The result is classic: the tank fills, but slowly.

Two places debris hides
- Bottom inlet screen: On many common valves, the screen is down at the threaded shank where the supply line connects.
- Top cap seal: Under the cap is typically a rubber seal or diaphragm. Grit can lodge here and reduce flow.
How to clear it
- Turn off the shutoff valve.
- Flush and sponge out most of the water so you can work without splashing.
Option A: Check the bottom inlet screen (most “screen cleaning”)
- Disconnect the supply line from the bottom of the tank (have a bowl ready).
- Look for a small screen at the fill valve inlet and rinse it clean. If it is removable on your model, pull it carefully and rinse it.
- Reconnect the supply line, turn water back on, and test.
Option B: Flush the valve under the top cap (common on Fluidmaster-style valves)
- Remove the fill valve cap (method varies by brand, but most twist off or pop off).
- Place a cup upside down over the open valve.
- Turn the water on briefly for a second or two to flush debris through the valve, then turn it back off.
- Inspect the rubber seal, rinse if gritty, then reassemble and test.
My real-world note: The first time I did this, I assumed I would find nothing. I flushed it and a burst of gritty black specks shot into the tank, and the refill speed doubled instantly.
When to replace instead
If the fill valve is old, noisy, or cleaning barely helps, replacing it is often the smarter use of your time. A new fill valve is usually inexpensive and comes with straightforward instructions.
Cause #3: Supply hose restriction
Even if the hose is not visibly kinked, older supply lines can restrict flow internally. This is especially true with older plastic lines or lines that have accumulated mineral scale.
Fix
- Replace the line with a new braided stainless steel supply hose of the correct length.
- Do not buy a hose that is “almost long enough”. Tension creates kinks and leaks.
- Hand-tighten the nuts, then snug gently with a wrench. Over-tightening is how DIYers crack plastic shanks and create slow, frustrating drips.
Cause #4: Float set too low
If your tank refills quickly but never reaches the water line mark (or it stops well below the overflow tube’s recommended level), the float may be set too low.
What “correct” looks like
- Most tanks want the water level about 1 inch below the top of the overflow tube.
- Many tanks also have a molded water line on the porcelain as a target.
How to adjust
- If you have a float cup, there is usually an adjustment screw or a pinch-clip on the float mechanism.
- Adjust in small increments, flush, and recheck.
Watch-out: If you set the level too high, water will spill into the overflow tube and you can create a “running toilet” problem. Aim for that 1-inch buffer.
Cause #5: Low house water pressure
If you cleaned the fill valve, confirmed the shutoff is fully open, replaced a questionable supply line, and the toilet still refills slowly, zoom out. You might have a pressure problem in the house, not just at the toilet.
Quick signs it is not just the toilet
- Sinks and showers have weak flow in multiple rooms.
- Pressure drops noticeably when another fixture turns on.
- Only hot or only cold is weak (could point to a valve or water heater shutoff issue).
Common pressure culprits
- Main shutoff not fully open (after plumbing work, it happens more than you would think).
- Pressure reducing valve (PRV) failing or set too low.
- Clogged whole-house filter (if you have one).
- Galvanized pipe corrosion restricting flow in older homes.
- Municipal supply issue or a partially closed curb stop.
If you suspect house-wide pressure, it is worth checking our house pressure content on Grit & Home, because the fix often lives at the main line, PRV, or filtration, not in the toilet tank.
When the fill valve is worn out
Fill valves do not last forever. If yours is older, crusty with mineral buildup, or keeps acting up after cleaning, replacement is usually the cleanest long-term solution.
Signs you should replace it
- Slow fill comes back quickly after cleaning.
- The valve is noisy, chattering, or squealing.
- The float sticks or the shutoff is inconsistent.
Budget tip: A standard universal fill valve is usually the best value. Fancy features are nice, but a reliable basic valve is what keeps your tank filling like it should.
Troubleshooting table
- Slow fill at this toilet only: shutoff valve partly closed, supply line kinked or restricted, fill valve debris, fill valve failing.
- Slow fill started after water was shut off: debris in the fill valve is very likely (inlet screen or top seal).
- Tank fills fast but stops low: float adjustment.
- Multiple fixtures weak: house pressure or main shutoff, PRV, filter, or plumbing restriction.
When to call a plumber
I am all for DIY, but I also love a project that ends without water damage.
- You cannot move the shutoff valve without risking breaking it.
- You see corrosion at the shutoff or the pipe coming out of the wall.
- You suspect a PRV failure or a main line issue and you are not comfortable working on it.
- You have galvanized plumbing and pressure is declining over time.
My simple, thrifty order
If you just want the shortest path to a win, here is the sequence I use in my own house:
- Open the shutoff valve fully.
- Check for a kinked supply hose.
- Clear the fill valve restriction (bottom inlet screen, then top-cap flush if needed).
- Adjust the float to the proper water level.
- If still slow, replace the supply line (cheap) and then the fill valve (still cheap).
- If multiple fixtures are weak, investigate house pressure.
The 30-Second Cheat Sheet
Essential takeaways for: Toilet Tank Fills Slowly After You Flush: Causes and Fixes
Quick diagnosis (2 minutes)
- Make sure the toilet shutoff valve is fully open (turn counterclockwise until it stops, do not force).
- Check the supply hose behind the toilet for kinks or crushing.
- If slow fill started after plumbing work, suspect debris either in the fill valve inlet screen (at the bottom shank) or in the fill valve seal (under the top cap).
Most common fixes
- Clear the fill valve restriction: shut off water, flush. First, check and rinse the inlet screen at the bottom (disconnect supply line). If you remove the top cap, flush the valve briefly (cup over the open valve) to clear grit, then reassemble and test.
- Replace a kinked or old supply line: install a new braided stainless line with enough slack to avoid bends.
- Adjust the float: set water level about 1 inch below the top of the overflow tube (or to the tank’s molded water line).
How to tell if it is a house-wide pressure issue
- Multiple faucets and showers have weak flow.
- Pressure drops a lot when another fixture turns on.
- Possible causes: main shutoff not fully open, clogged whole-house filter, failing PRV, corroded old piping, or a municipal issue.
When to replace parts (skip the struggle)
- Replace the fill valve if cleaning helps only briefly, it is noisy, or it sticks.
- Replace the shutoff valve if it will not open fully or it restricts flow during a quick flow test.
Stop and call a pro if
- The shutoff valve is seized or corroded and feels like it might snap.
- You suspect a main line, PRV, or whole-house plumbing restriction and you are not comfortable servicing it.
💡 Tip: Scroll up to read the full article for detailed, step-by-step instructions.
⬆️ Back to topAbout Marcus Vance
Content Creator @ Grit & Home
Marcus Vance is a lifelong DIY enthusiast and self-taught home renovator who has spent the last decade transforming a dilapidated 1970s ranch into his family's dream home. He specializes in budget-friendly carpentry, room-by-room renovations, and demystifying power tools for beginners. Through his writing, Marcus shares practical tutorials and hard-learned lessons to help homeowners tackle their own projects with confidence.